
Shopify <> UnifyApps Integration
Overview
Embedding UnifyApps applications in Shopify allows seamless integration of UnifyApps features within your Shopify store.
Step-by-Step Instructions
Step 1: Add Shopify Token to the Application
For the application you want to embed, you will need to add the Shopify token to it to enable proper integration.
To obtain the required credentials, contact support@unifyapps.com.
Step 2: Search for UnifyApps in the Shopify App Store
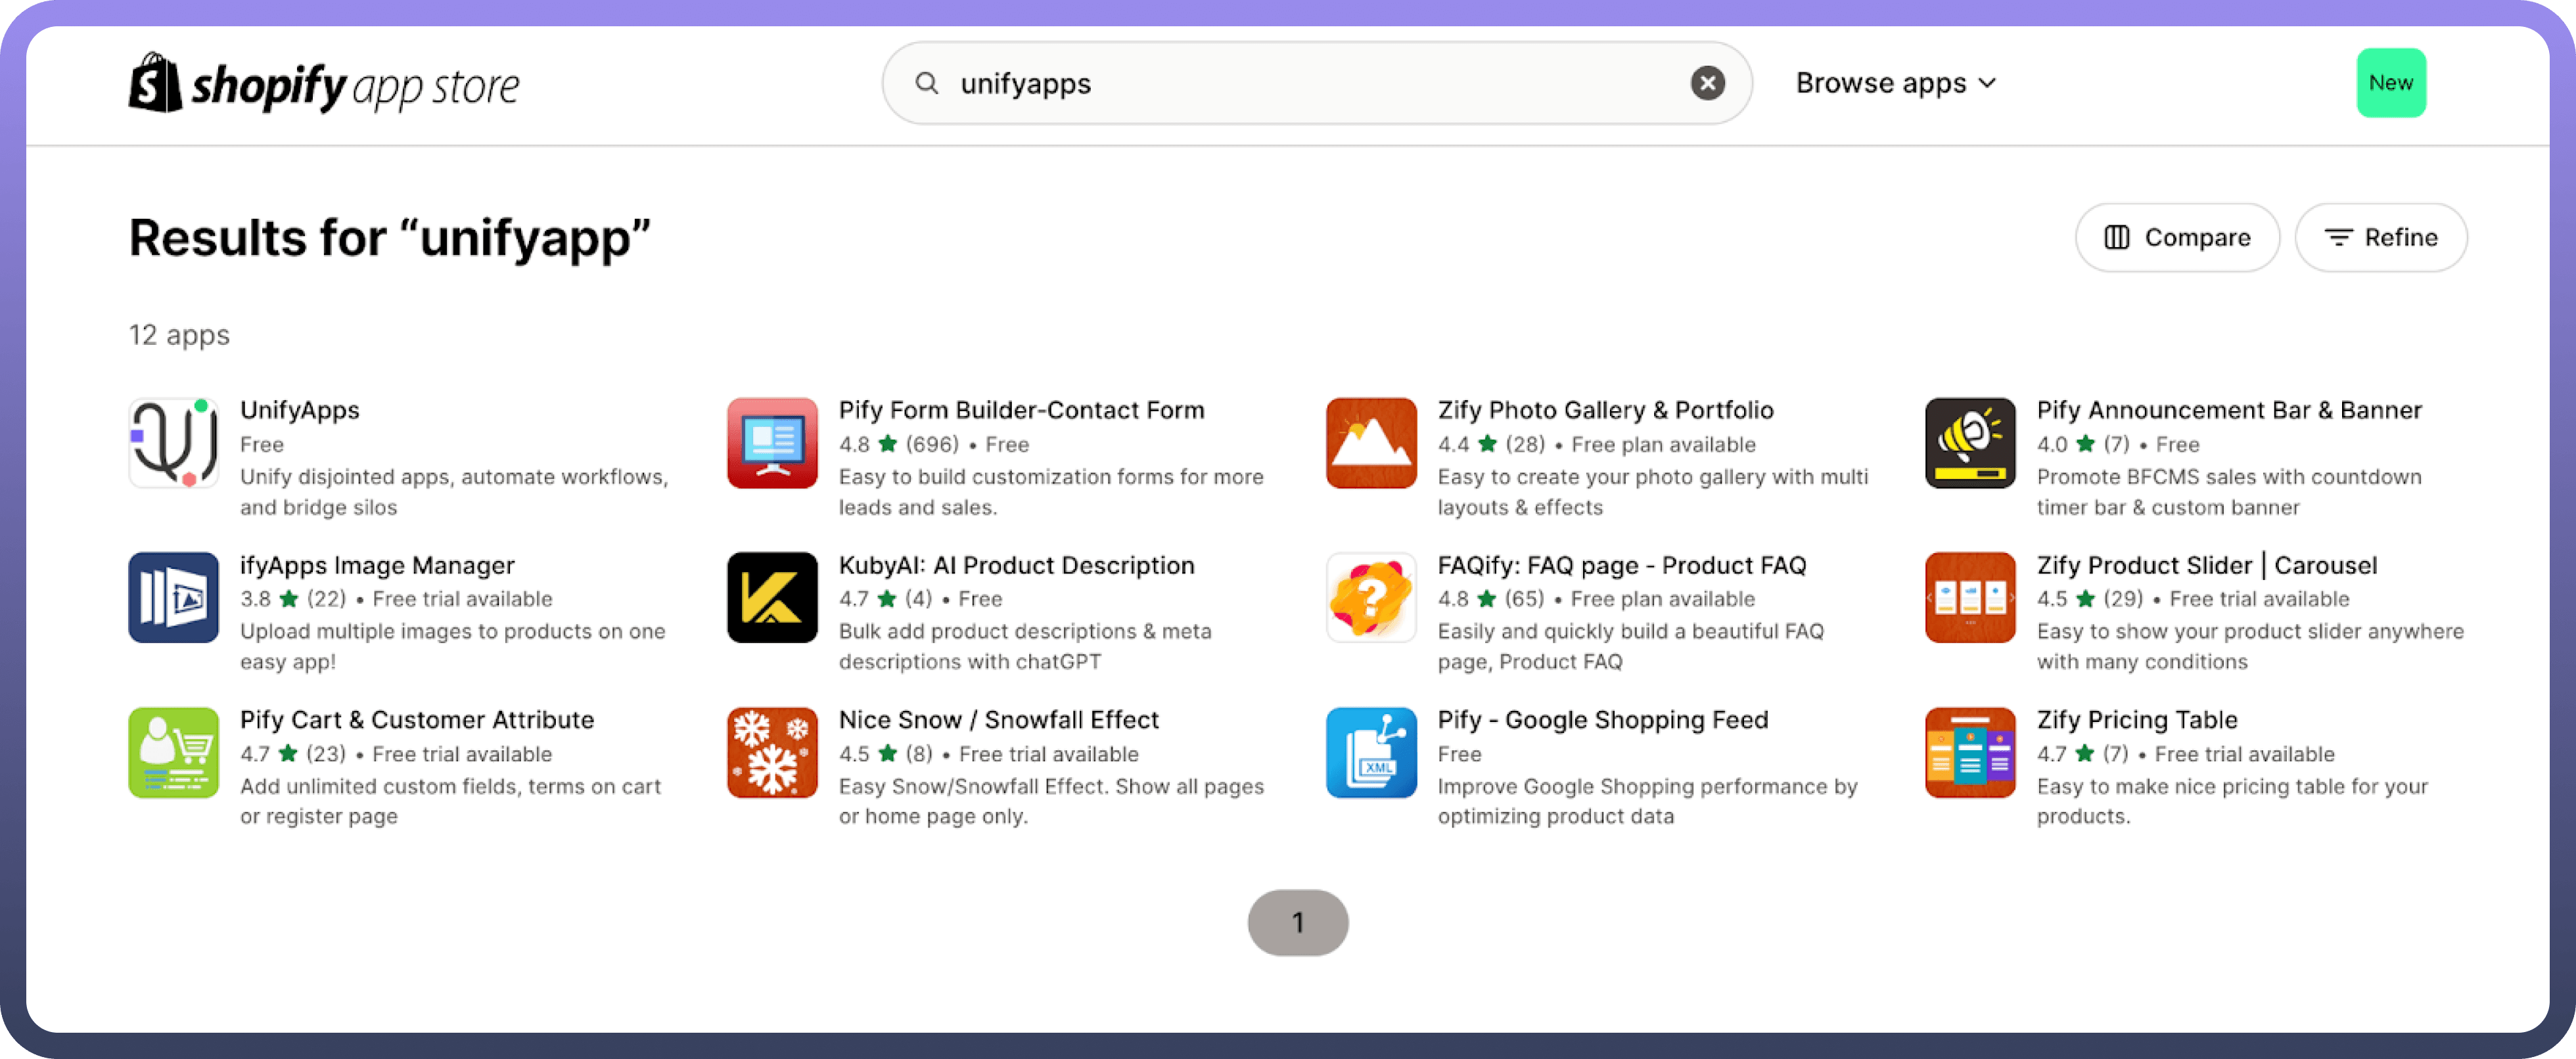
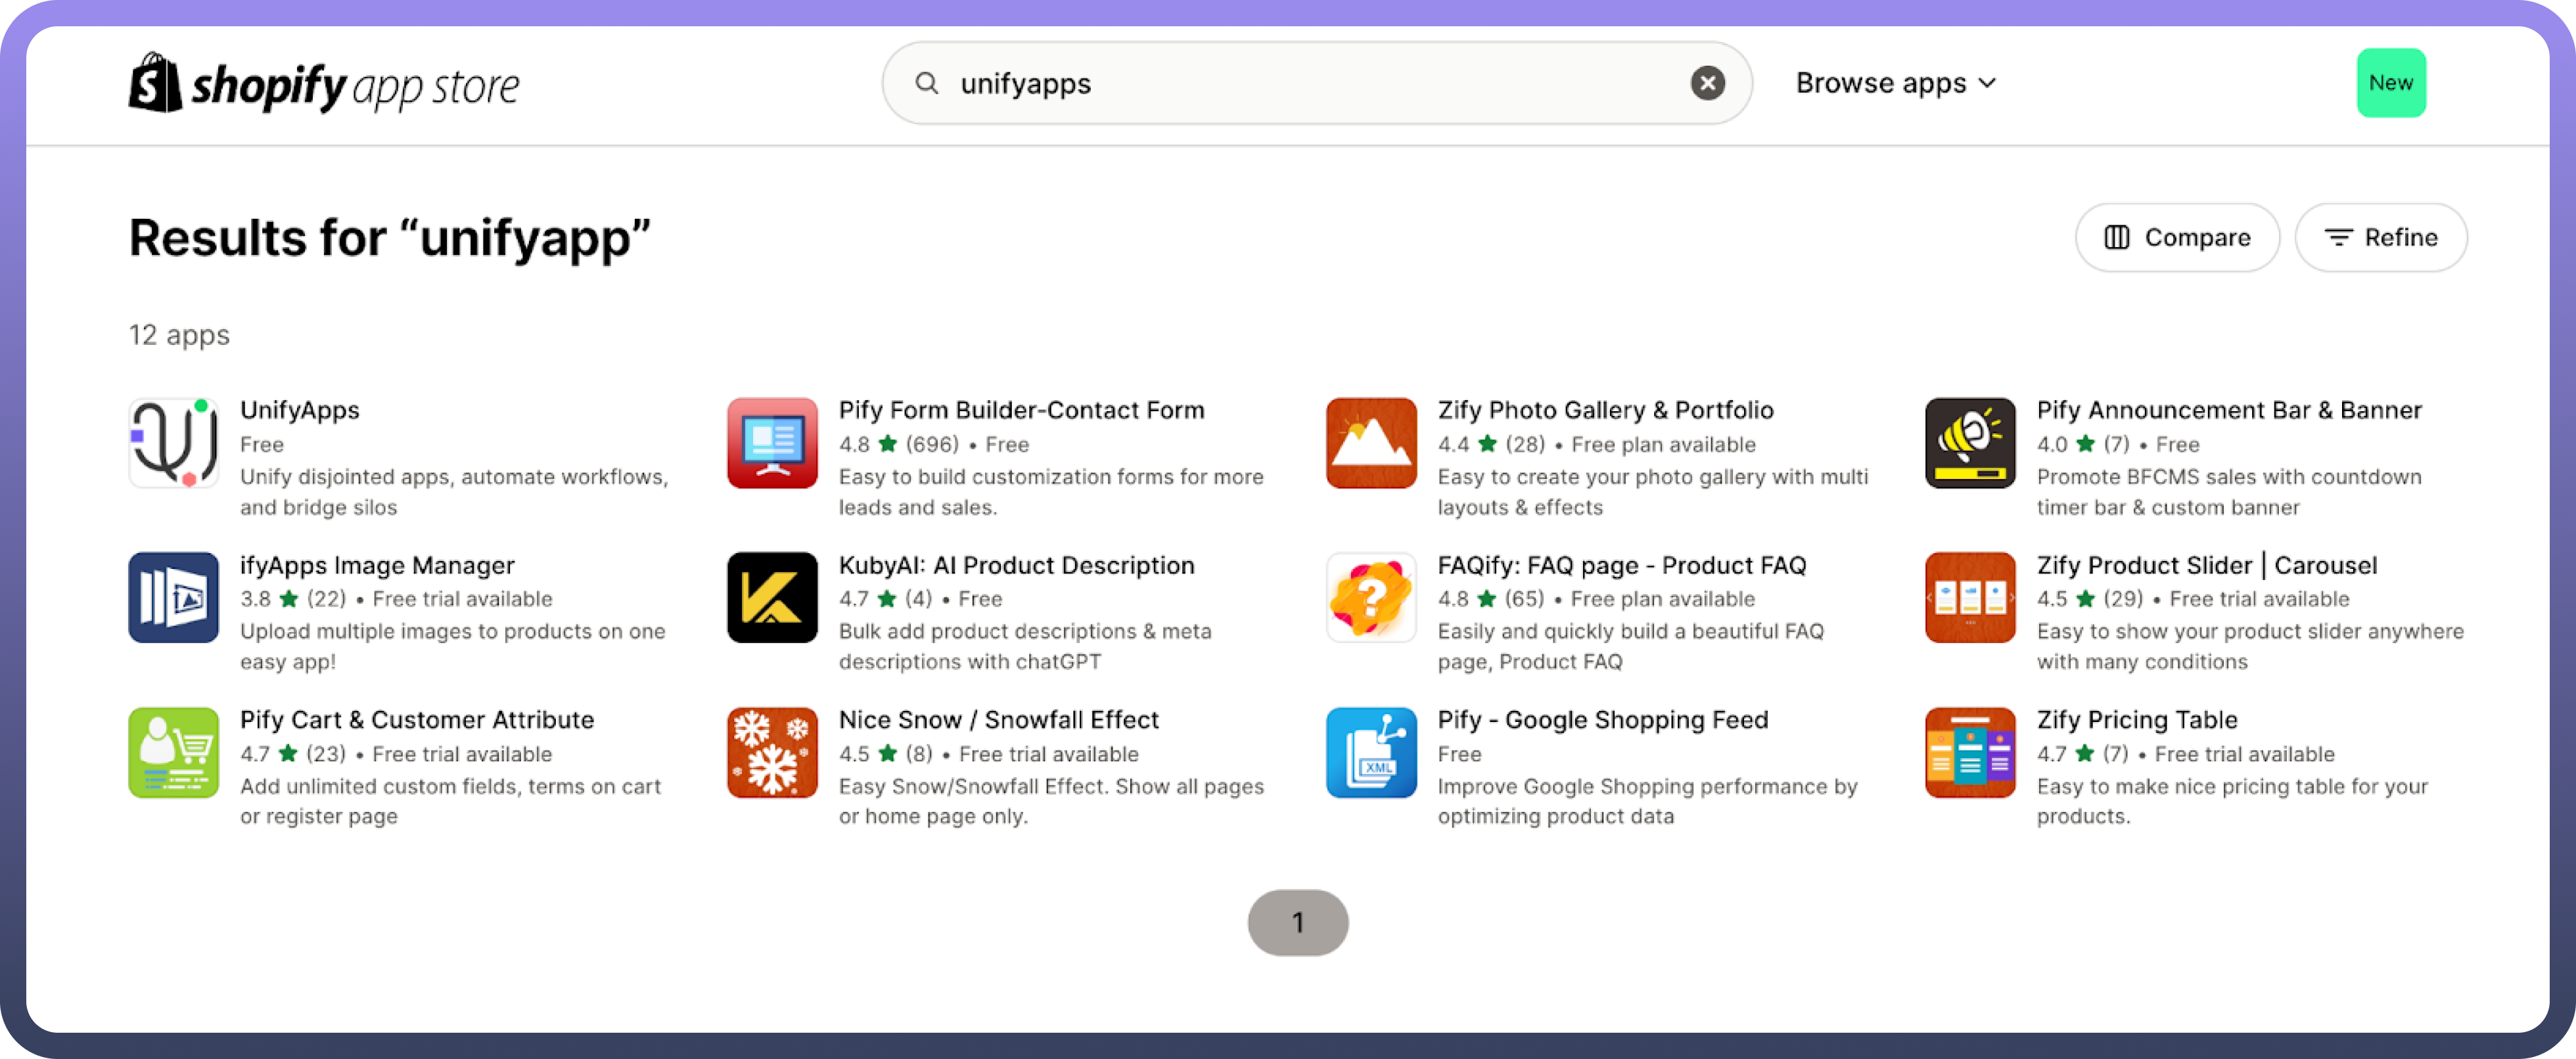
Navigate to the Shopify App Store and search for "
UnifyApps".
Step 3: Install the UnifyApps Application
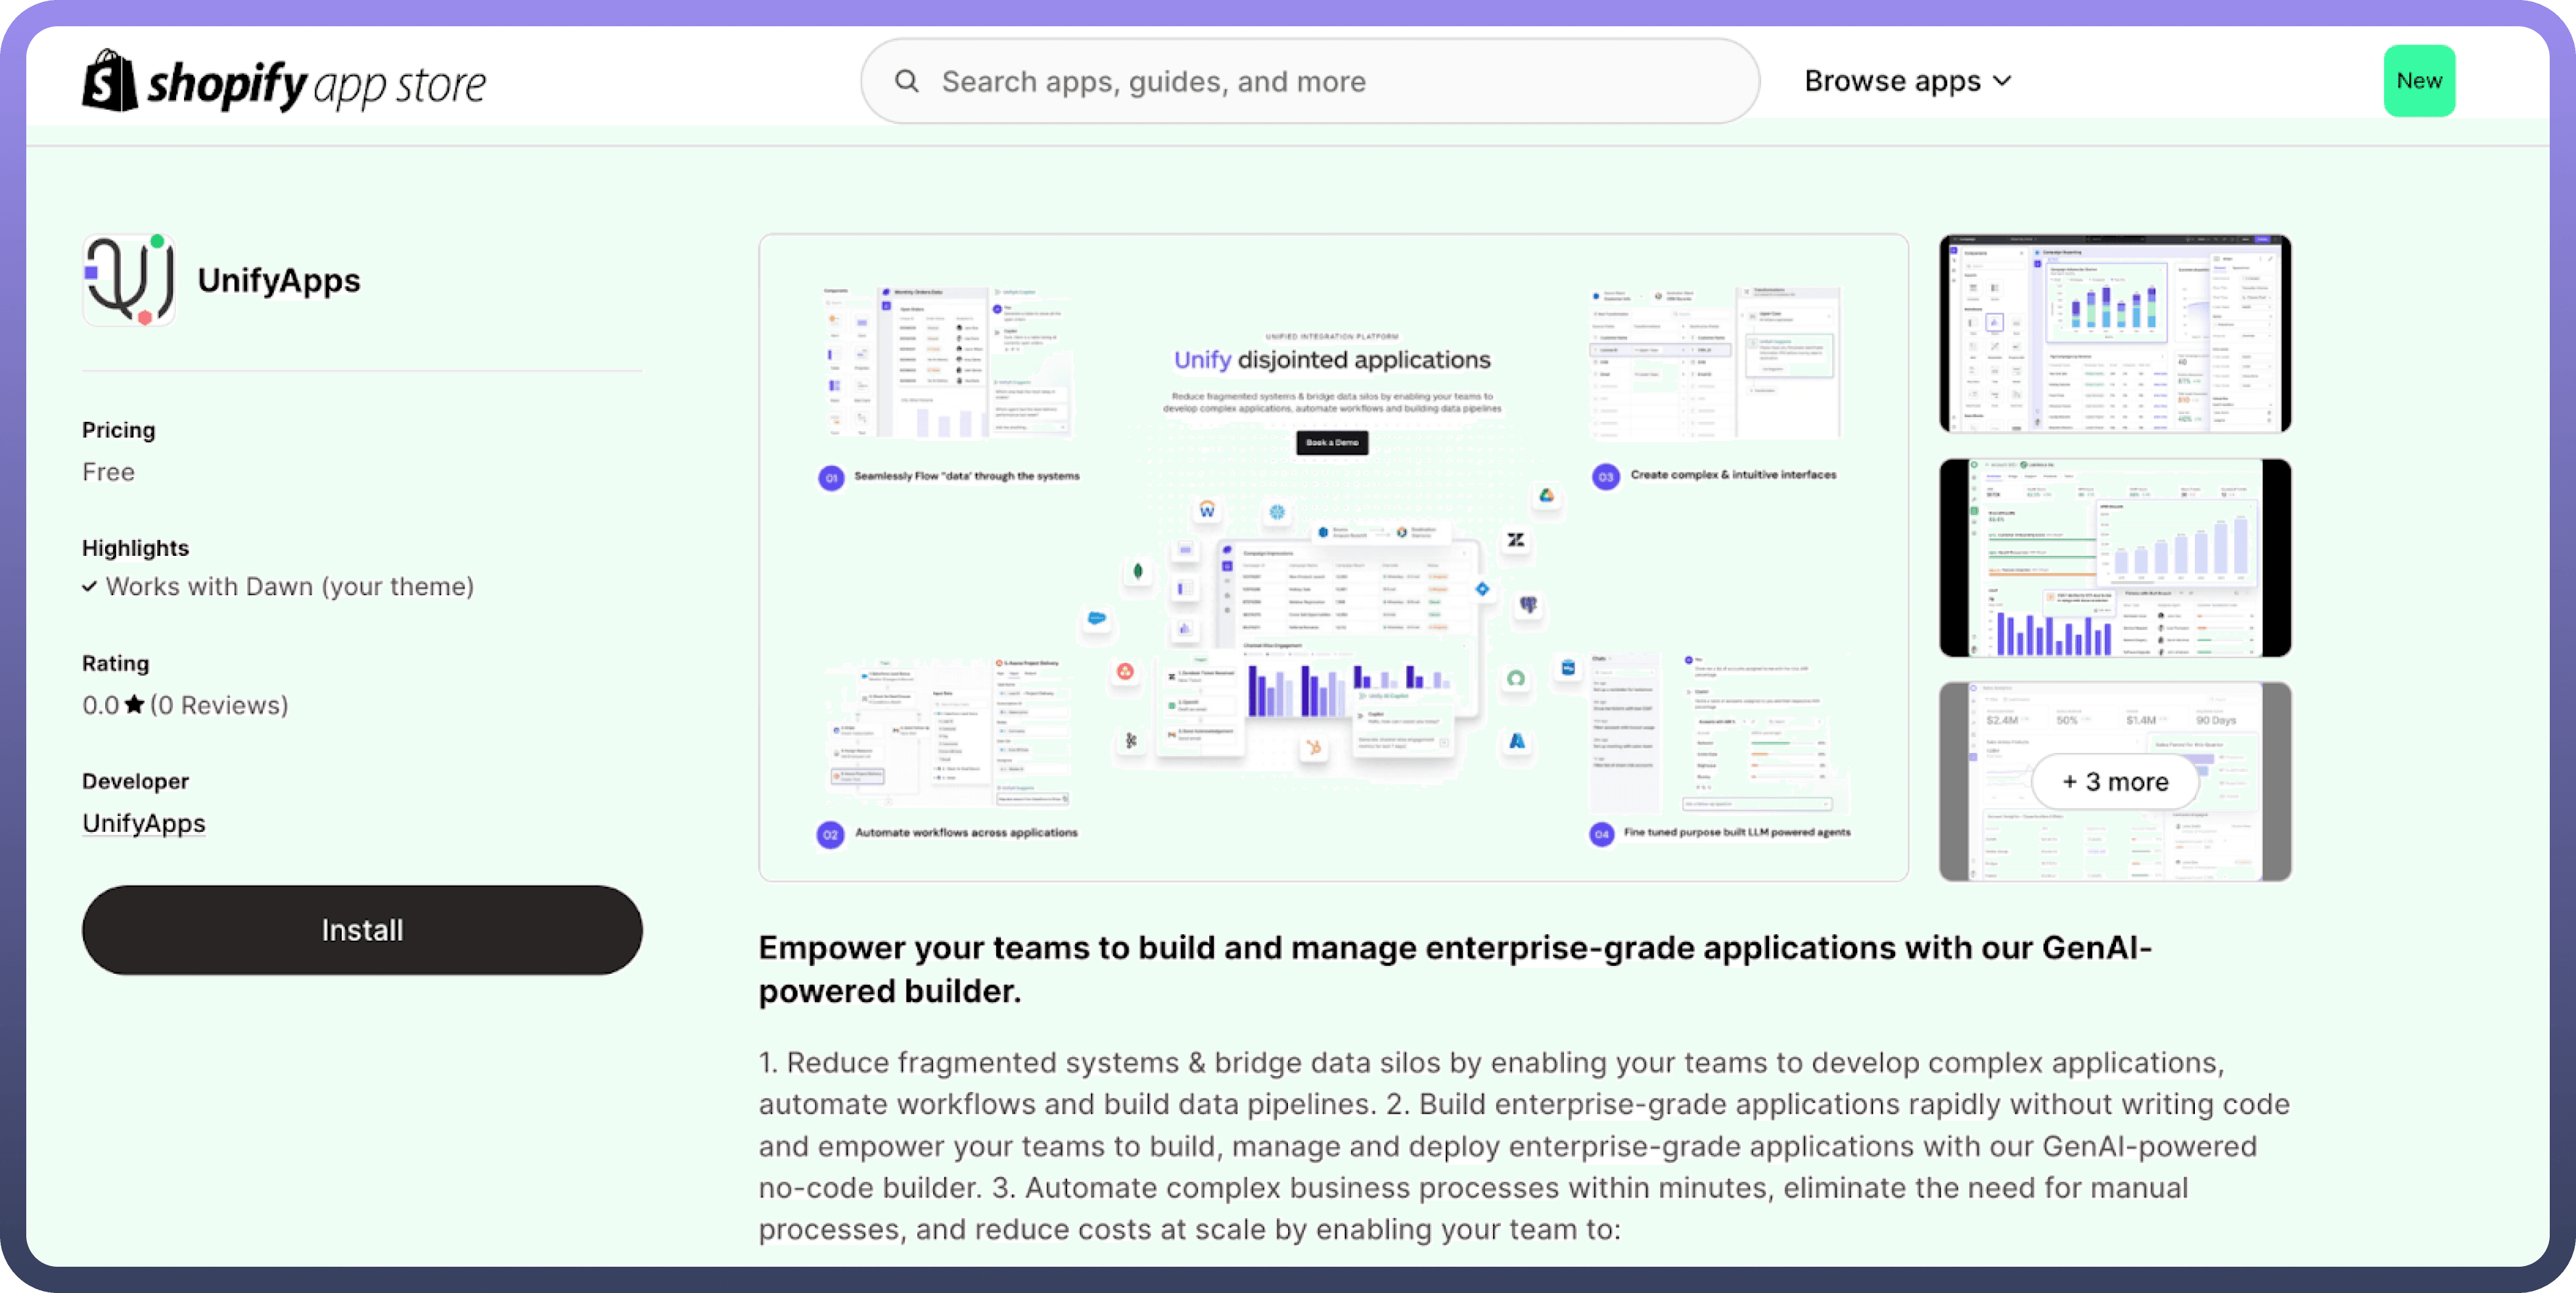
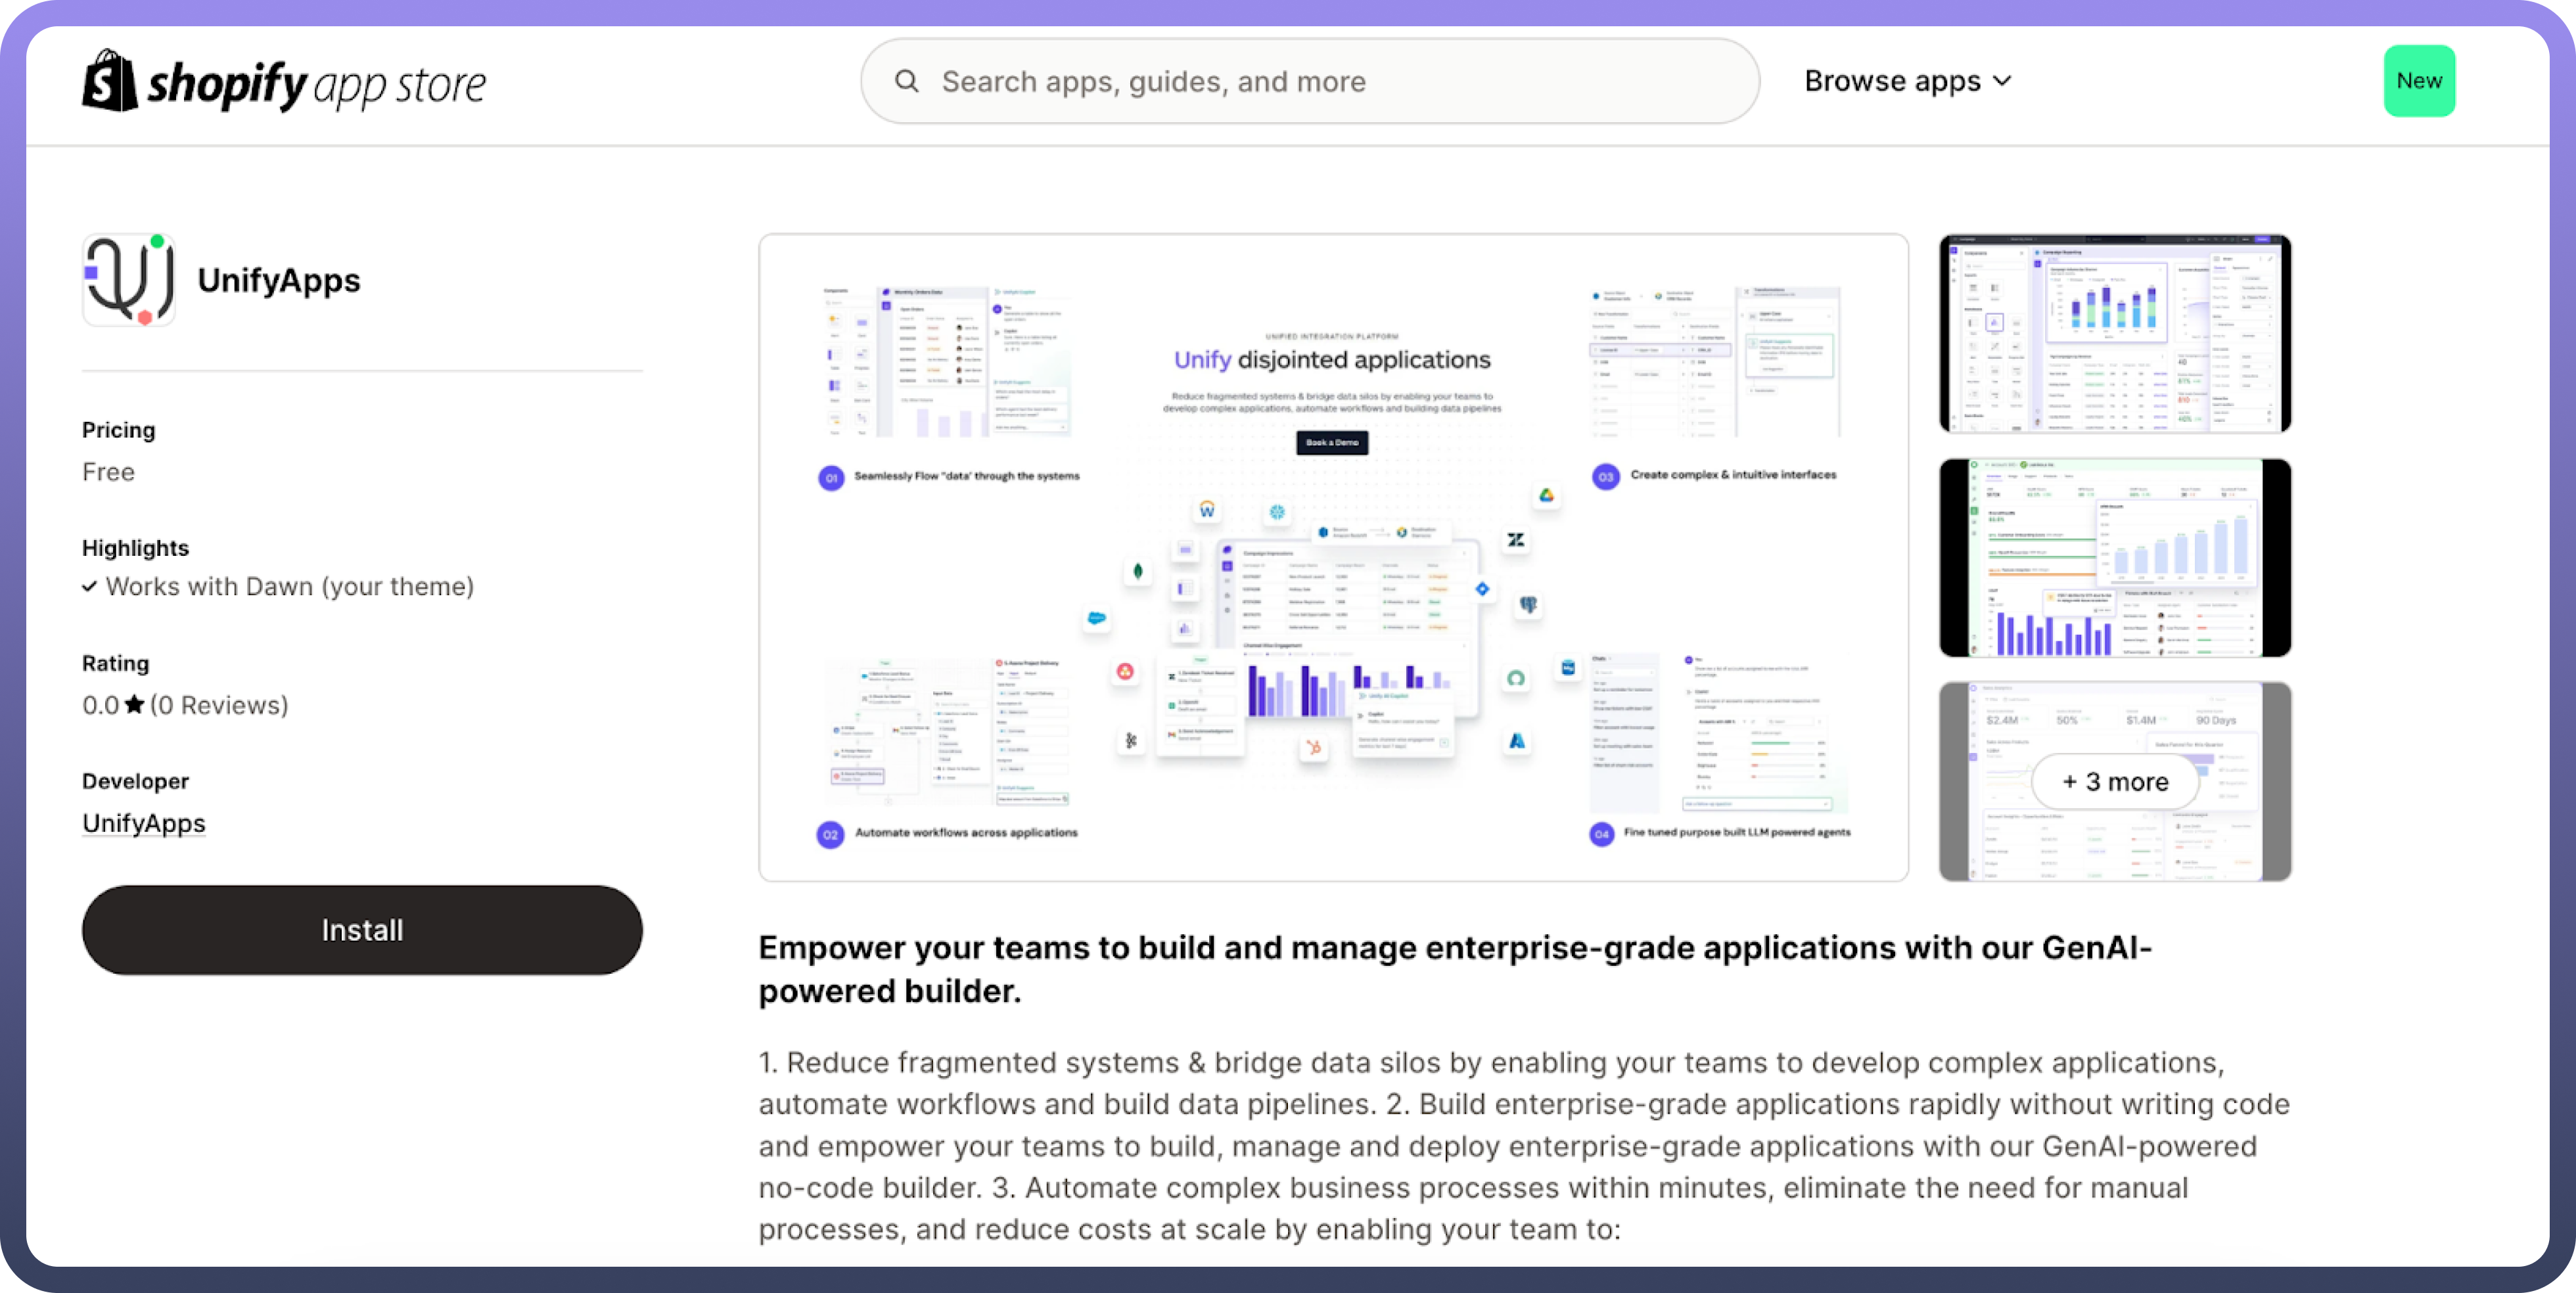
Click on the UnifyApps application and install it in your Shopify store.
Step 4: Provide a Tenant App URL
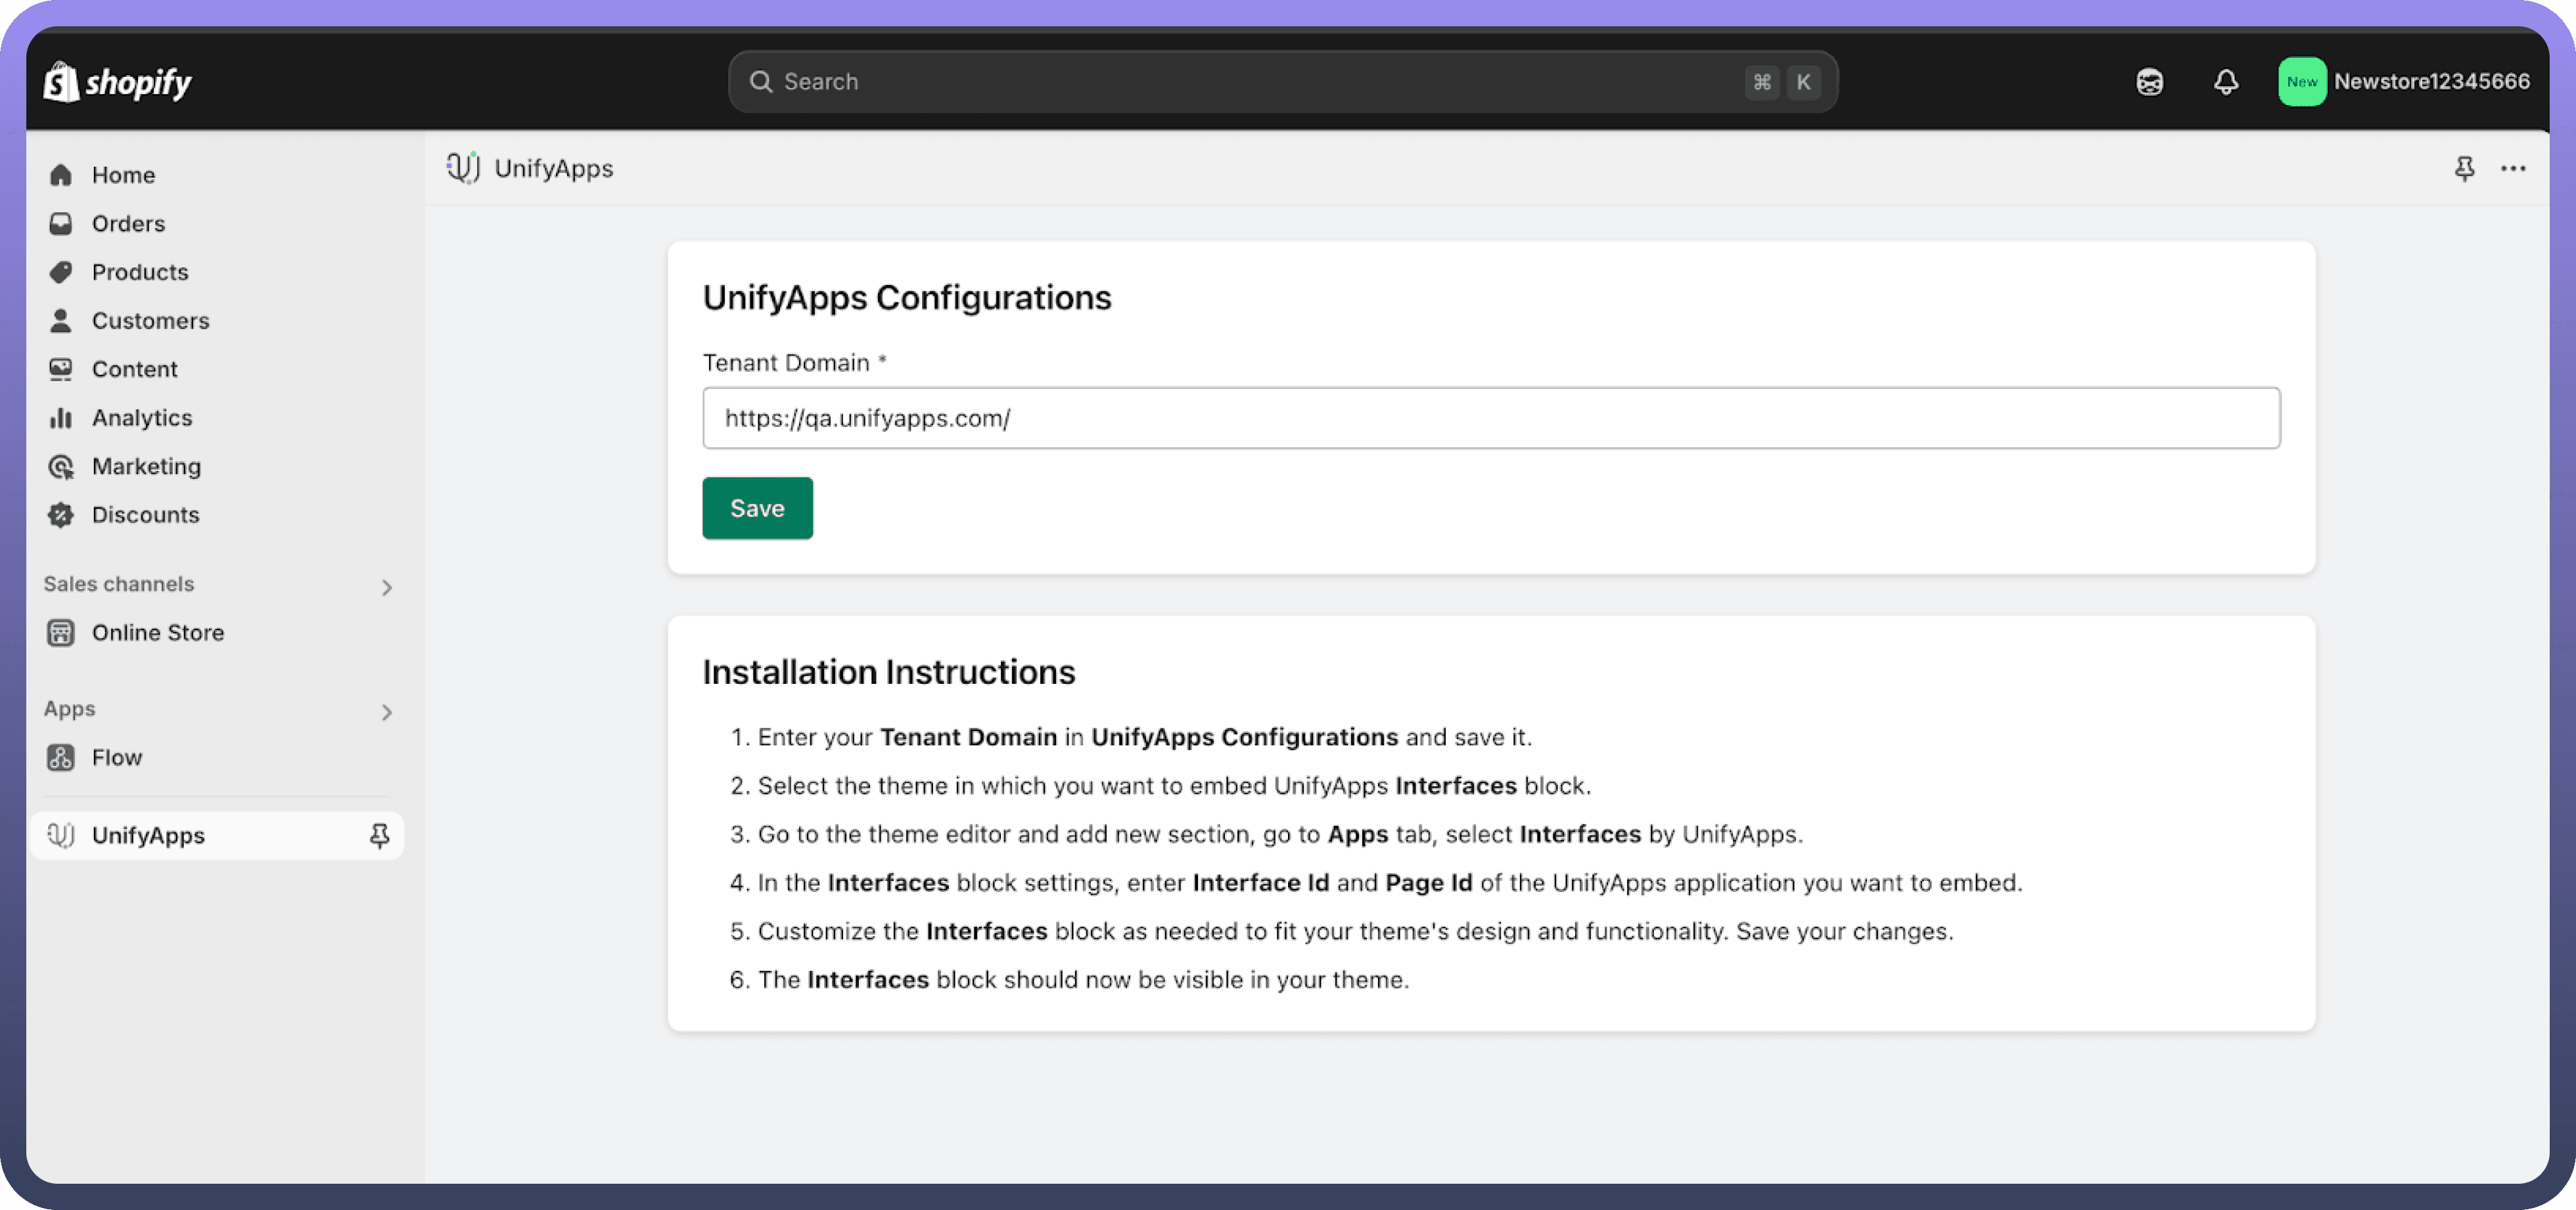
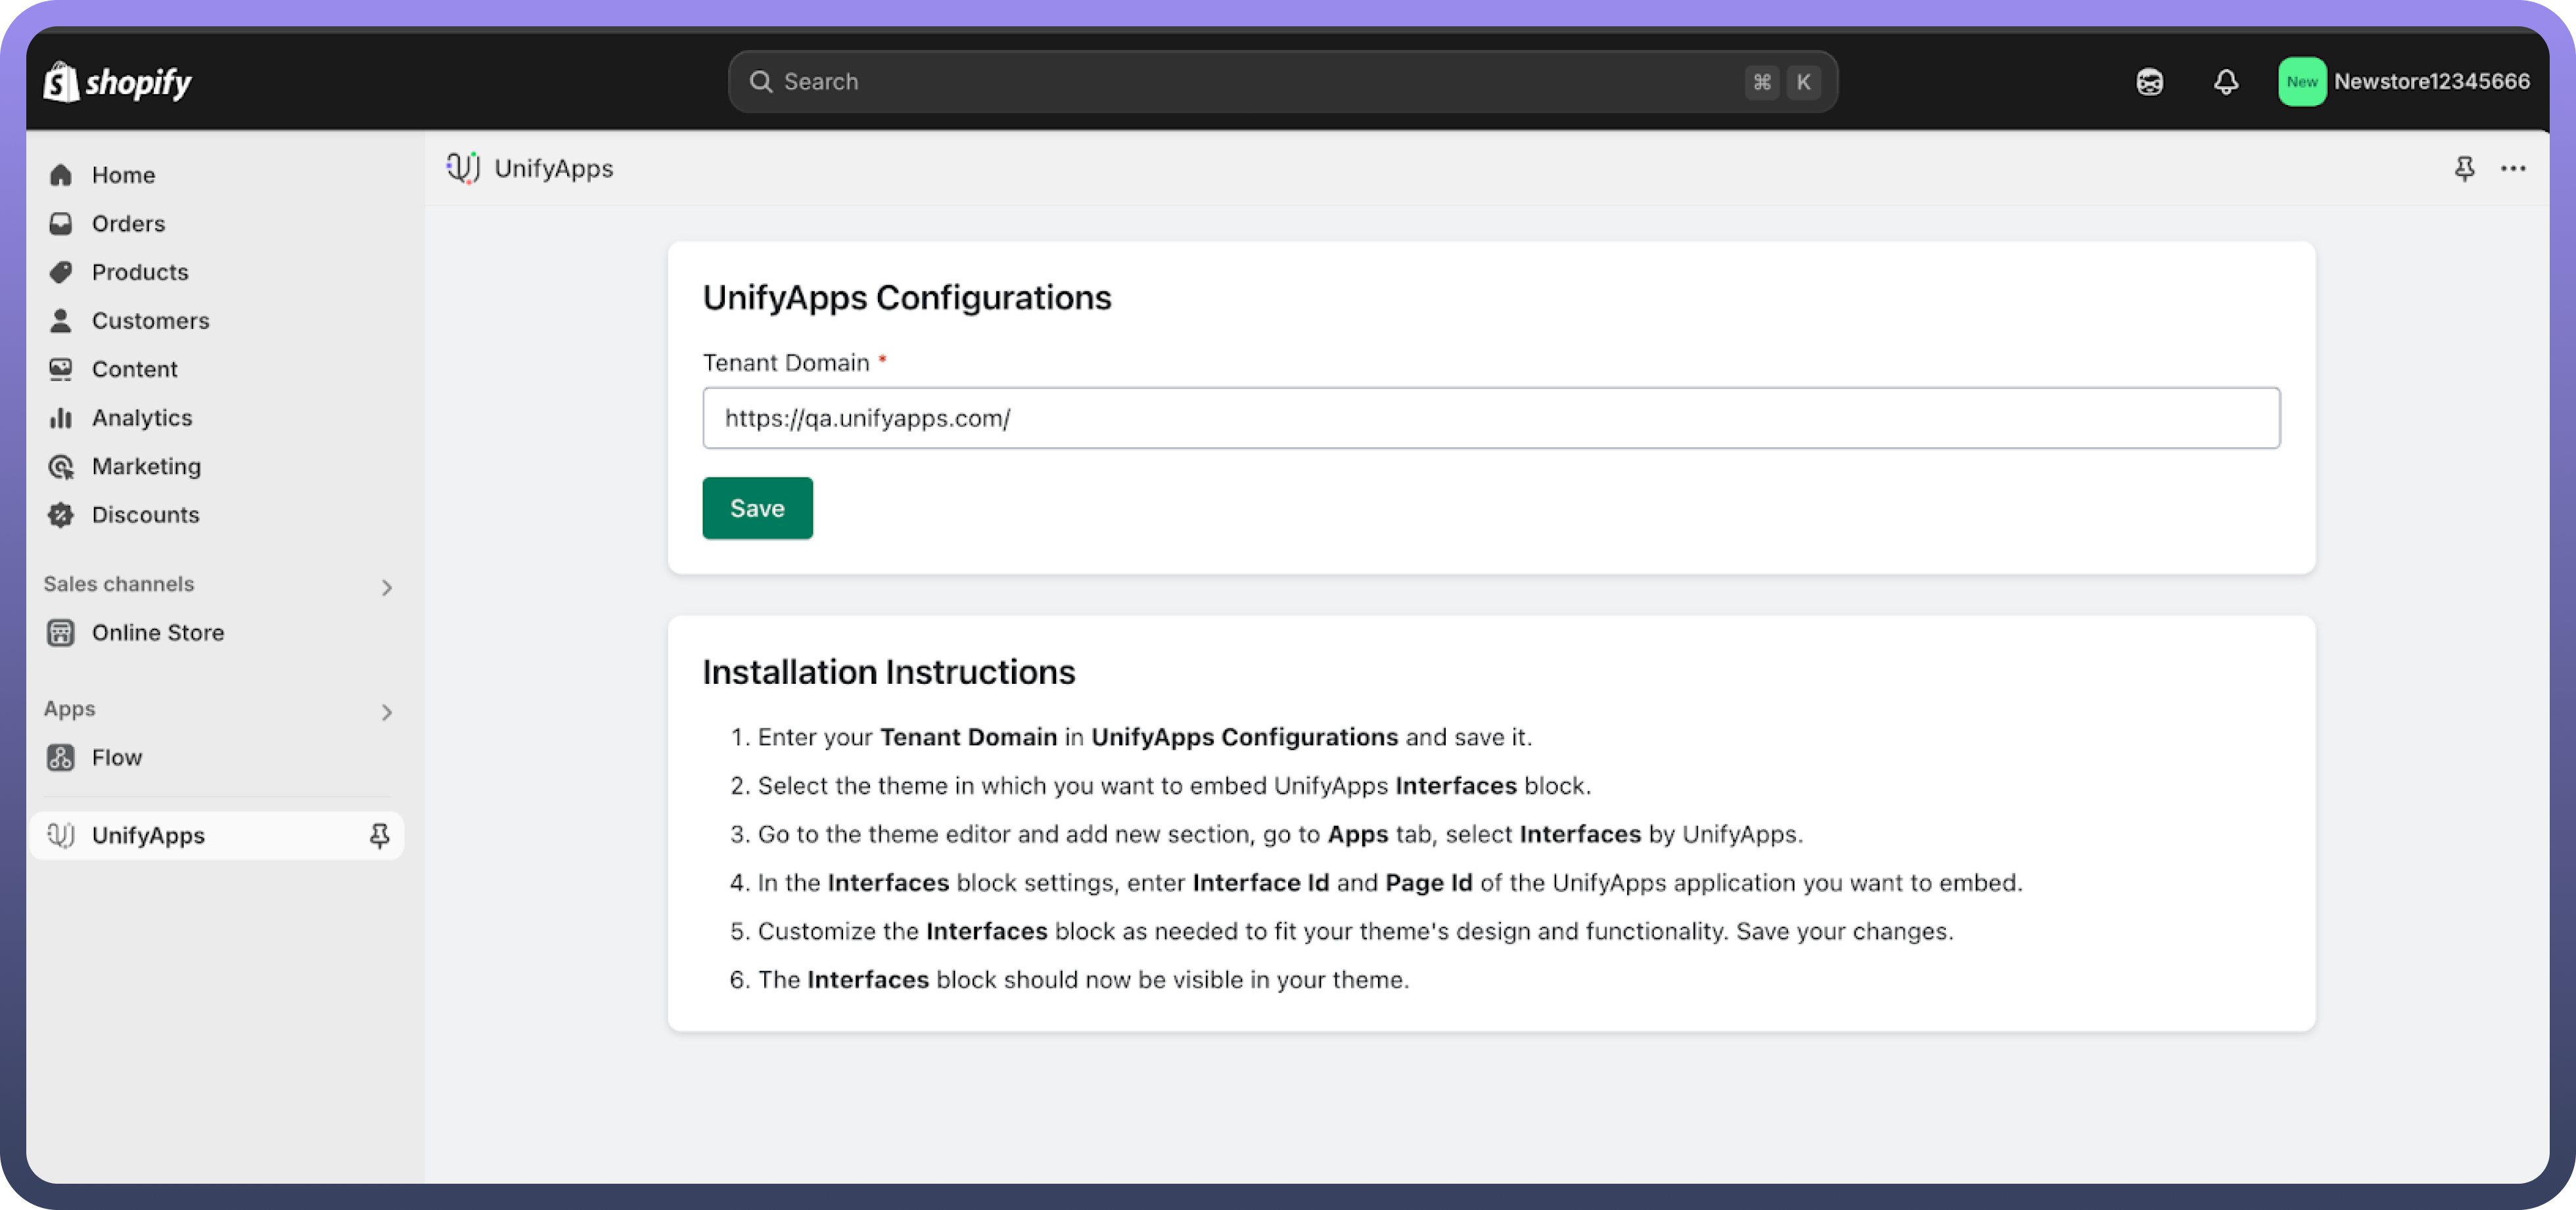
Inside the UnifyApps application, provide the main URL of the environment your application is hosted on. For example: https://xyz.abc.unifyapps.com
Step 5: Navigate to the Online Store Customization Section
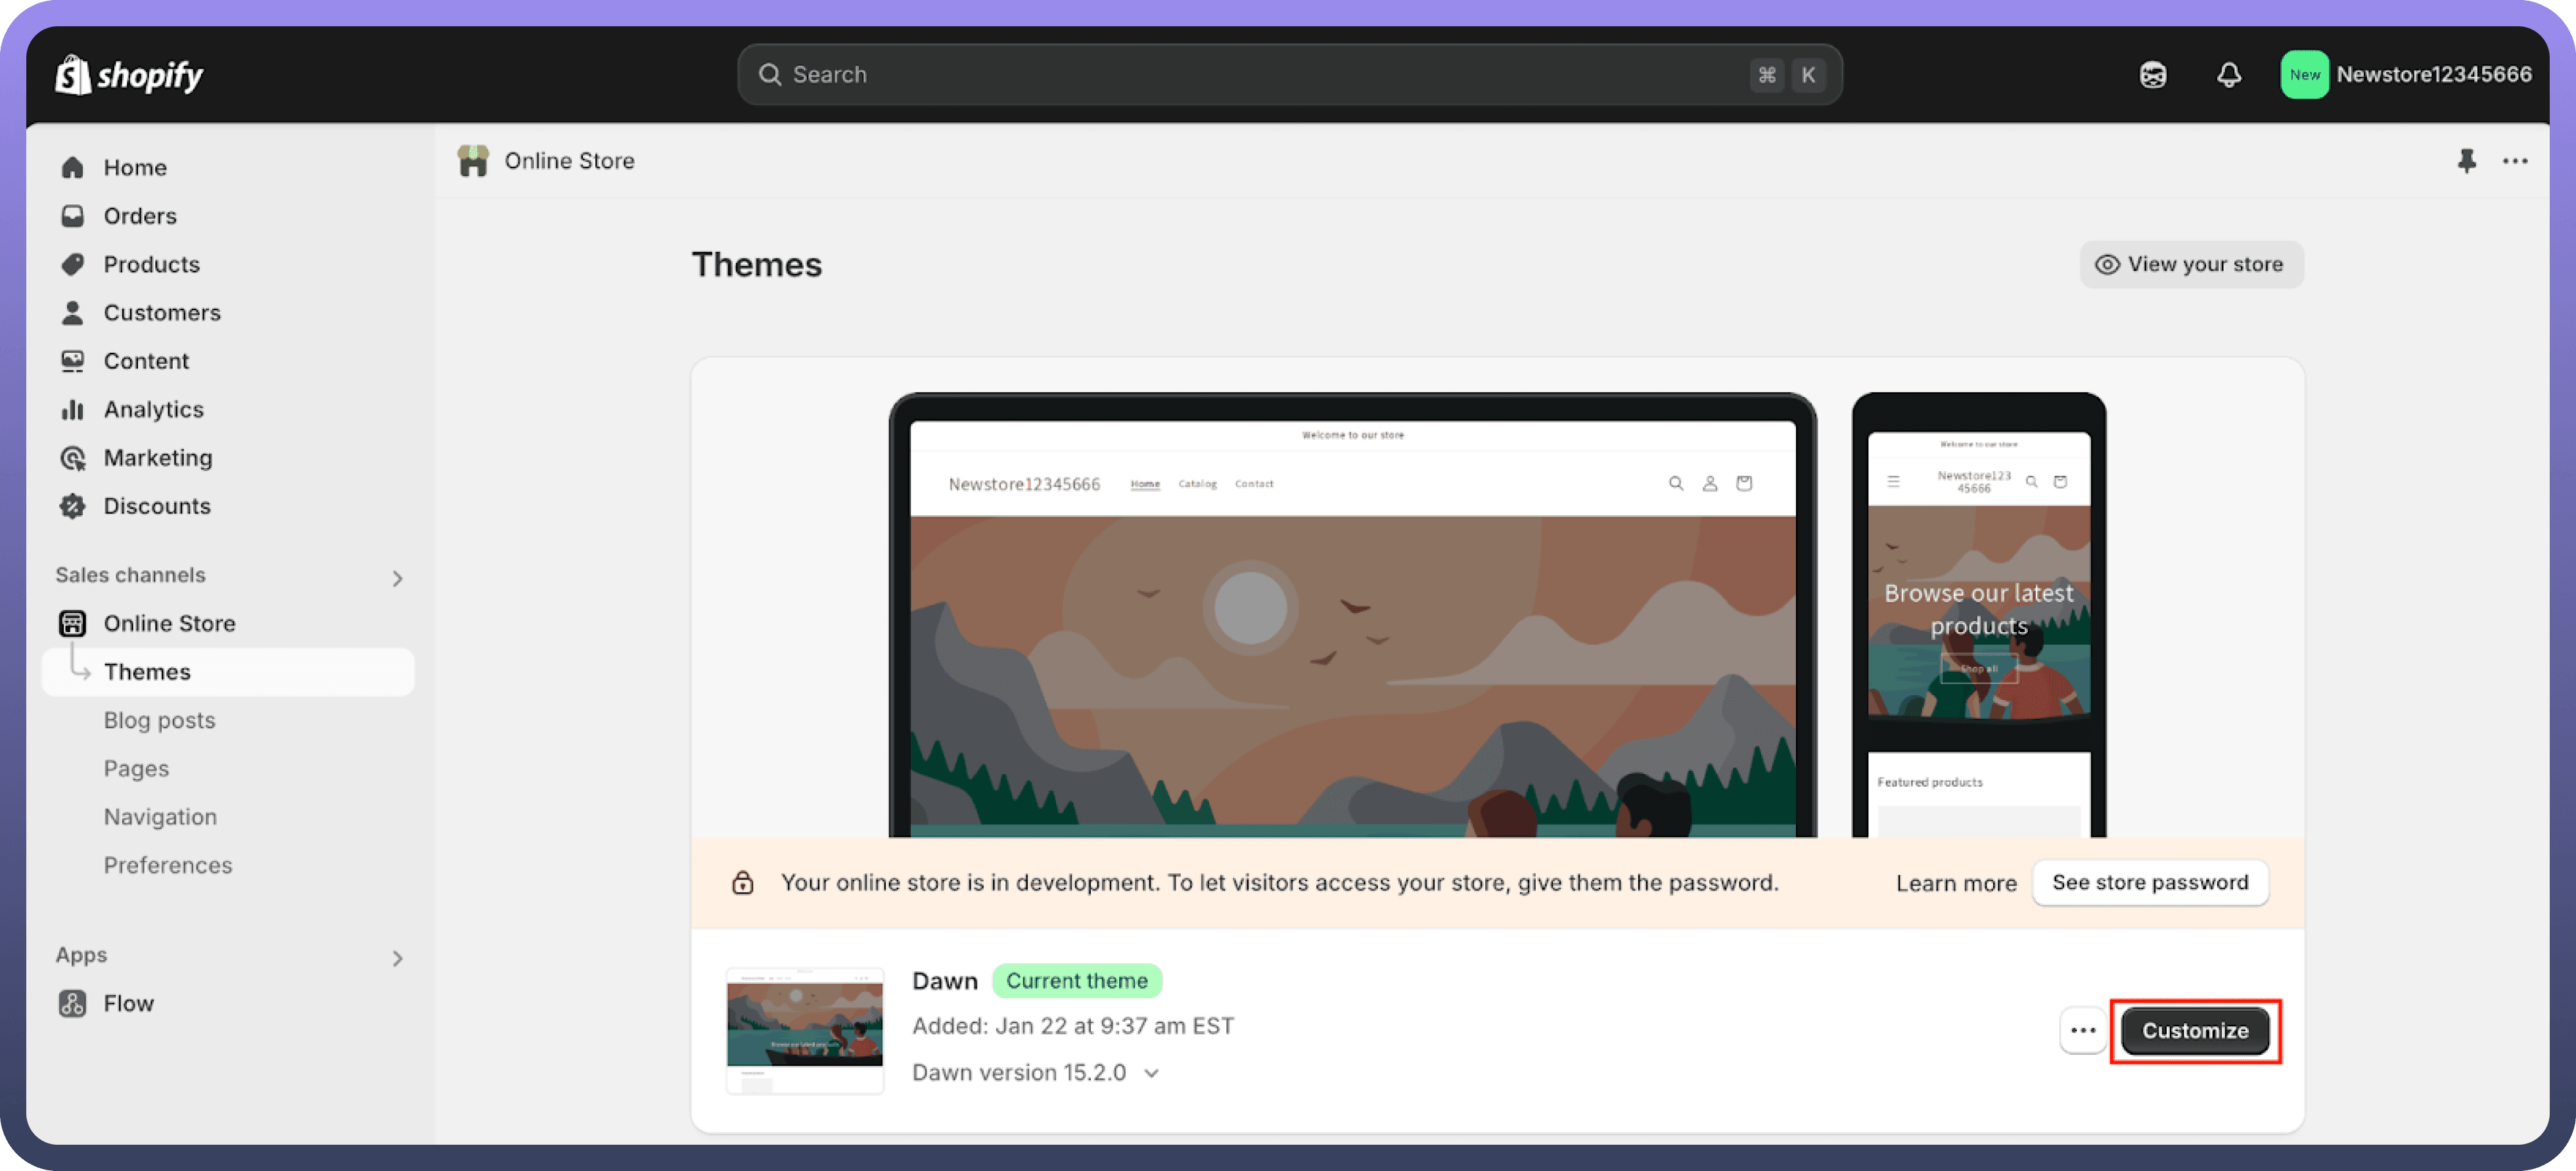
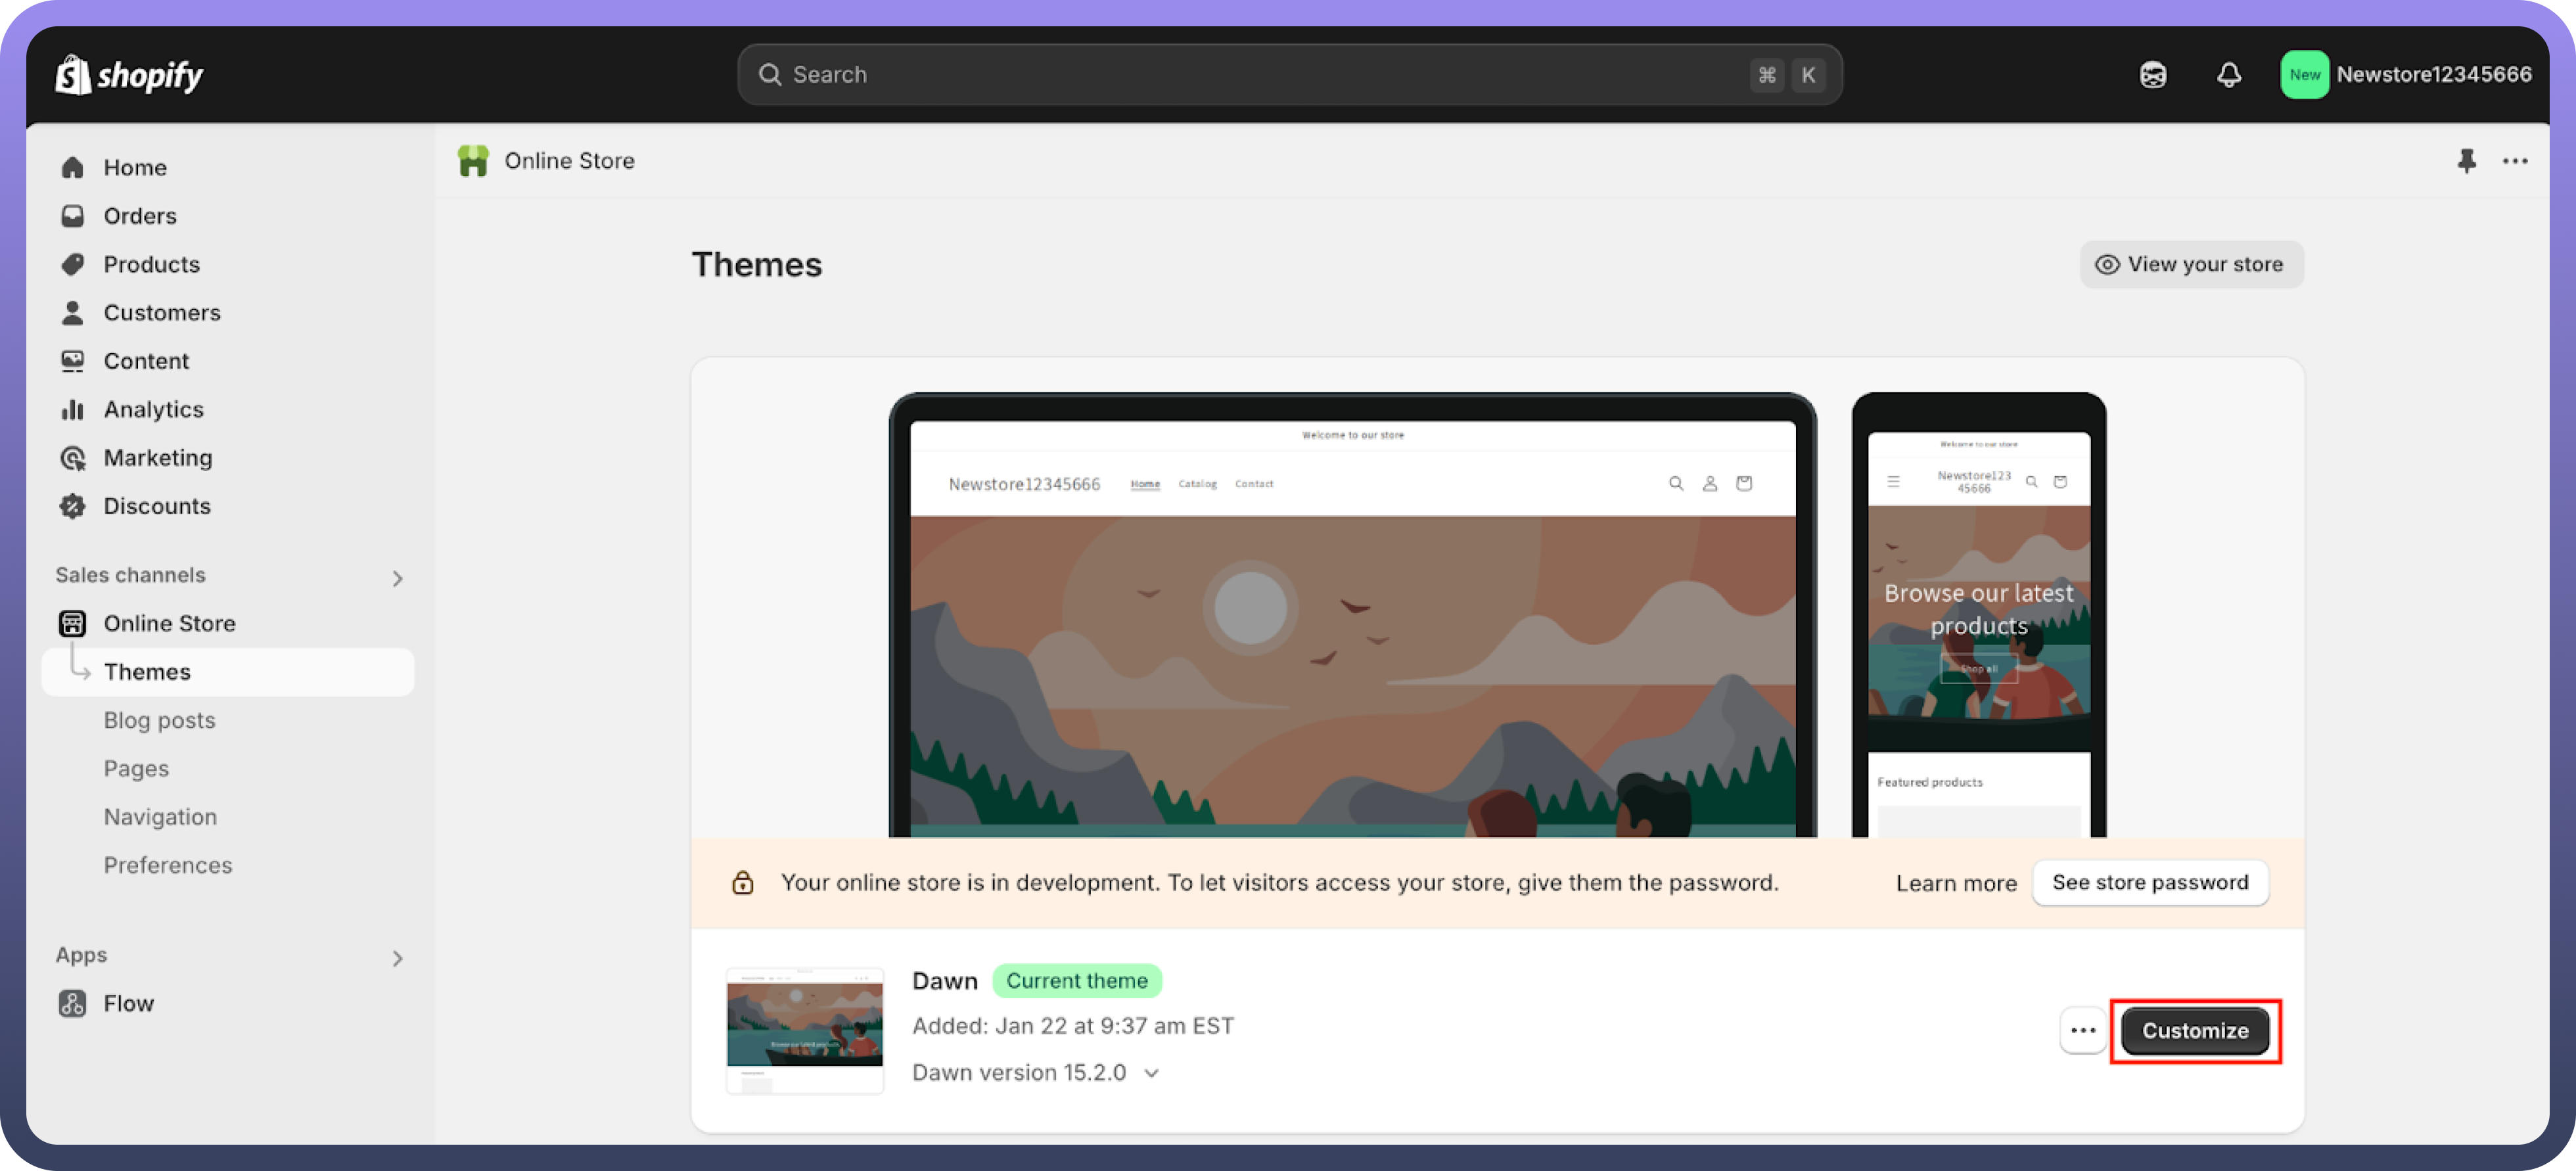
Go to the online store where you want to embed the UnifyApps application.
Click on
Customizeto modify the store layout.
Step 6: Add UnifyApps as a Section
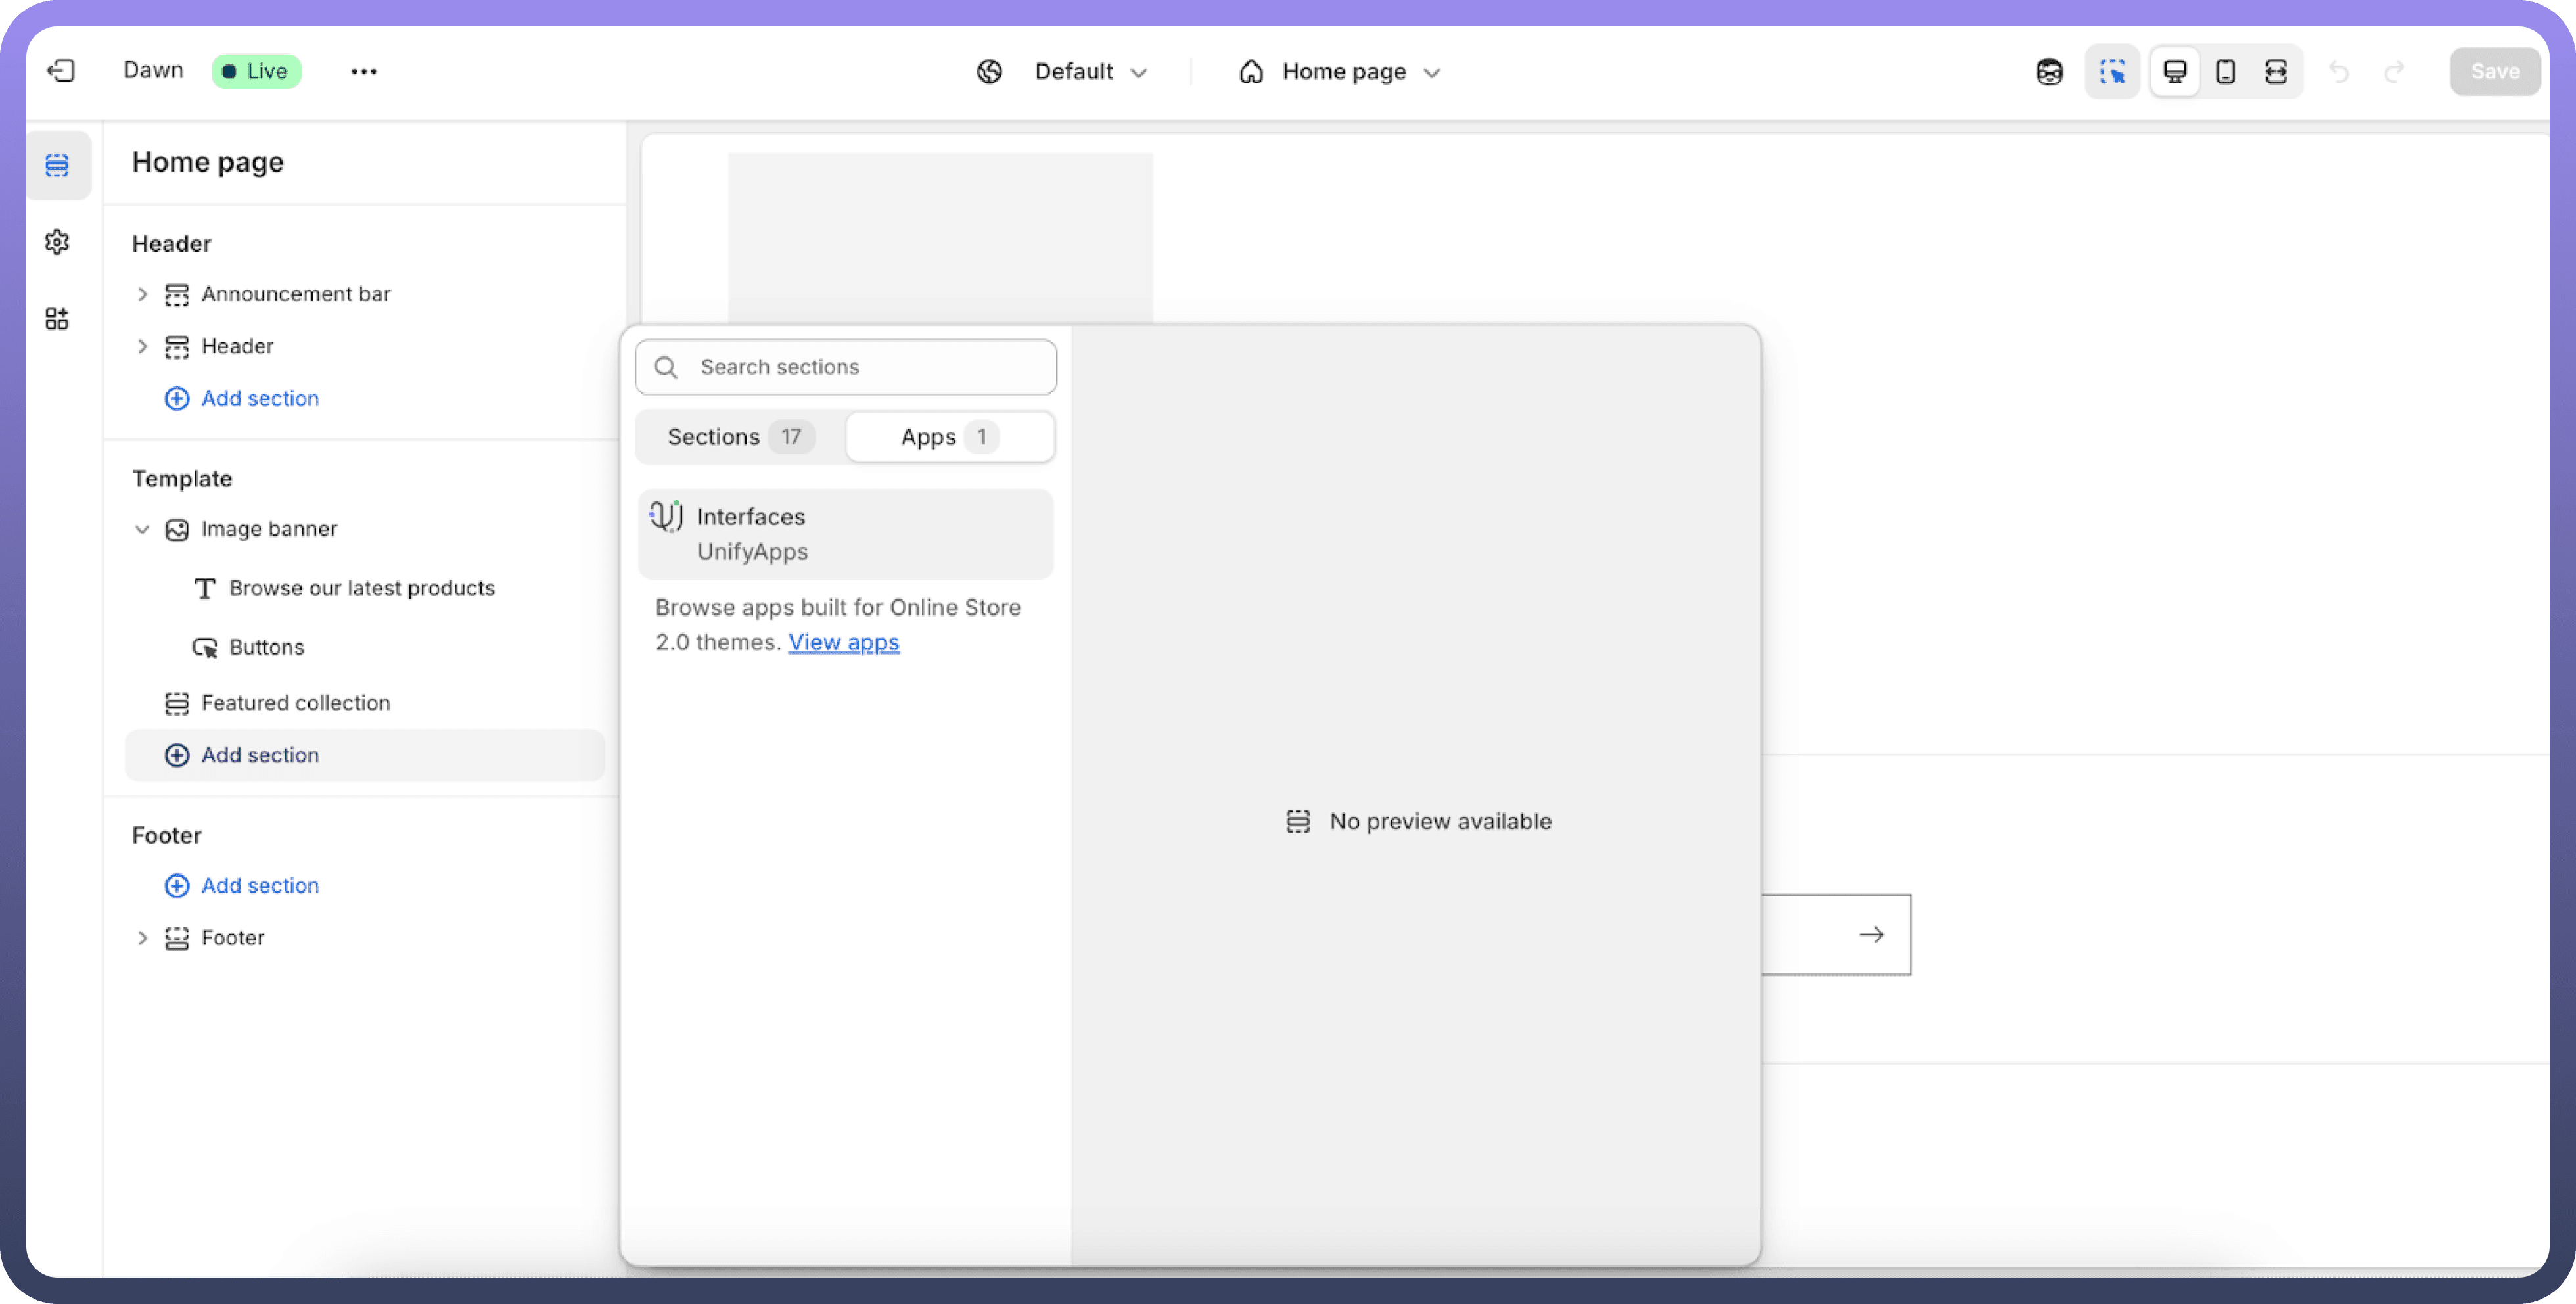
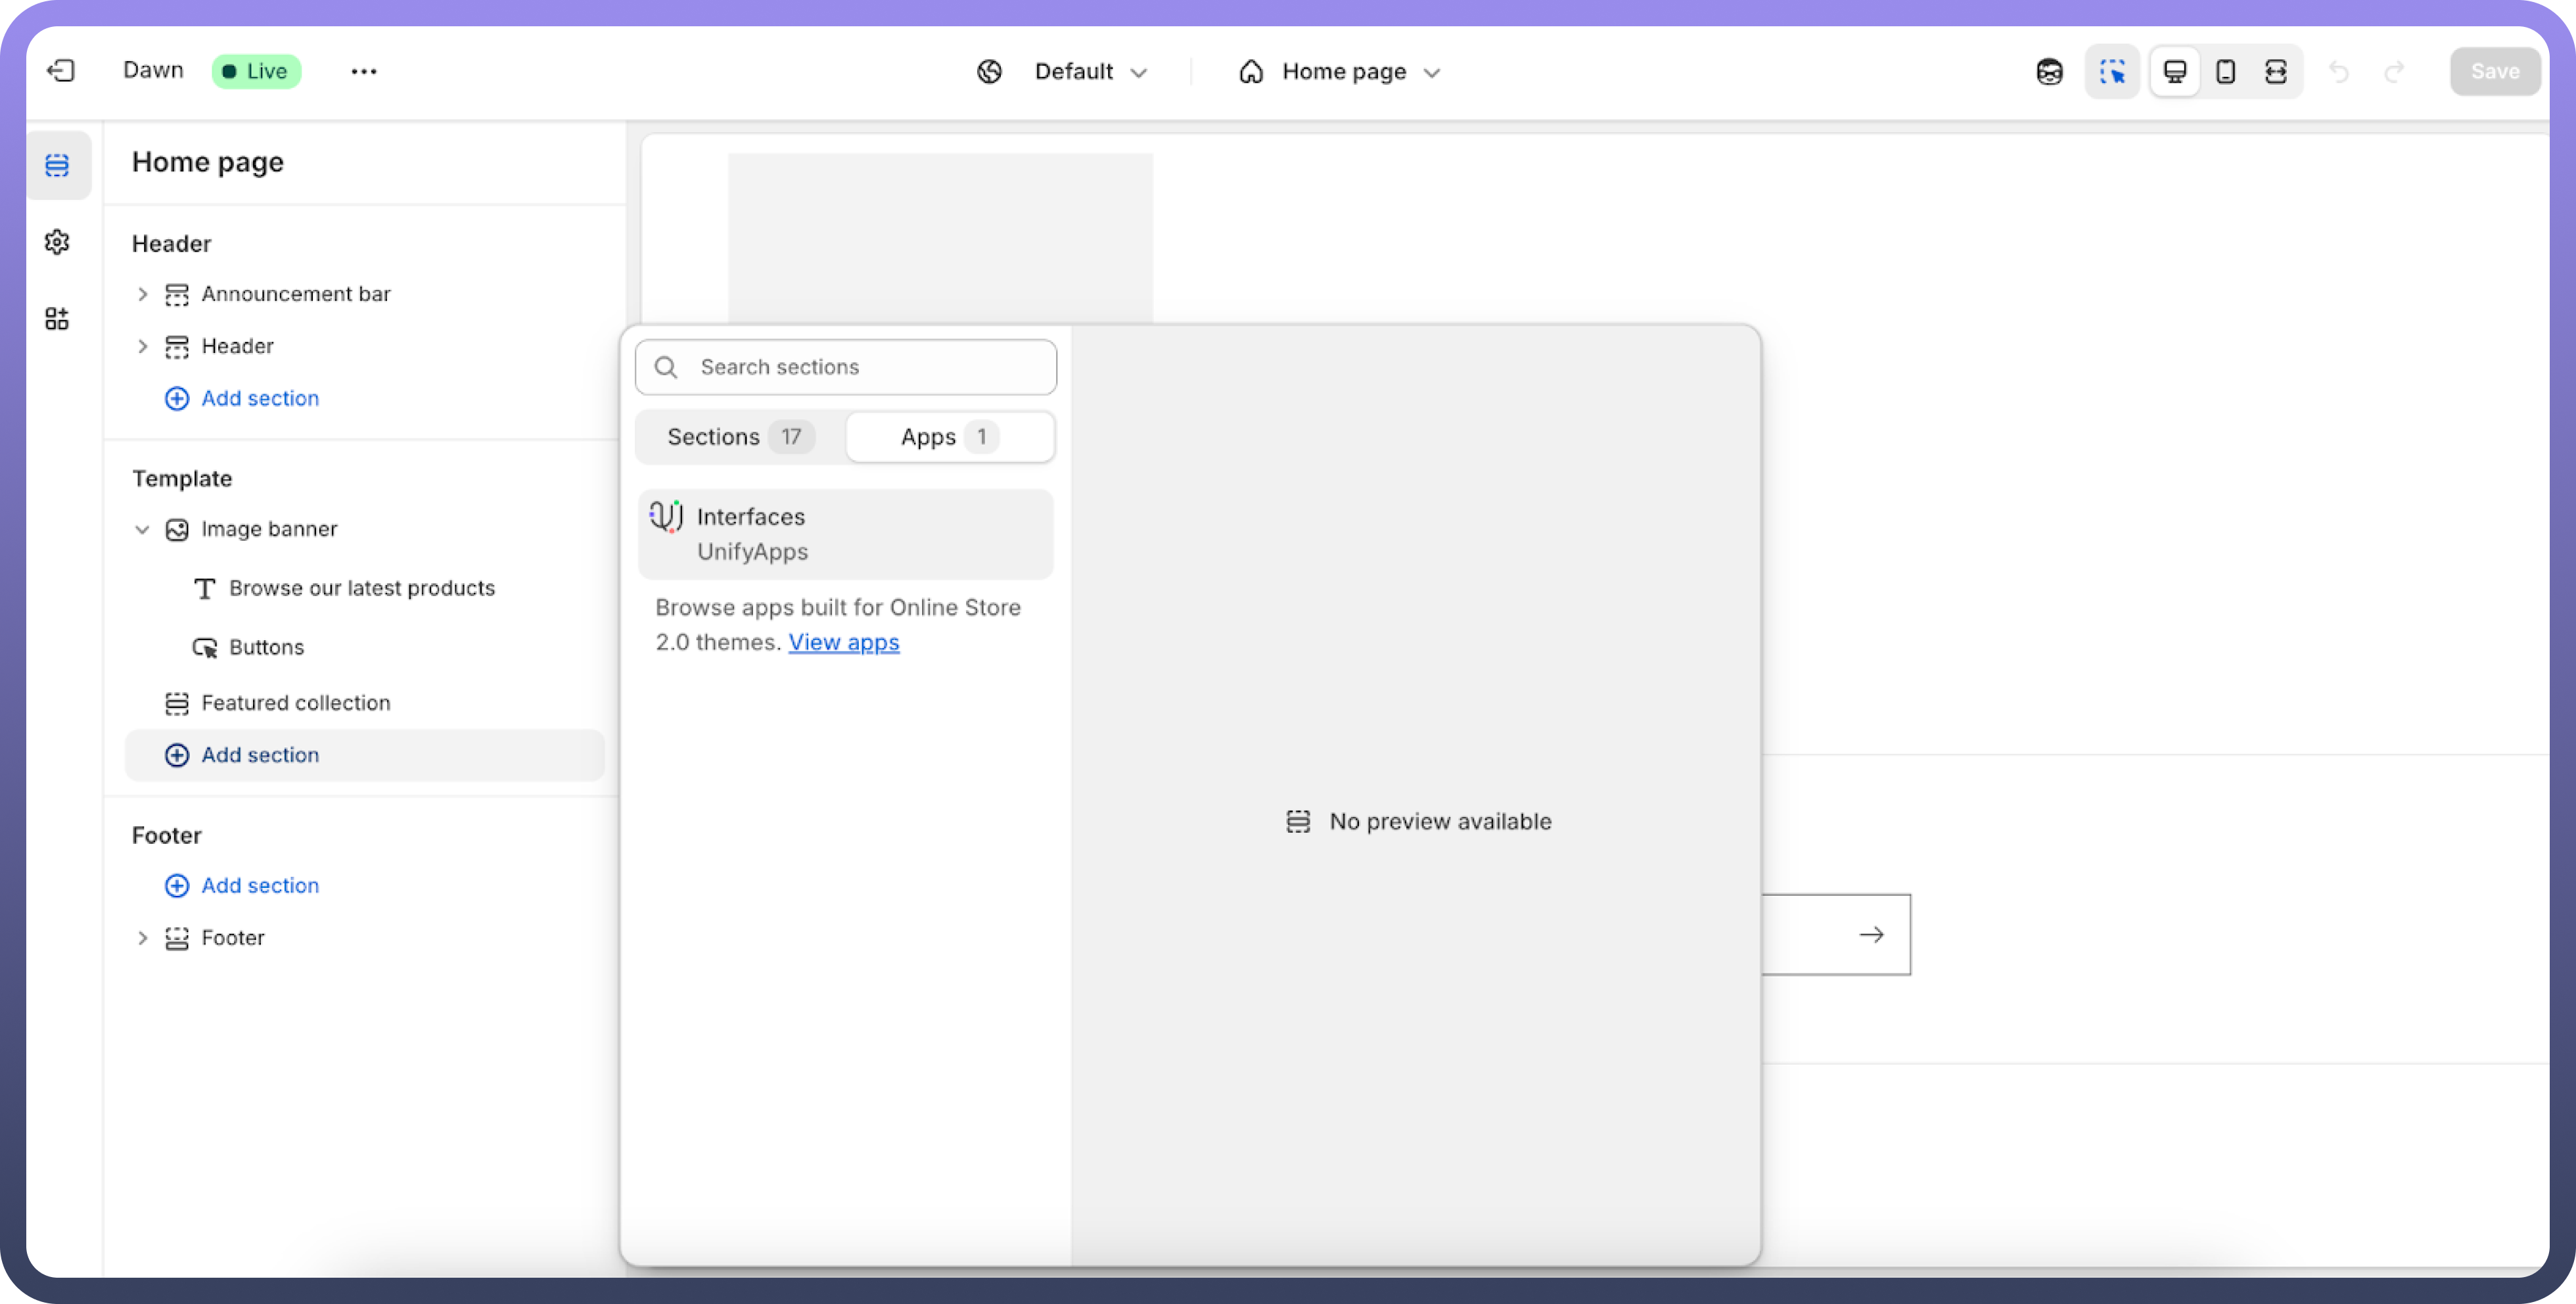
In the
Sectionstab, clickAdd Sectionat the desired location within the sequence of elements on your page.
Step 7: Configure UnifyApps Interface
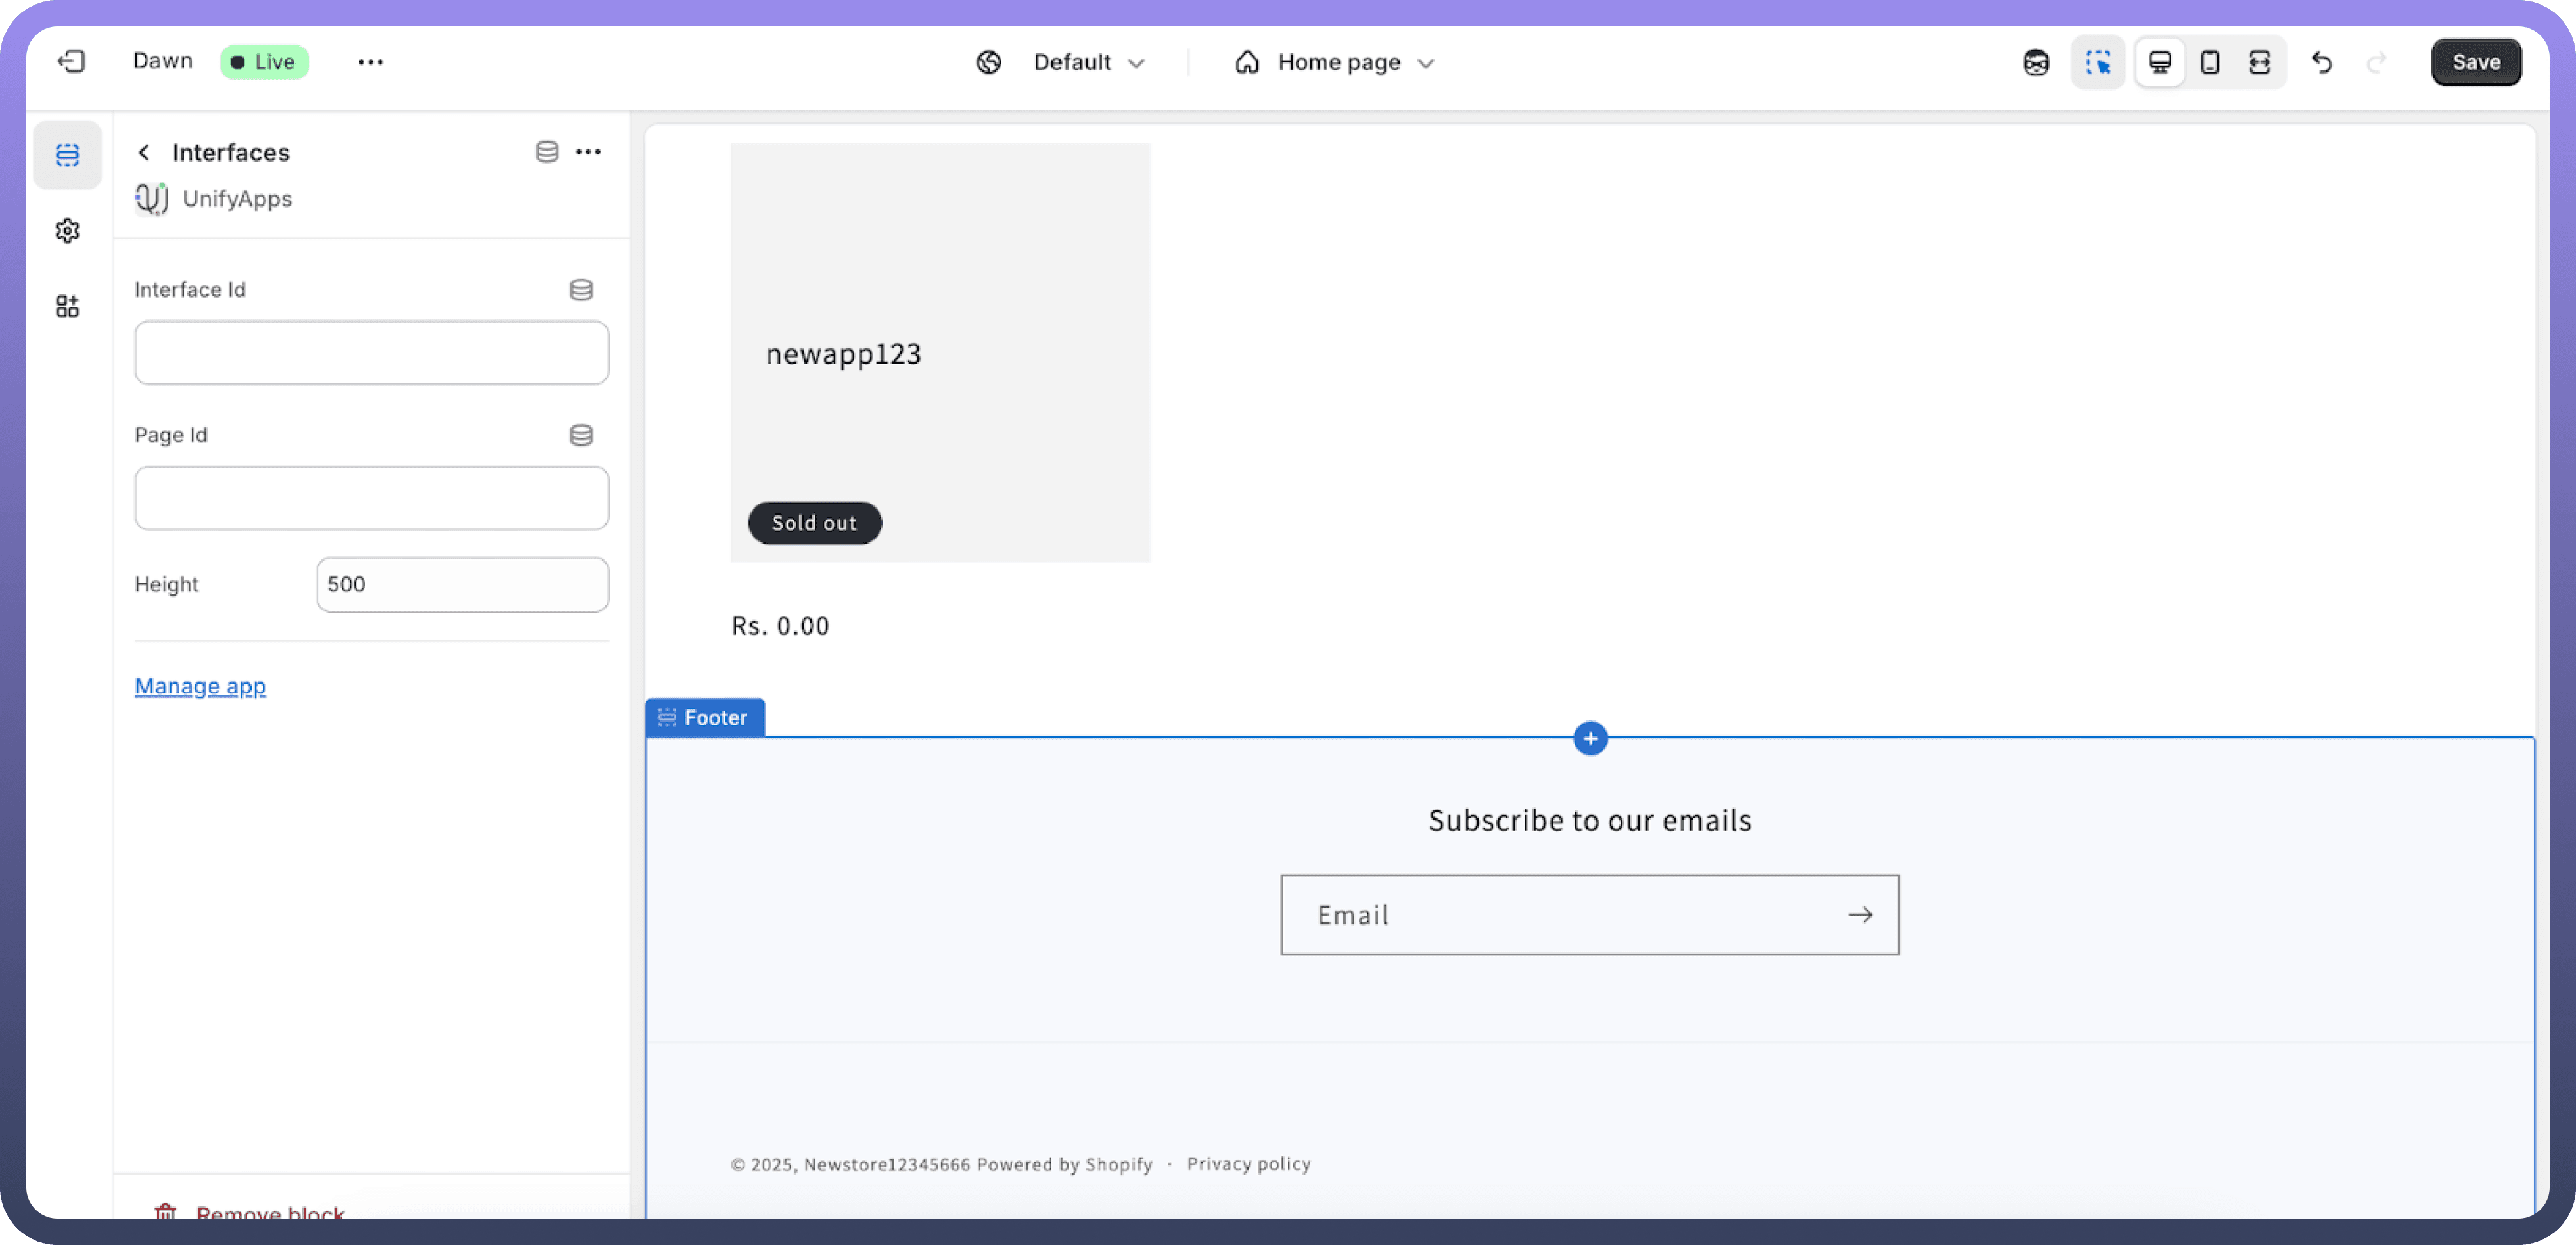
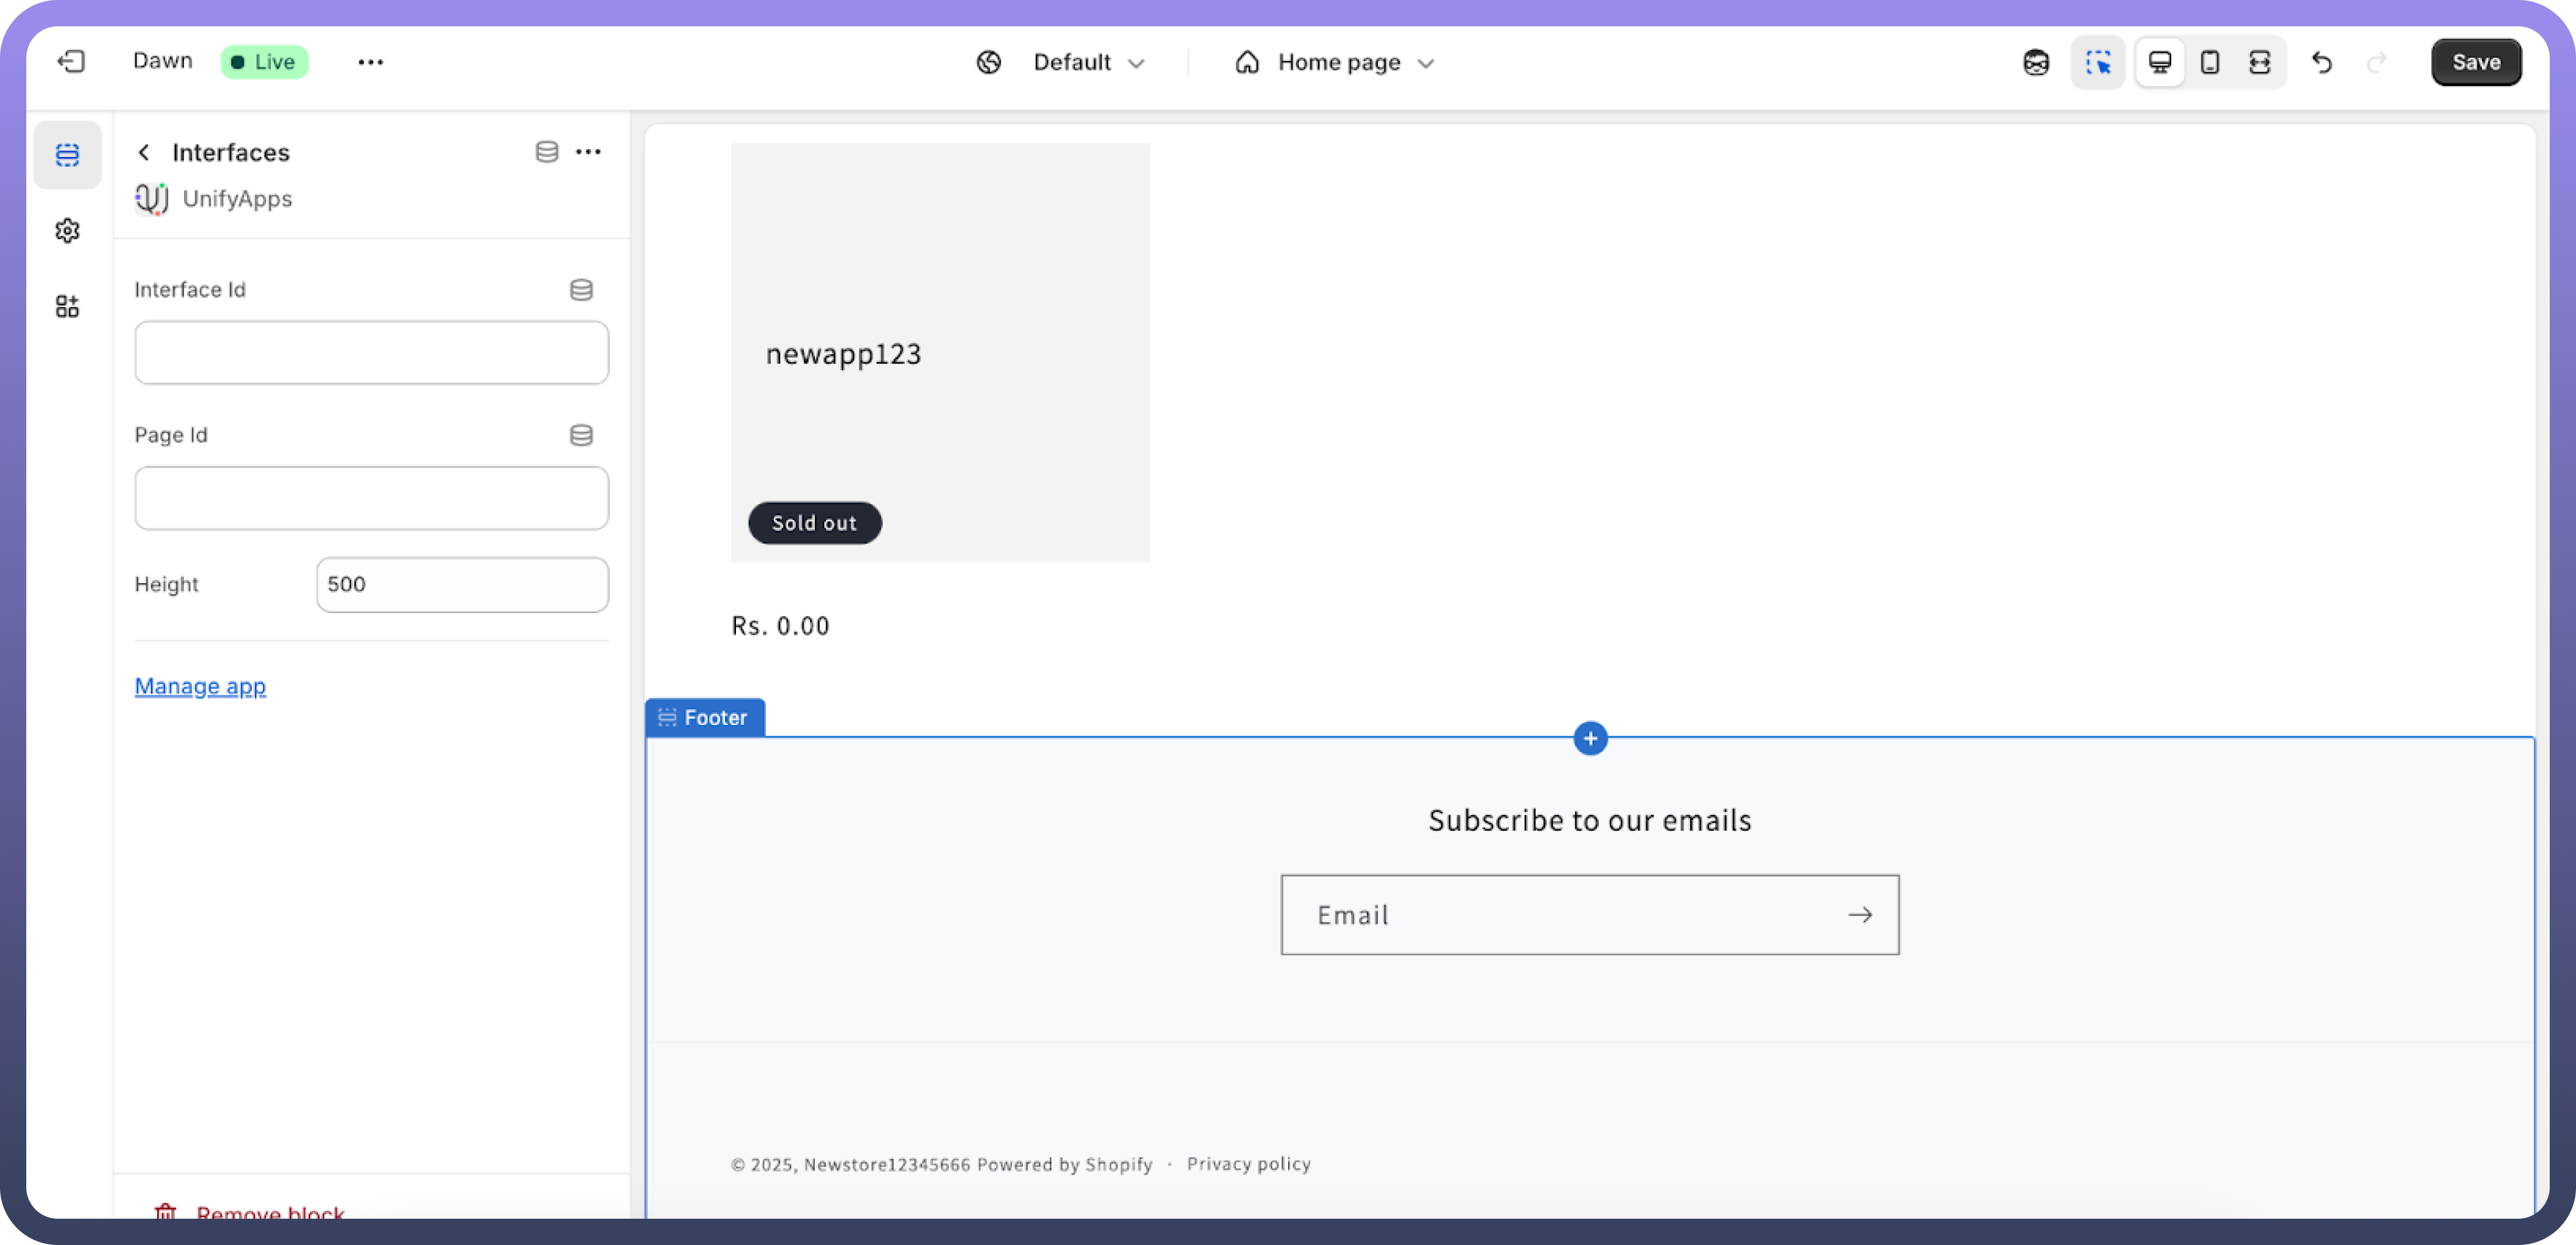
Select
UnifyAppsfrom the available sections.Enter the required
Interface IDandPage IDbased on your application’s URL structure.Example URL: https://xyz.unifyapps.com/p/0/interfaces/interface-ID/builder/page-Id
Step 8: Adjust the Display Width
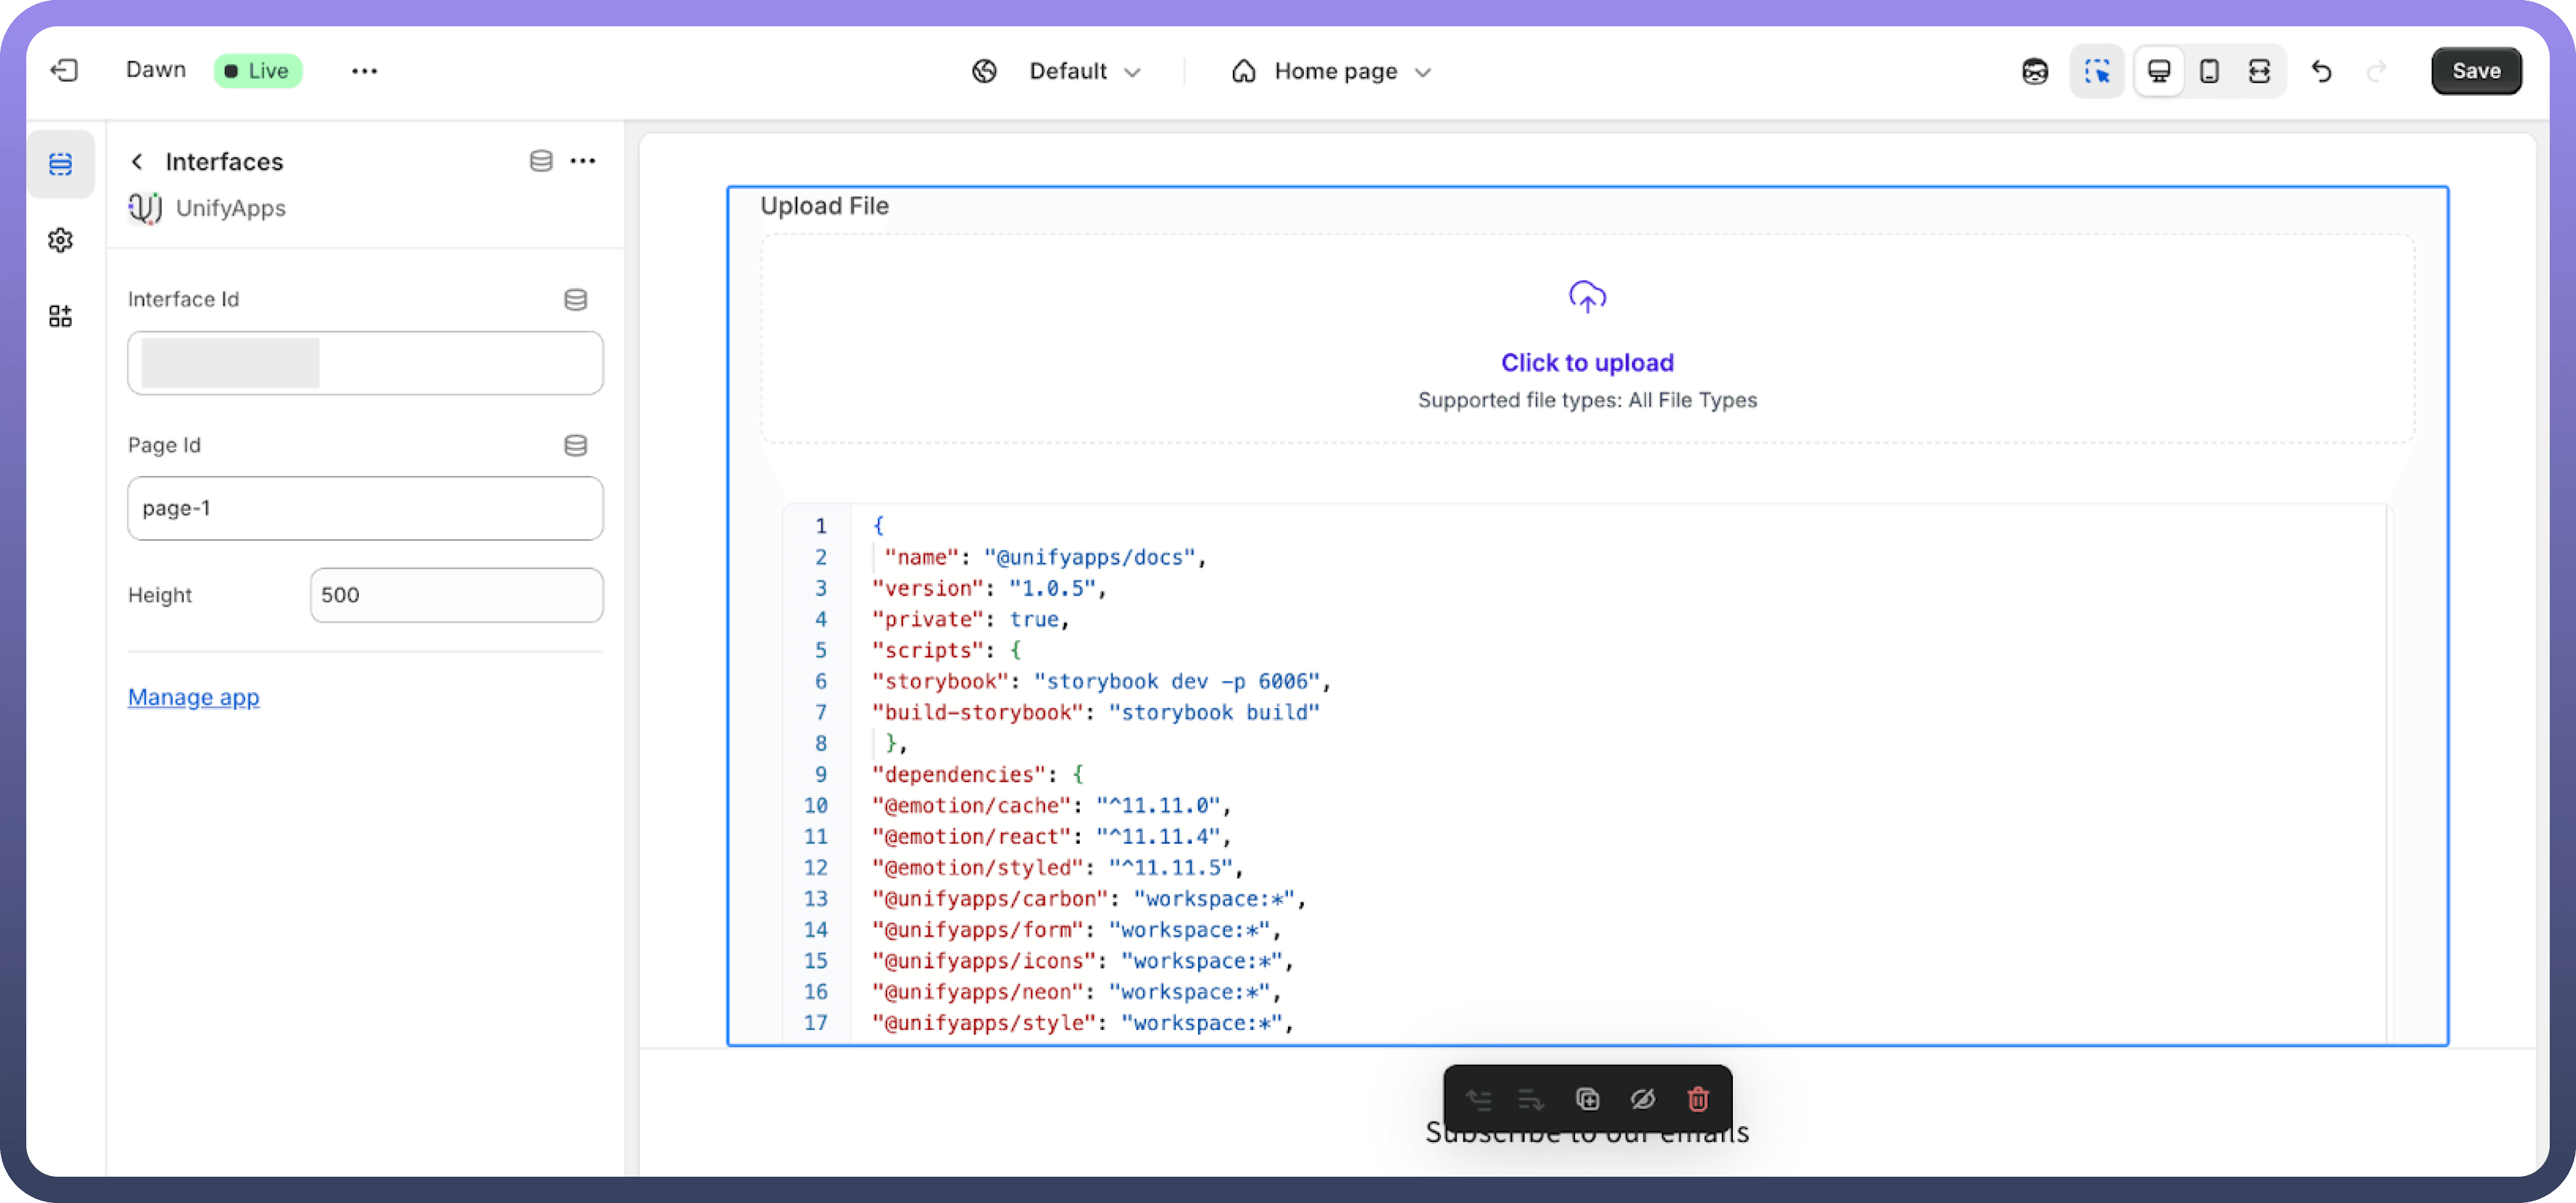
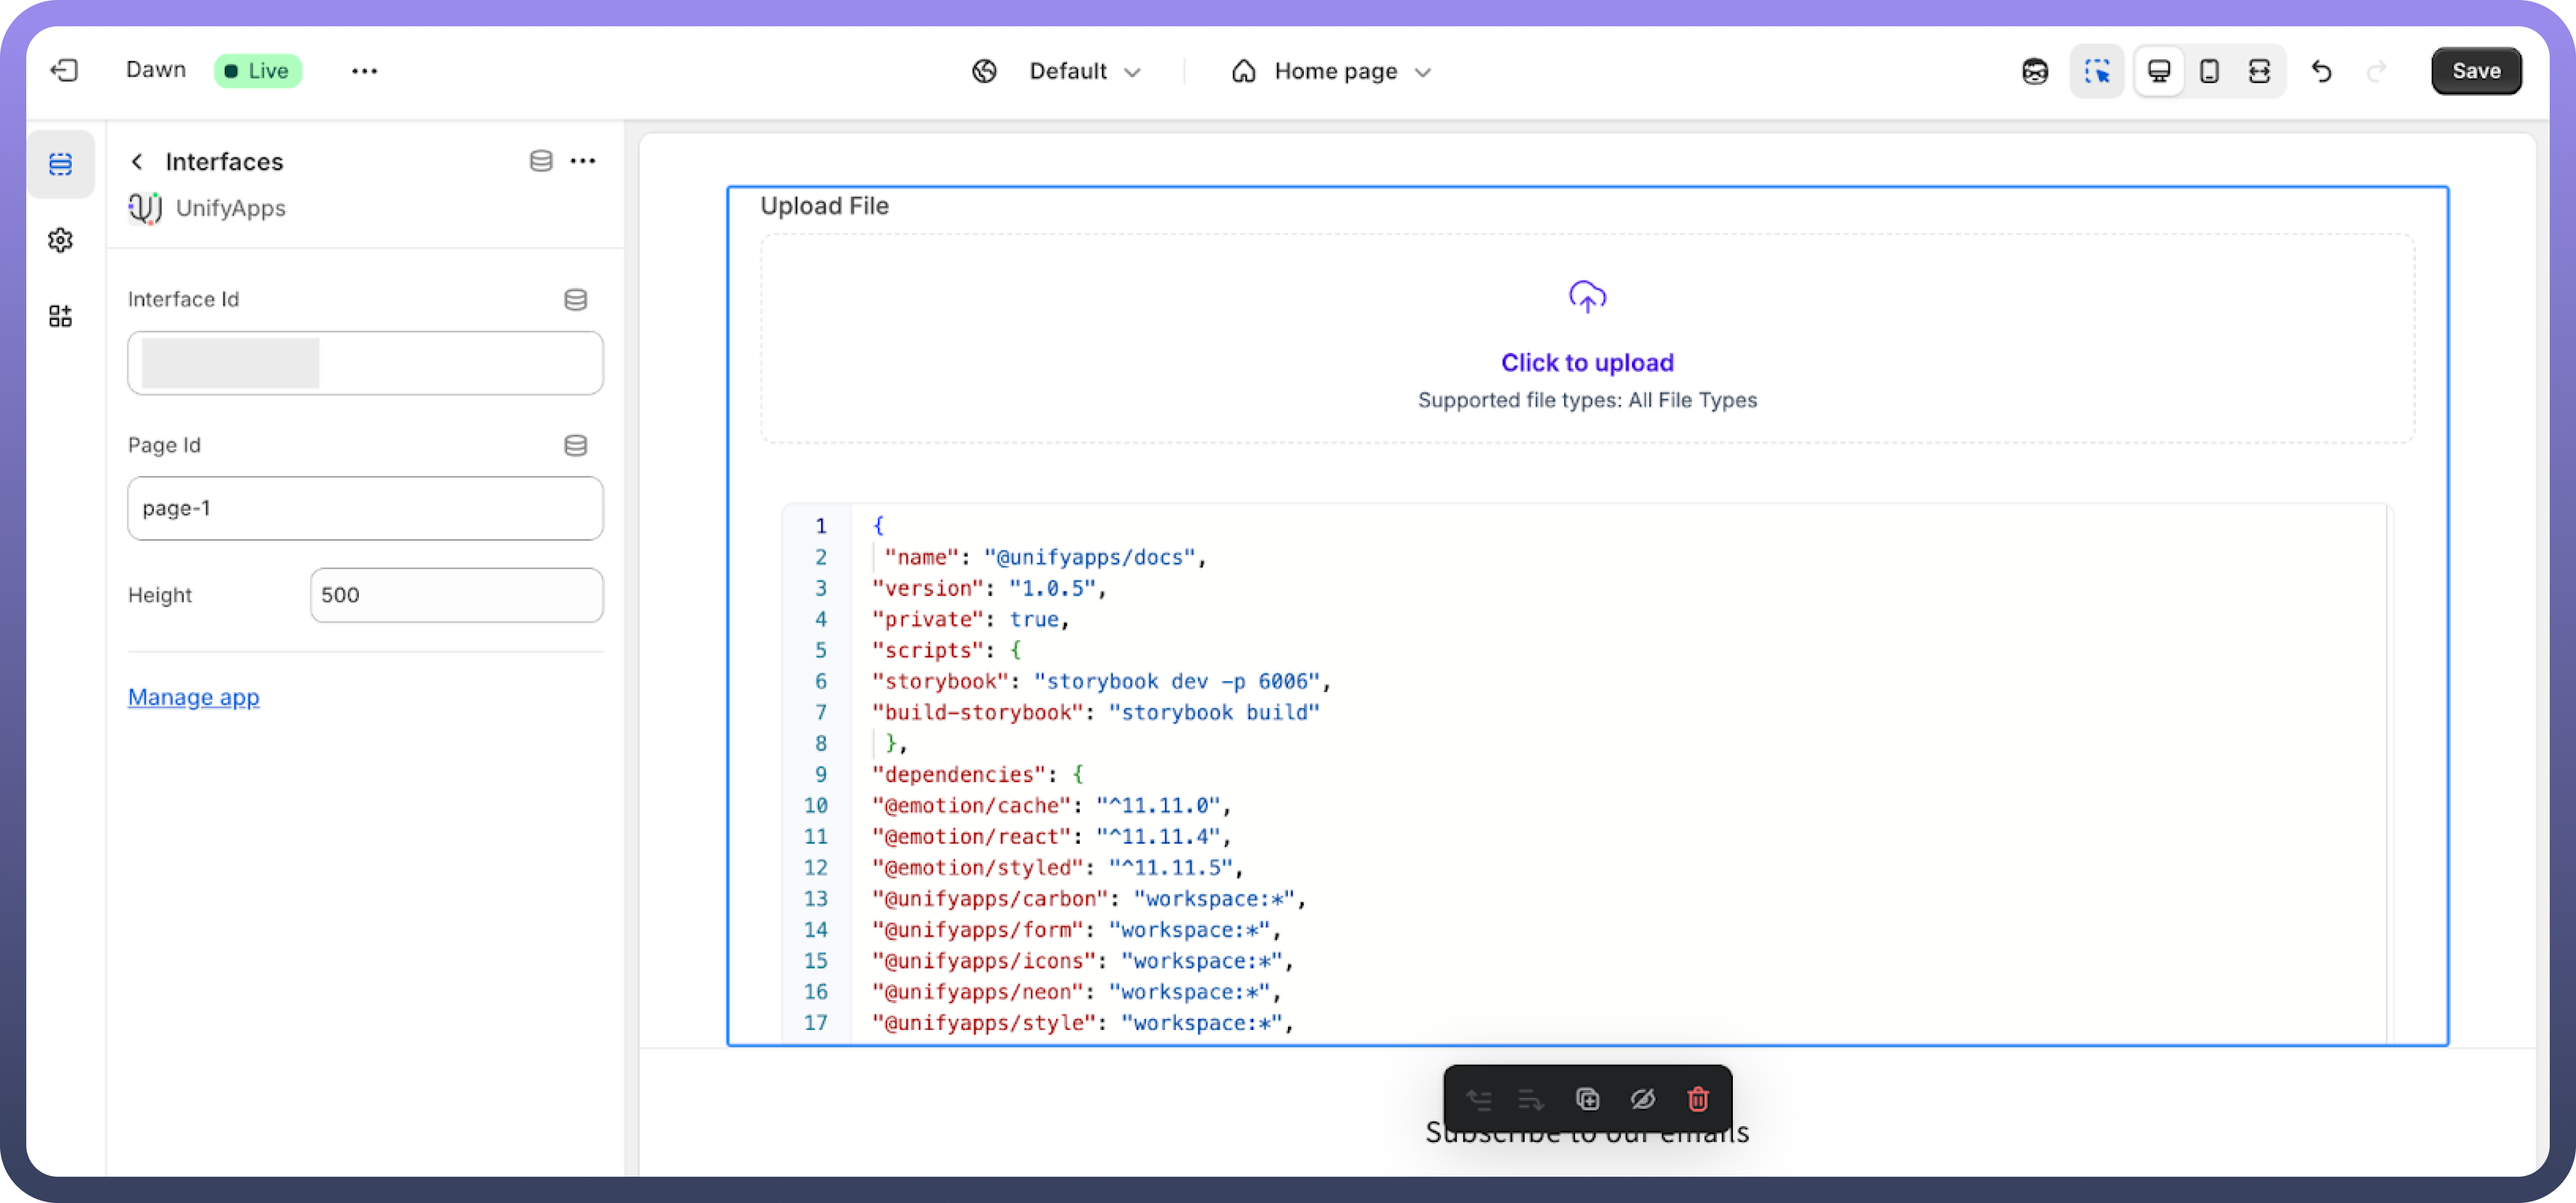
Configure the width of the UnifyApps interface according to your store layout needs.
Salesforce <> UnifyApps Integration
Overview
Embedding UnifyApps applications in Zendesk allows seamless integration of UnifyApps features within your Shopify store.
Step-by-Step Instructions
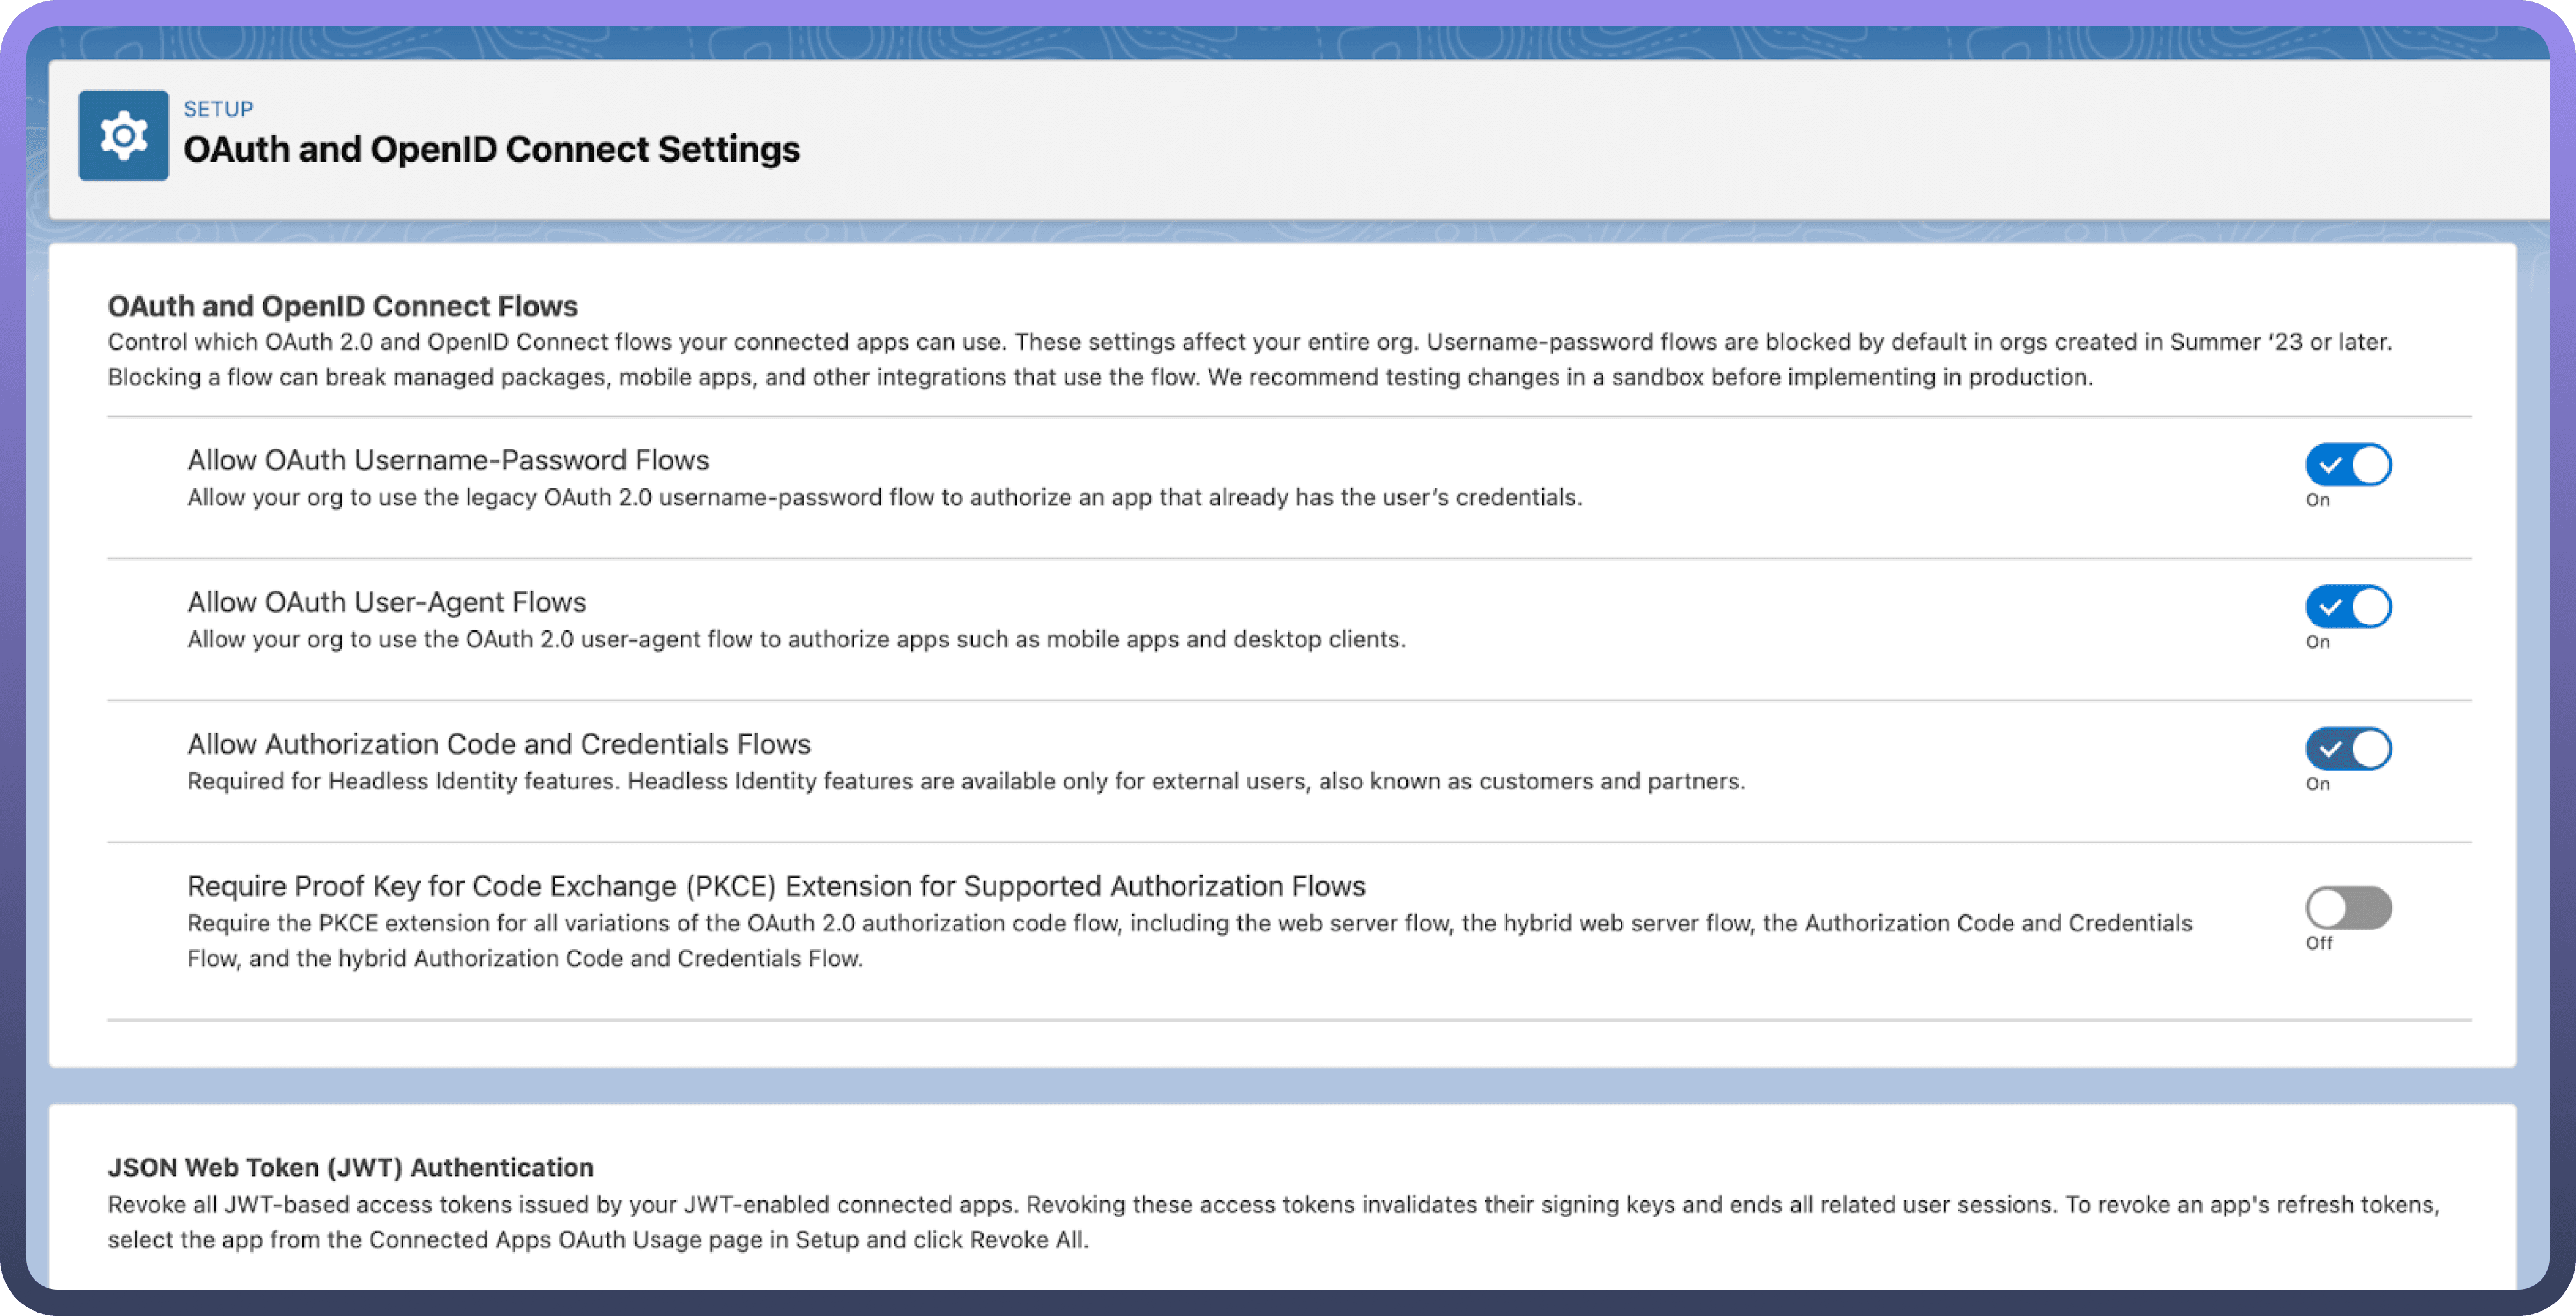
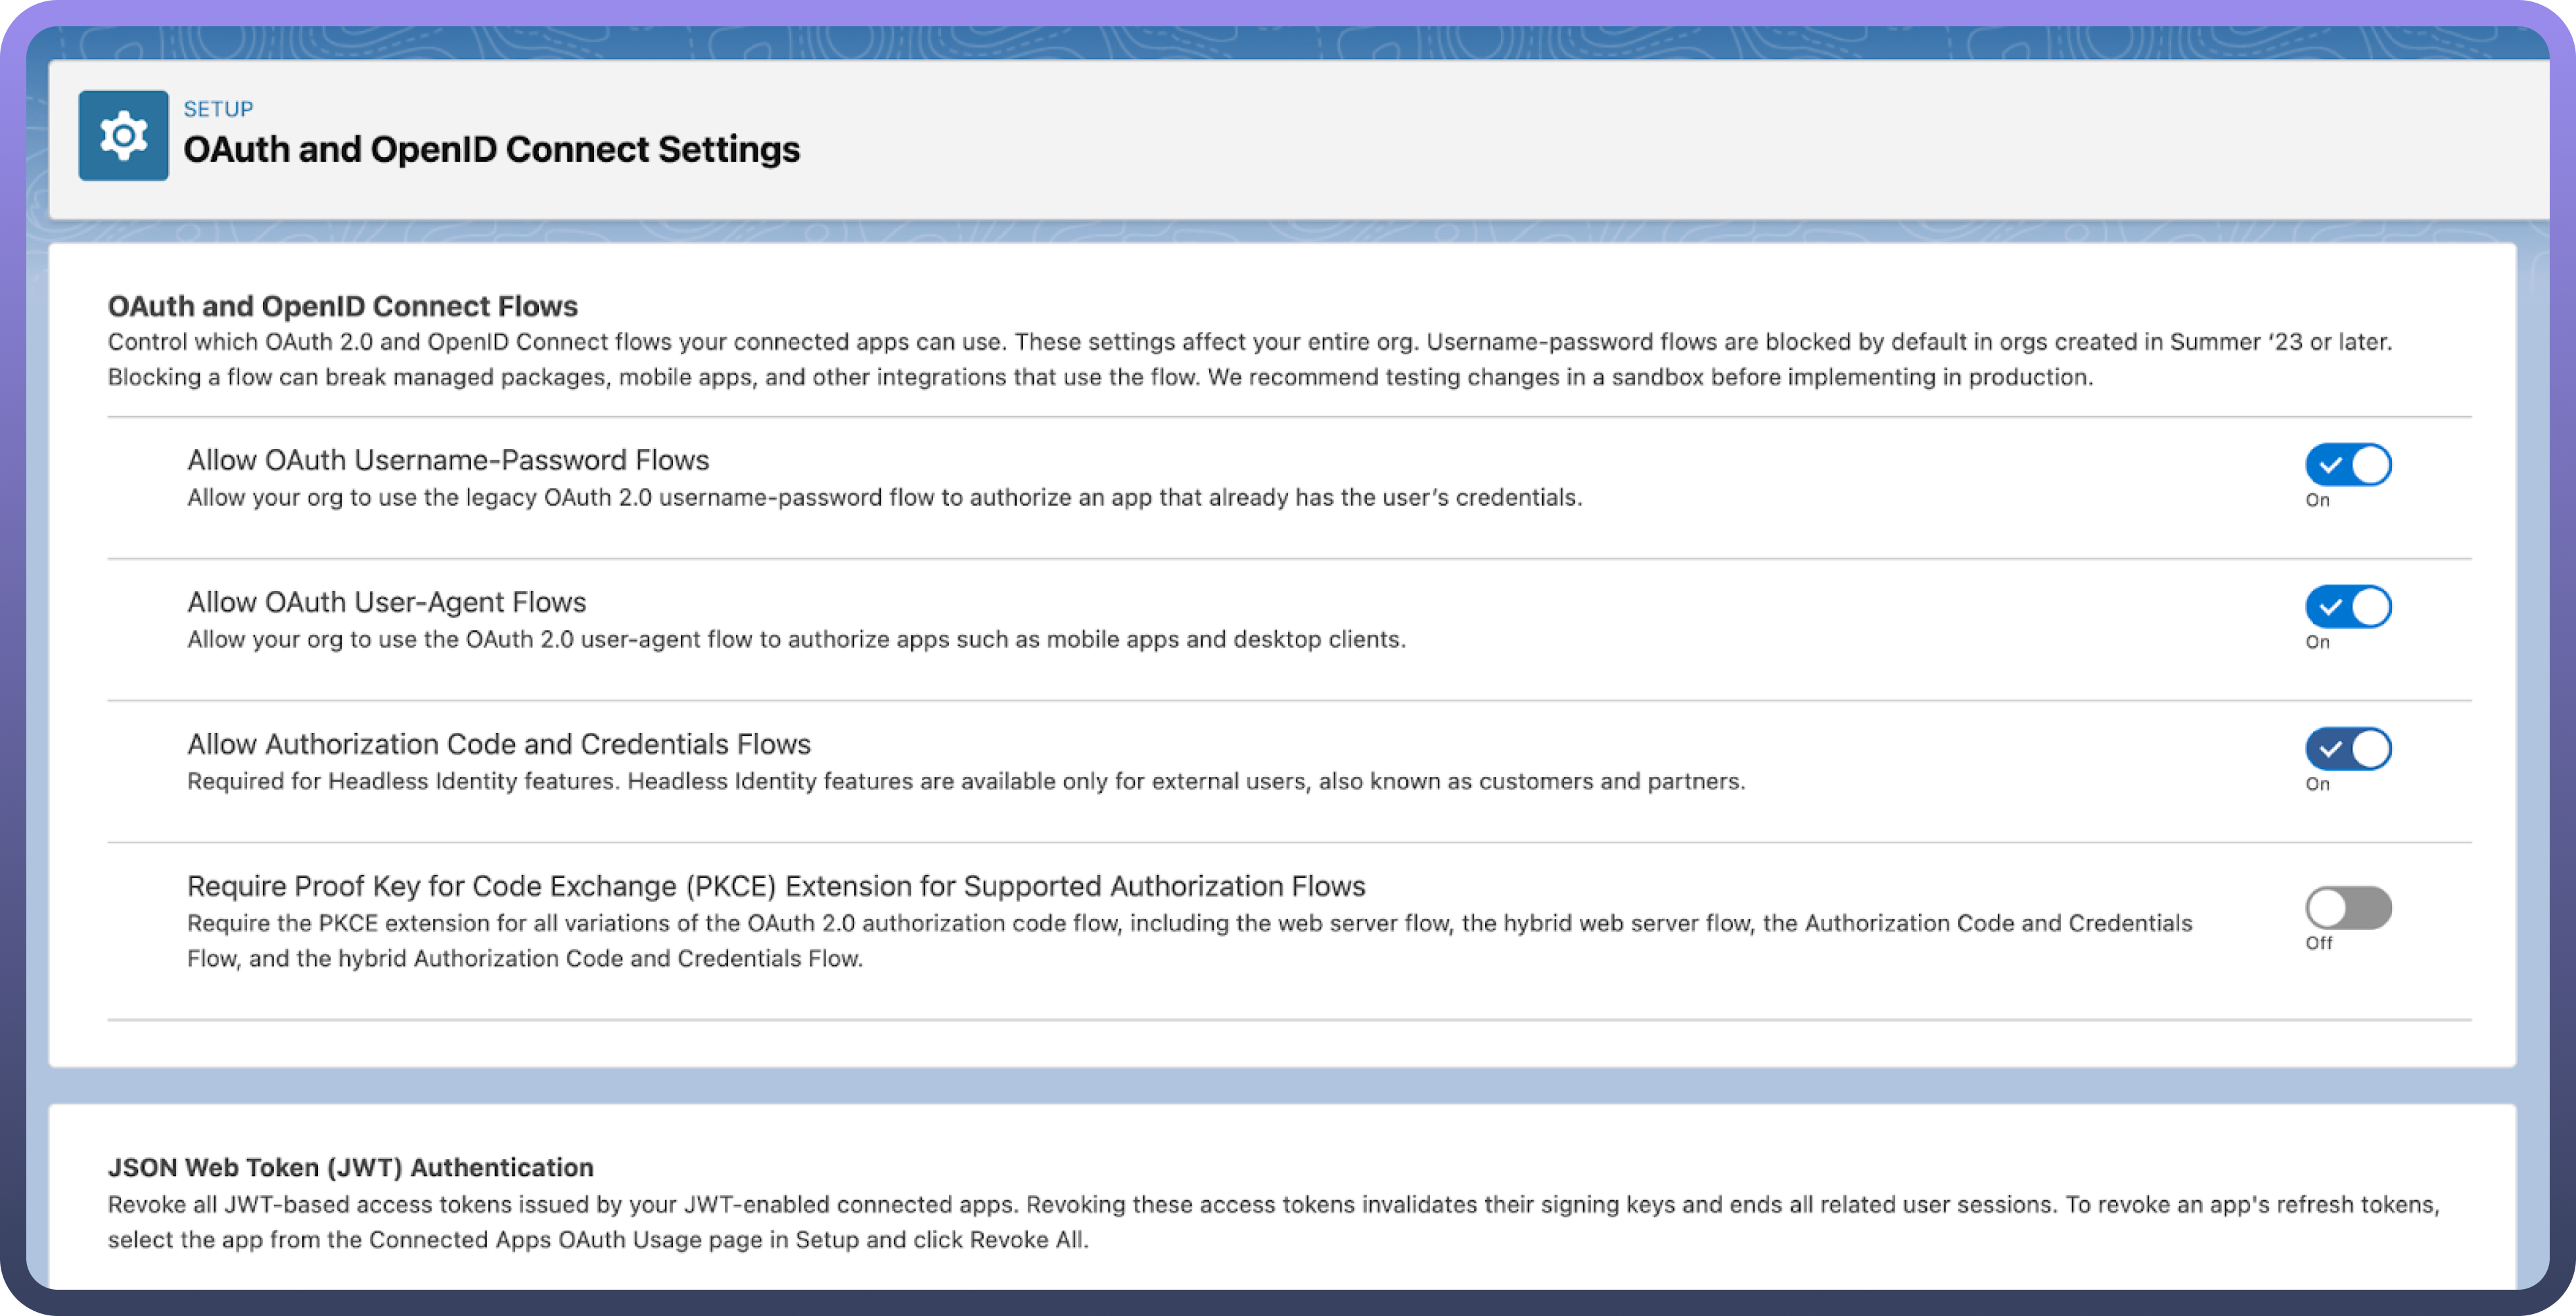
Pre Requisite 1
Ensure that “
Allow Authorisation Code and Credentials Flows” is enabled in OAuth and OpenID Connect Settings.This is required to fetch Salesforce data in UnifyApps
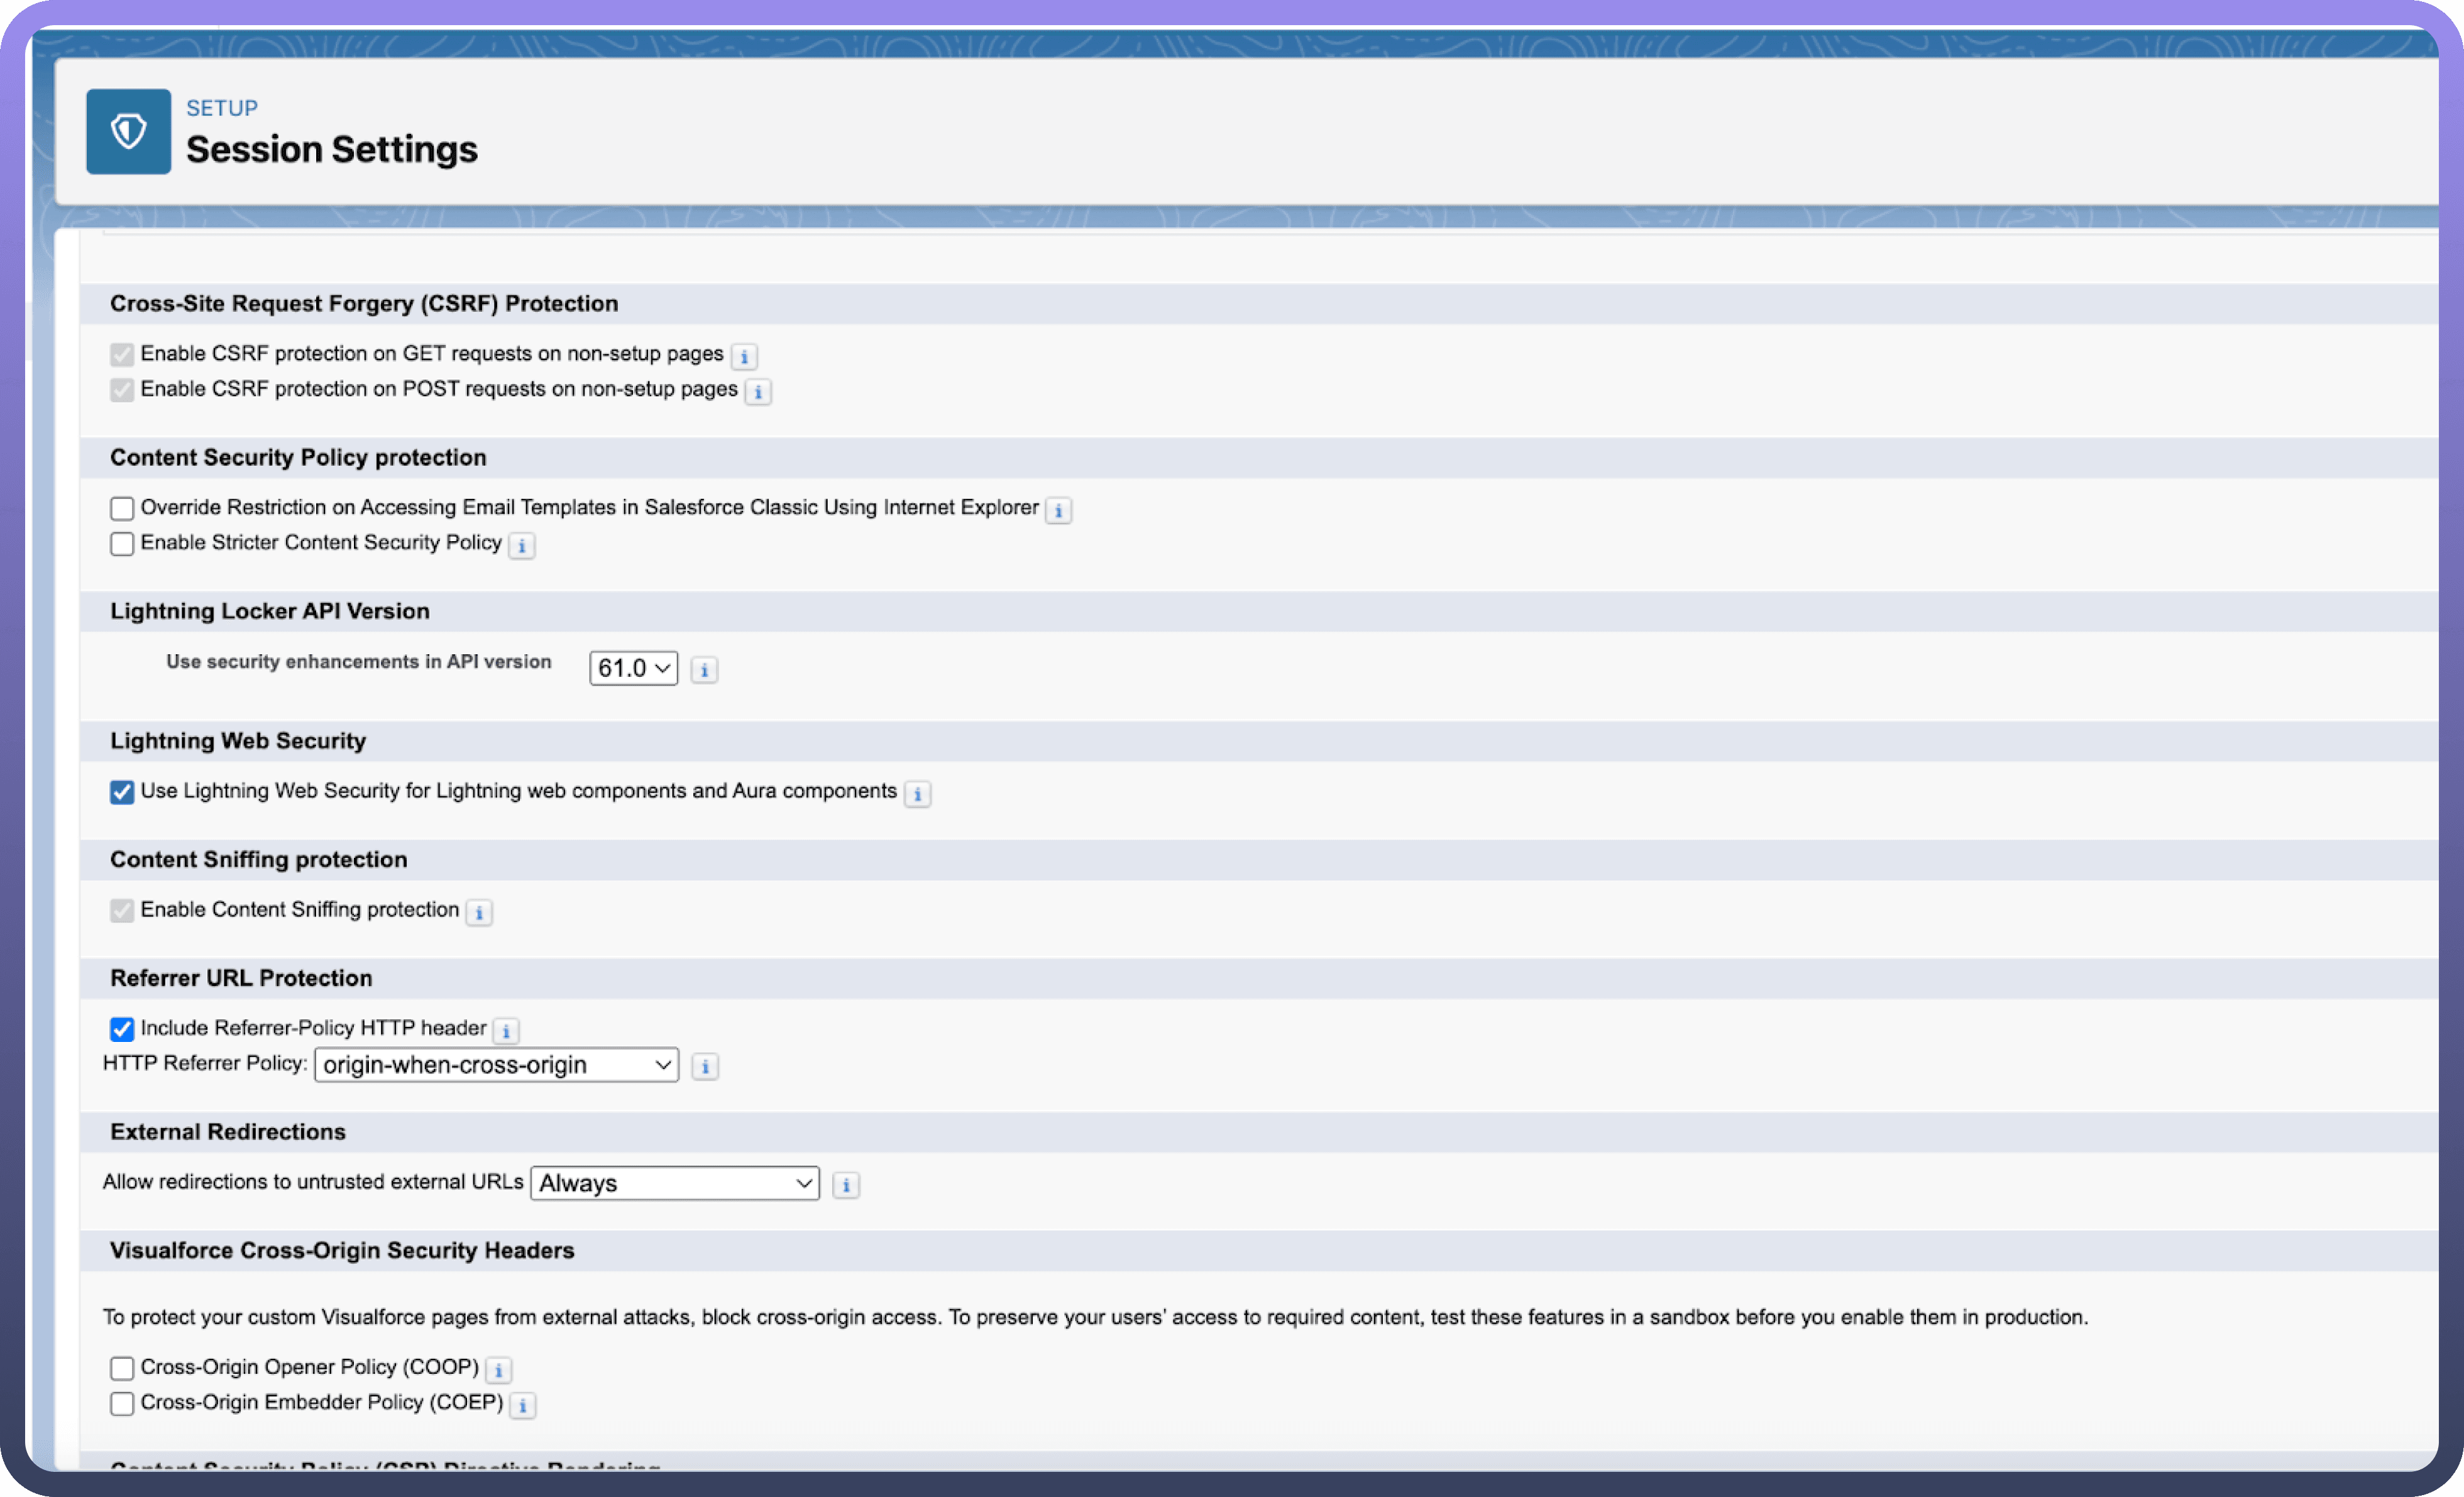
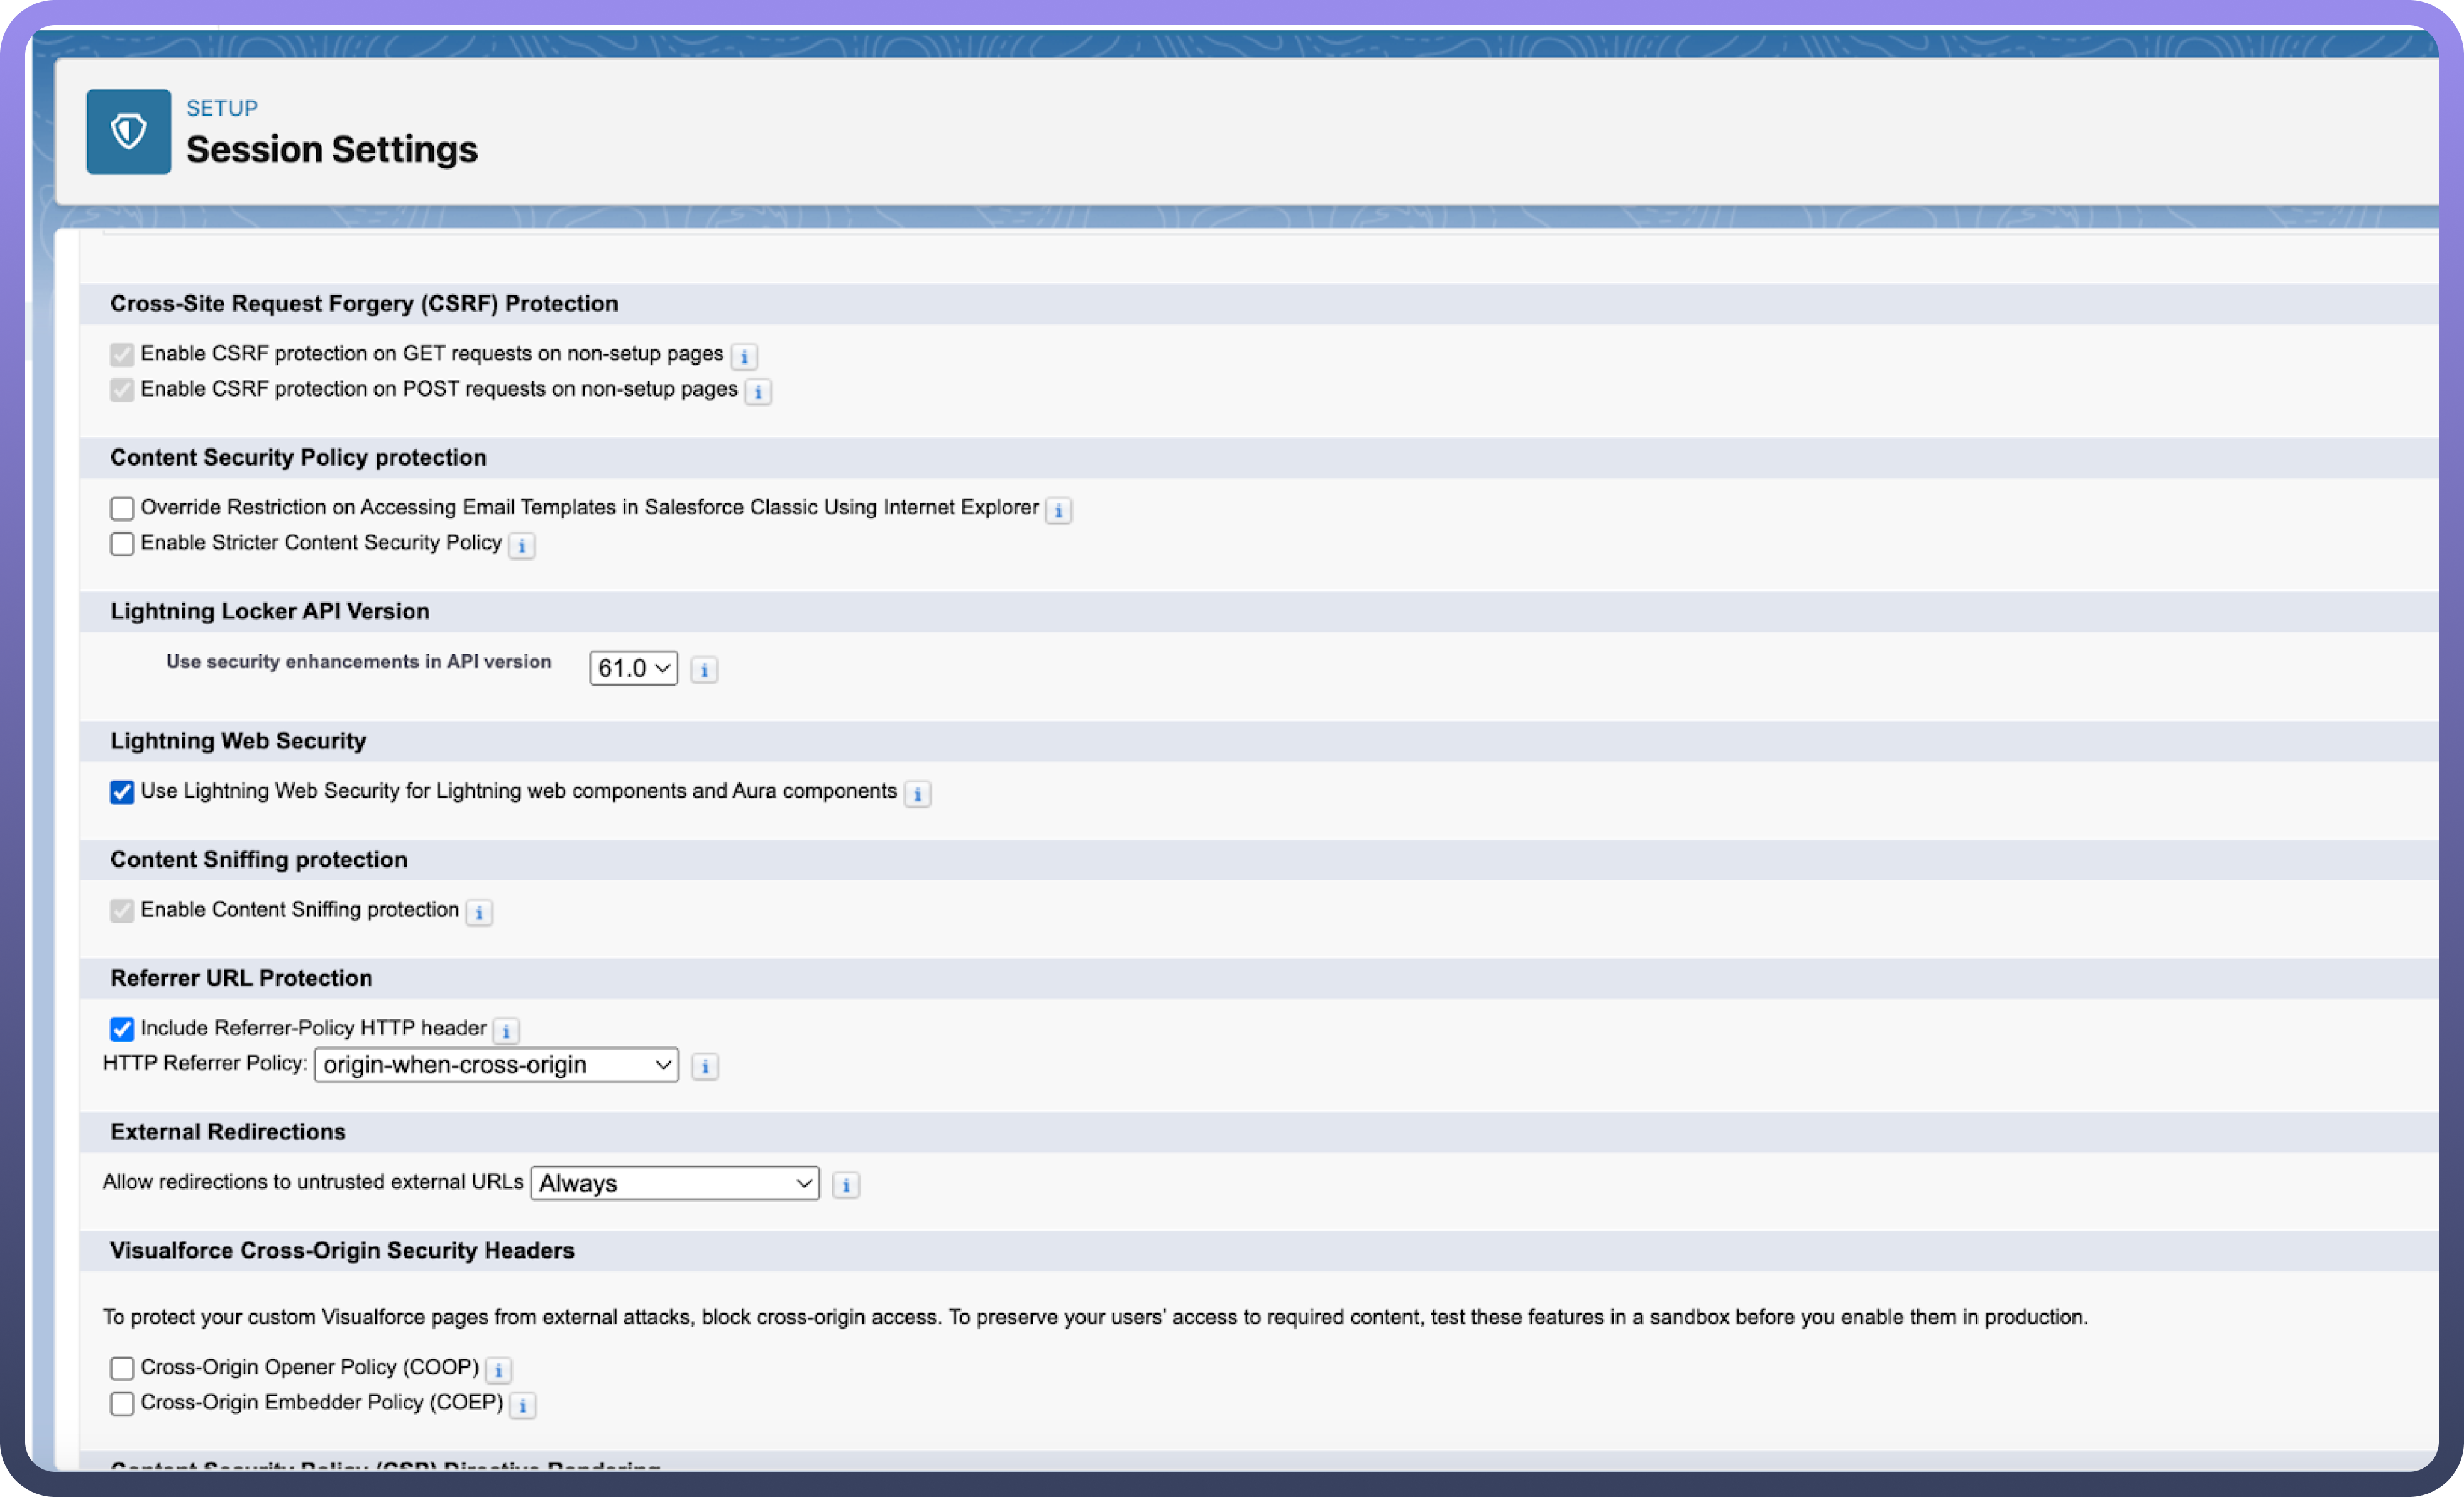
Pre-Requisite 2
Enable “Use Lightning Web Security for Lightning web components and Aura components” in Session Settings.
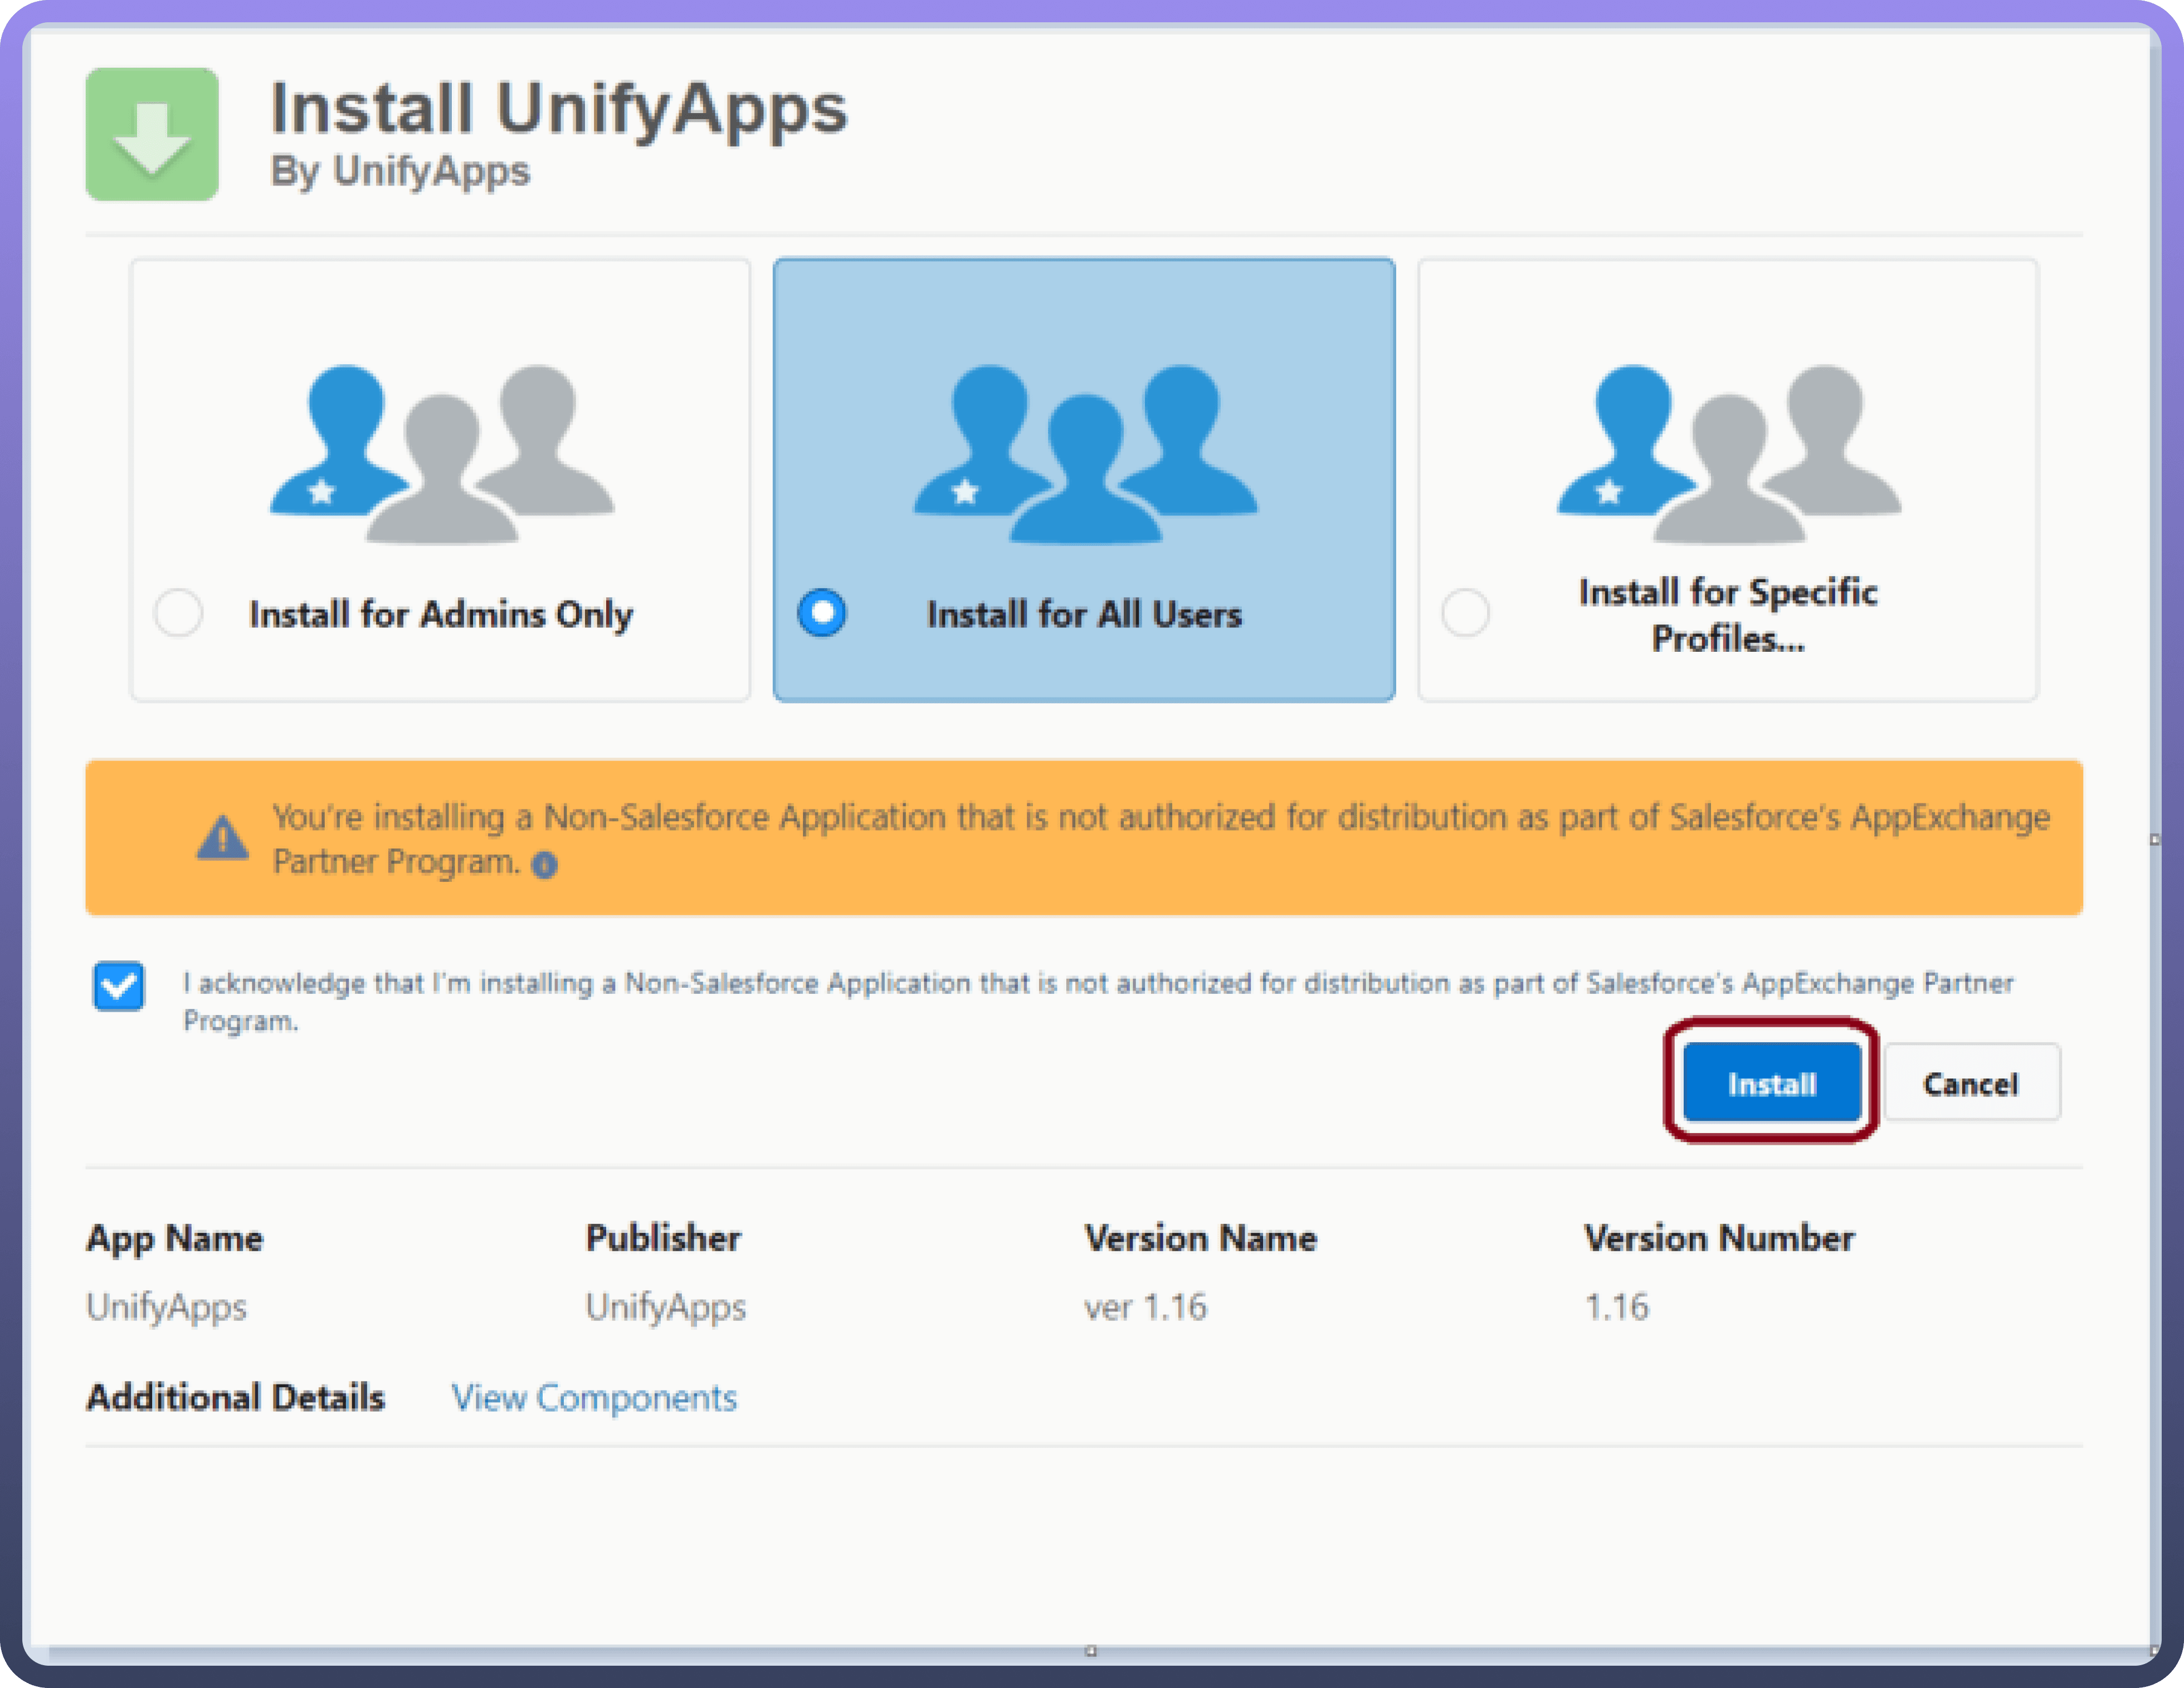
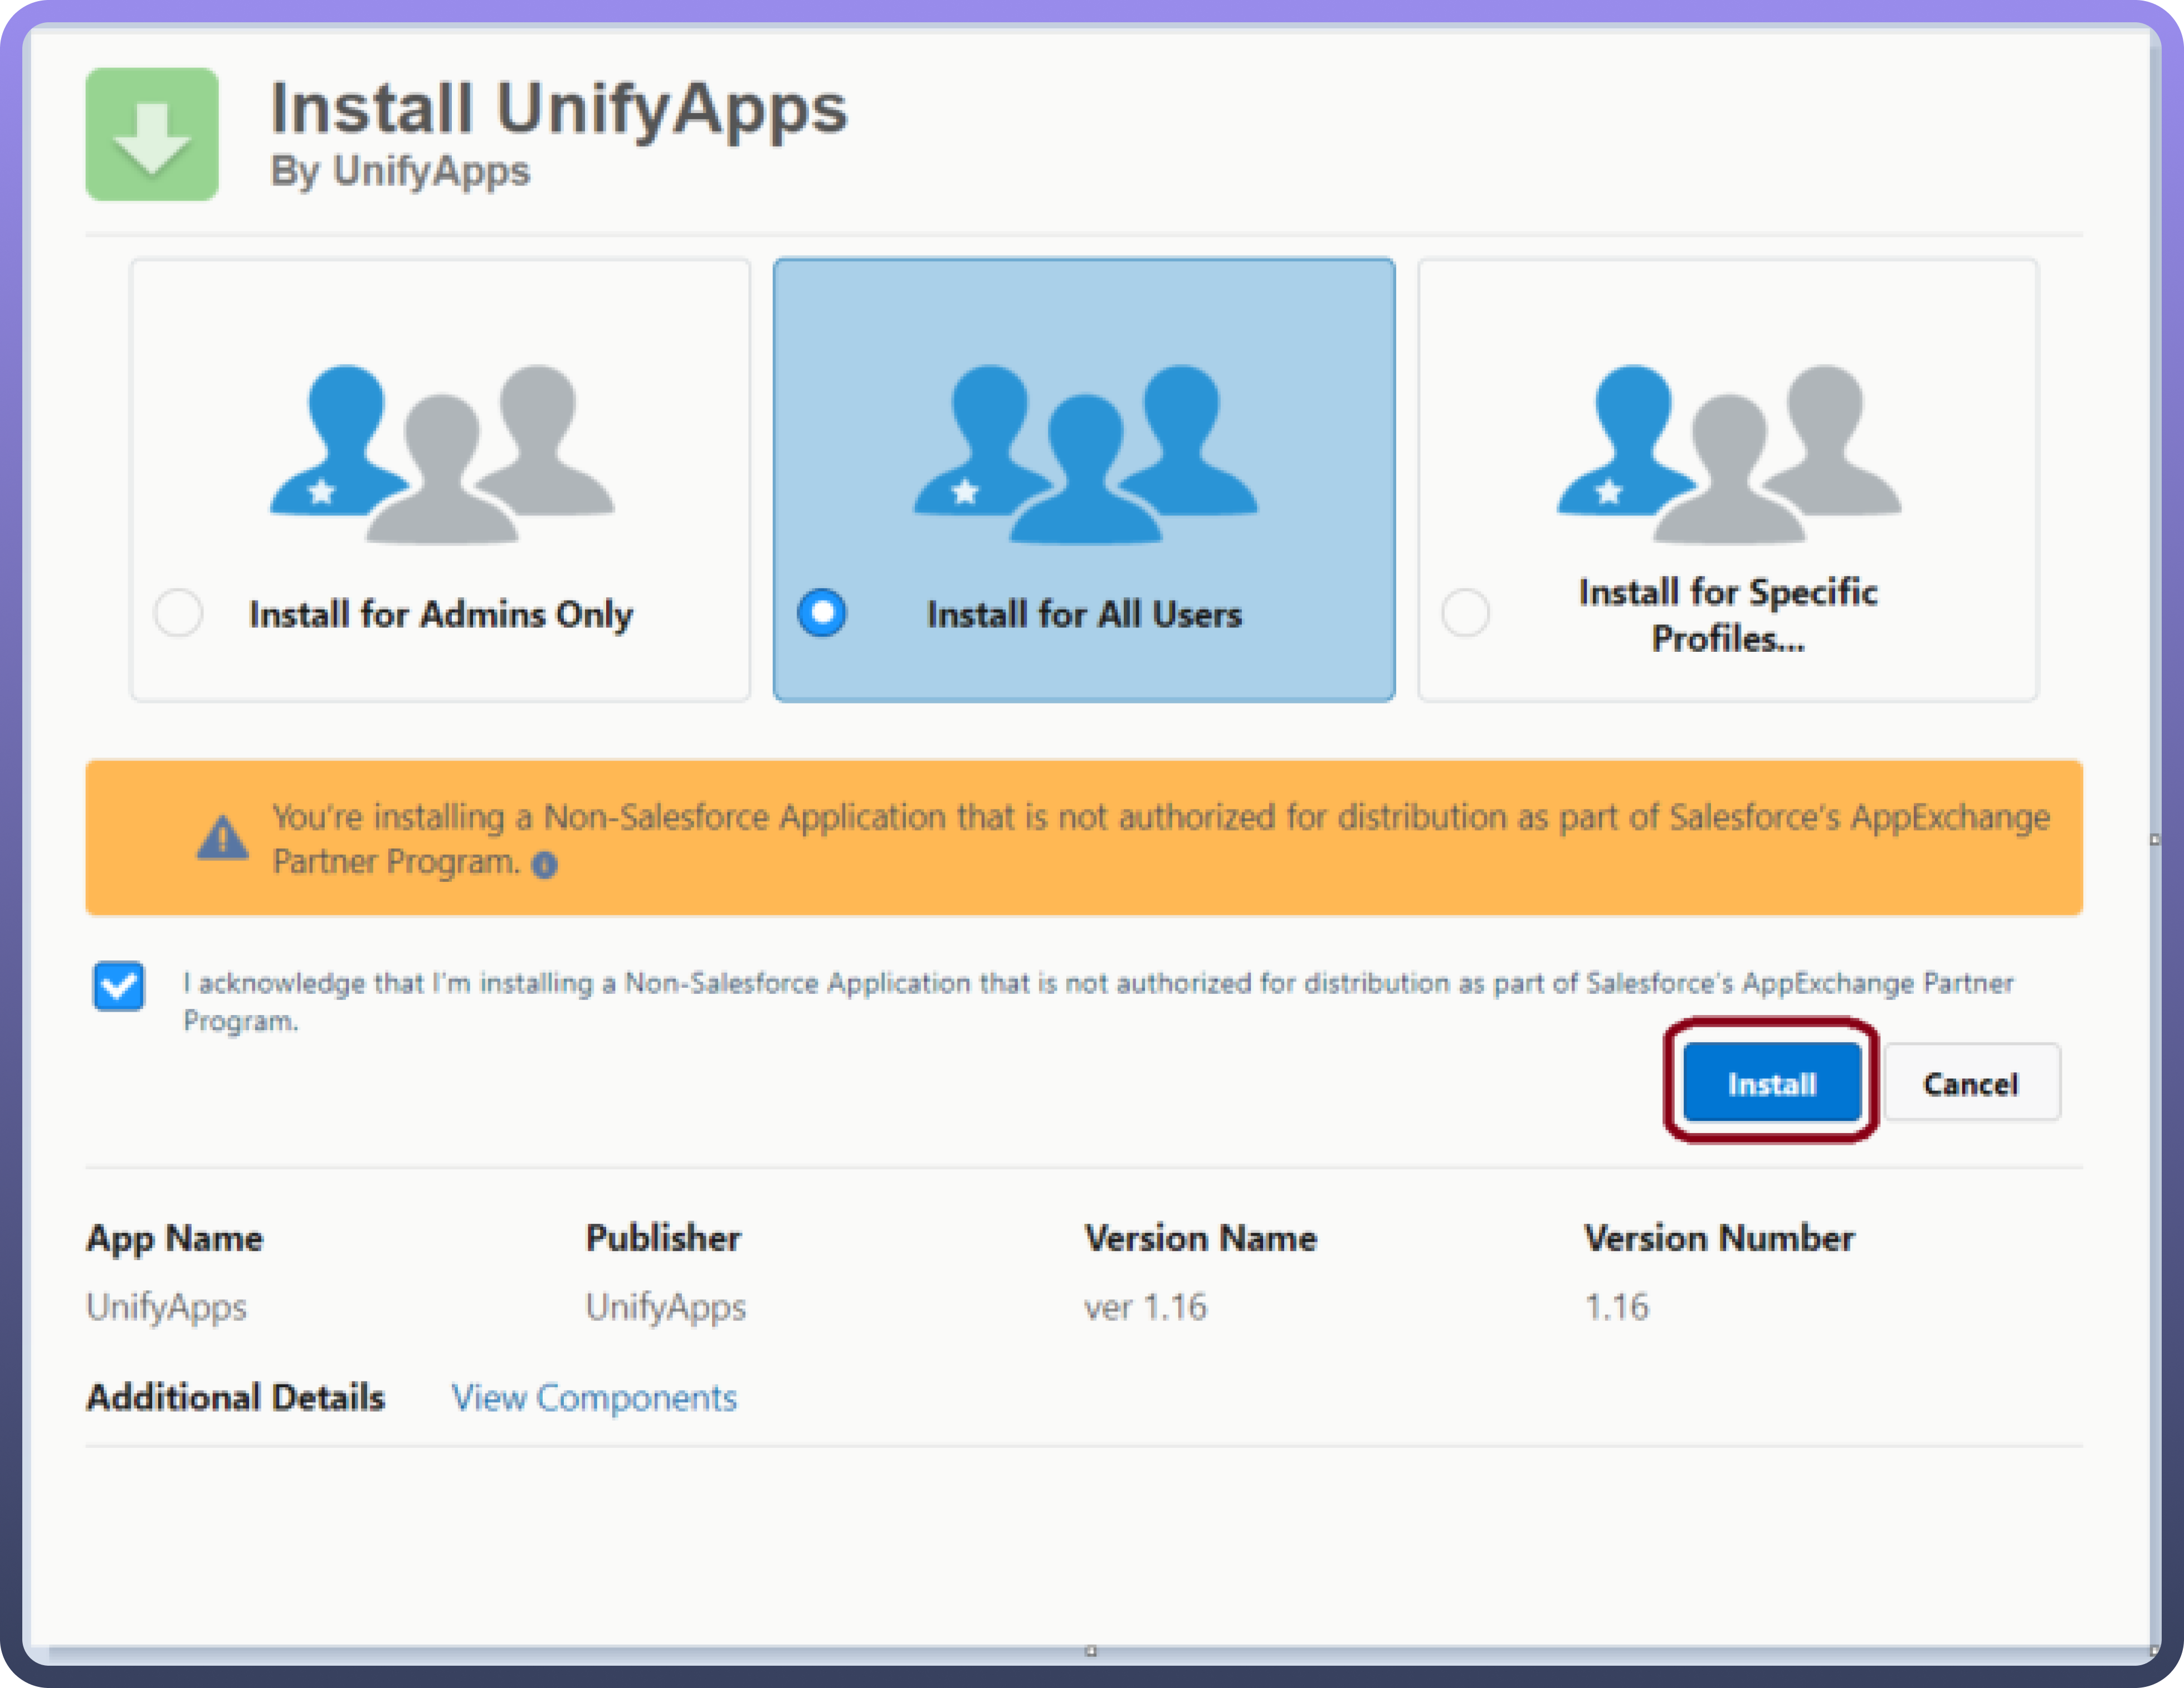
Step 1: Install UnifyApps
Open the following link to redirect to the installation screen. (Unify Apps package will be available in AppExchange in 1-2 months, as it is currently undergoing approval process.)
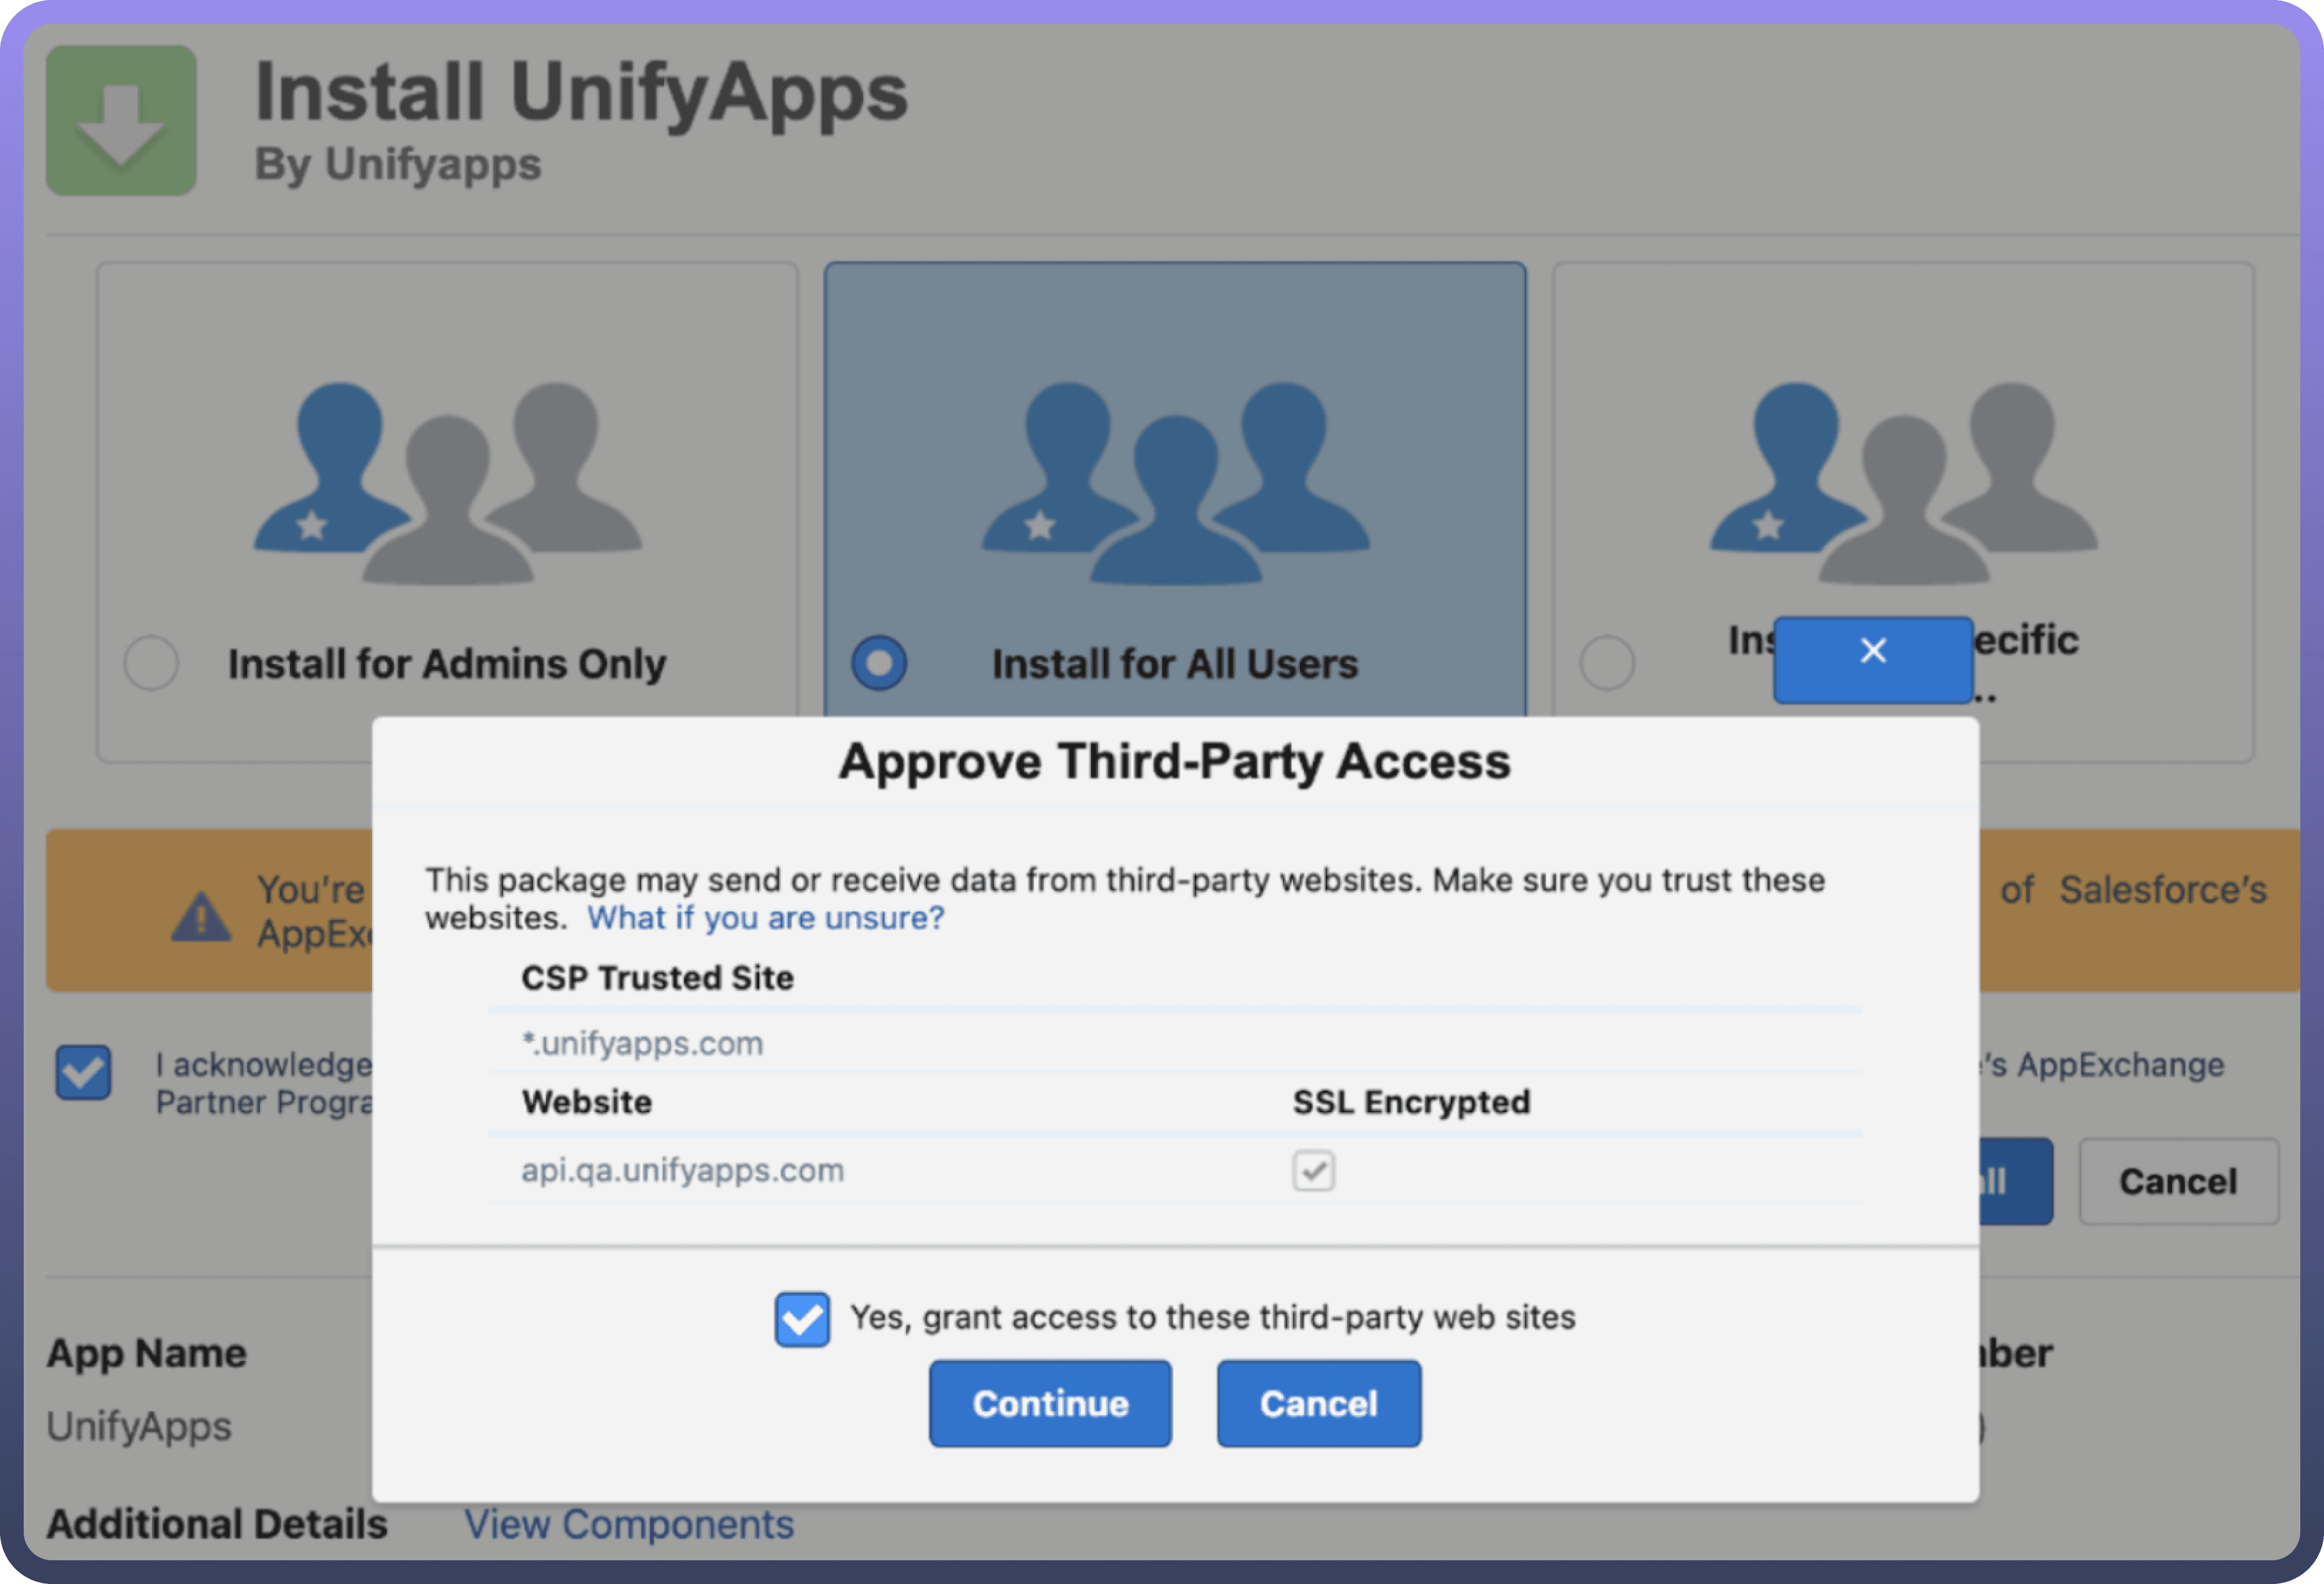
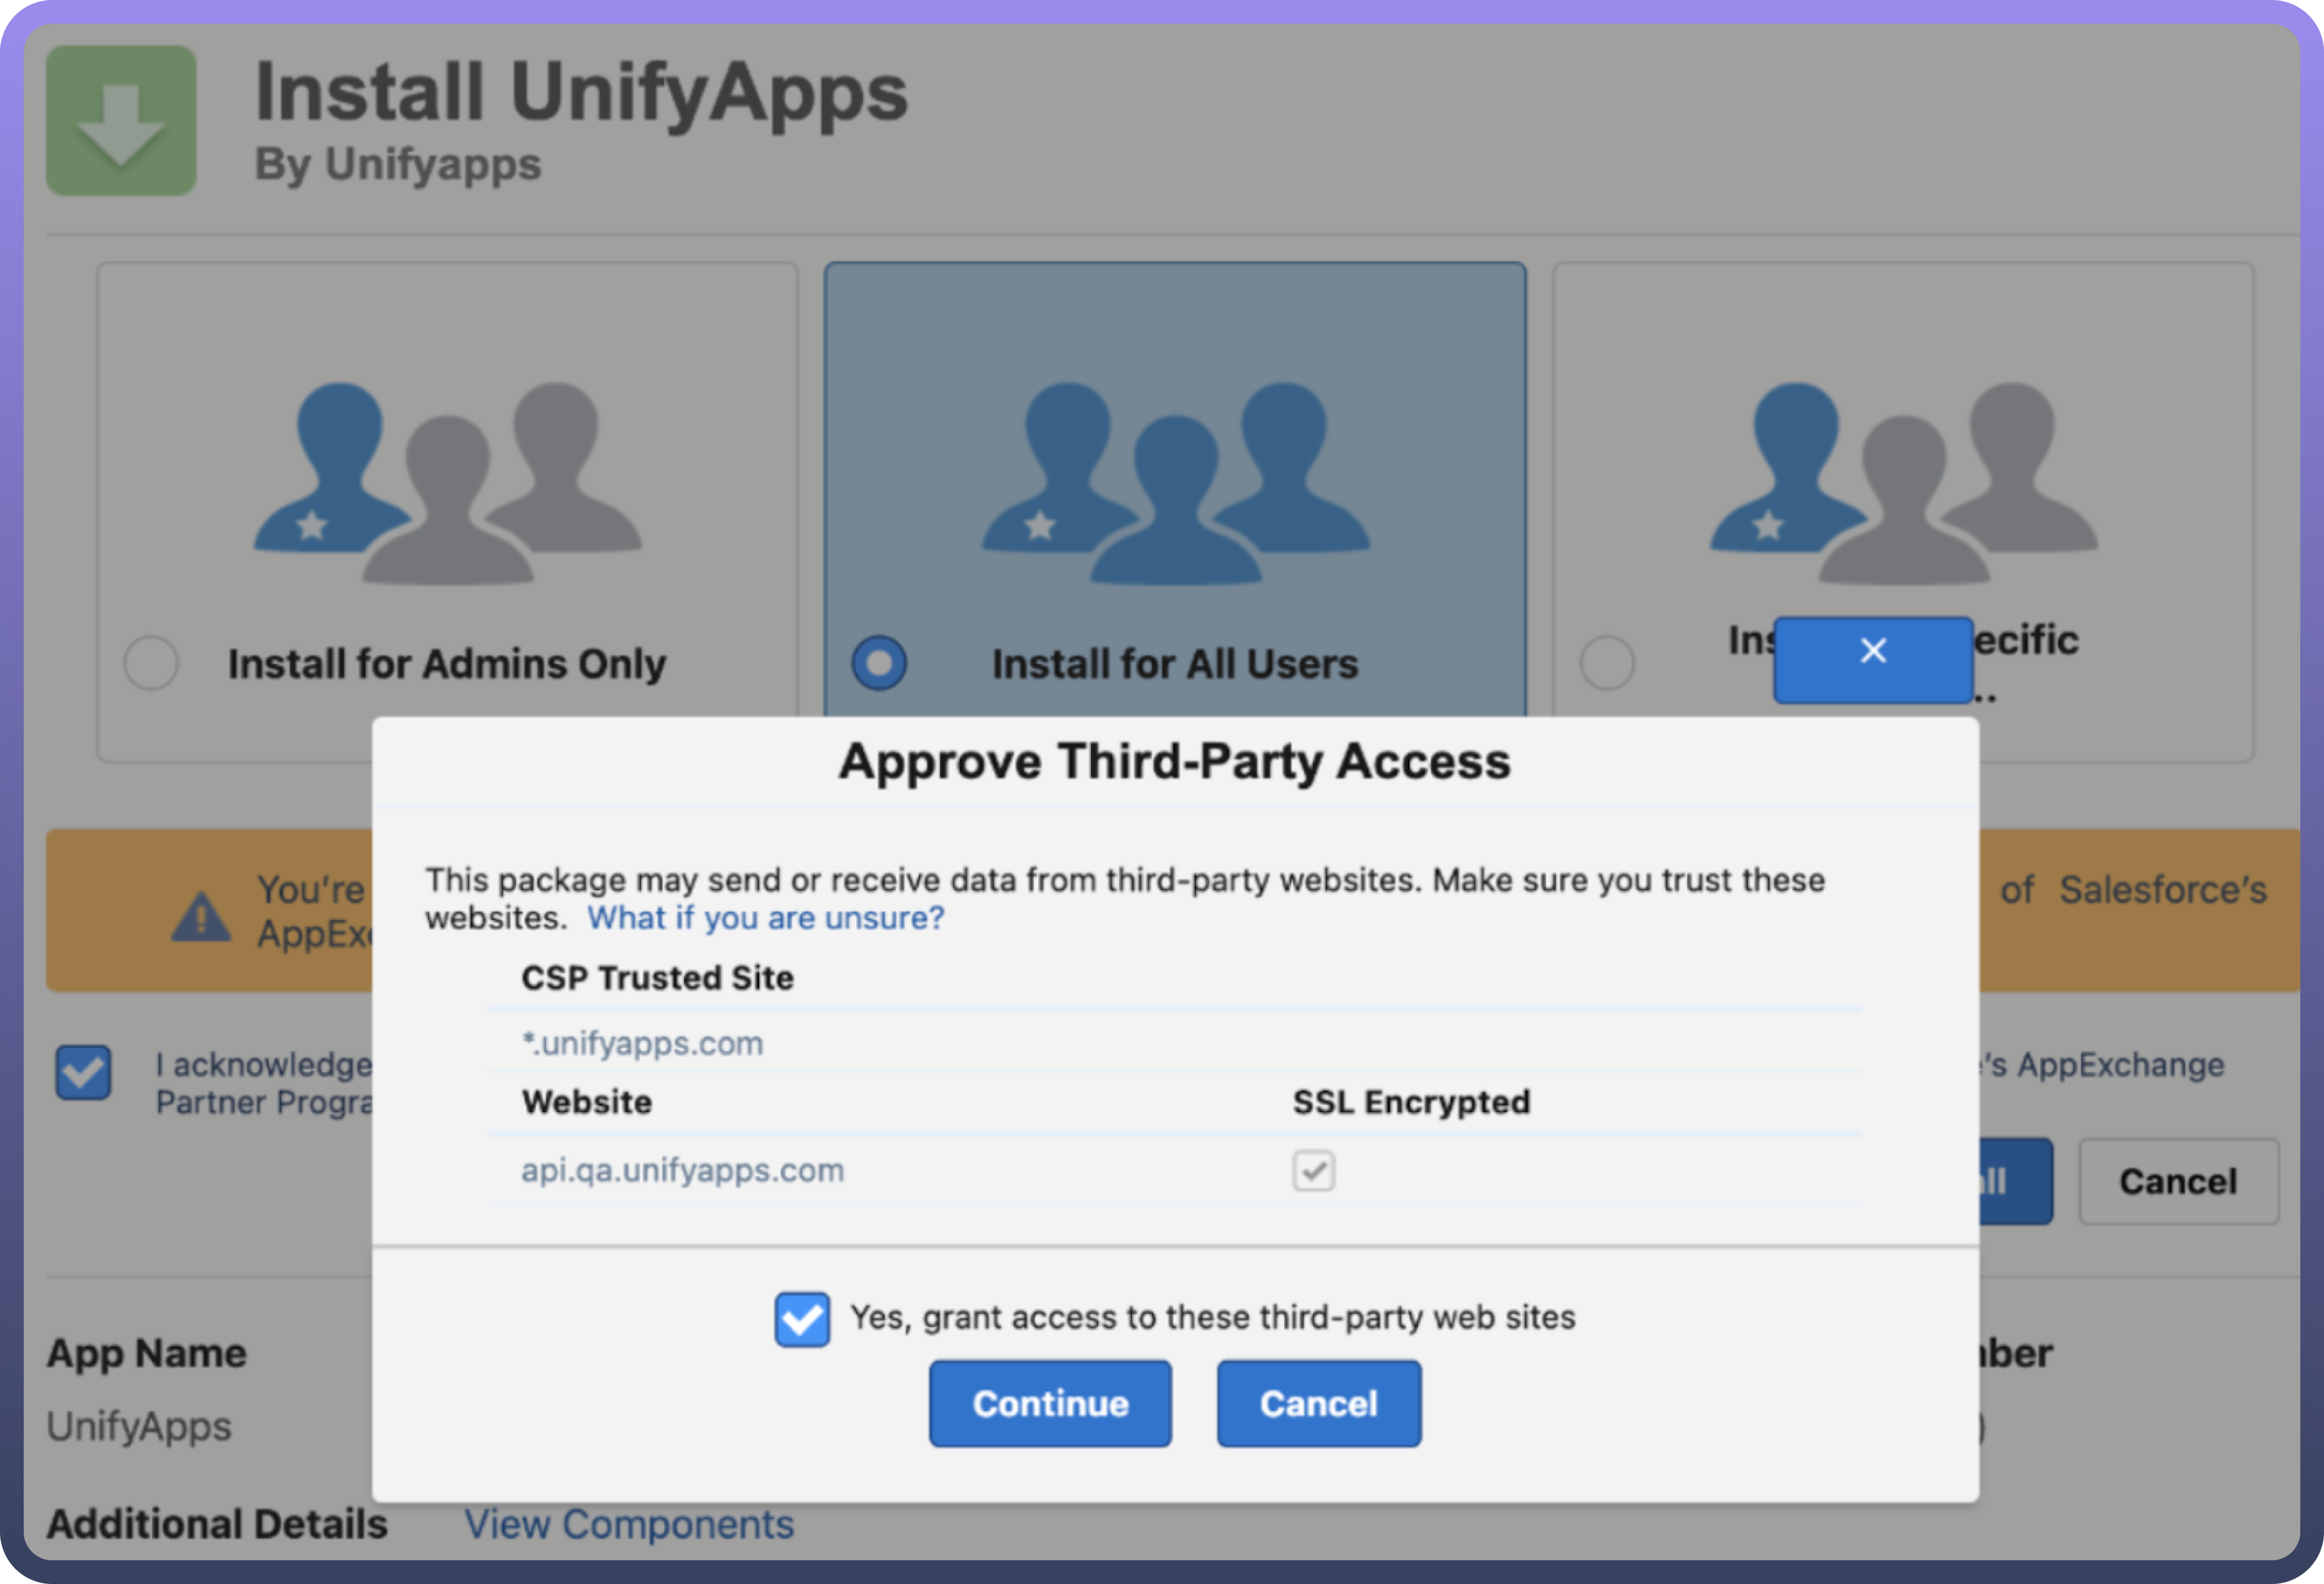
Choose
Install for All Users.Click on
InstallButton.Approve third-party access on Salesforce and click on "
Continue."You will have to wait for a few minutes for the installation to complete.
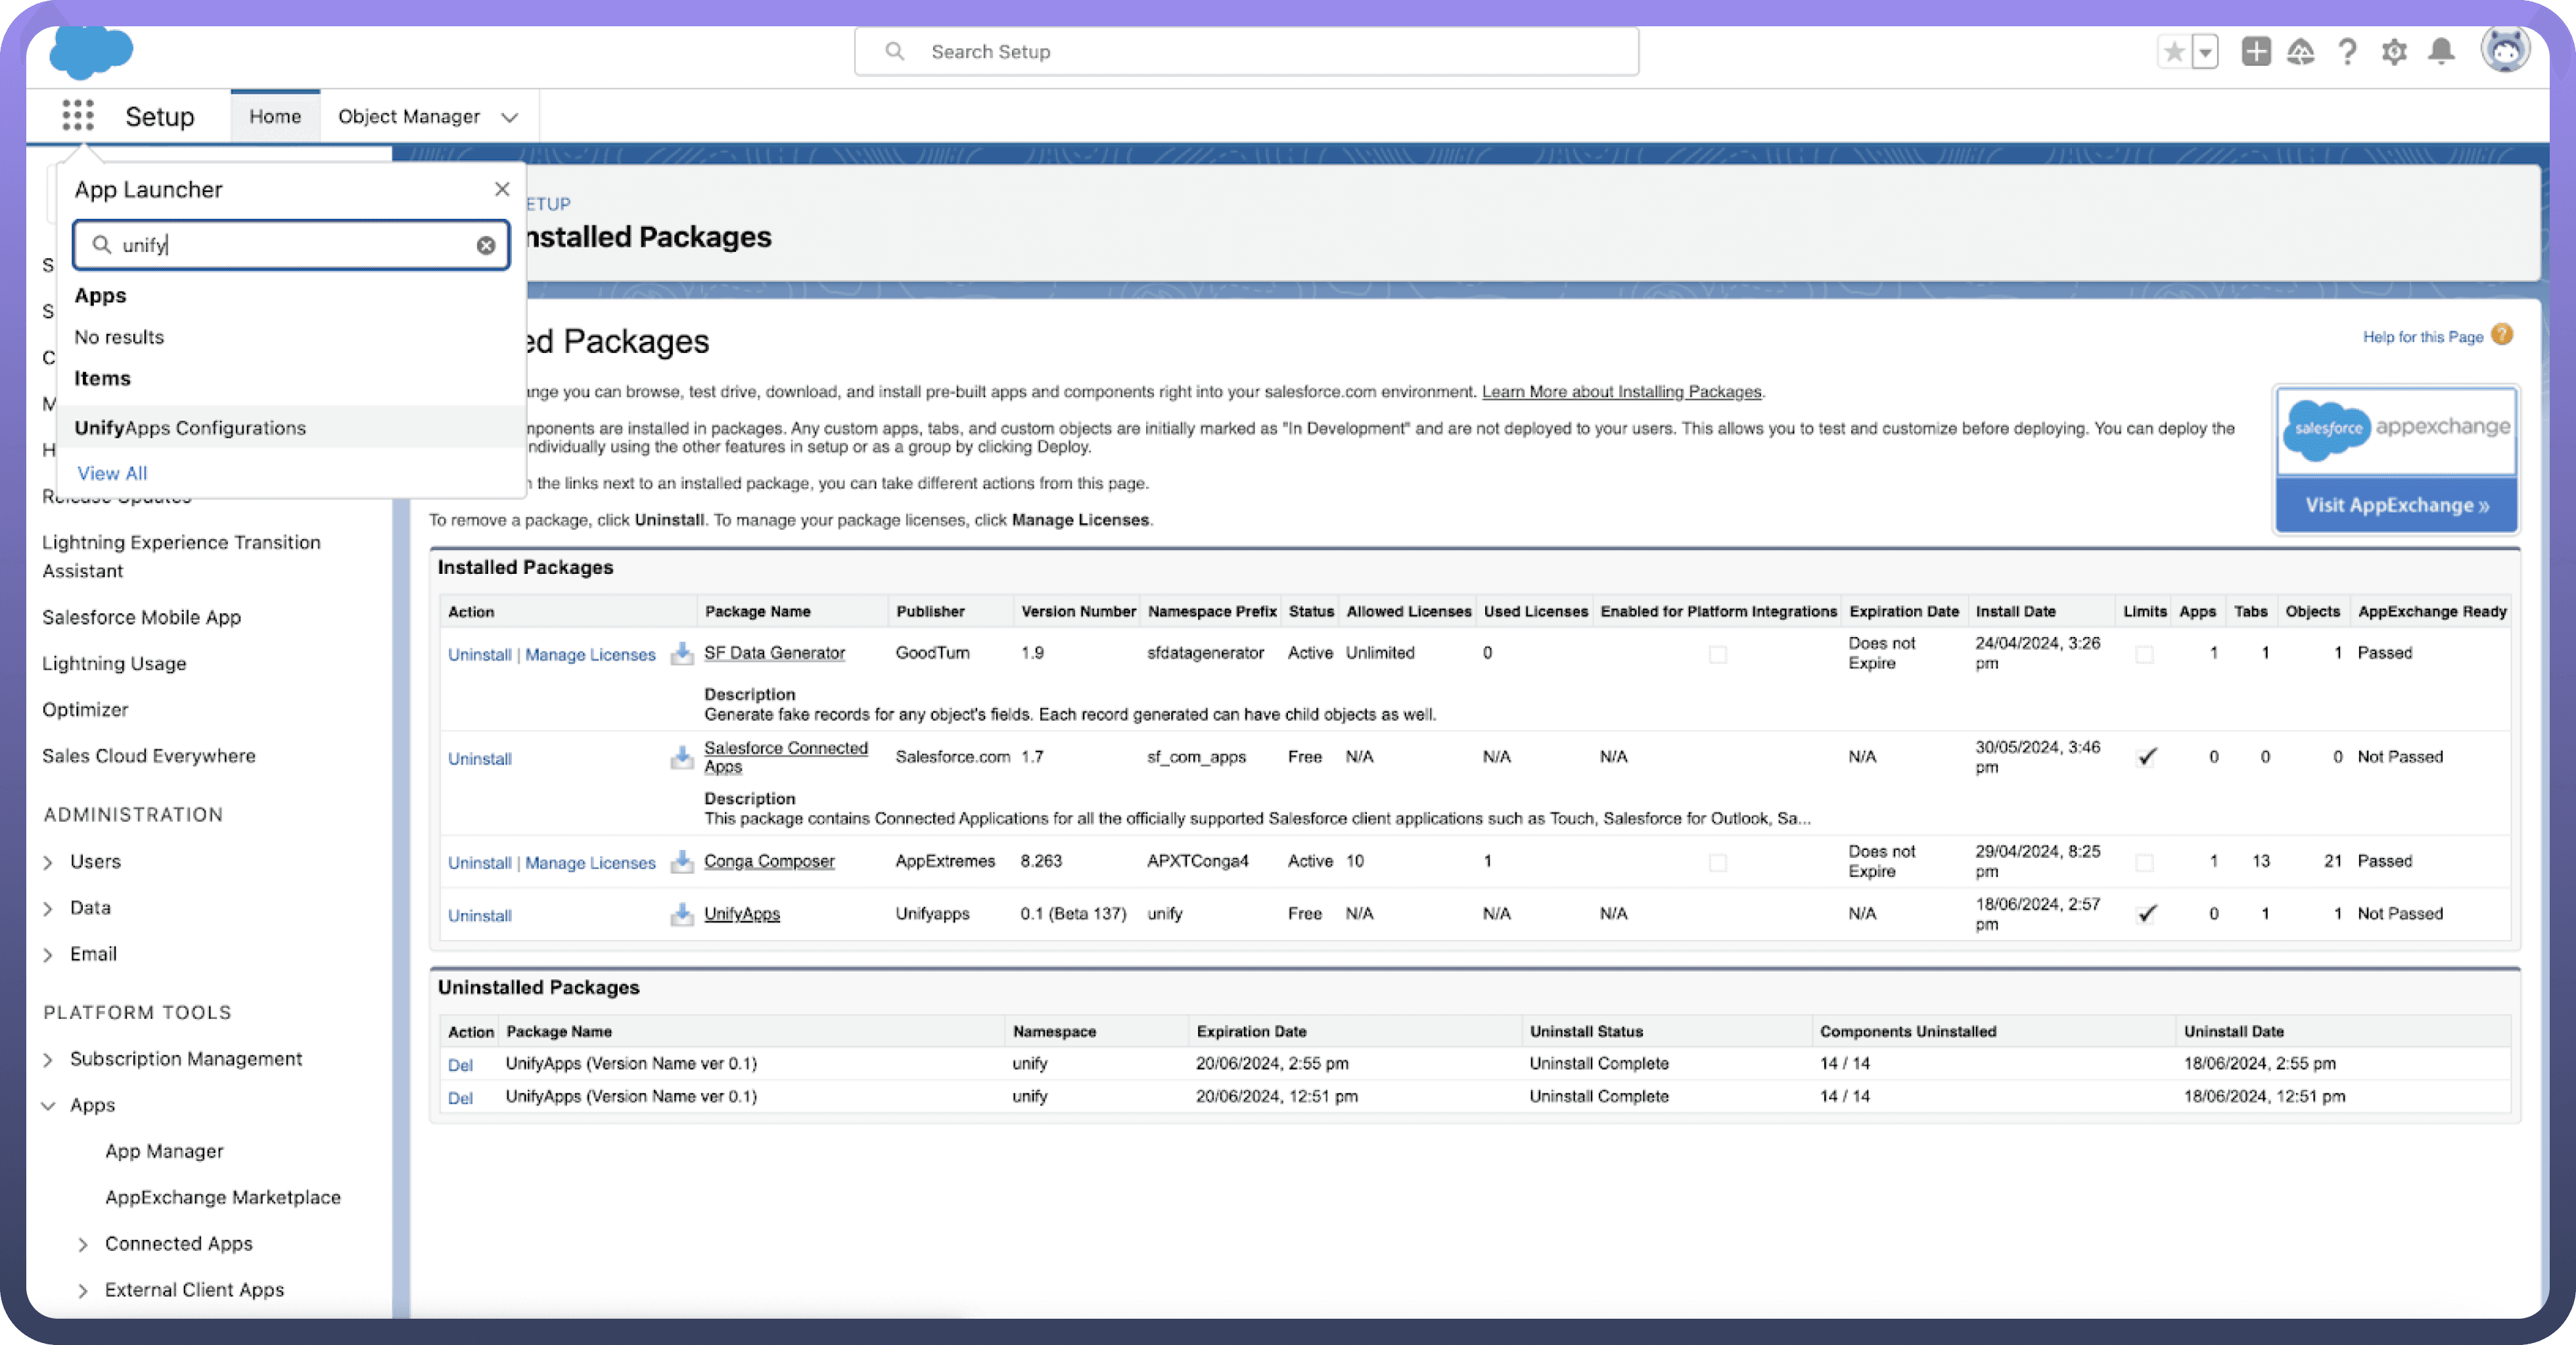
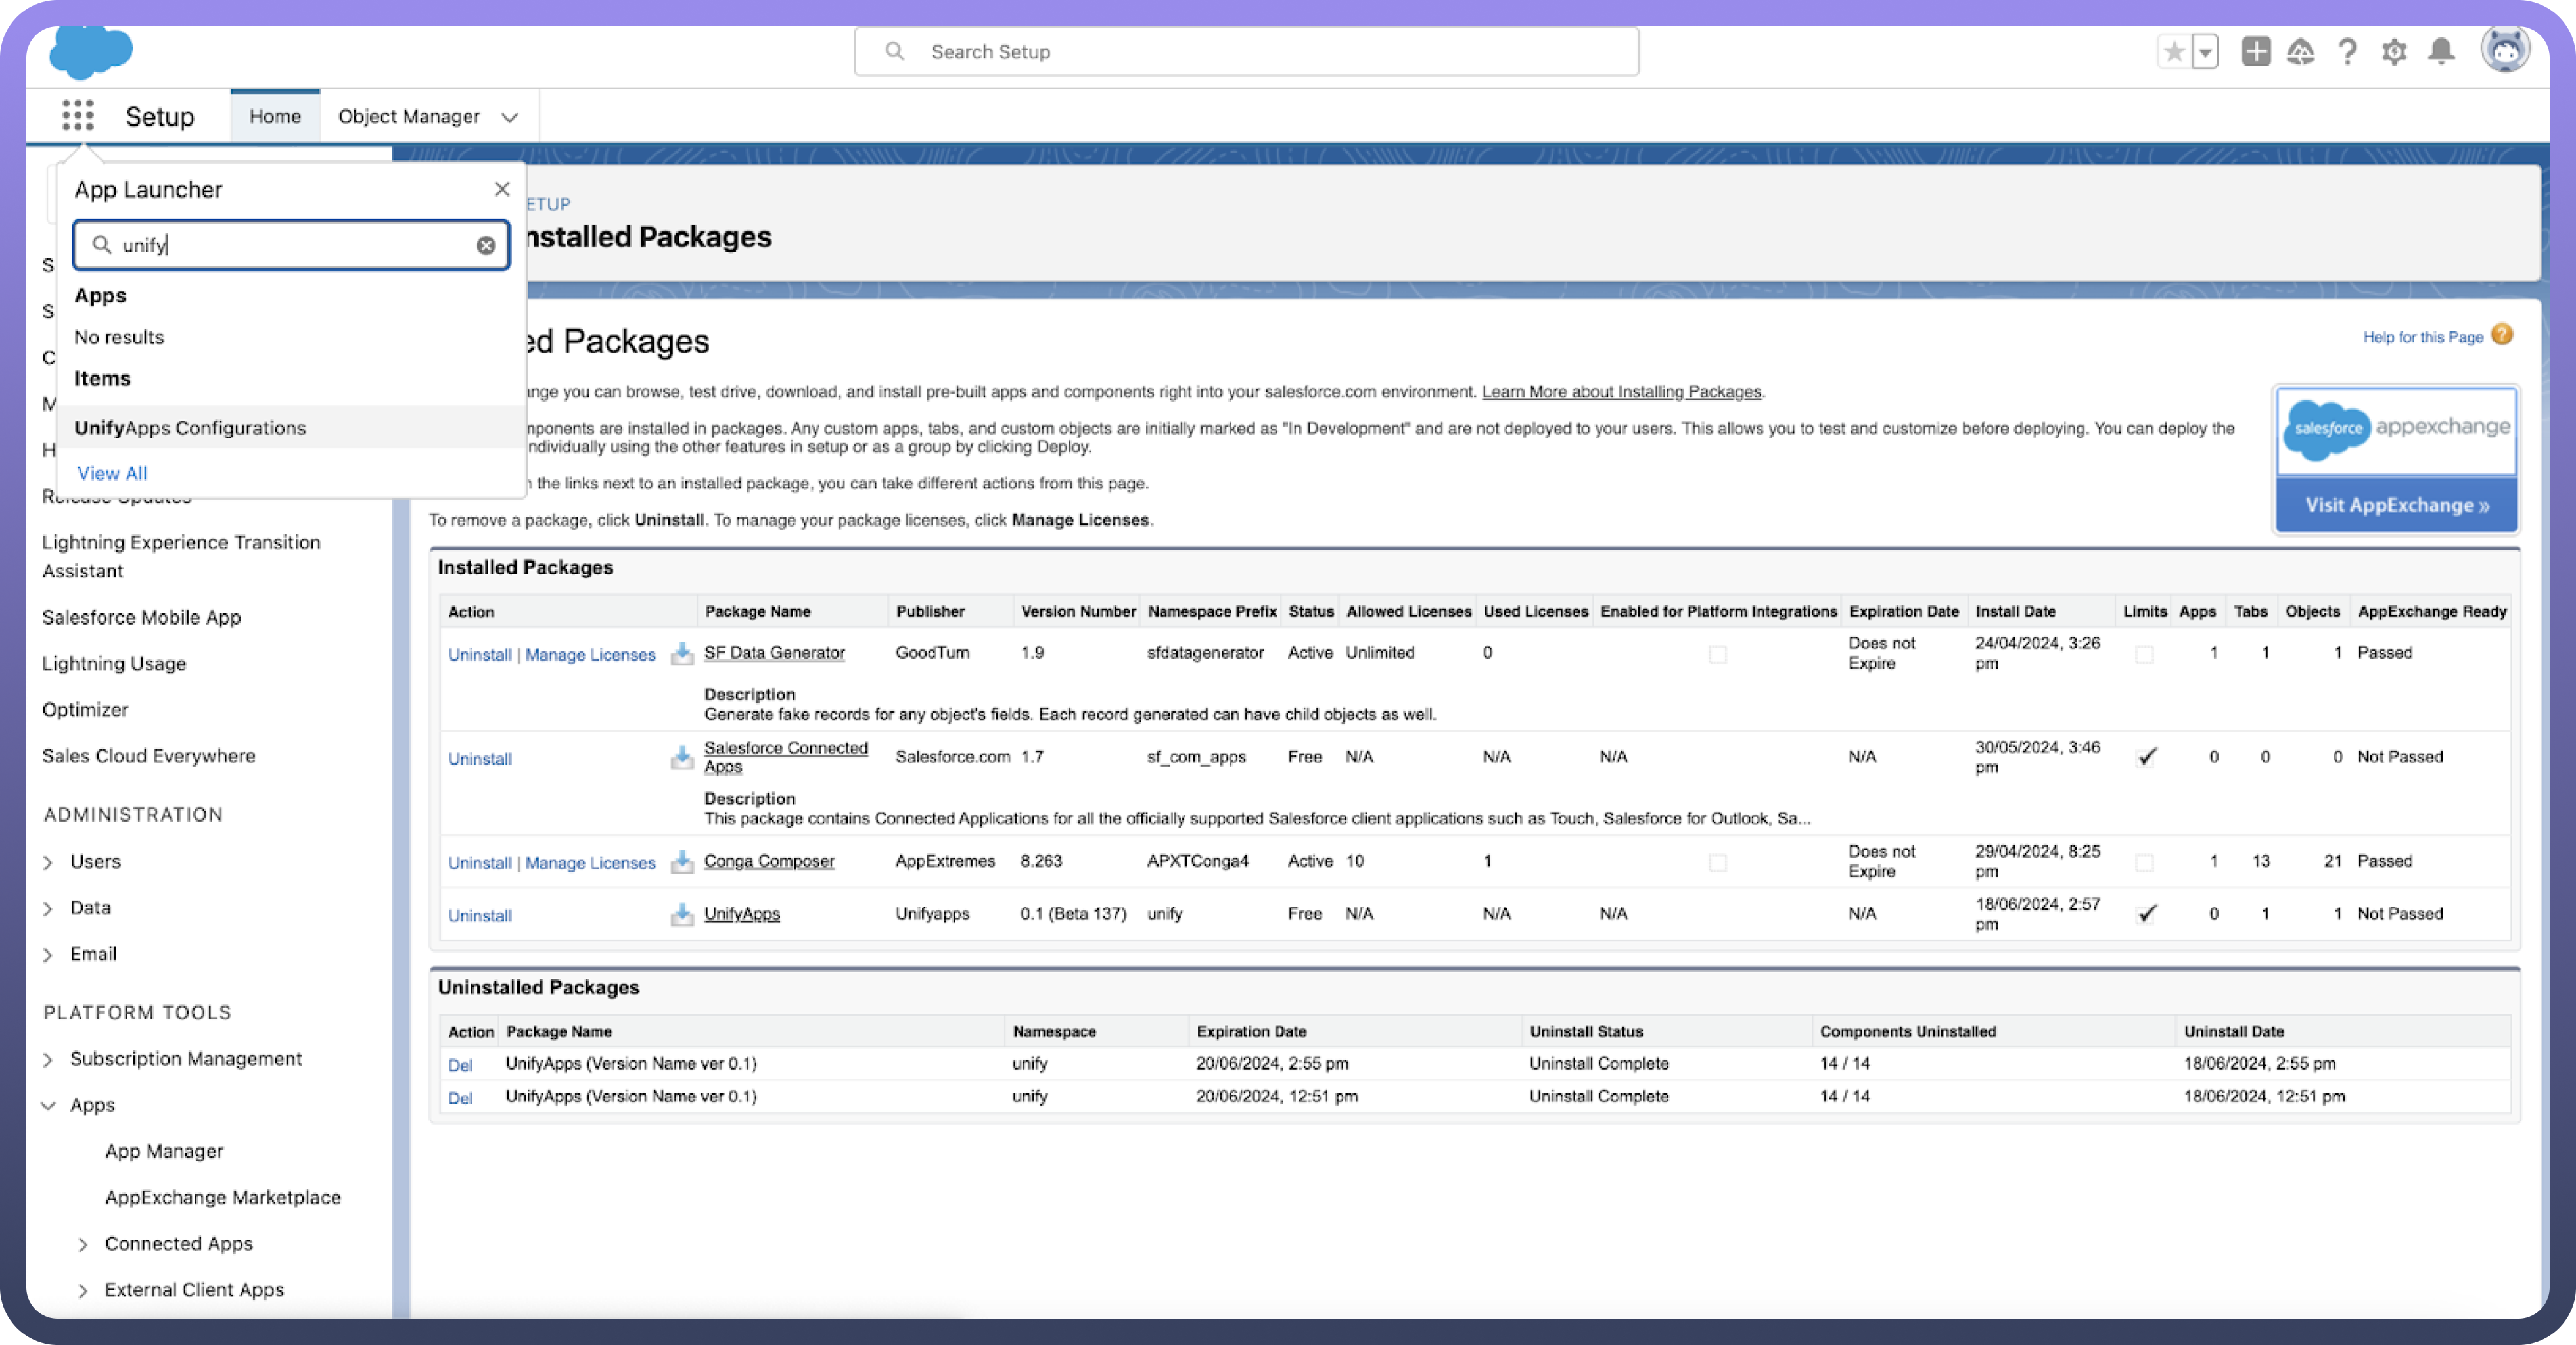
Step 2: Configure UnifyApps
In Salesforce, Click on
App launcherand open Unify Apps configuration.Enter
Domain&Tenant ID
Step 3: Authenticate UnifyApps
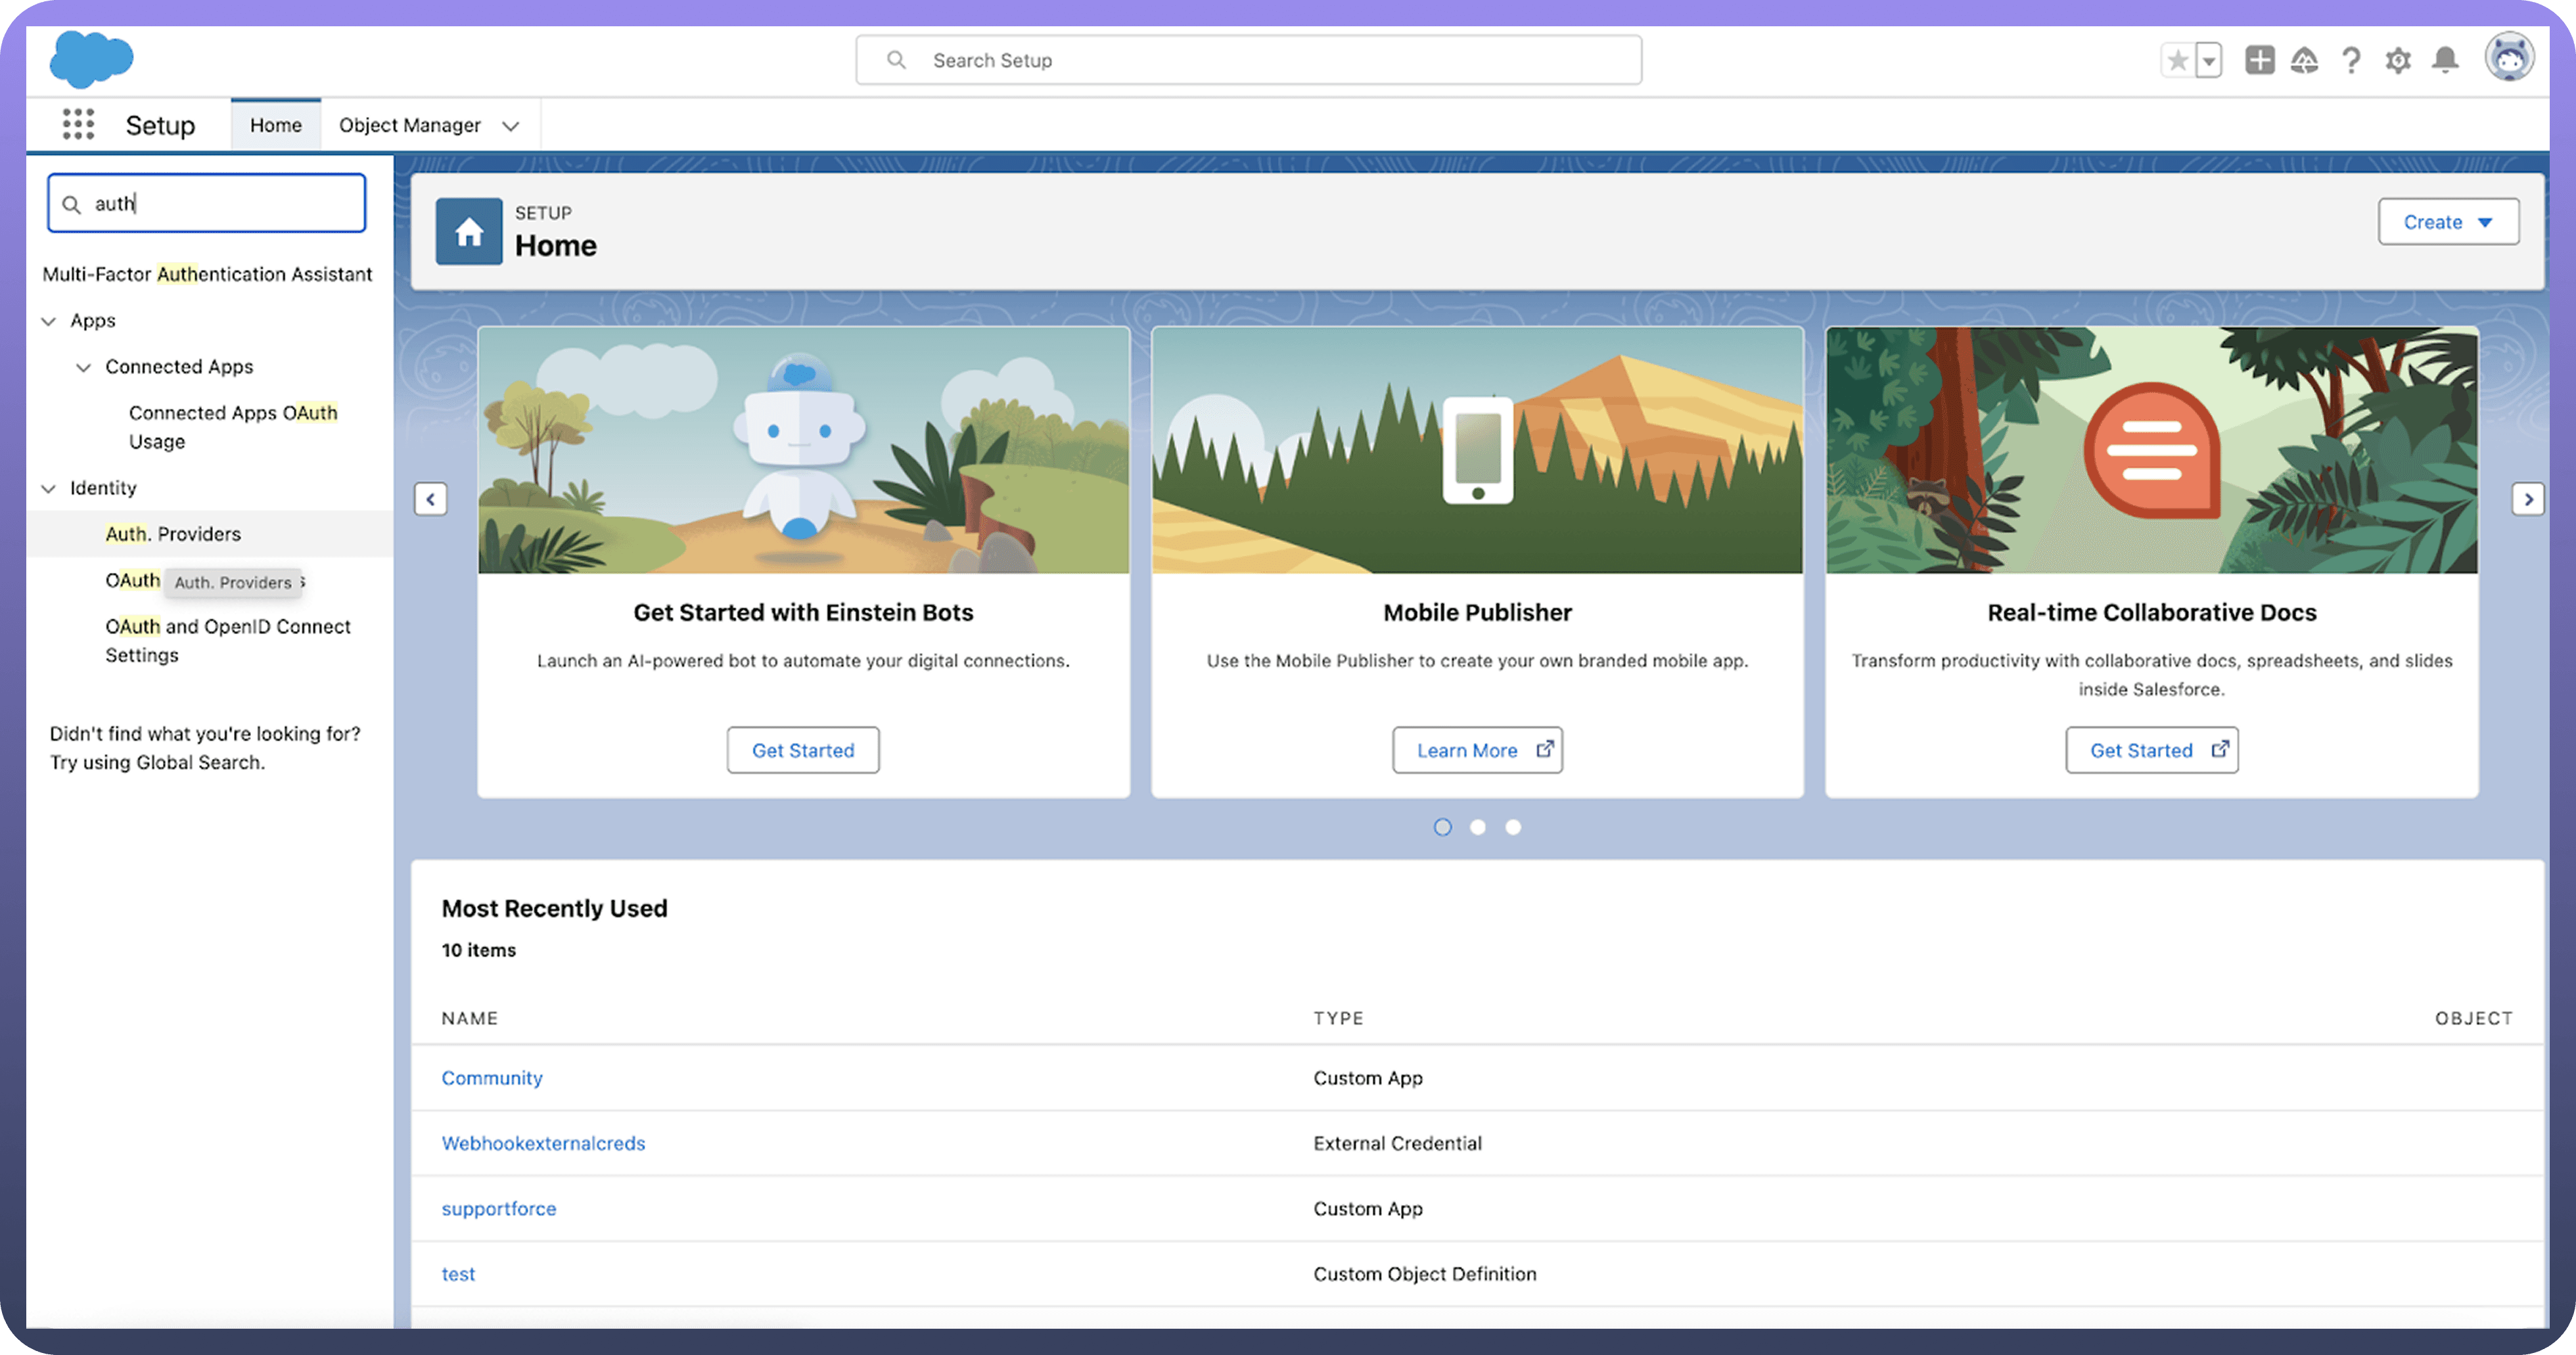
Go to the setup page under Settings.
Search for Auth Providers in setup.
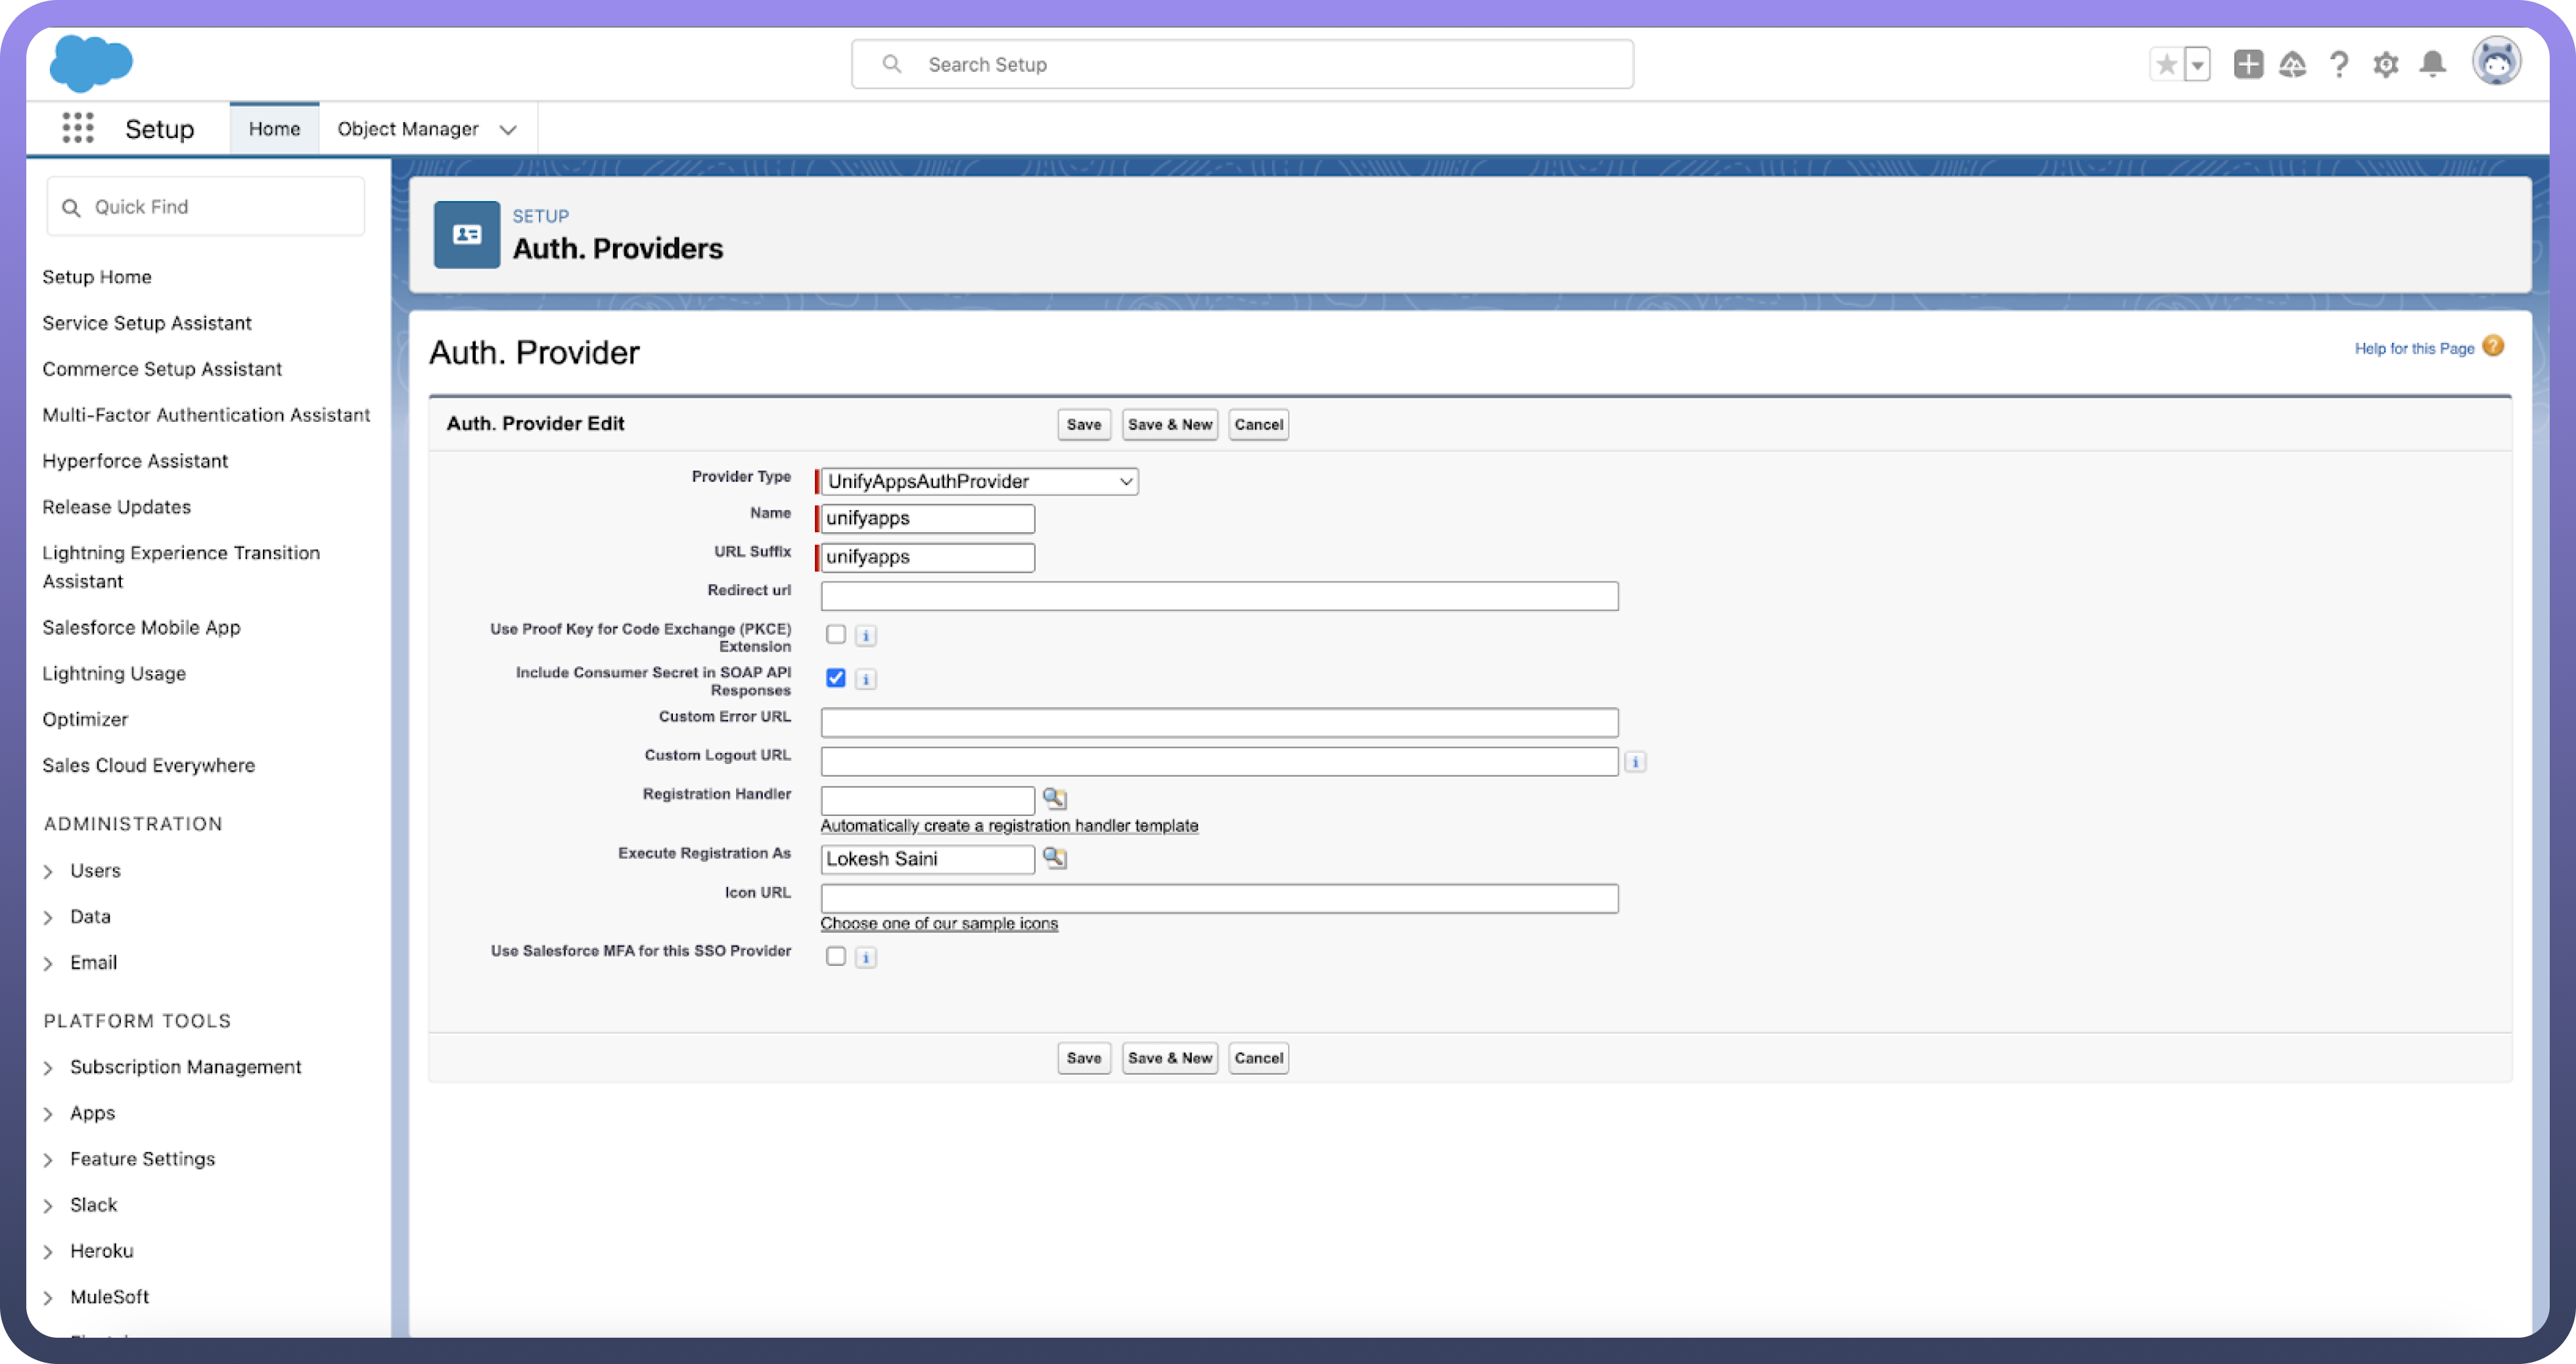
Create a New Auth with AuthProvider Named “UnifyAppsAuthProvider”

Choose UnifyAppsAuthProvider as Provider Type.
Keep Name & URL Suffix as unifyapps.
Choose an admin from your SF org for Execute Registration As Field.
Click on
SaveButton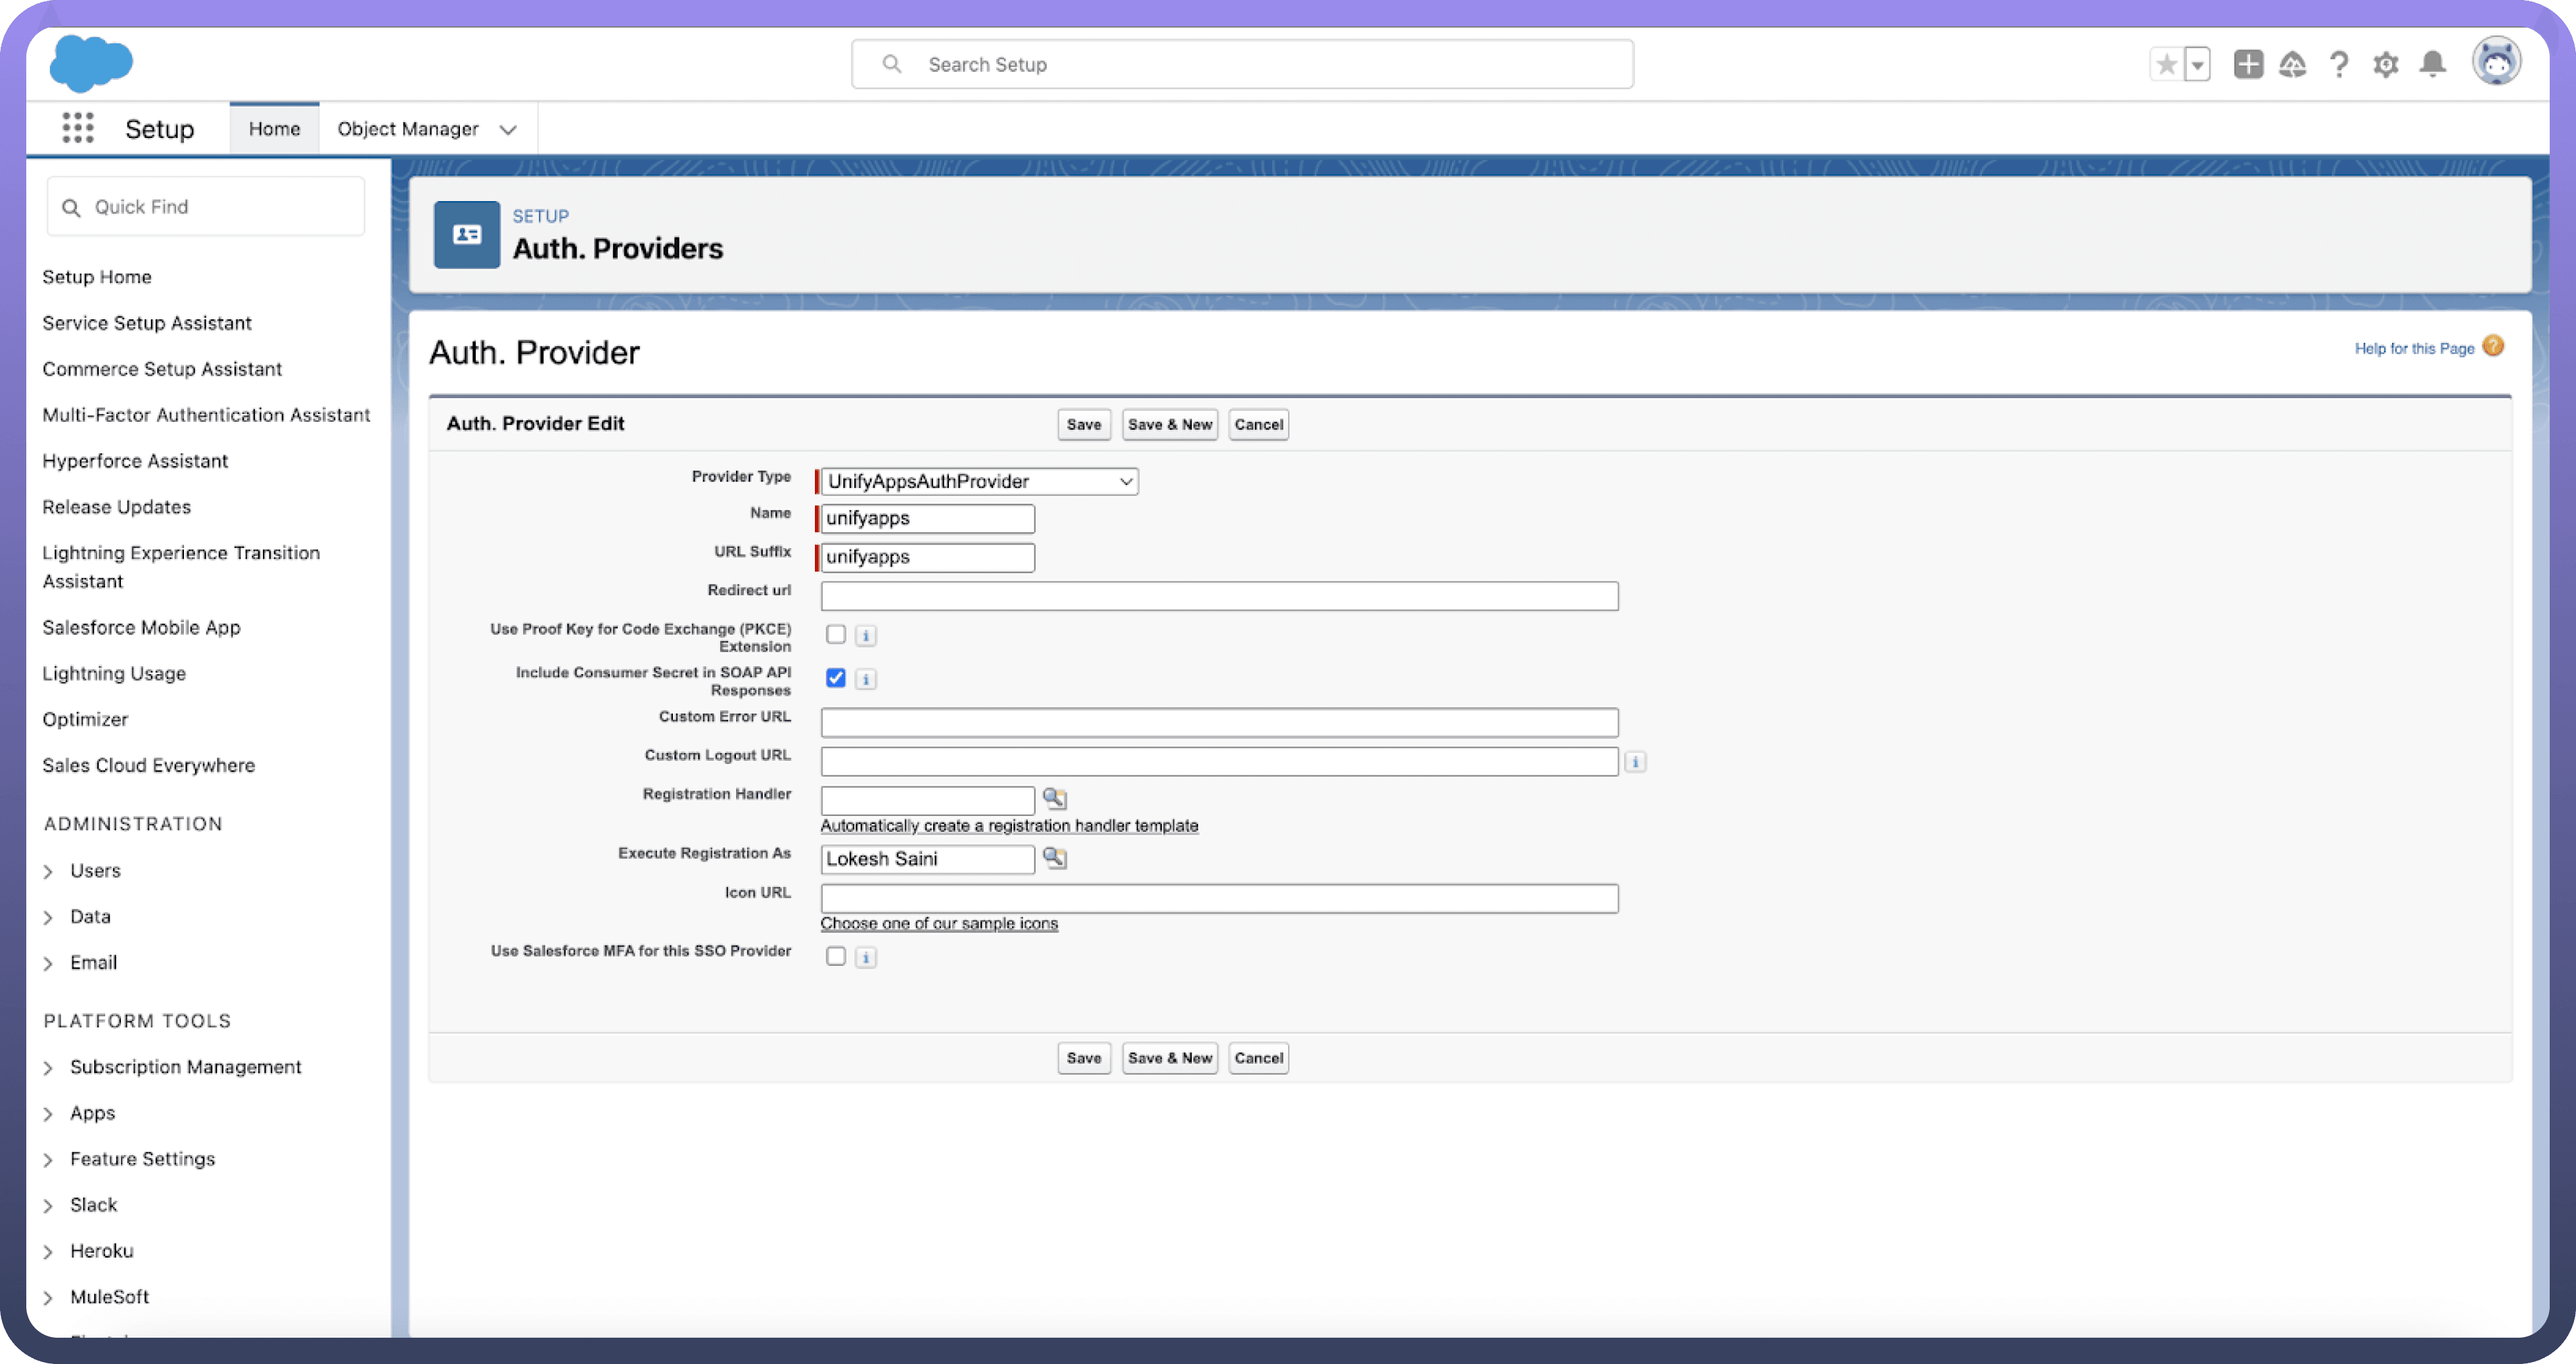
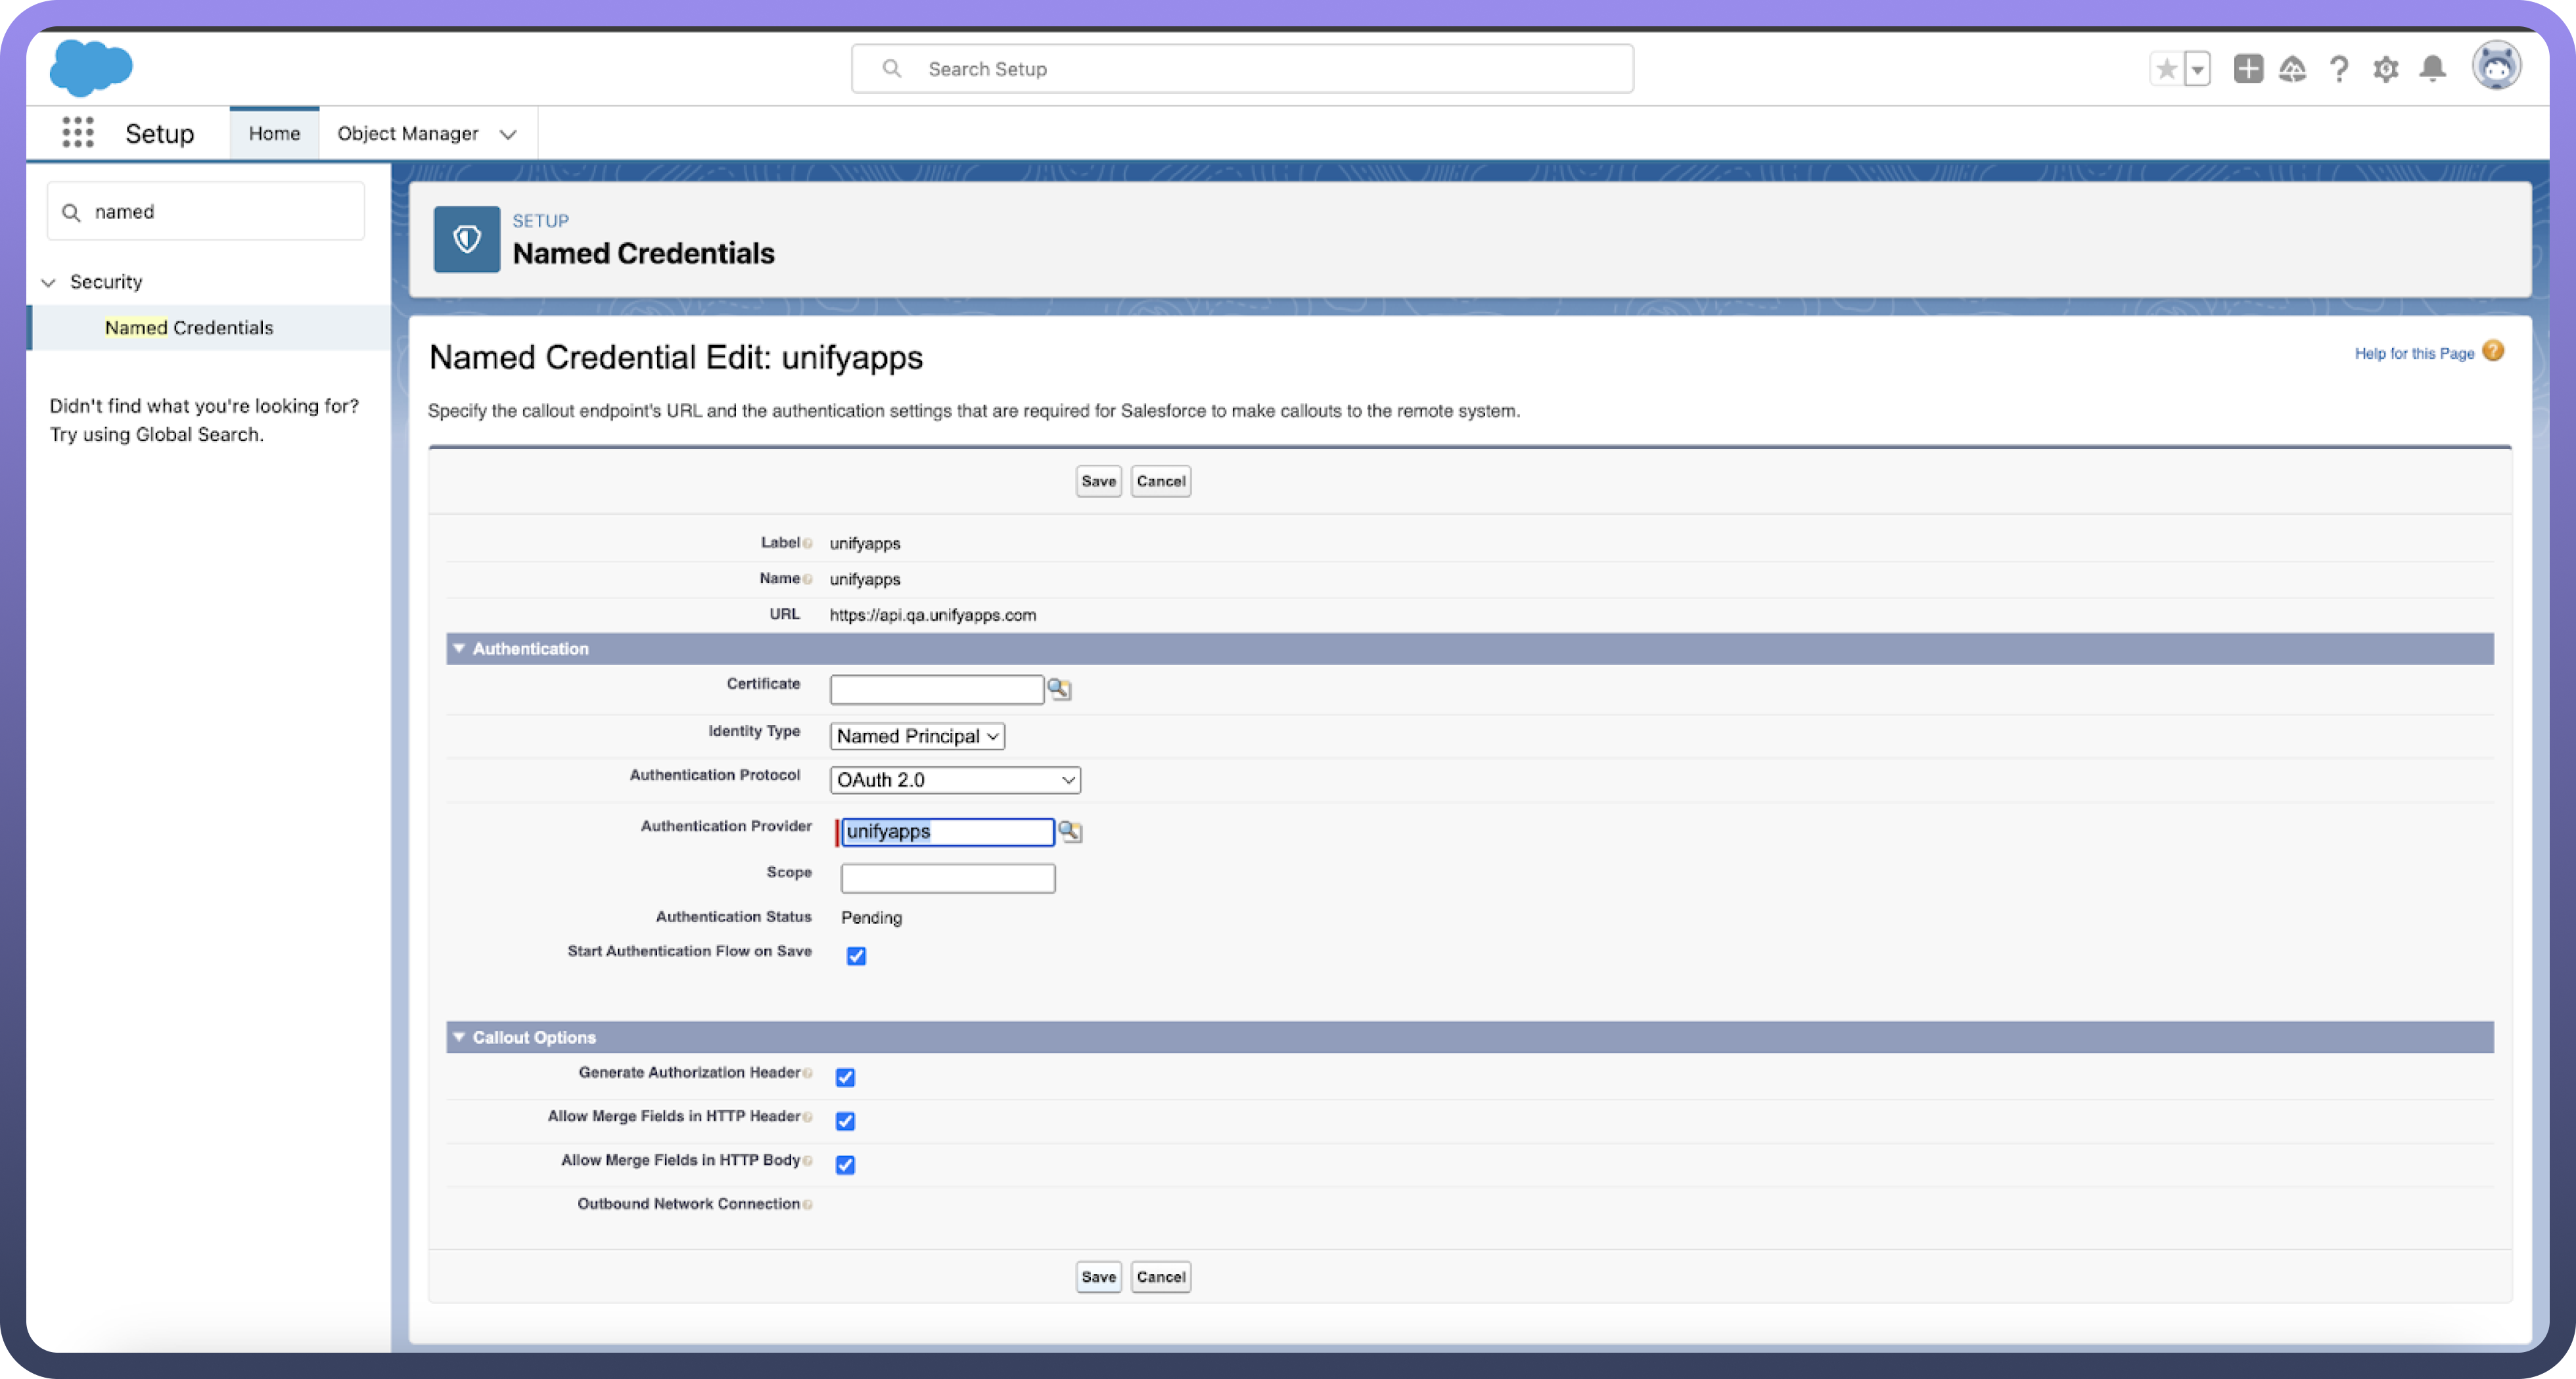
Step 4: Named Credentials
Search for Named Credentials in Setup.
Edit unifyapps named credentials
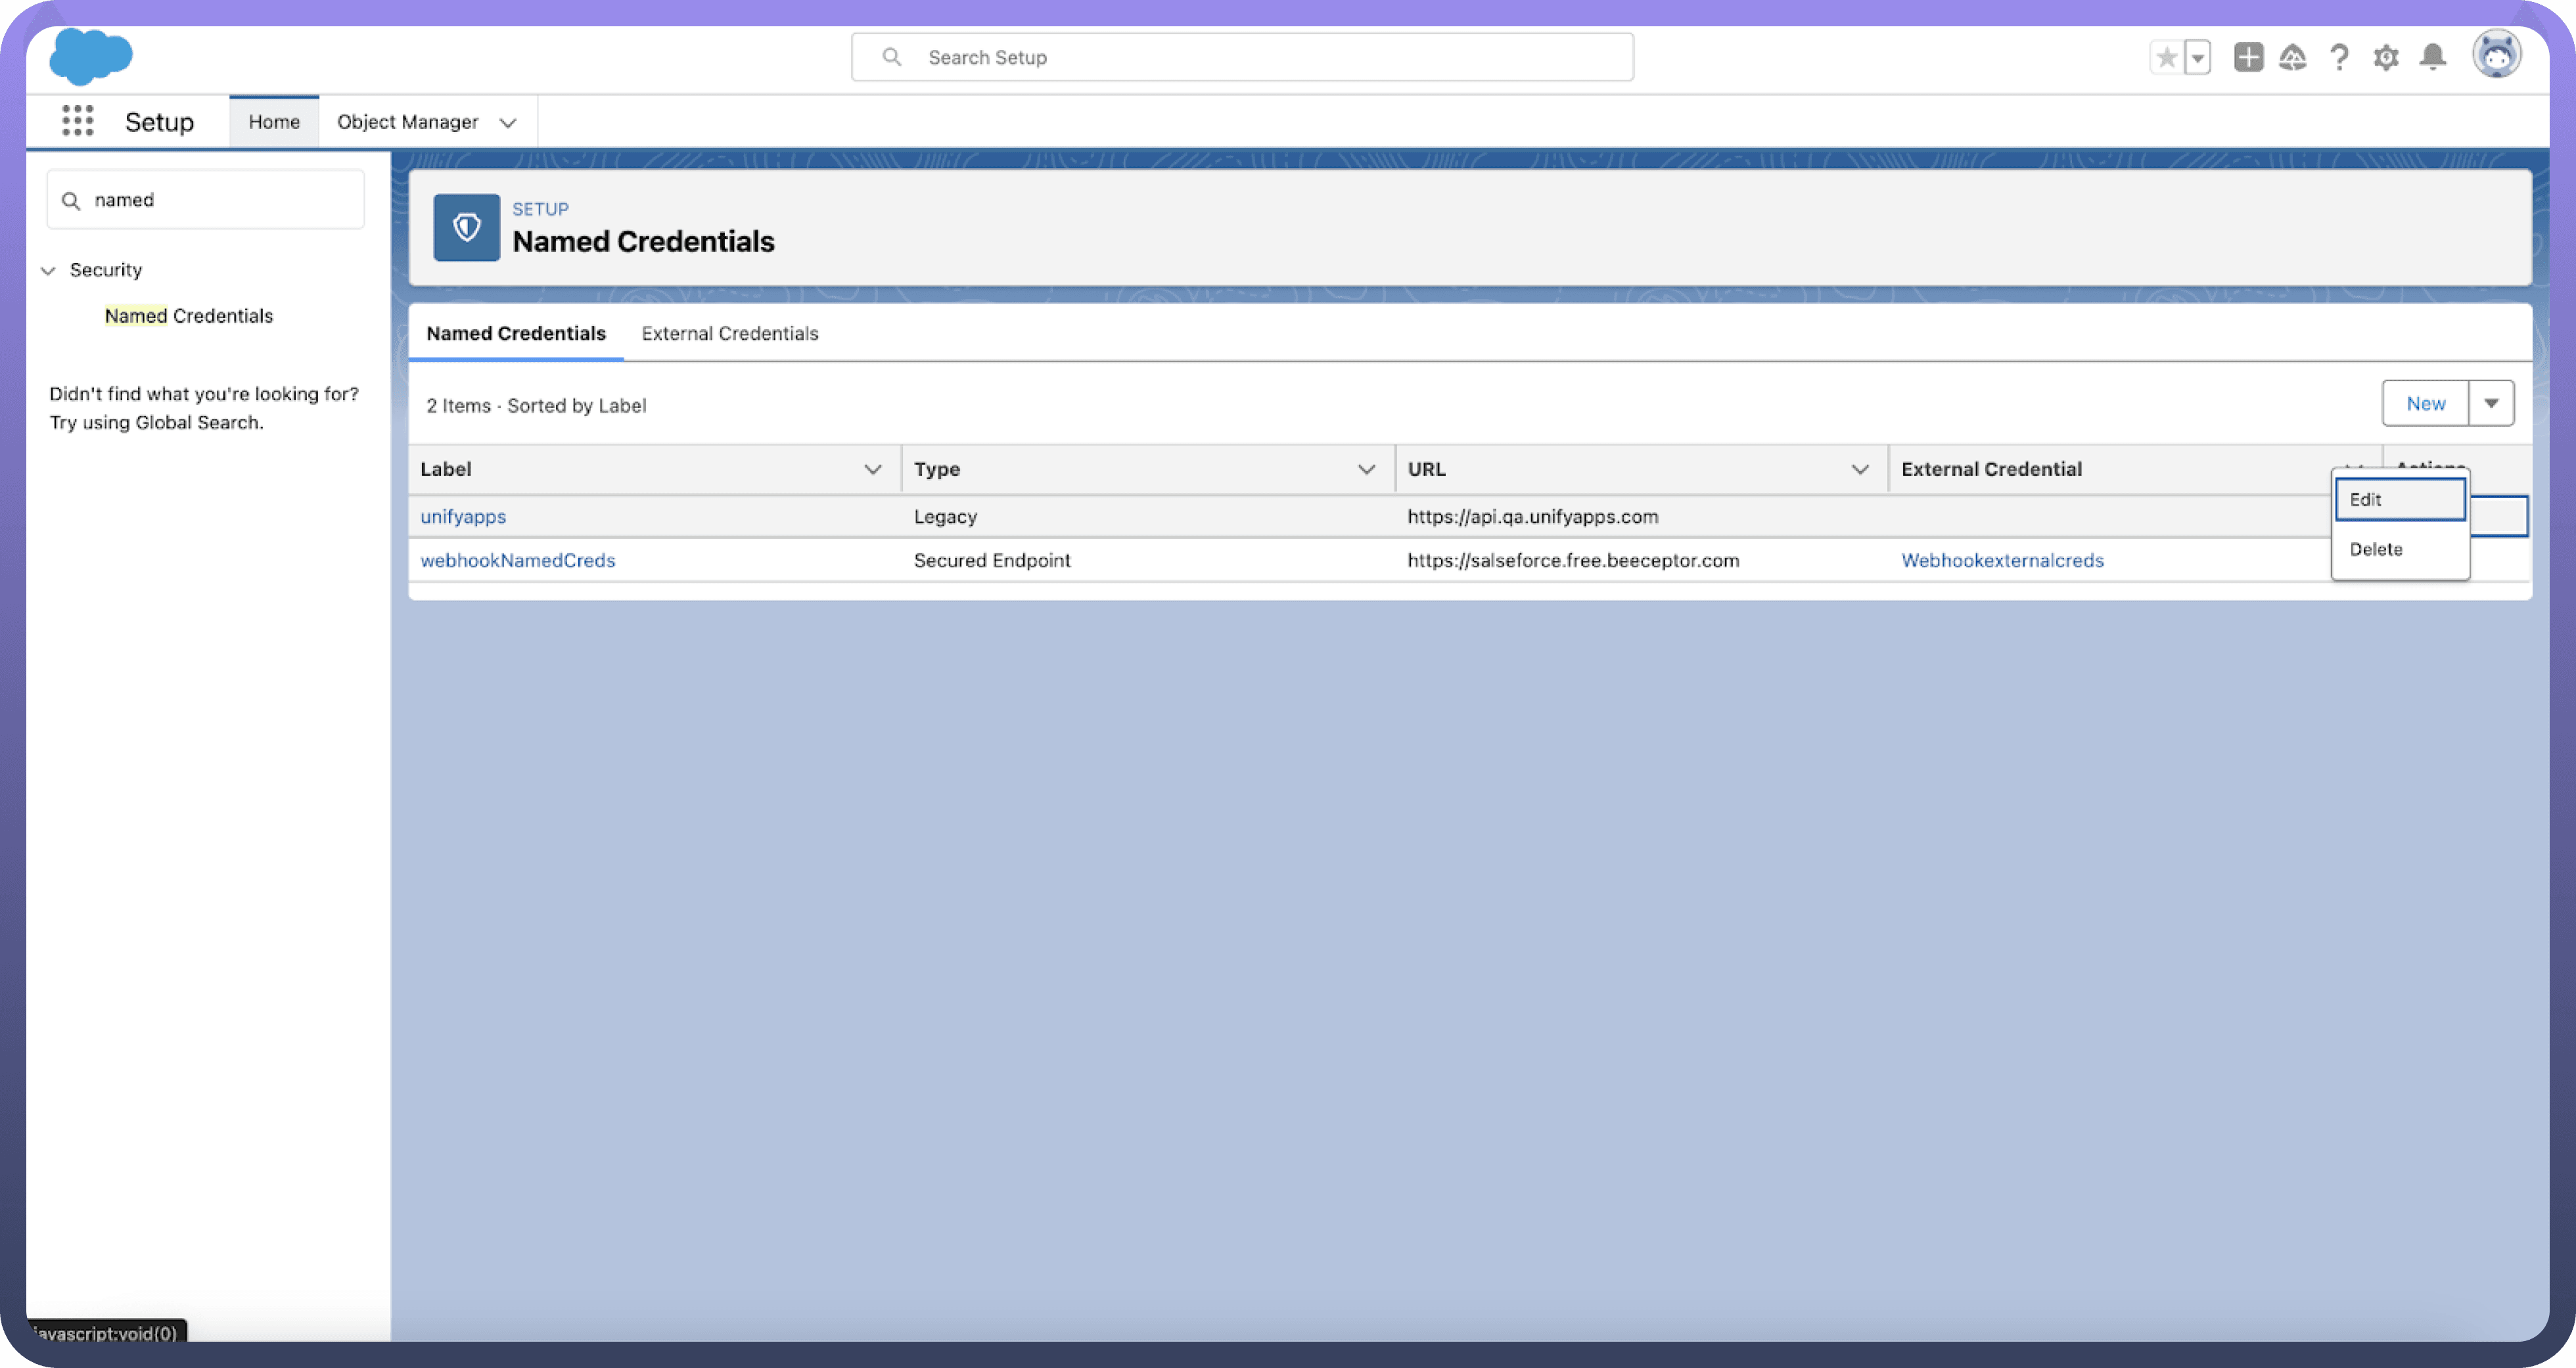

Choose
OAuth 2.0as Authentication Protocol.Choose unifyapps as Authentication Provider.
Select “
Start Authentication Flow on Save”Click on
SaveButton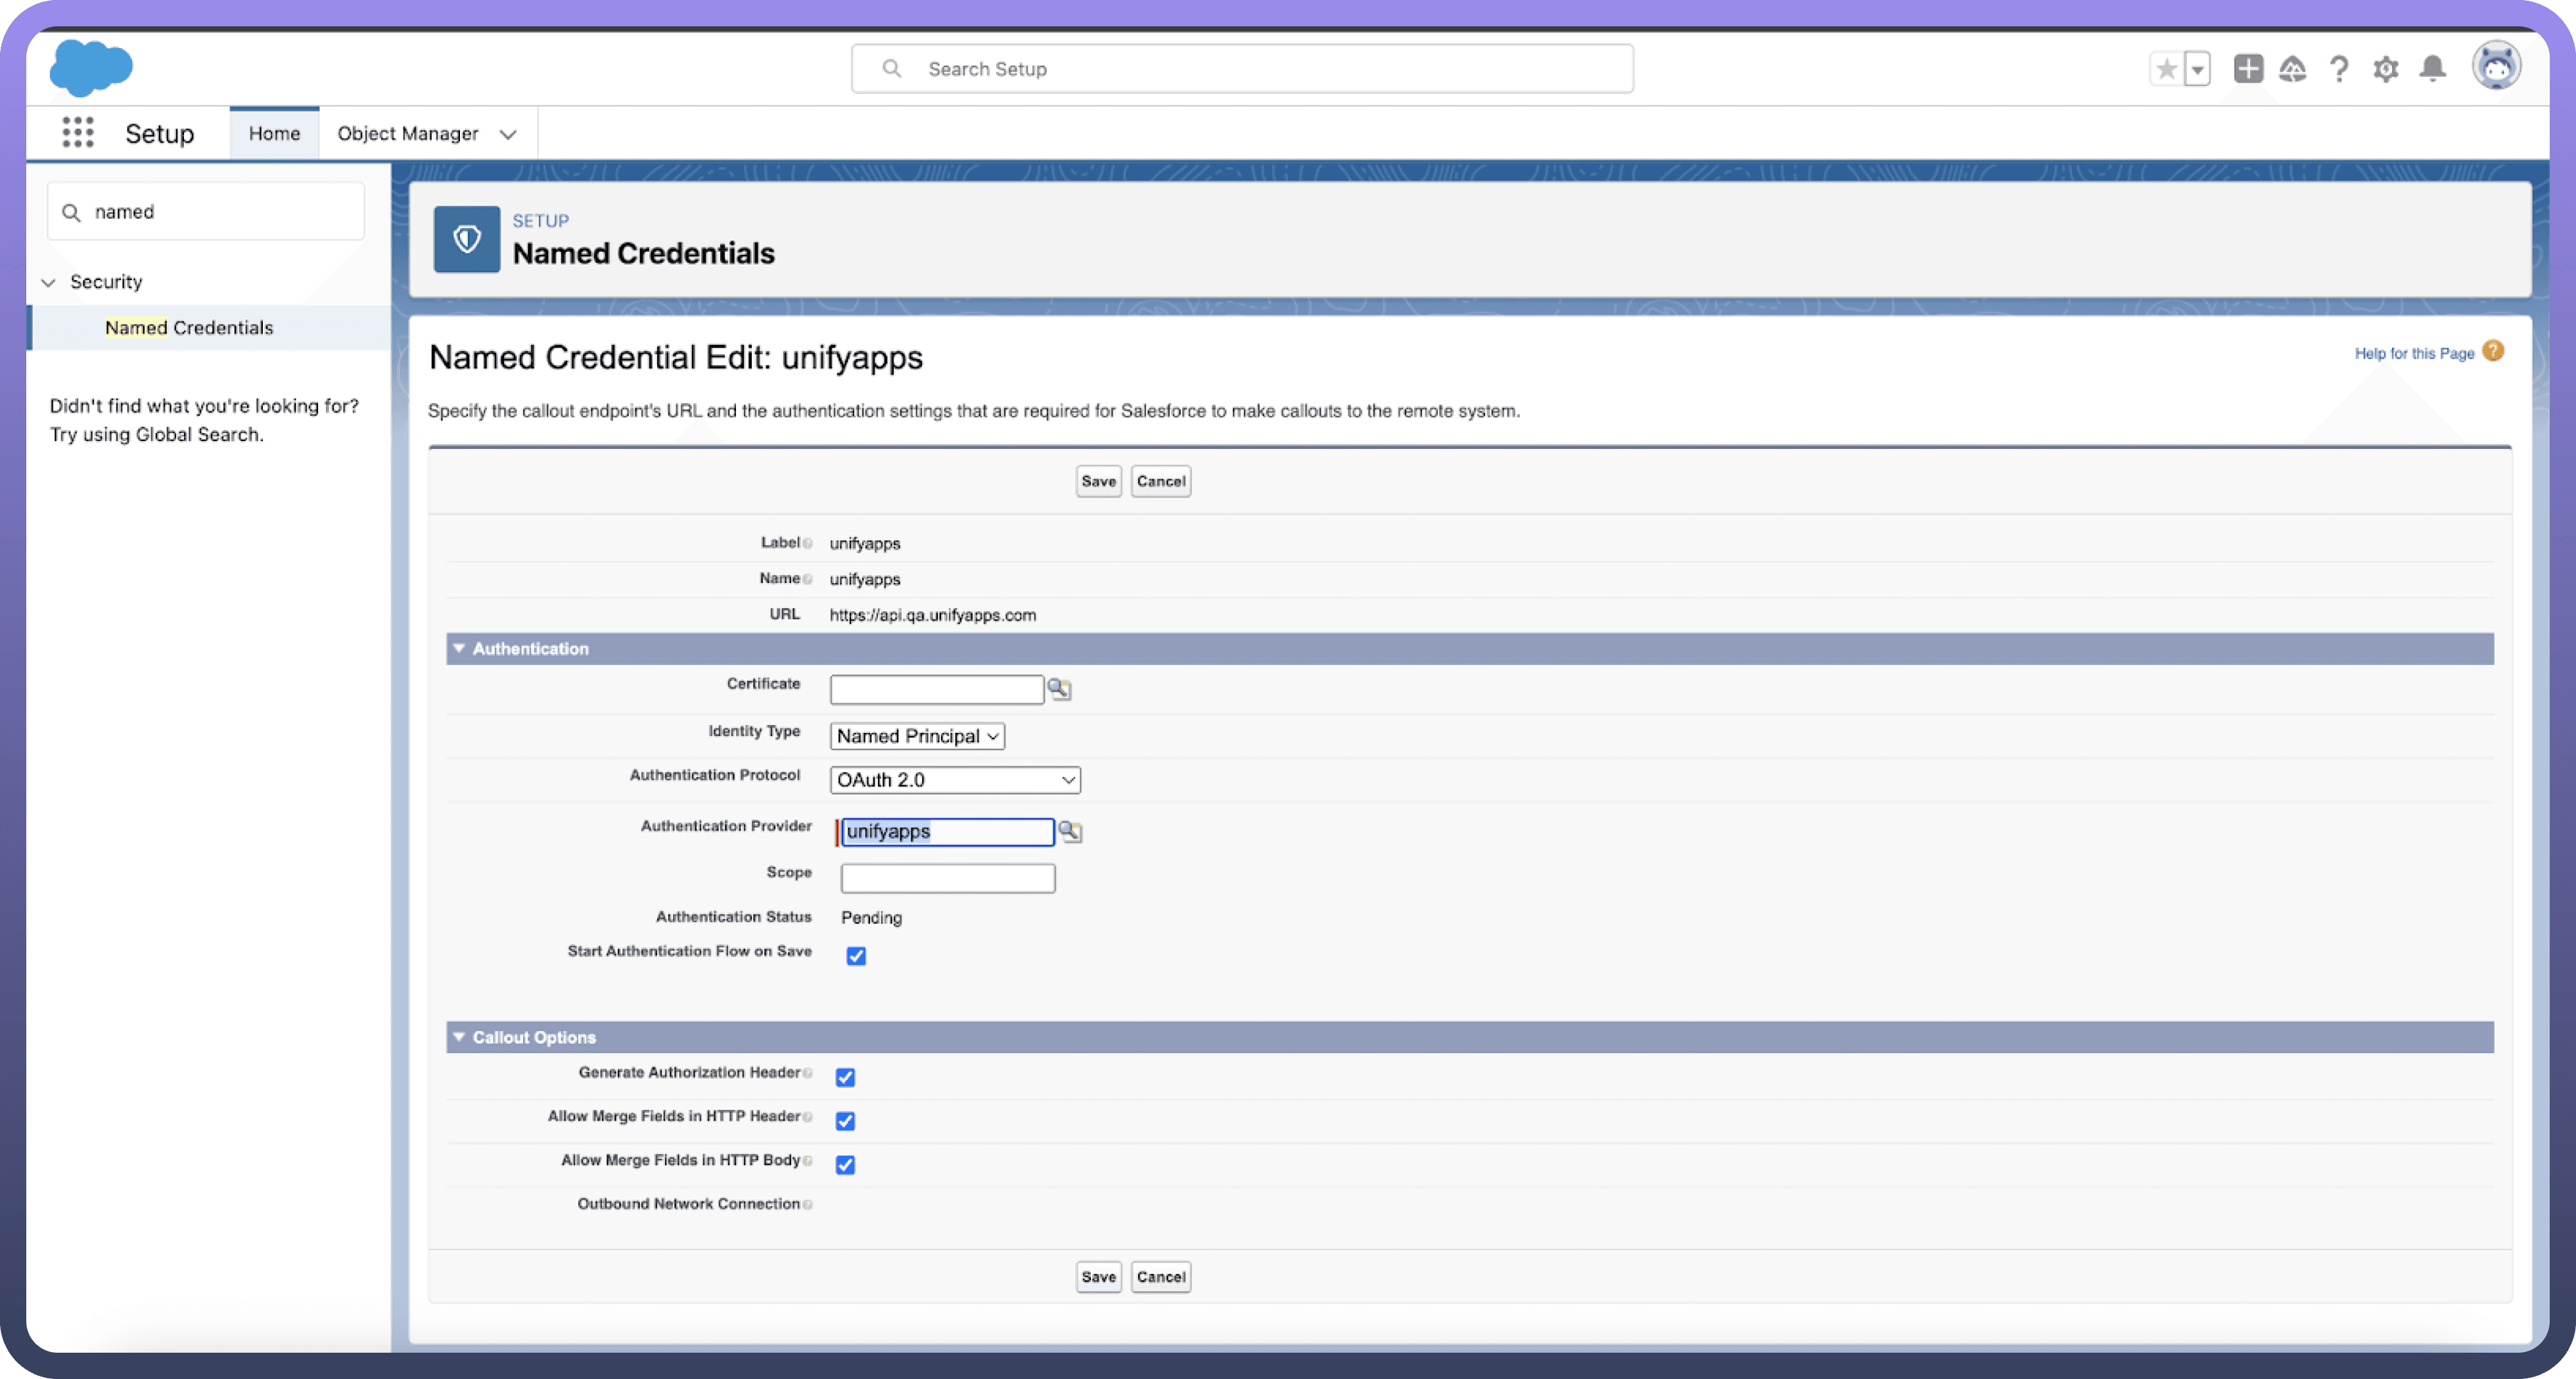
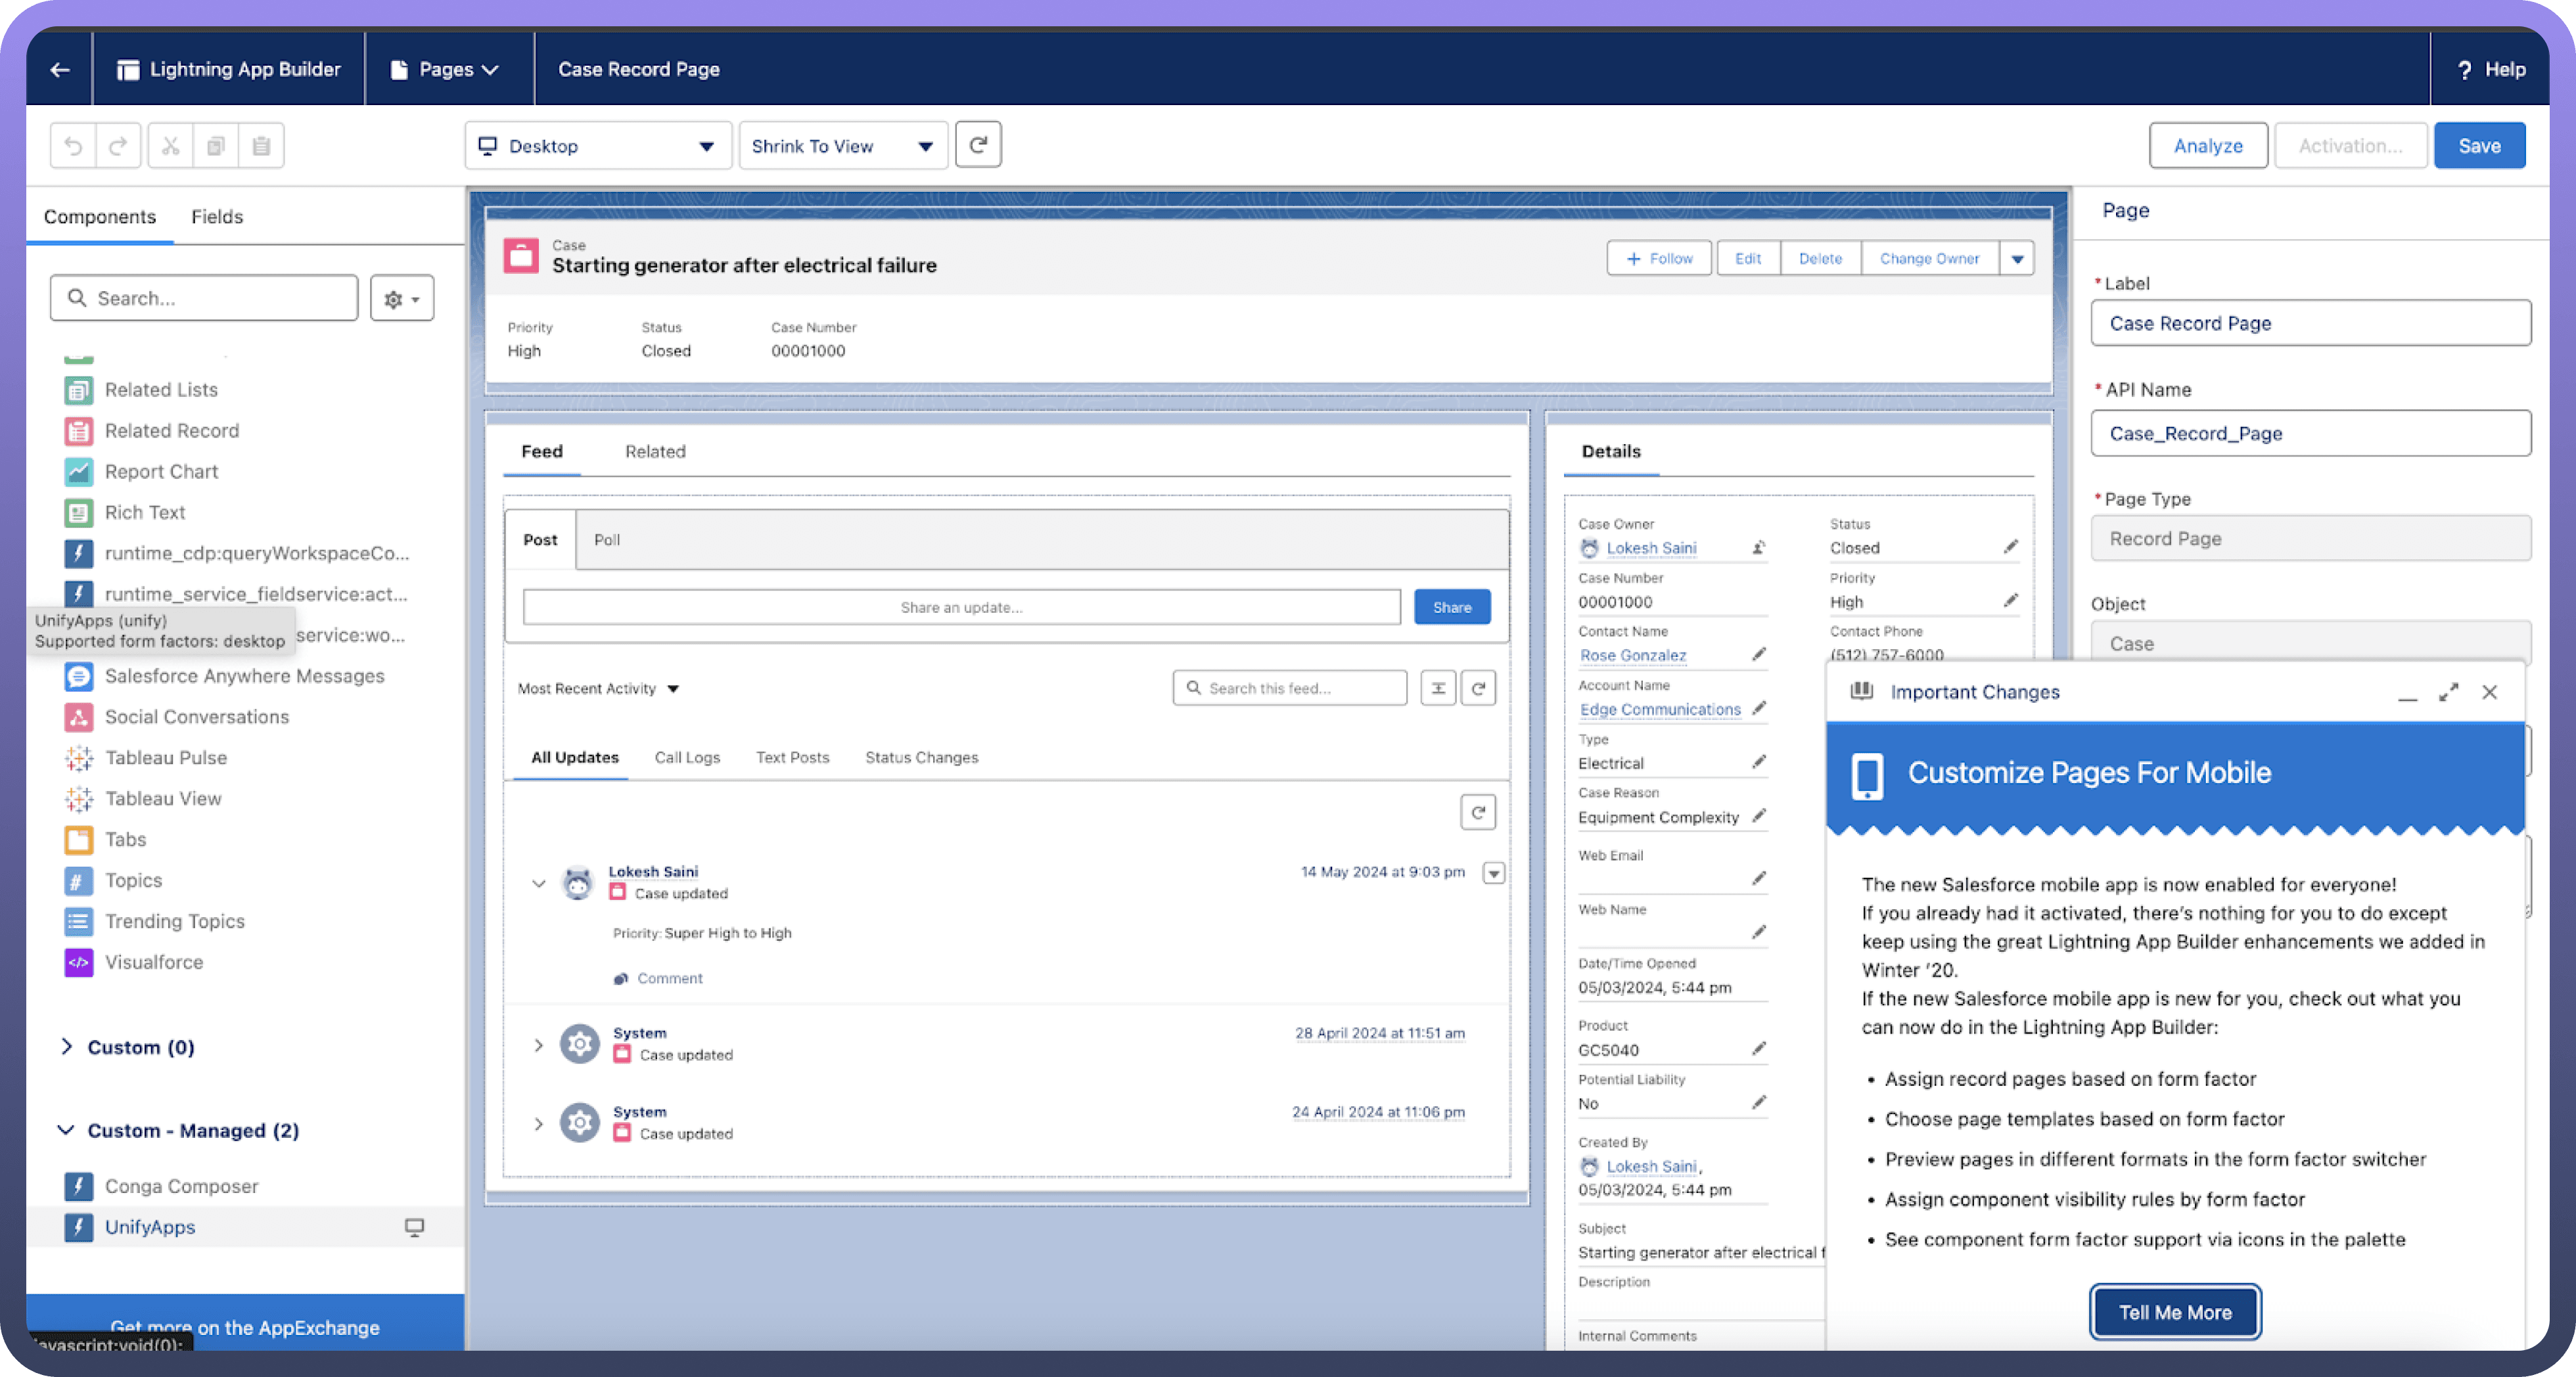
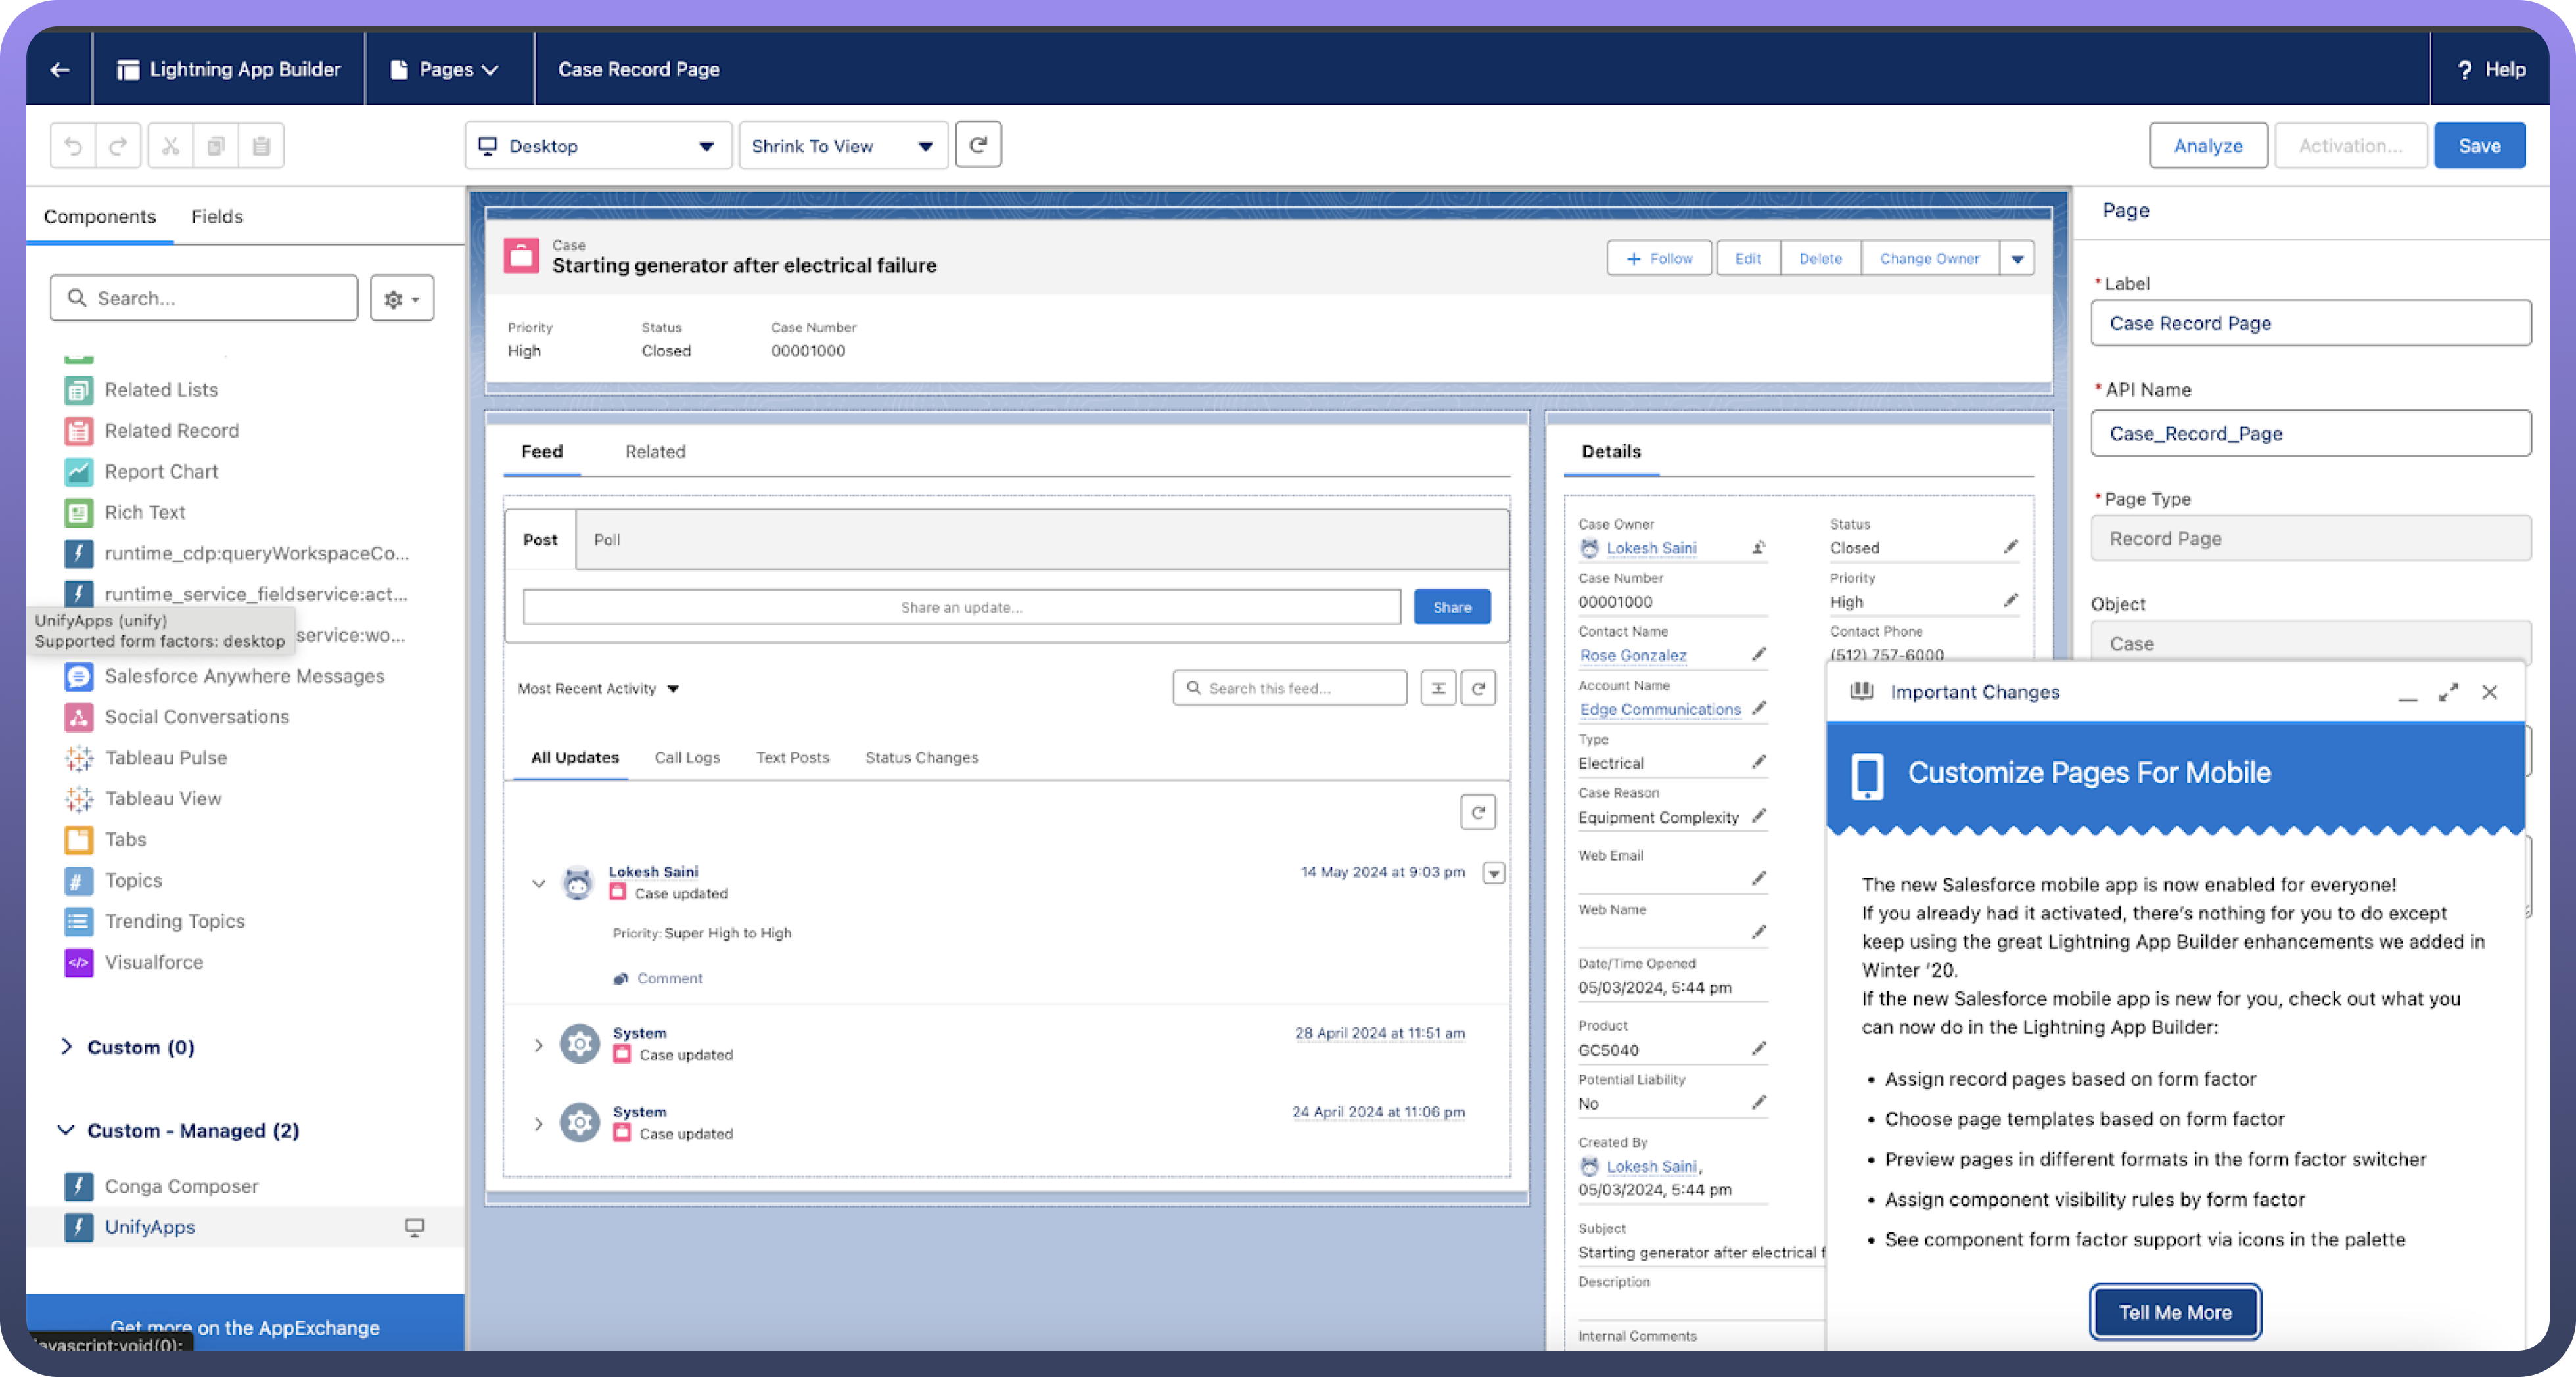
Step 5: App Builder
Open Page where you want to add UnifyApps Interface component
Search for UnifyApps Interface component in Custom-Managed Components.
Drag and Drop UnifyApps Interface component in the screen to add it
Add Interface and page id to render UnifyApps application page.
Zendesk <> UnifyApps Integration
Overview
Embedding UnifyApps applications in Zendesk allows seamless integration of UnifyApps features within your Zendesk support environment.
Step-by-Step Instructions
Step 1: Search for UnifyApps in the Zendesk App Store
Navigate to the Zendesk App Store and search for "
UnifyApps," or follow this link: UnifyApps on Zendesk Marketplace.
Step 2: Install the UnifyApps Application
Click the
Installbutton to add the UnifyApps application to your Zendesk support environment.
Step 3: Configure UnifyApps in Zendesk Support Apps
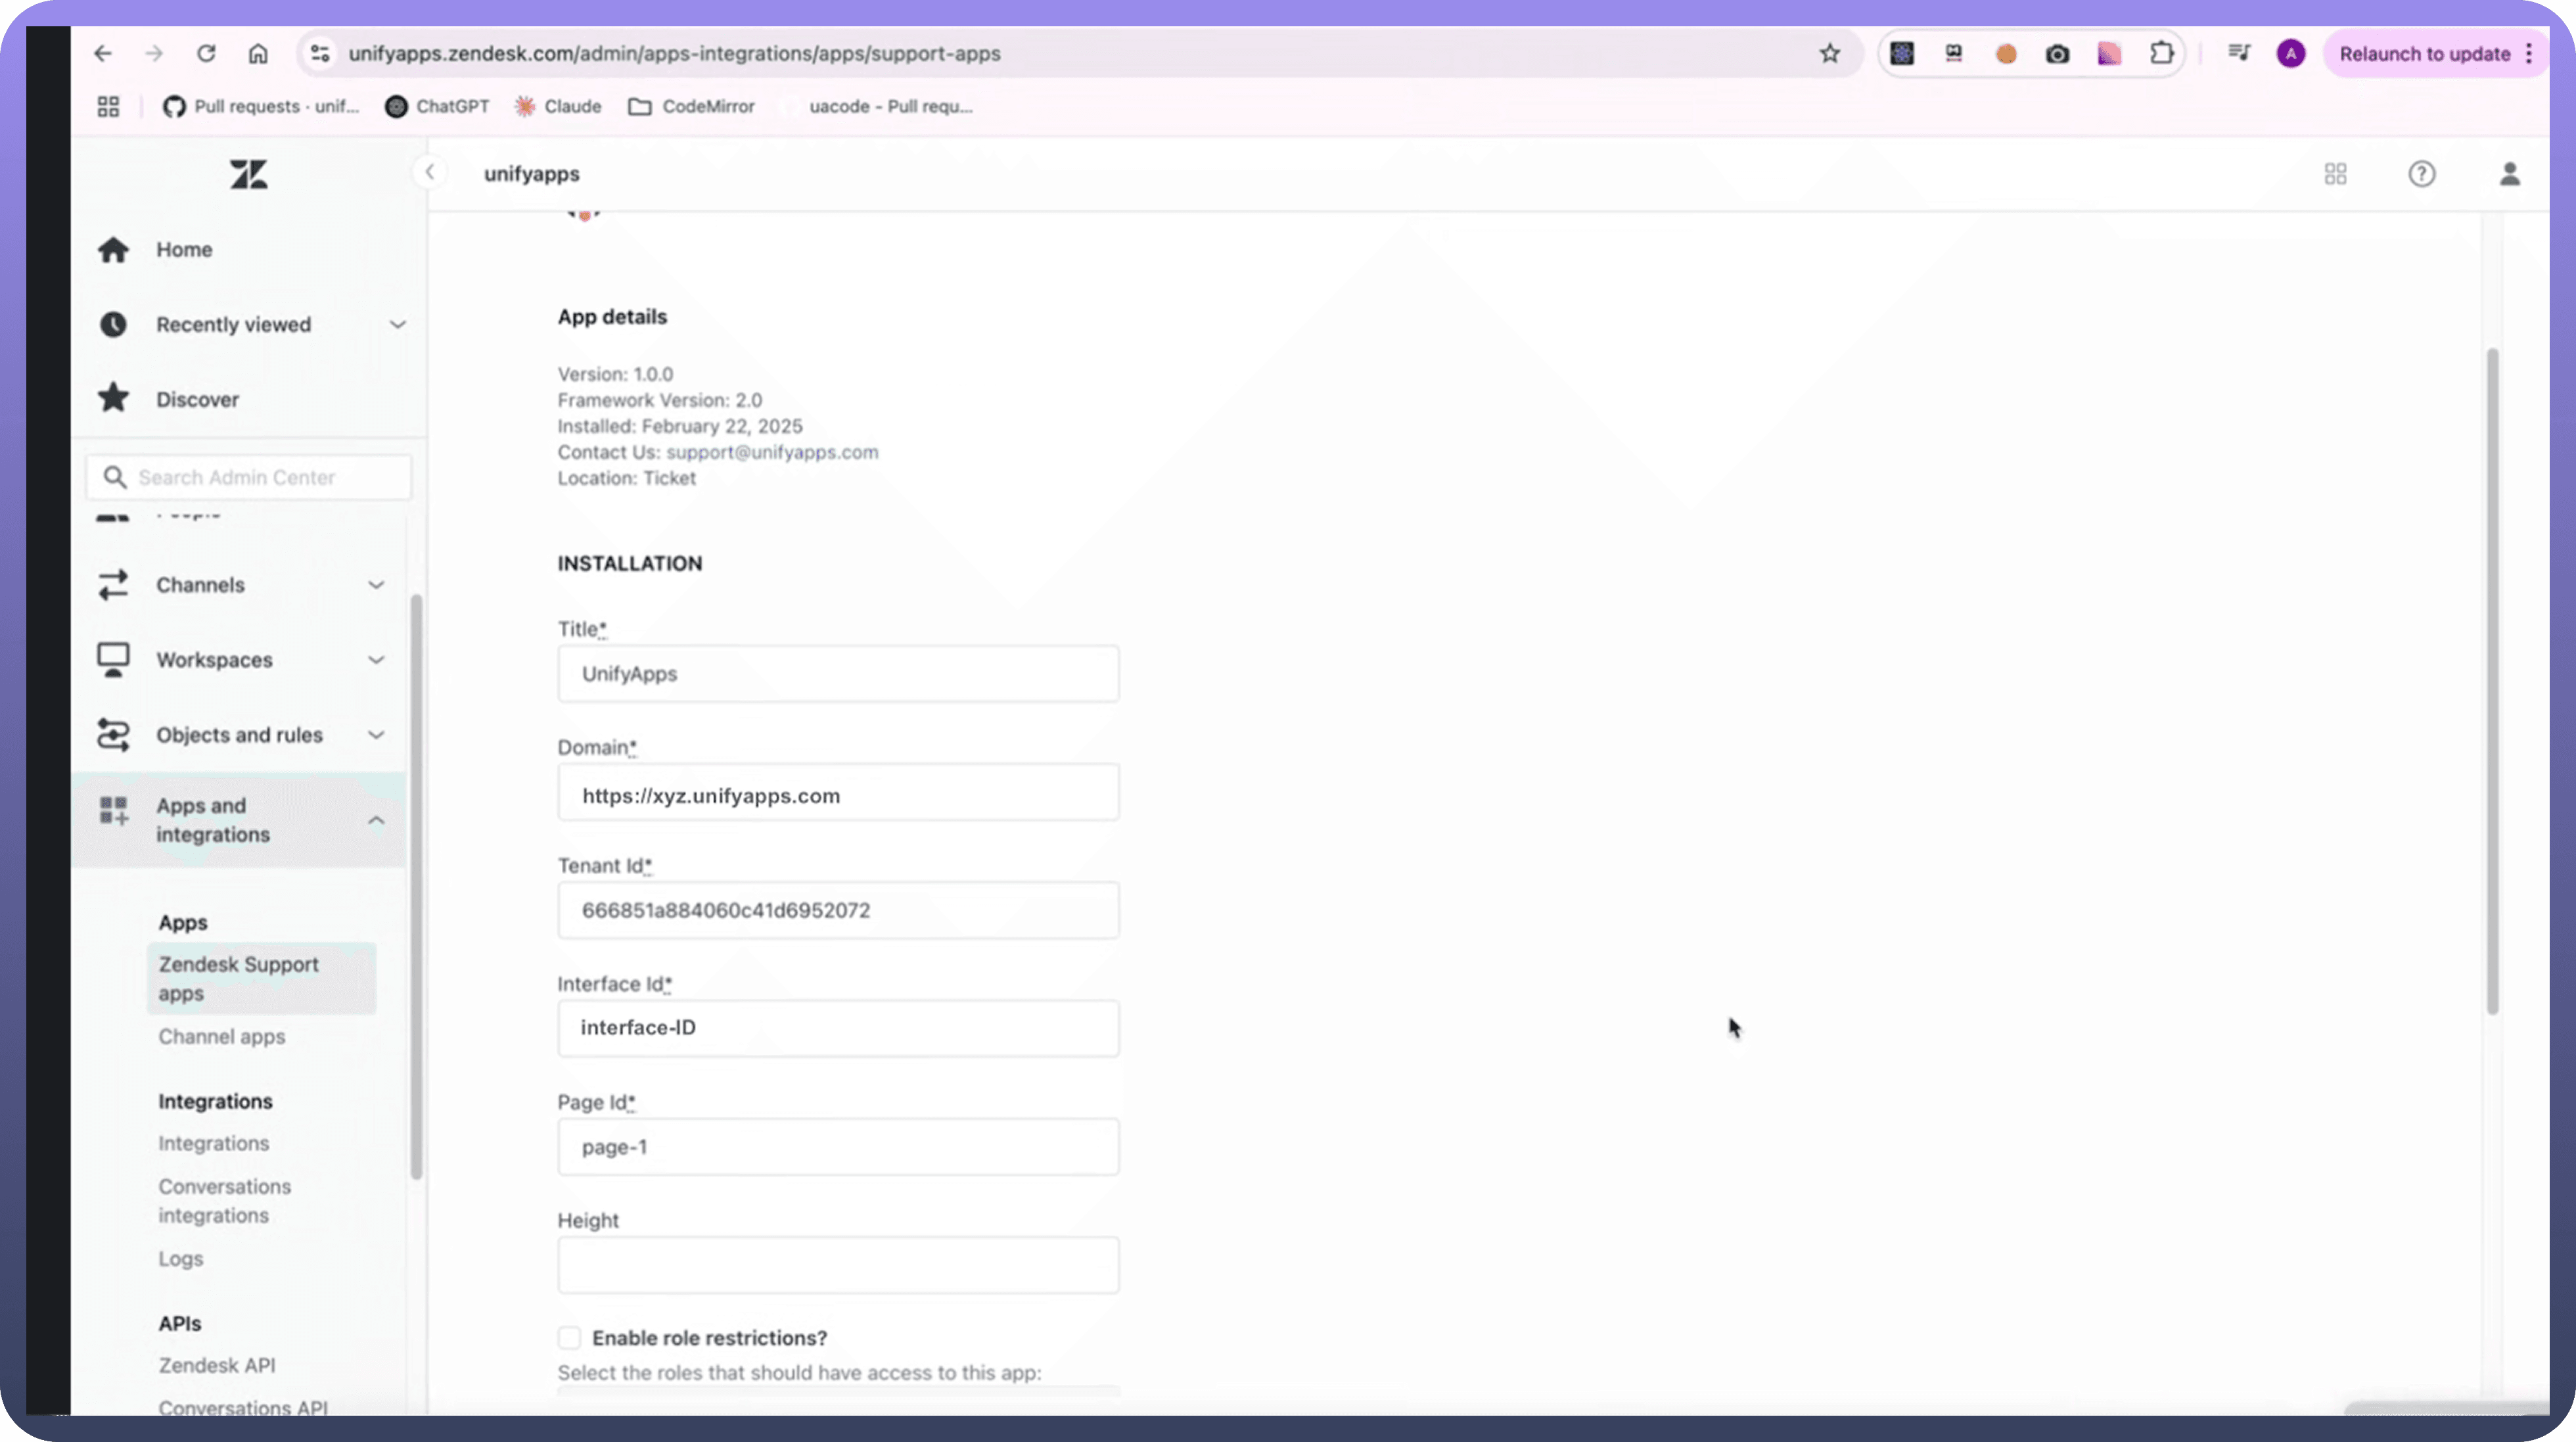
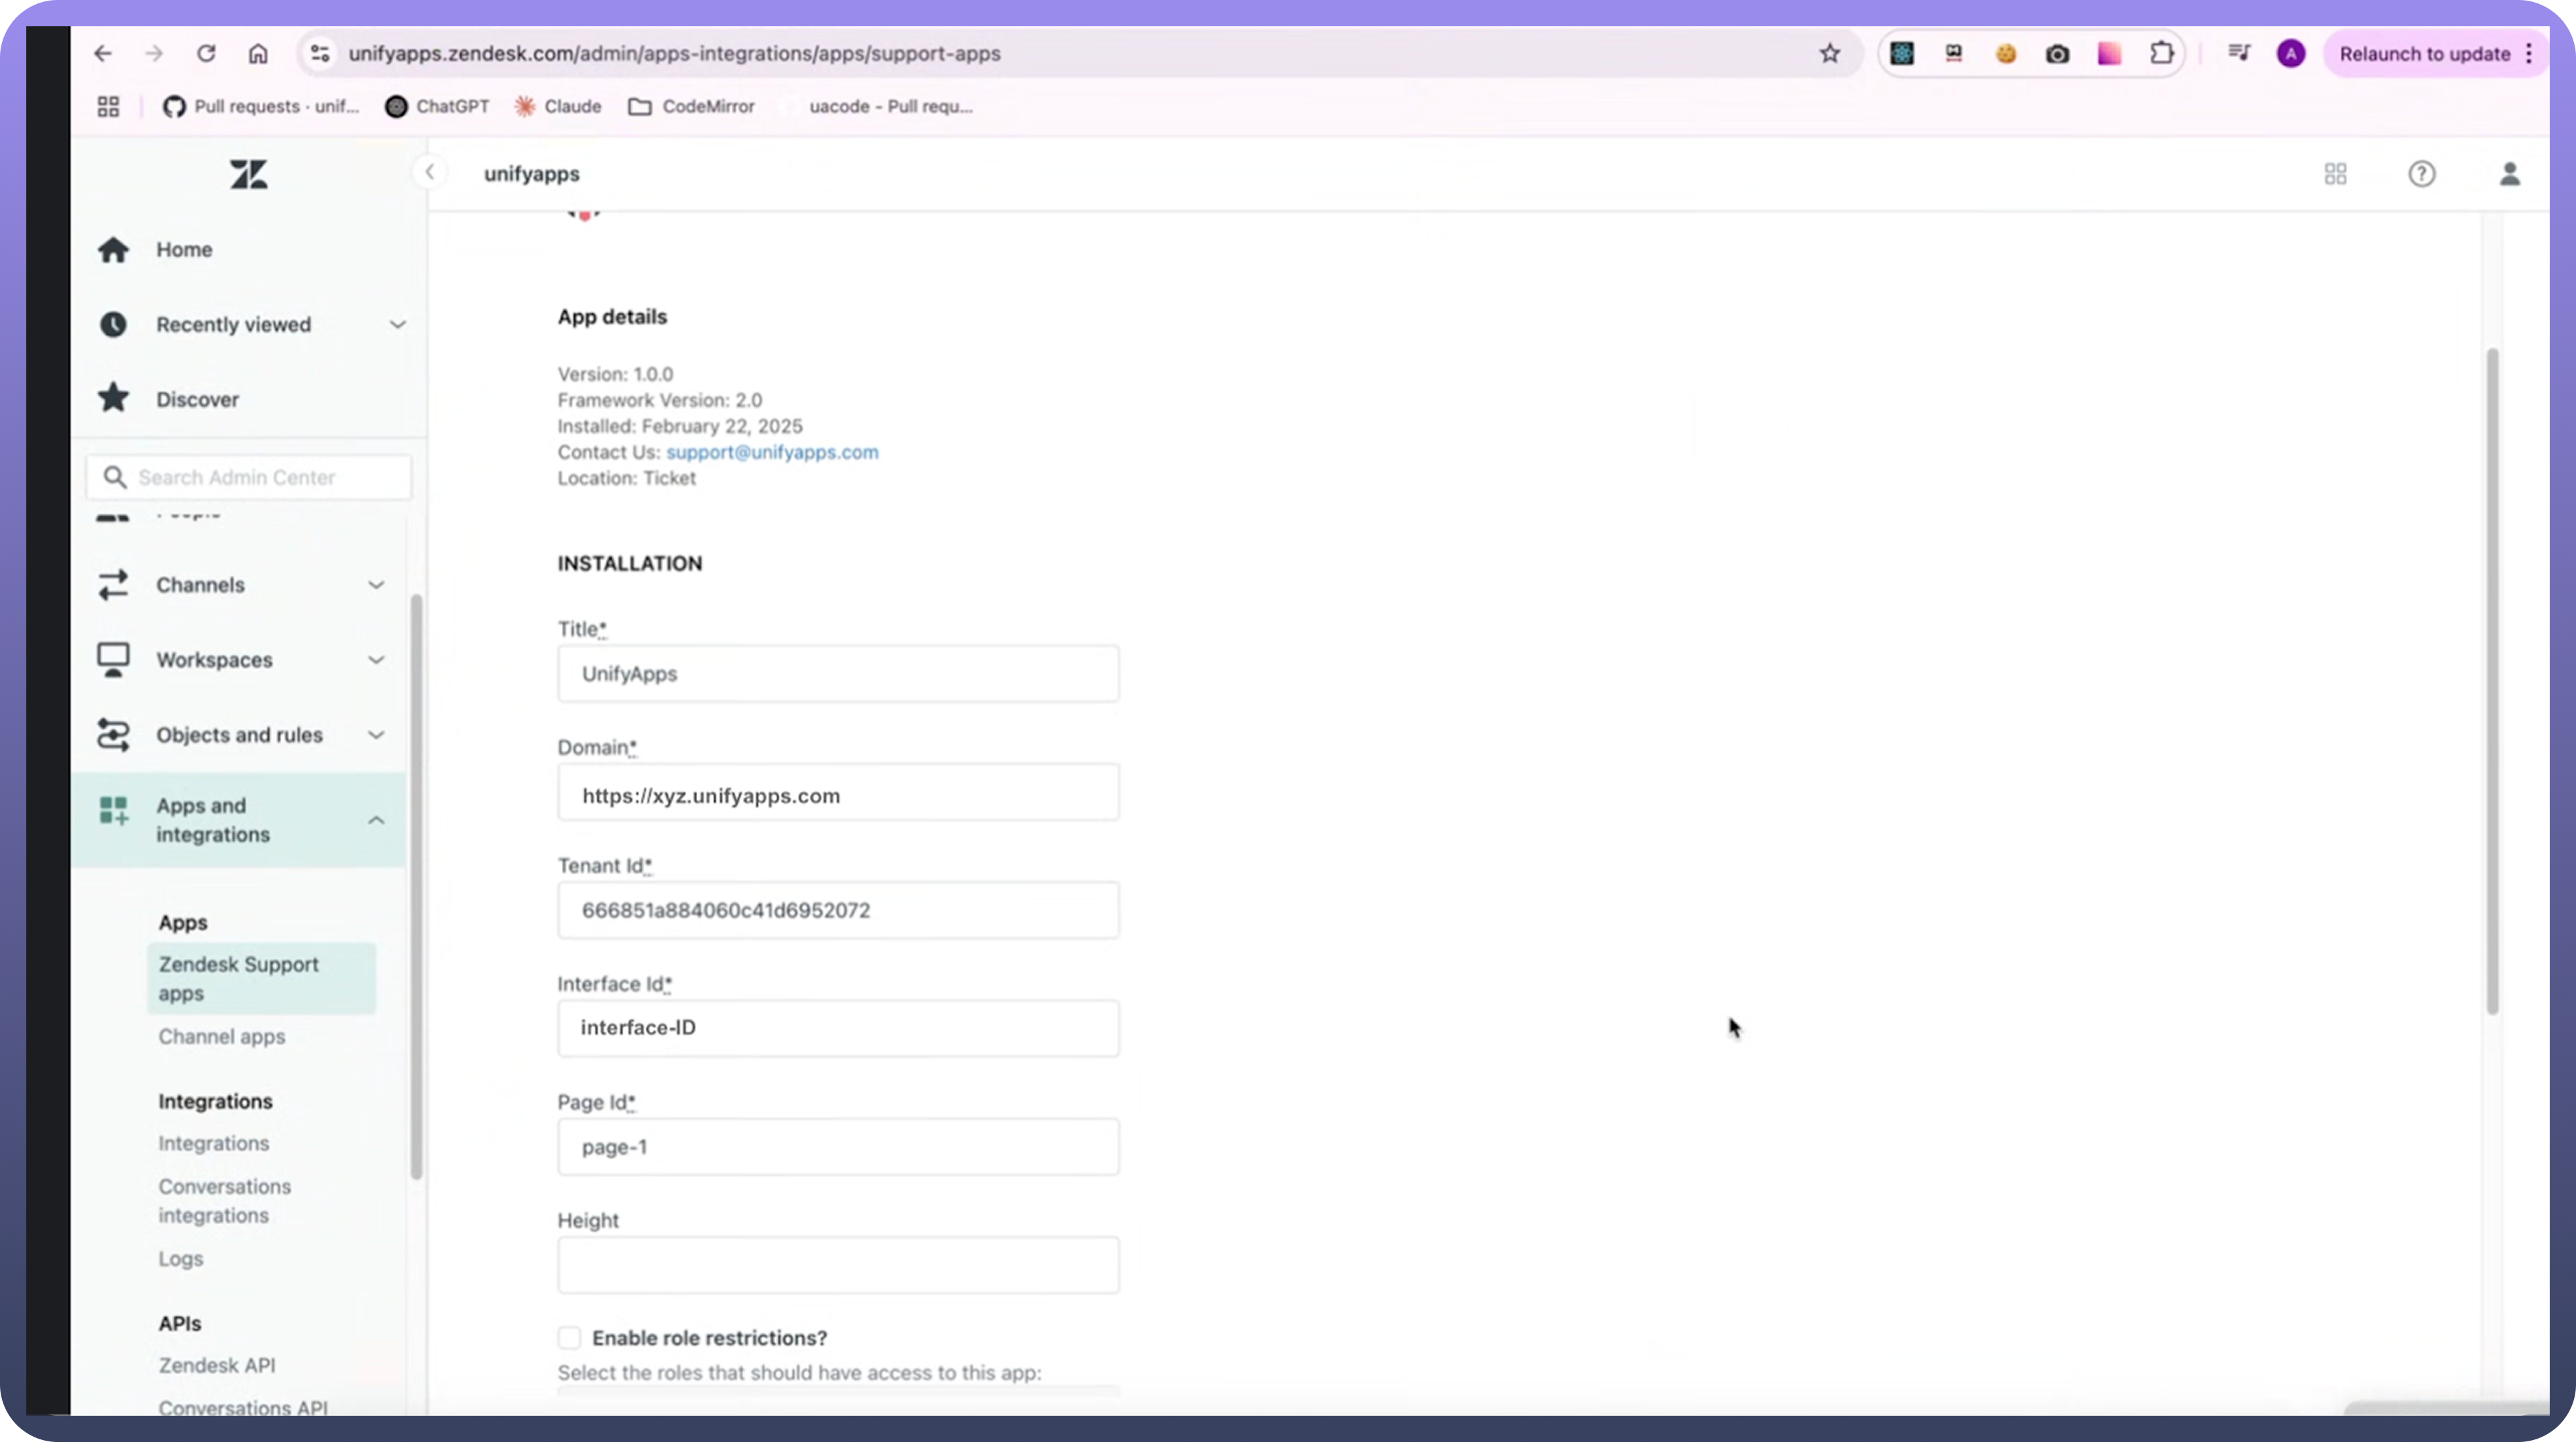
Go to
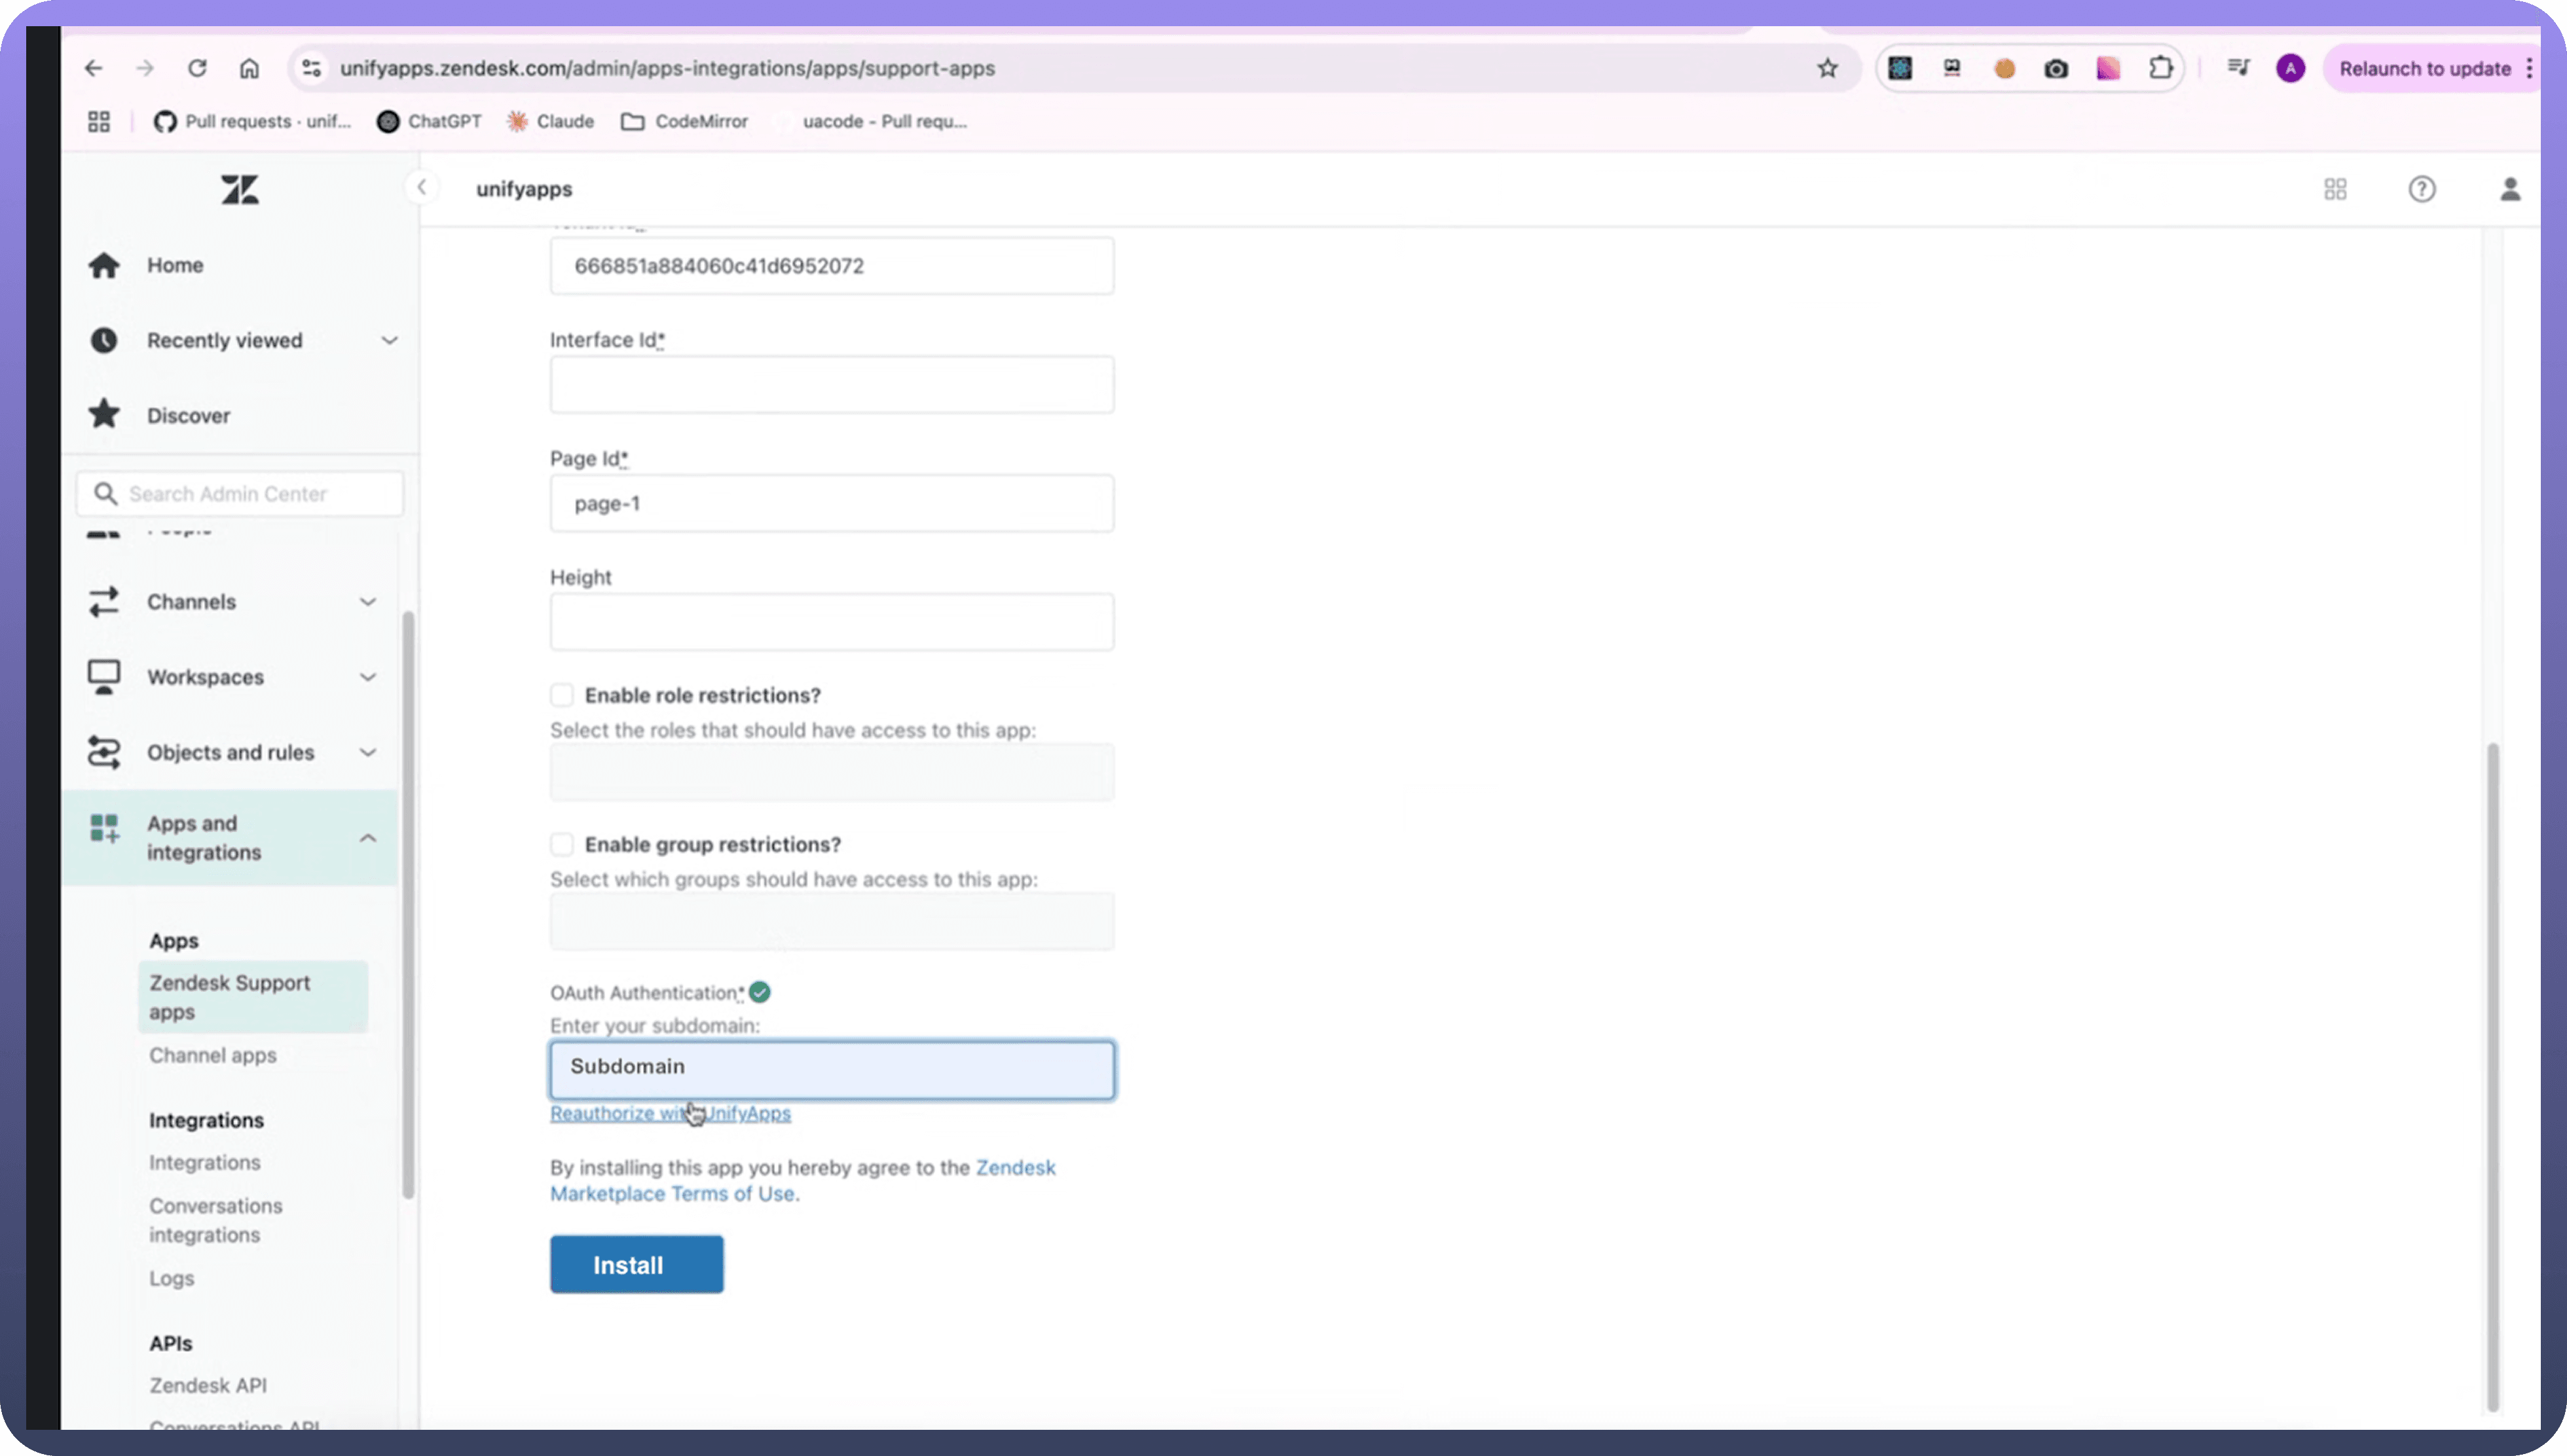
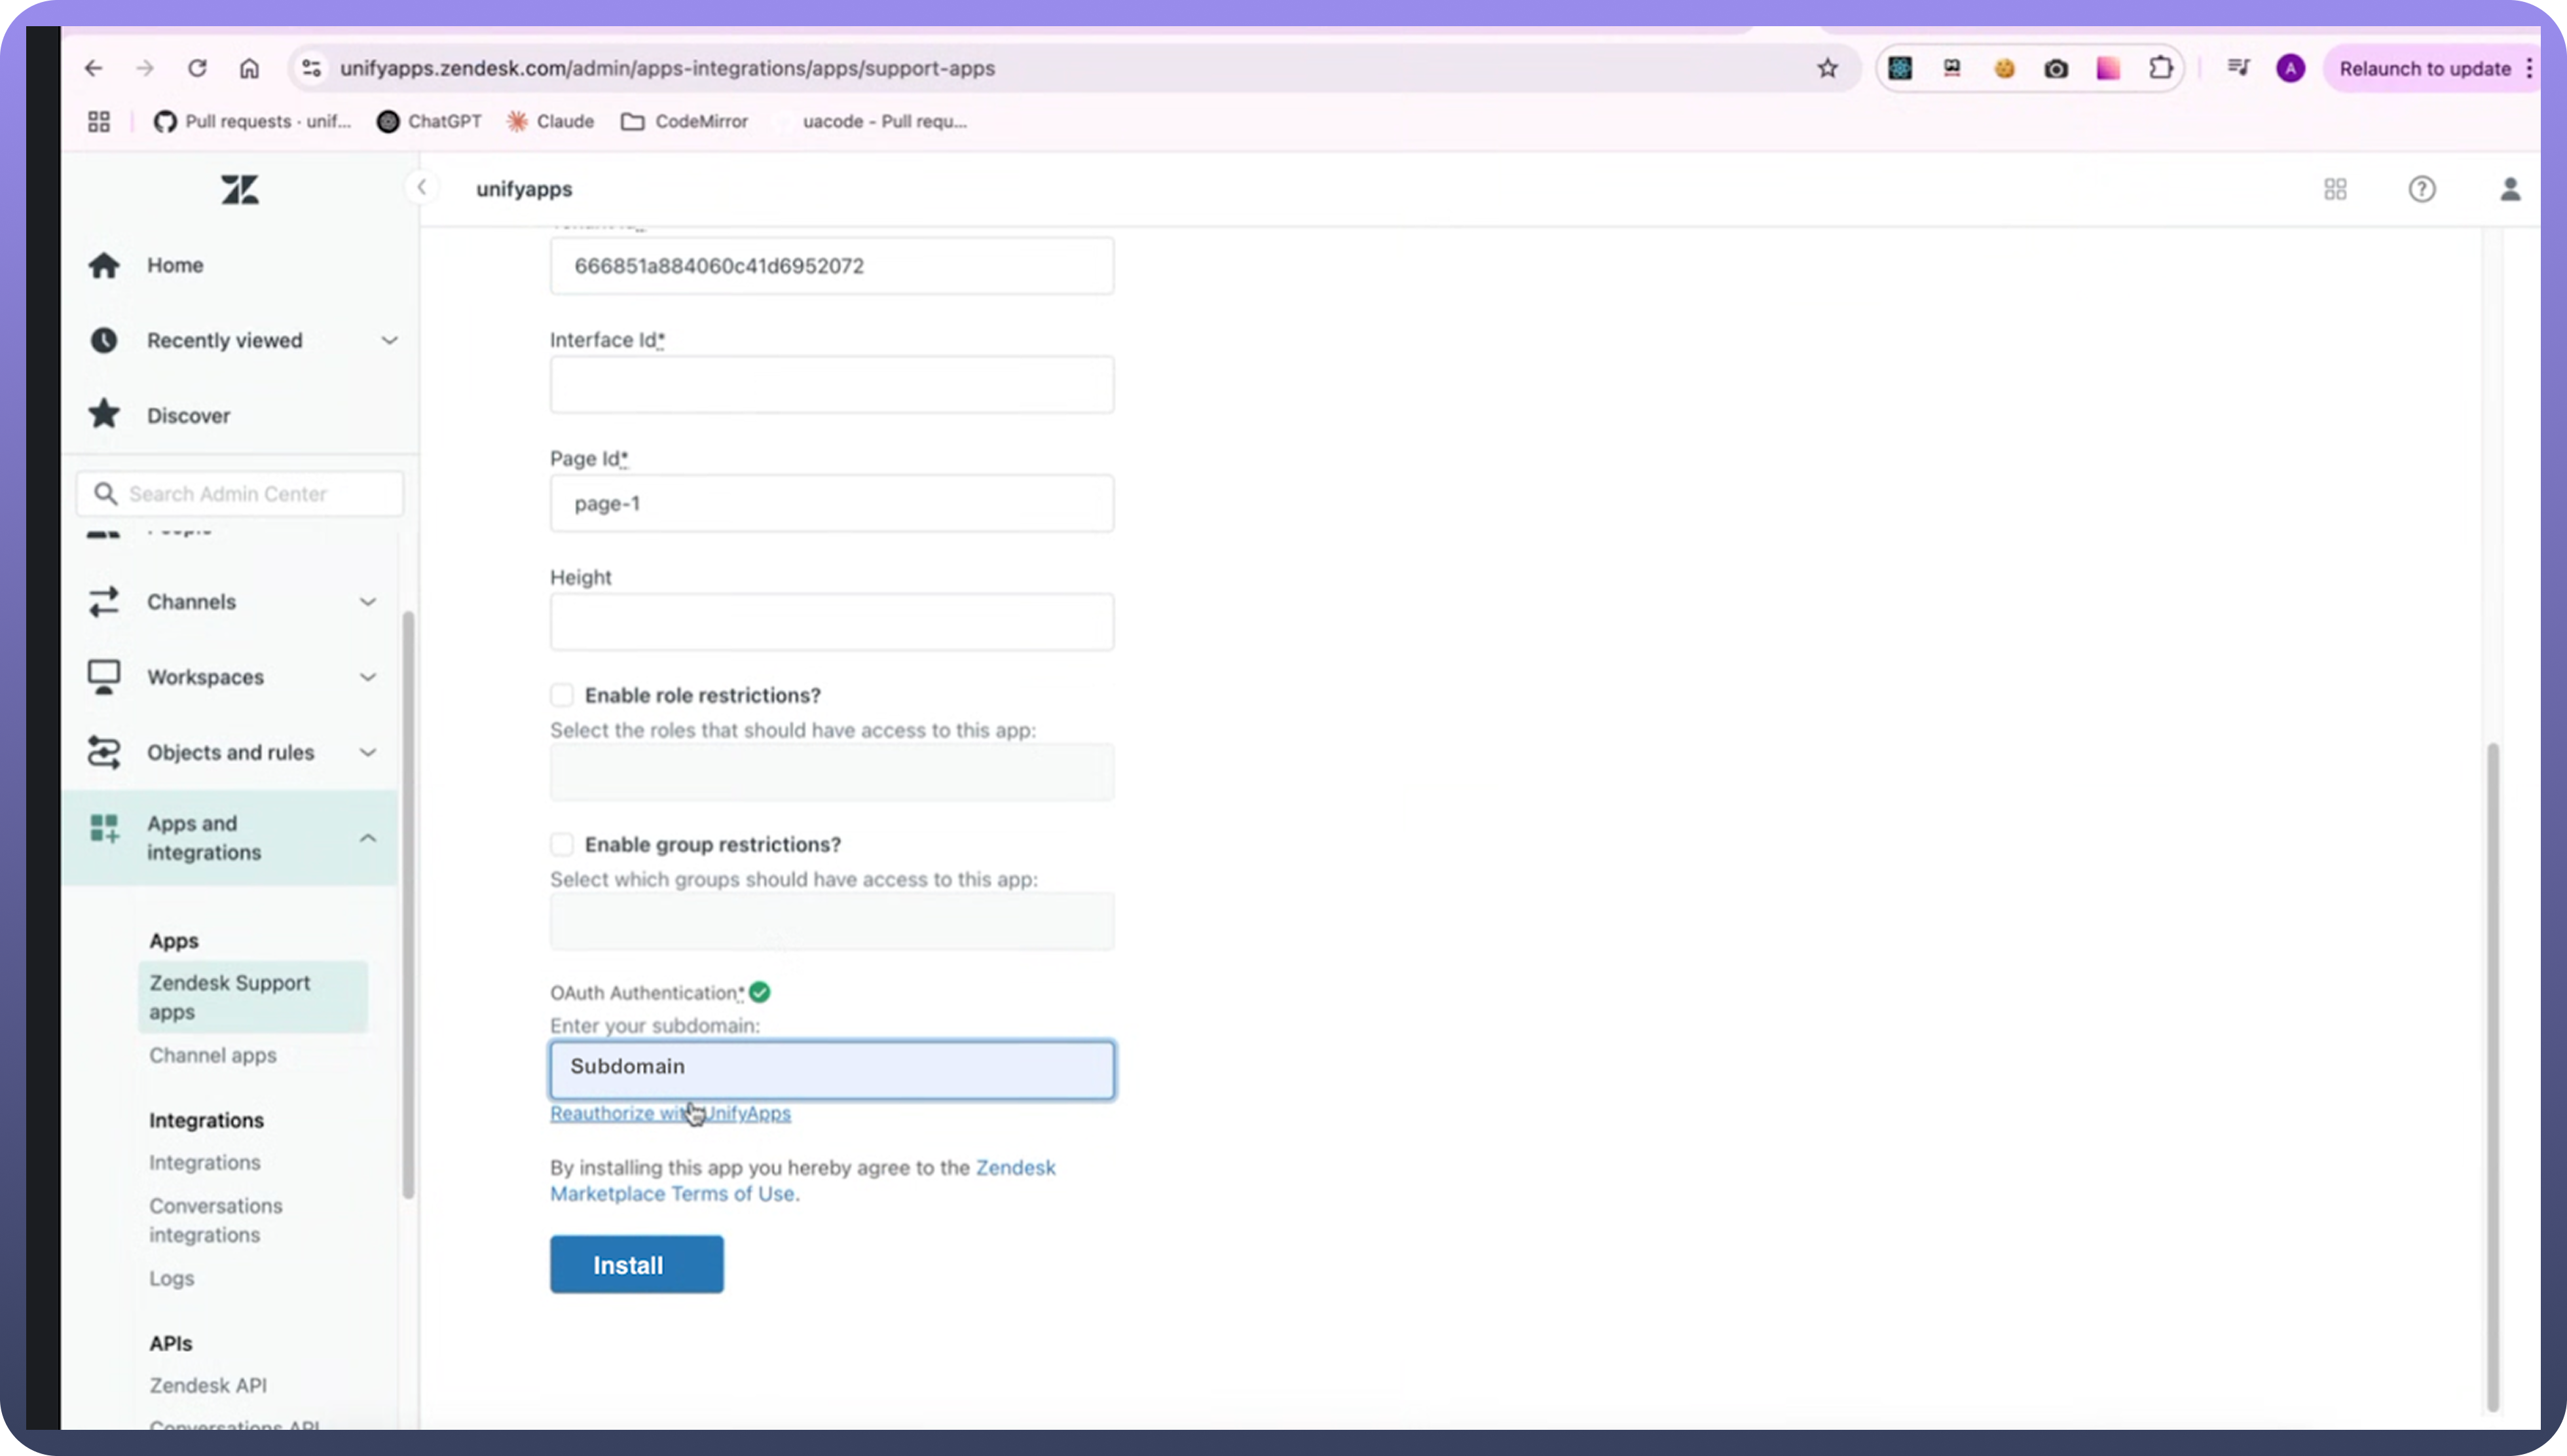
Apps and Integrationsunder Zendesk Support Apps.Fill in the required configuration details:
Title– Provide a relevant title for the integration.Domain– Enter your UnifyApps domain (e.g., xyz.prod.unifyapps.com).Tenant ID– Specify the tenant ID associated with your environment.Interface ID– Enter the interface ID corresponding to your application.Page ID– Provide the specific page ID to be used.Height– Adjust the height settings for the embedded app.Role-Based Access– Enable role restrictions and select which roles should have access to this app.Group-Based Access– Enable group restrictions and choose the groups allowed to use the app.Authentication– Enter your subdomain and reauthorise with UnifyApps.
Ensure that the
Interface ID,Page ID, andSubdomainalign with your application’s URL structure:Click on Install.
Step 4: Place the Embedded Apps
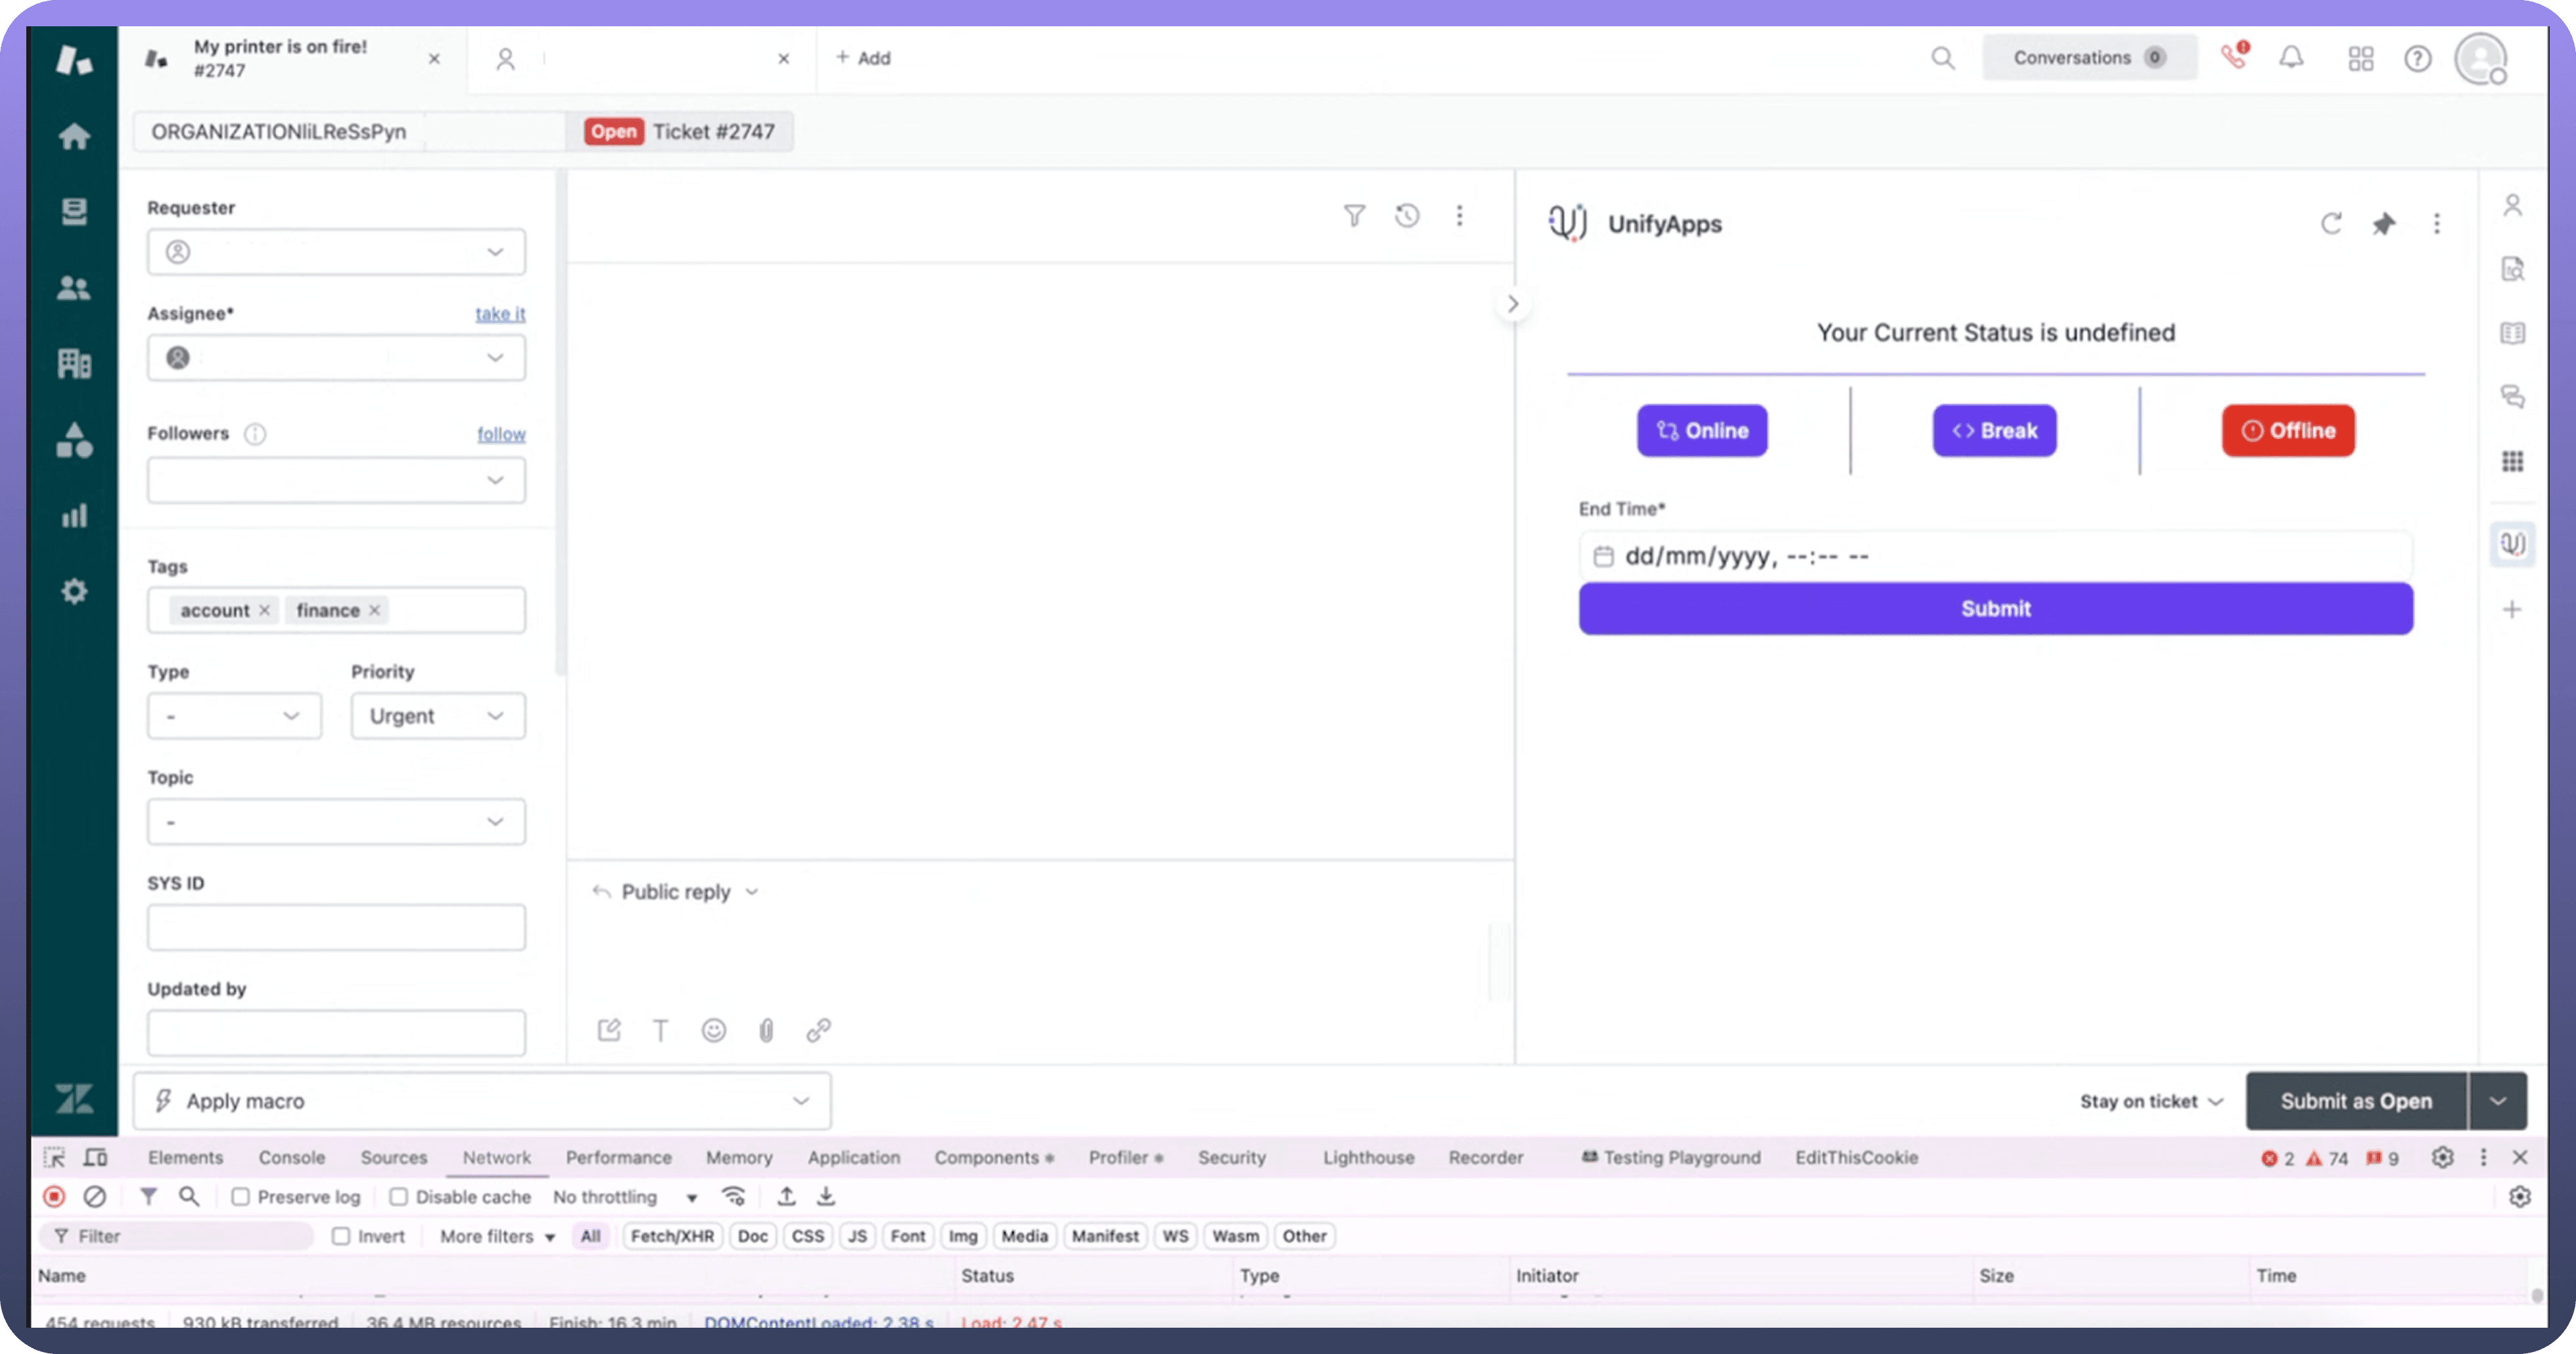
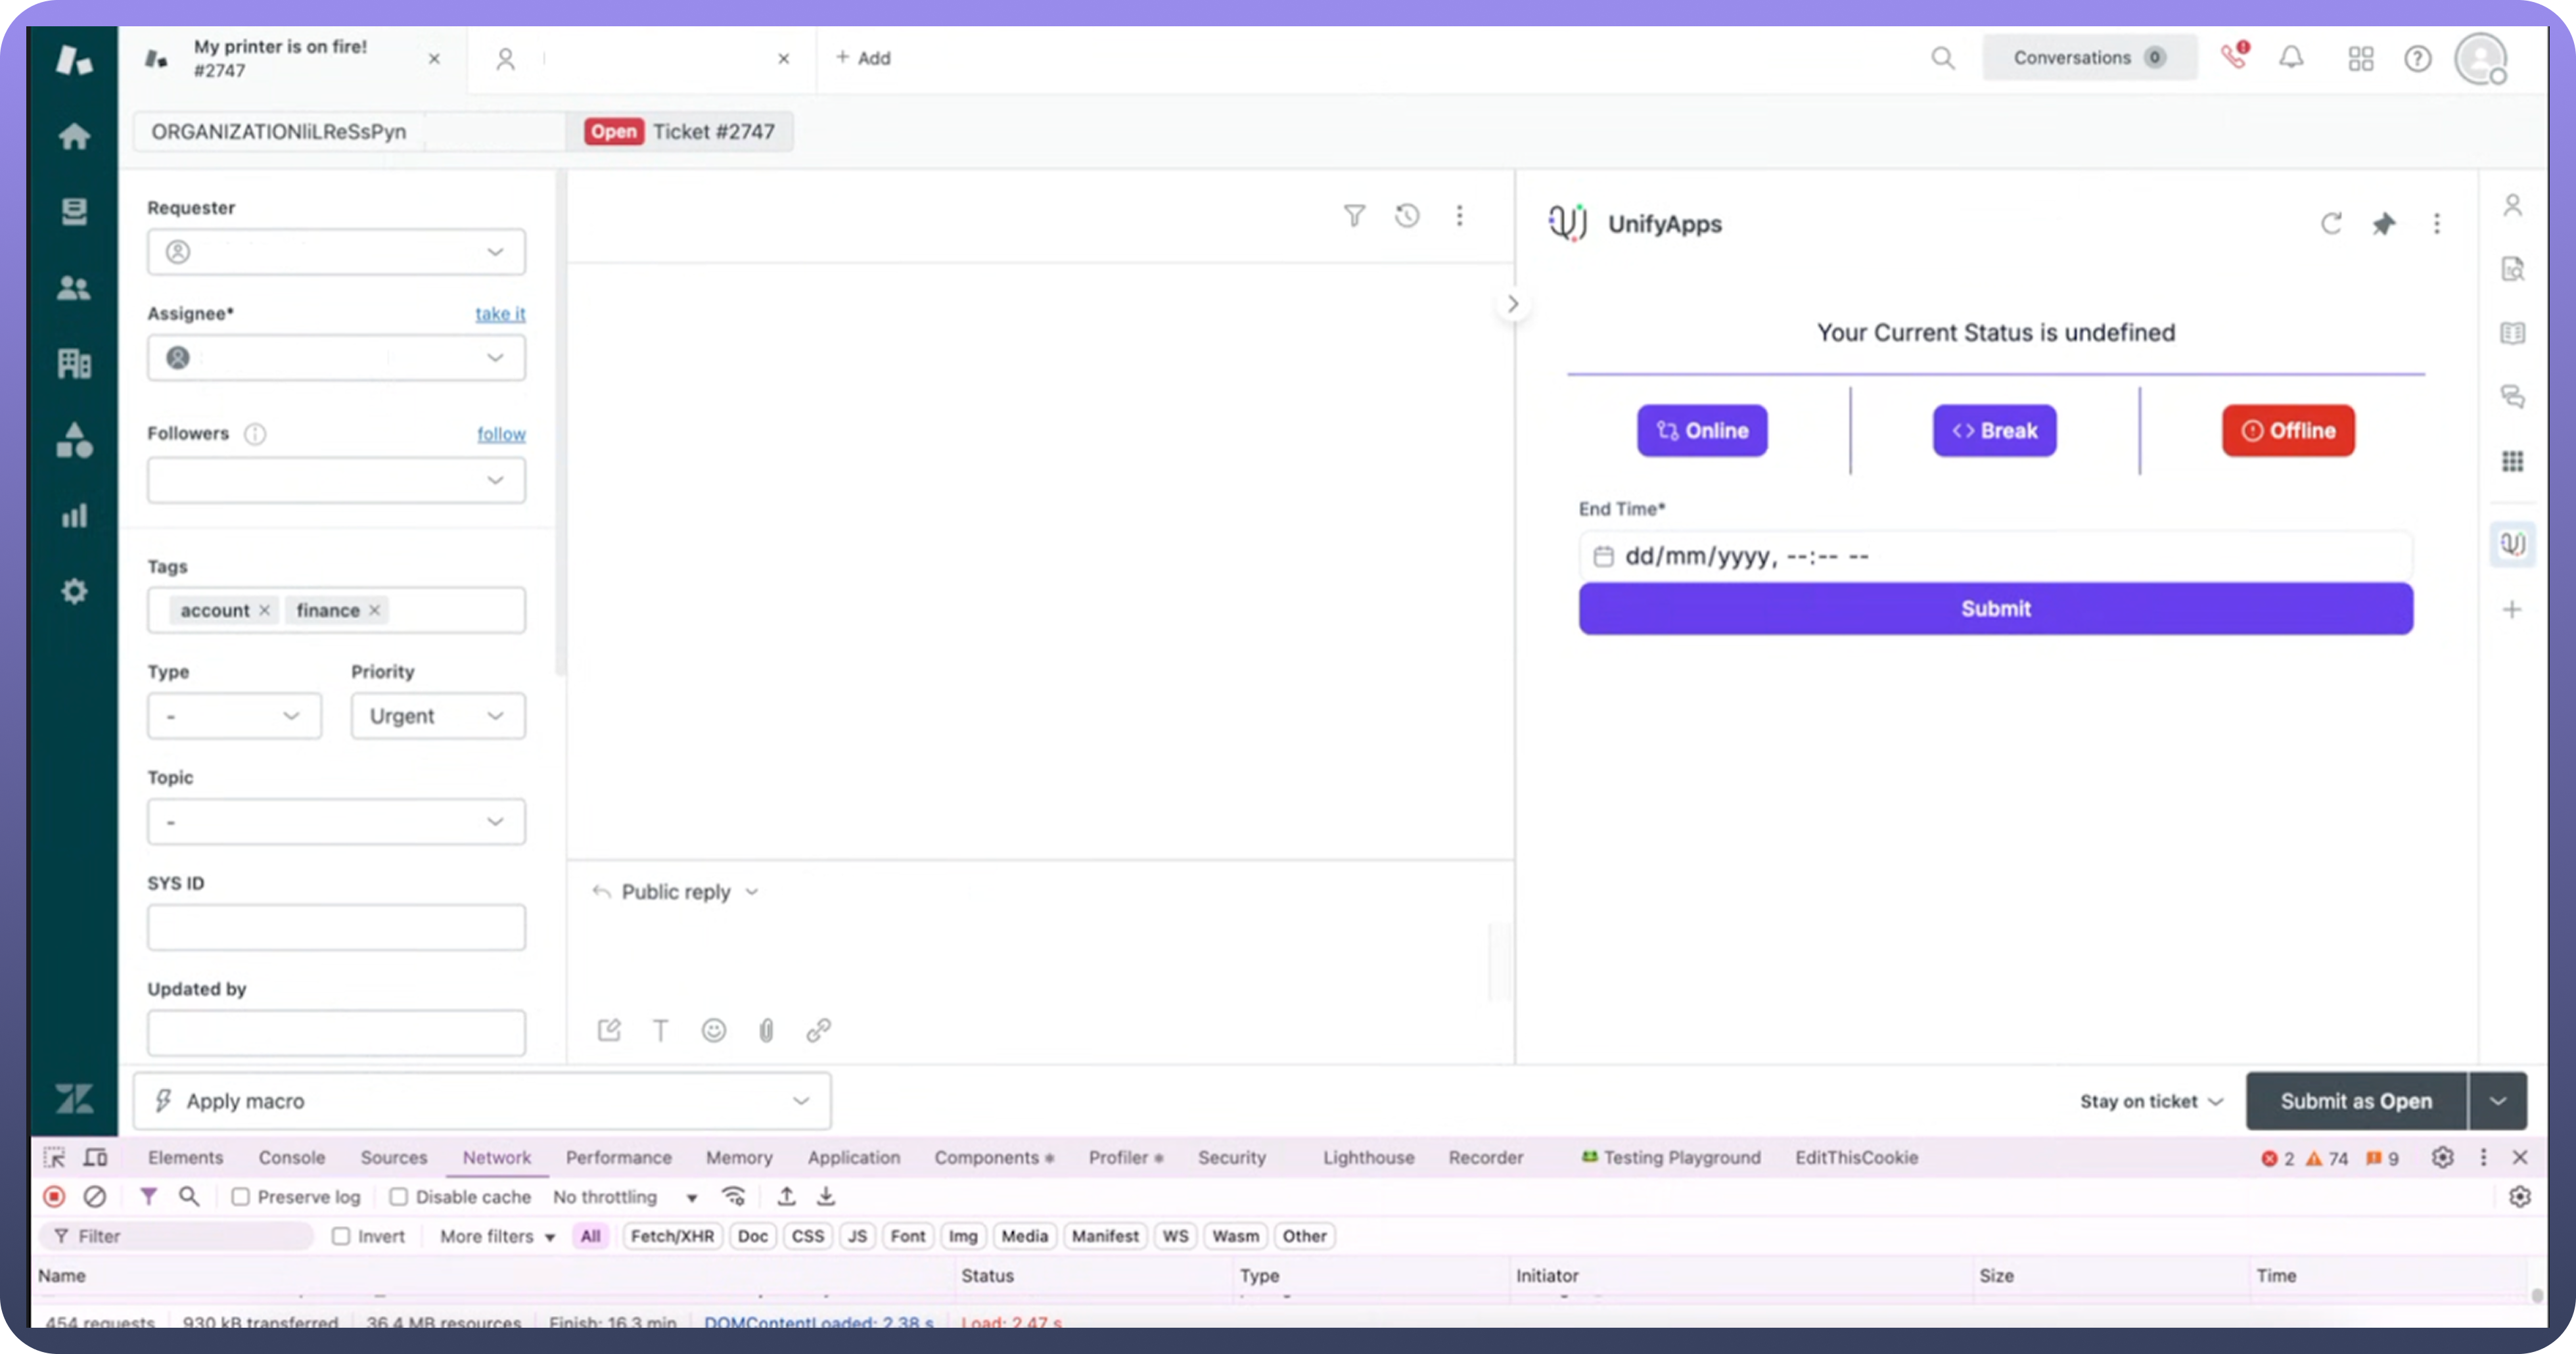
Position the UnifyApps embedded applications in your Zendesk environment based on your business needs.
Best Practices
Generate a session ID by creating an authentication token for UnifyApps on the server side, behind your local authentication system
Maintain separate environments for production and development, and configure them to point to their respective UnifyApps environments.


