Contents

Cancel

Recommended Articles

  1. unify-apps

    IMAP

    Unify Integrations

    Integrate your app with IMAP to enable seamless email synchronization, real-time access, and enhanced communication workflows.

  2. unify-apps

    Preview Your Work

    Unify Automations

    Effortlessly review & monitor your automation’s performance

  3. unify-apps

    FTP/FTPS

    Unify Integrations

    Connect your app with FTP/FTPS to automate secure file transfers and streamline data exchange across systems.

  4. unify-apps

    Snowflake

    Unify Automations

    Connect to Snowflake for fast, scalable cloud data warehousing and analytics

  5. unify-apps

    Button

    Unify Applications

    Create interactive elements with ease using buttons

  6. unify-apps

    BambooHR

    Unify Automations

    Integrate your app with BambooHR to streamline HR management, automate employee data processing, and enhance onboarding workflows

  7. unify-apps

    Build your first automation

    Unify Automations

    Learn how to build your automation step by step

  8. unify-apps

    User Management

    Unify Applications

    Efficiently manage user roles and permissions

  9. unify-apps

    Microsoft Teams

    Unify Automations

    Connect your app with Microsoft Teams to enhance communication, automate workflows, and foster collaboration across your organization

  10. unify-apps

    Jira

    Unify Automations

    Use Jira to plan, track, and manage your agile and software development projects

  11. unify-apps

    Google Calendar

    Unify Integrations

    Integrate your app with Google Calendar to streamline scheduling, automate event management, and improve team coordination

  12. unify-apps

    SAP HANA

    Unify Integrations

    Connect your app with SAP HANA to leverage in-memory computing for real-time data processing and advanced analytics at scale.

  13. unify-apps

    Encoding

    Unify Data

    Convert data effortlessly with advanced encoding

#
Unify Applications
Logo
Define Layout of Interface
Logo
Stack

Stack

Logo

3 mins READ

Introduction

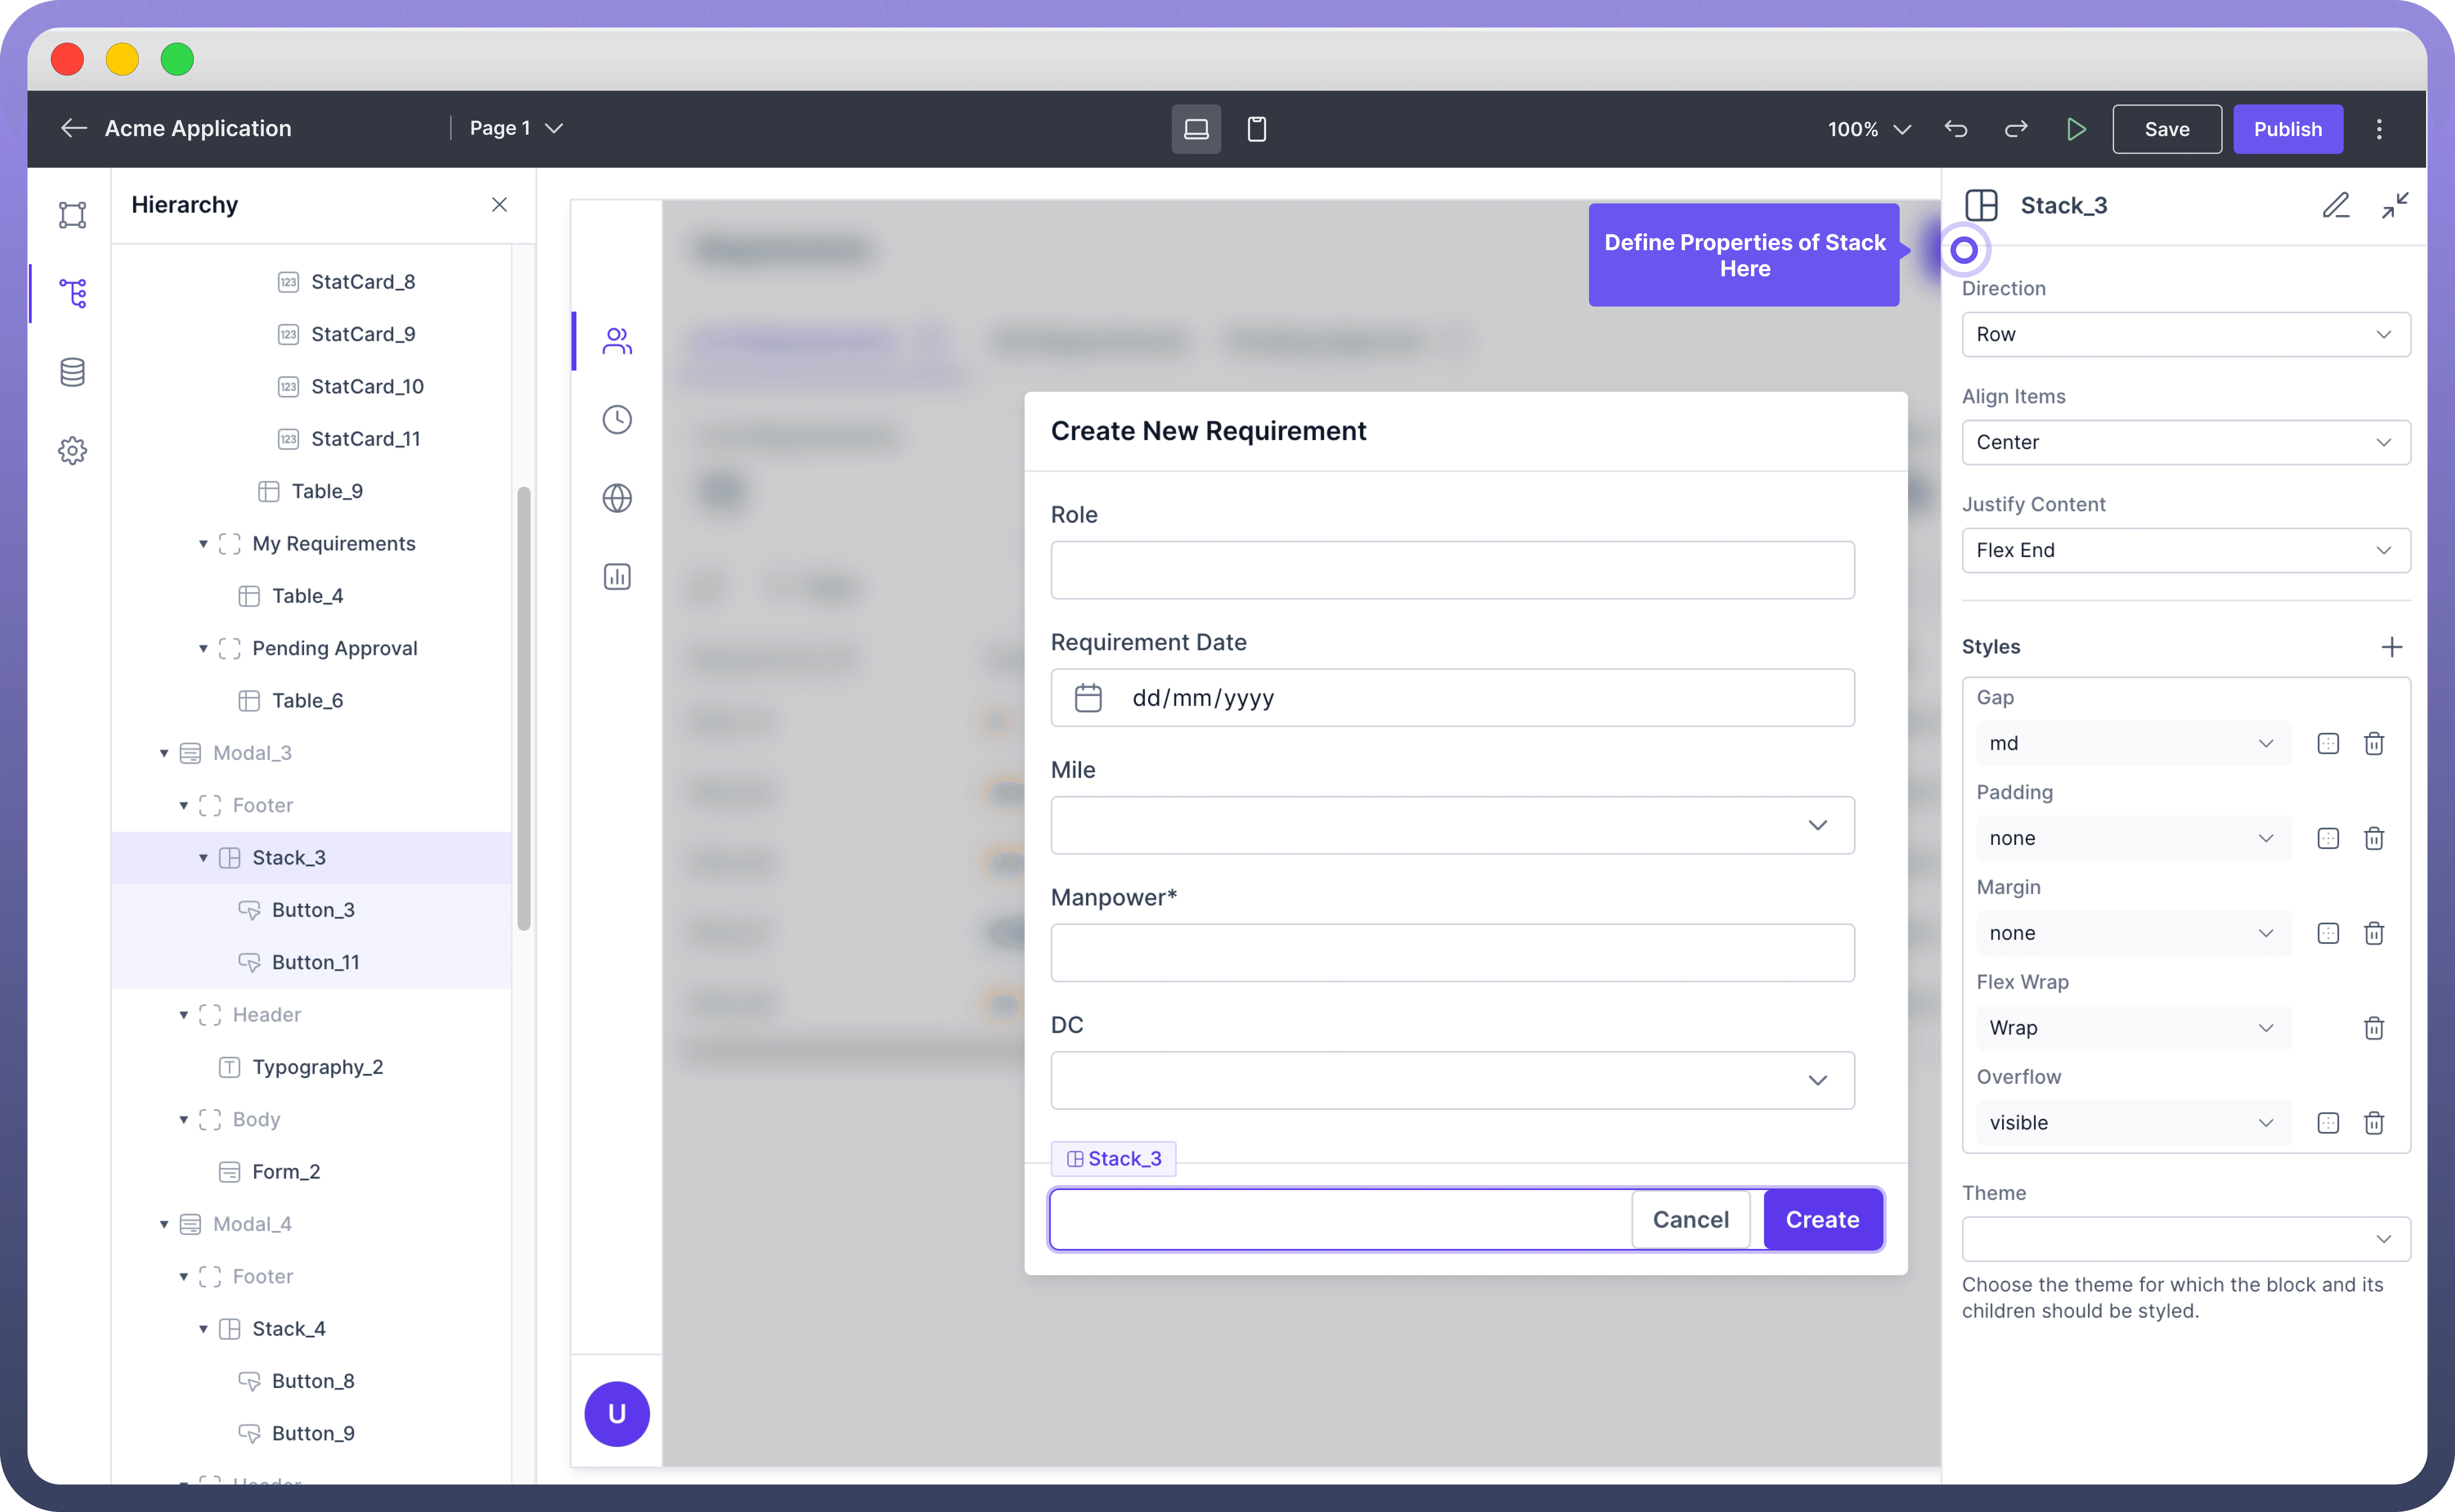
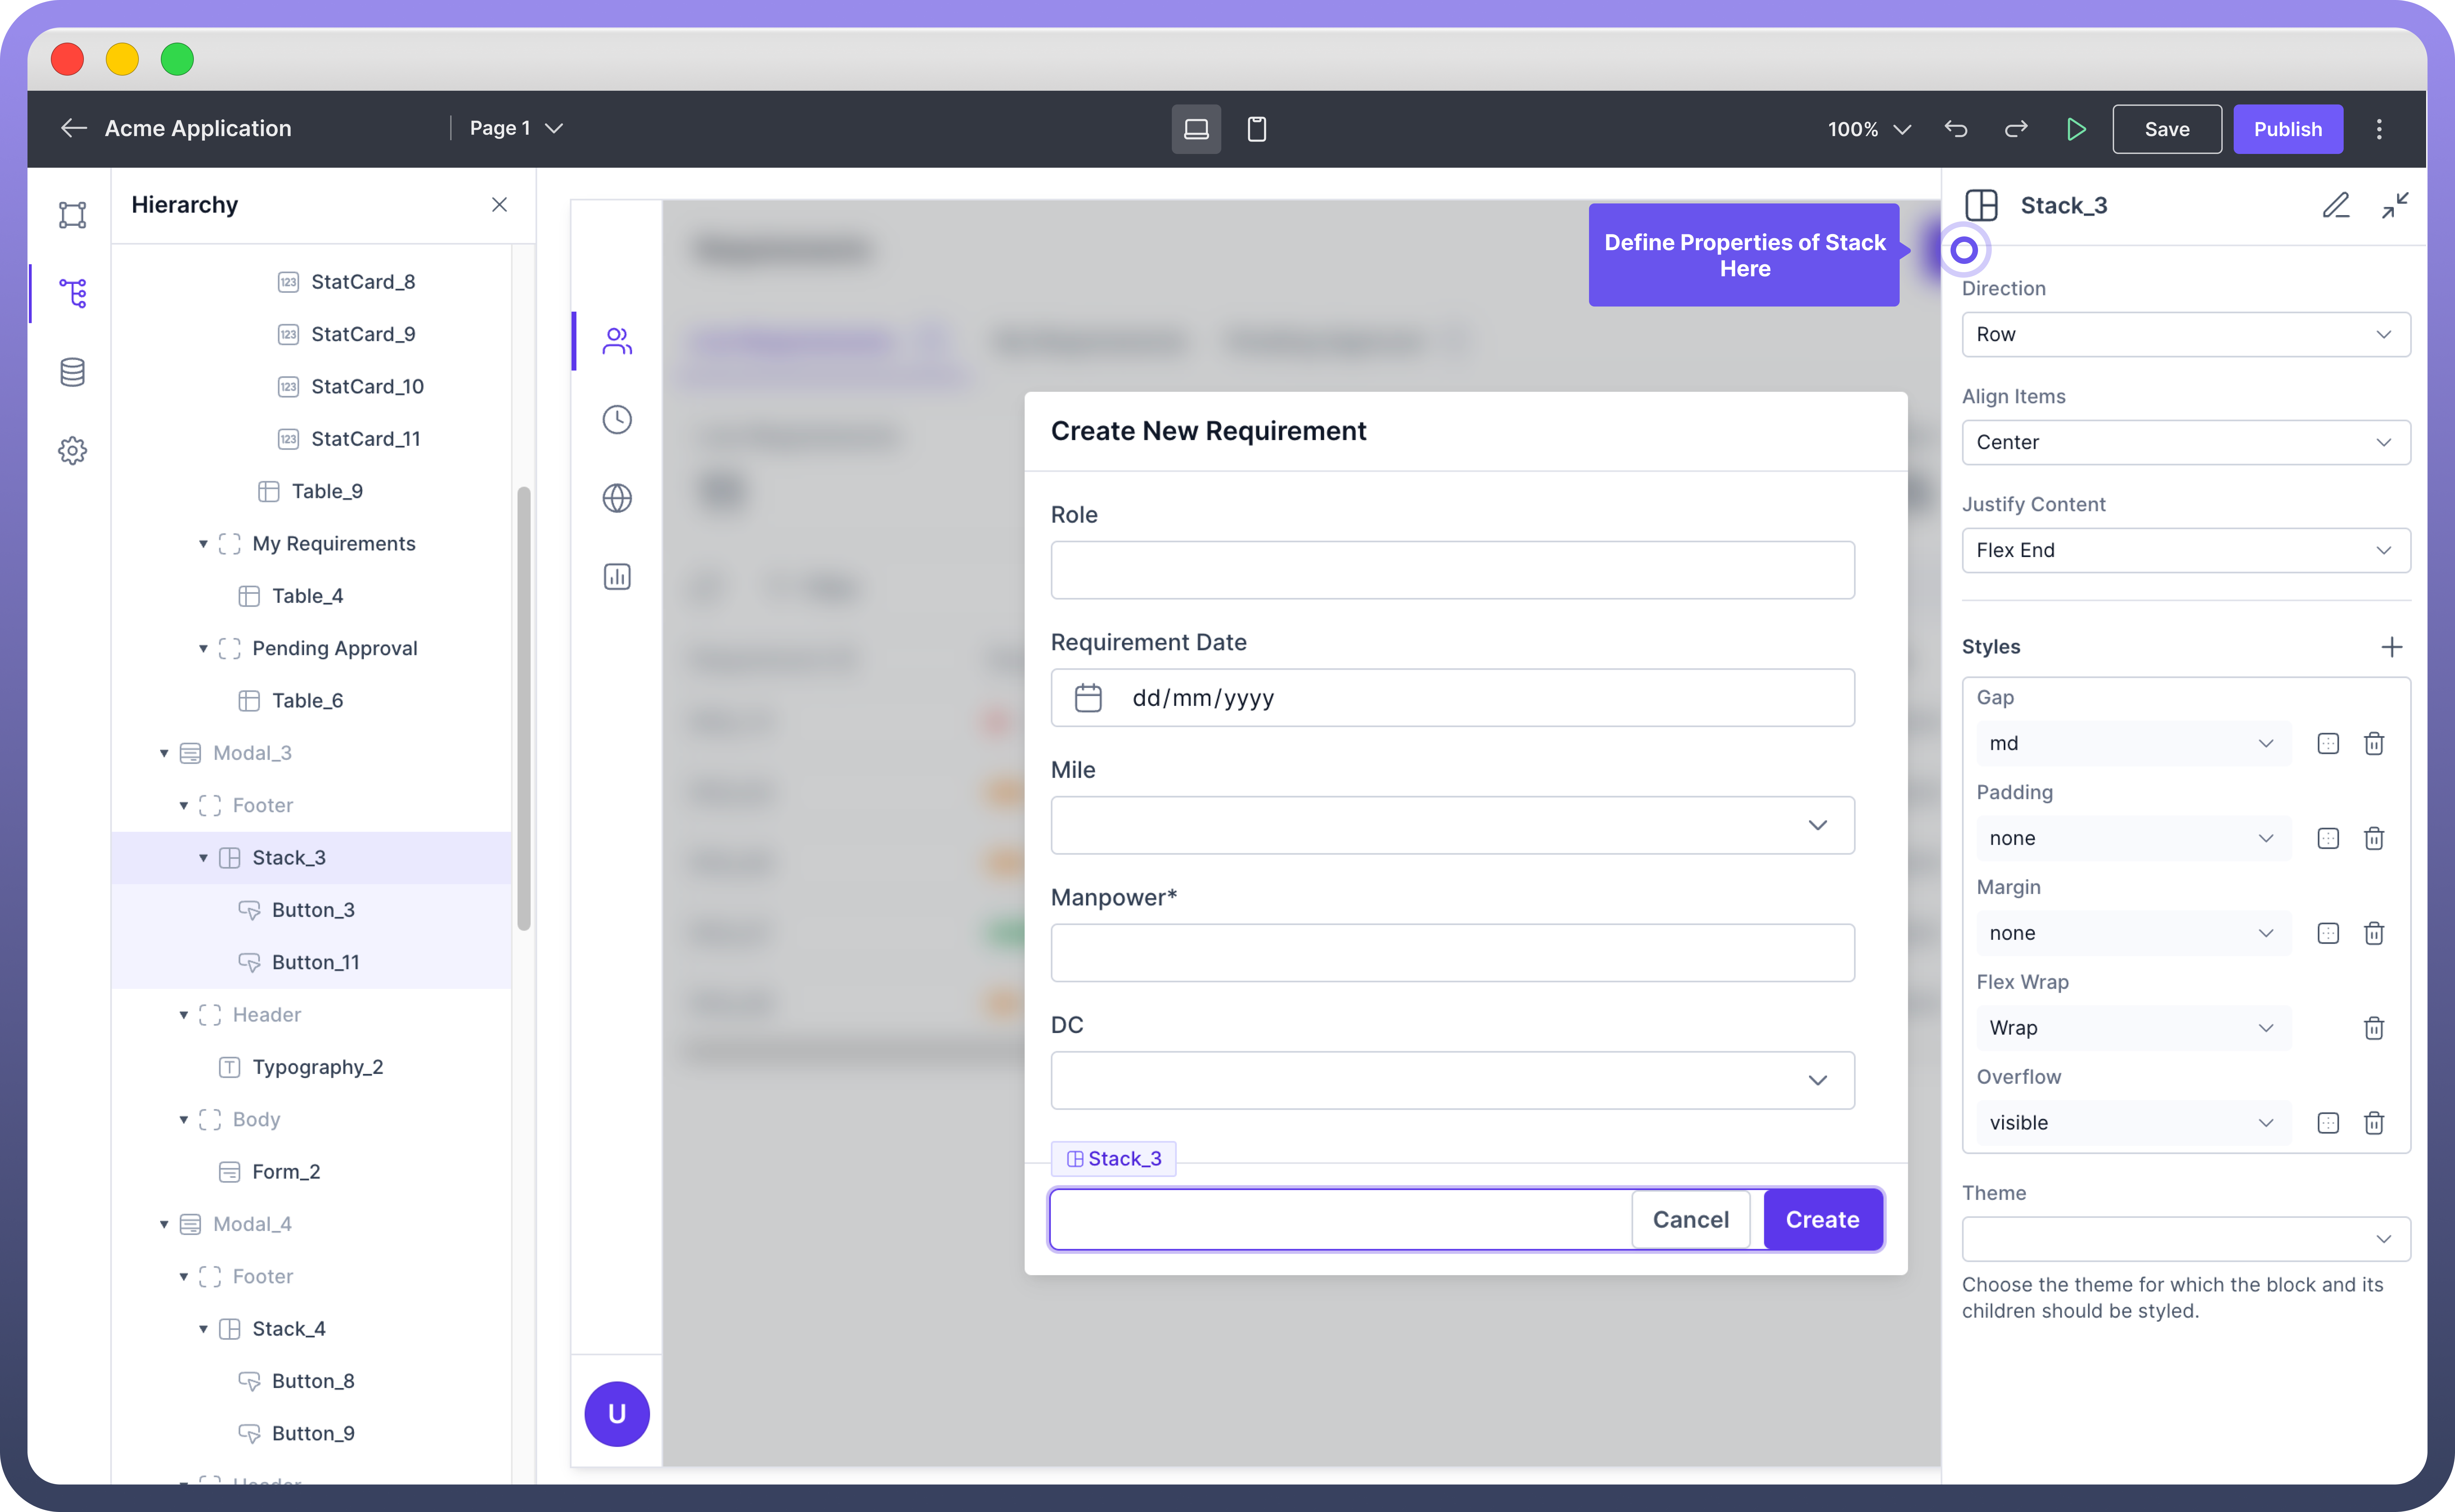
Stack is a flexible UI component that groups and organizes components vertically or horizontally.

Stacks automatically manage spacing and alignment between child elements and allow an indefinite number of components within them.
Image
Image

Create Stacks with Child Elements

  • Select the Stack: Select the Stack component from the component panel. Click on the Stack component within your layout where you want to add child components.

  • Add Component: In the hierarchy panel, click on the "Add Component" button next to the selected Stack.

  • Choose Child Components: From the component panel, choose the desired components you want to add as children to the Stack. You can select multiple components such as images, text, buttons, or other UI components.

    Image
    Image

Organize Child Elements

Any child components within an stack can be arranged using 3 settings given in the table below:

Setting

Description

Direction

You can choose between vertical (Column) or horizontal (Row) stacking.

This setting determines how the child components are arranged within the Stack.

Align Items

This setting allows you to align child components along the cross axis.

Options include Flex Start, Flex End, Center, Baseline, and Stretch.

Justify Content

This setting aligns child components along the main axis.

Options include Flex Start, Flex End, Center, Space Between, Space Around, and Space Evenly.

Style your Stack

Styling a Stack component allows you to control the appearance and layout of the child components within it.

Below are the key properties you can configure, along with their descriptions.

Property

Description

Gap

Set the space between child components within the Stack.

Options typically include none, small, medium, and large.

Padding

Add space inside the Stack's border to create separation between the content and the border.

Options typically include none, small, medium, and large.

Margin

Set the outer space around the Stack to create distance between it and surrounding elements.

Options typically include none, small, medium, and large.

Flex Wrap

Control whether child components should wrap onto multiple lines or remain on a single line.

Options include No Wrap and Wrap.

Overflow

Define how content that overflows the Stack's box should be handled.

Options include visible, hidden, and scroll.

Theme

Choose the theme for which the Stack and its children should be styled.

Options typically include Light and Dark.

Thumbnail

Note

The Stack component’s Overflow property is particularly useful for handling content that exceeds the available space, ensuring your layout remains tidy.

Best Practices

  1. Use Stacks for Simplicity: When you need a straightforward layout of components, use the Stack component for simplicity and ease of maintenance.

  2. Combine with Other Layout Components: Use Stacks in combination with Containers and Cards to create more complex and structured layouts.

  3. Consistent Spacing: Utilize the Gap property to ensure consistent spacing between elements, providing a cleaner look.

FAQs

Can I nest Stack components?

Yes, you can nest Stack components within each other to create more complex layouts.

Can I align items differently in nested Stack components?

Yes, each Stack component can have its own alignment settings, allowing for varied and customized layouts.