Overview
The Icon Button is used when you want an icon that also acts like a button, making it clickable and interactive
It helps users quickly understand the action they can take by just looking at the icon.


Key Properties
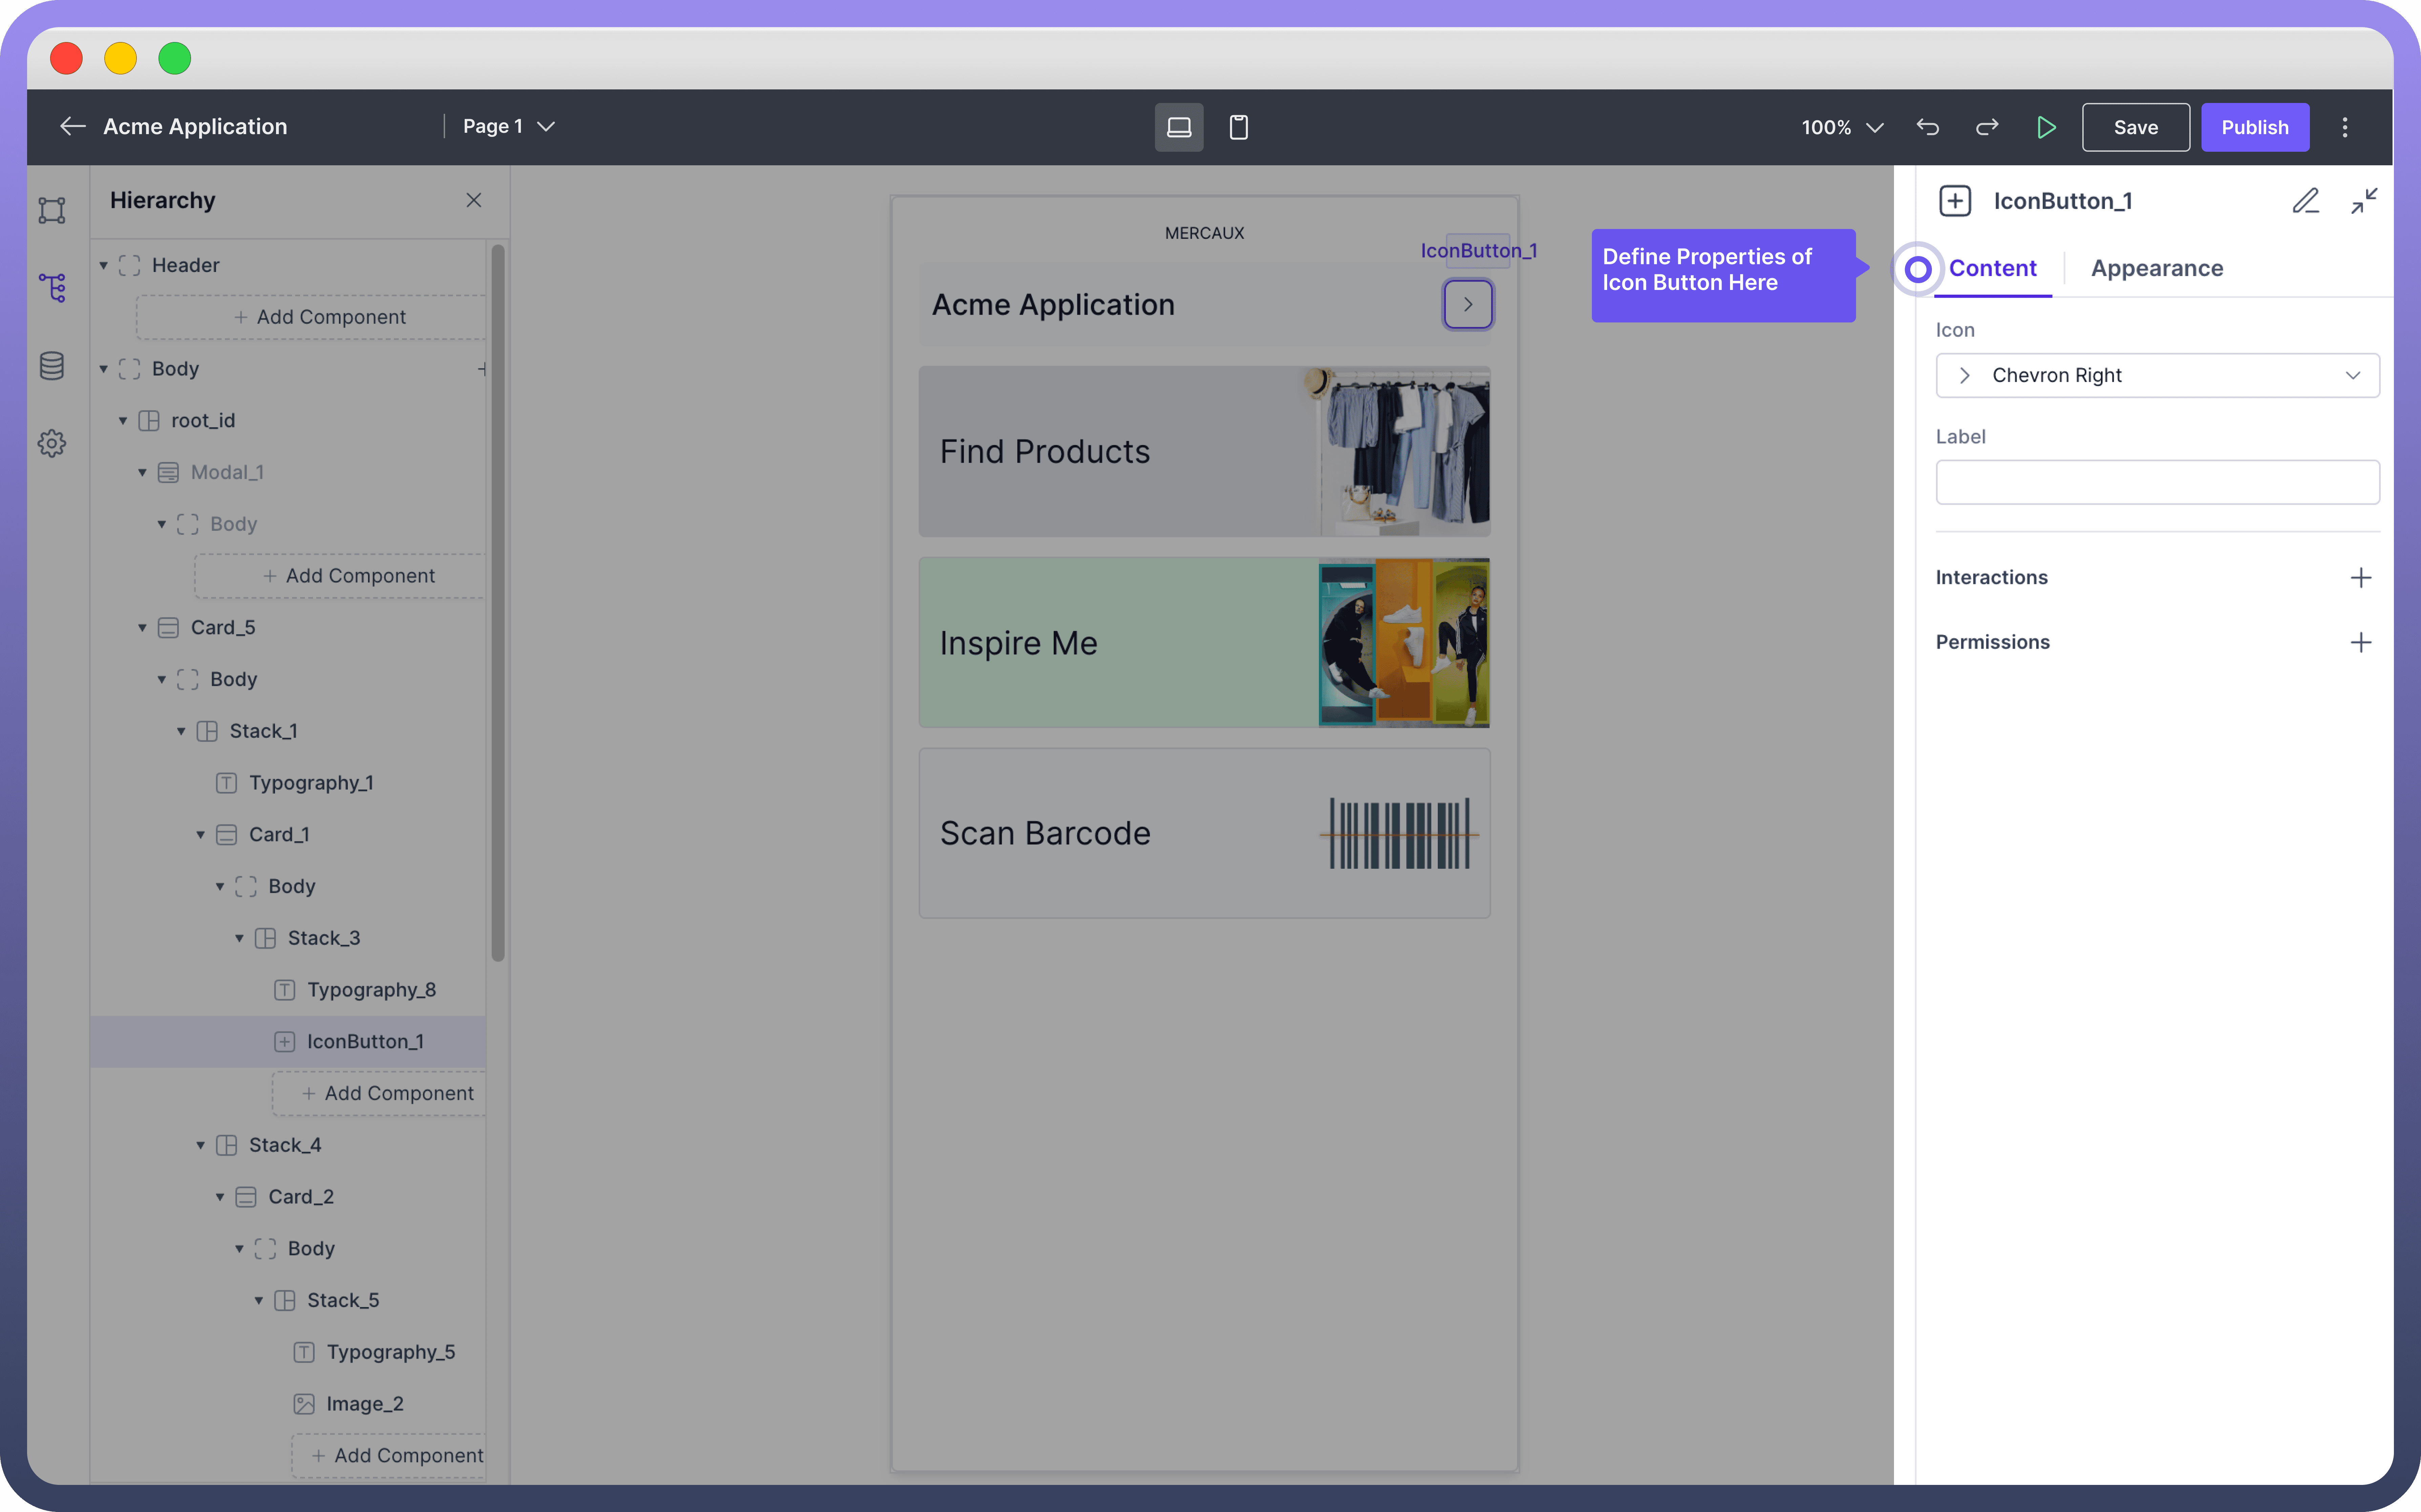
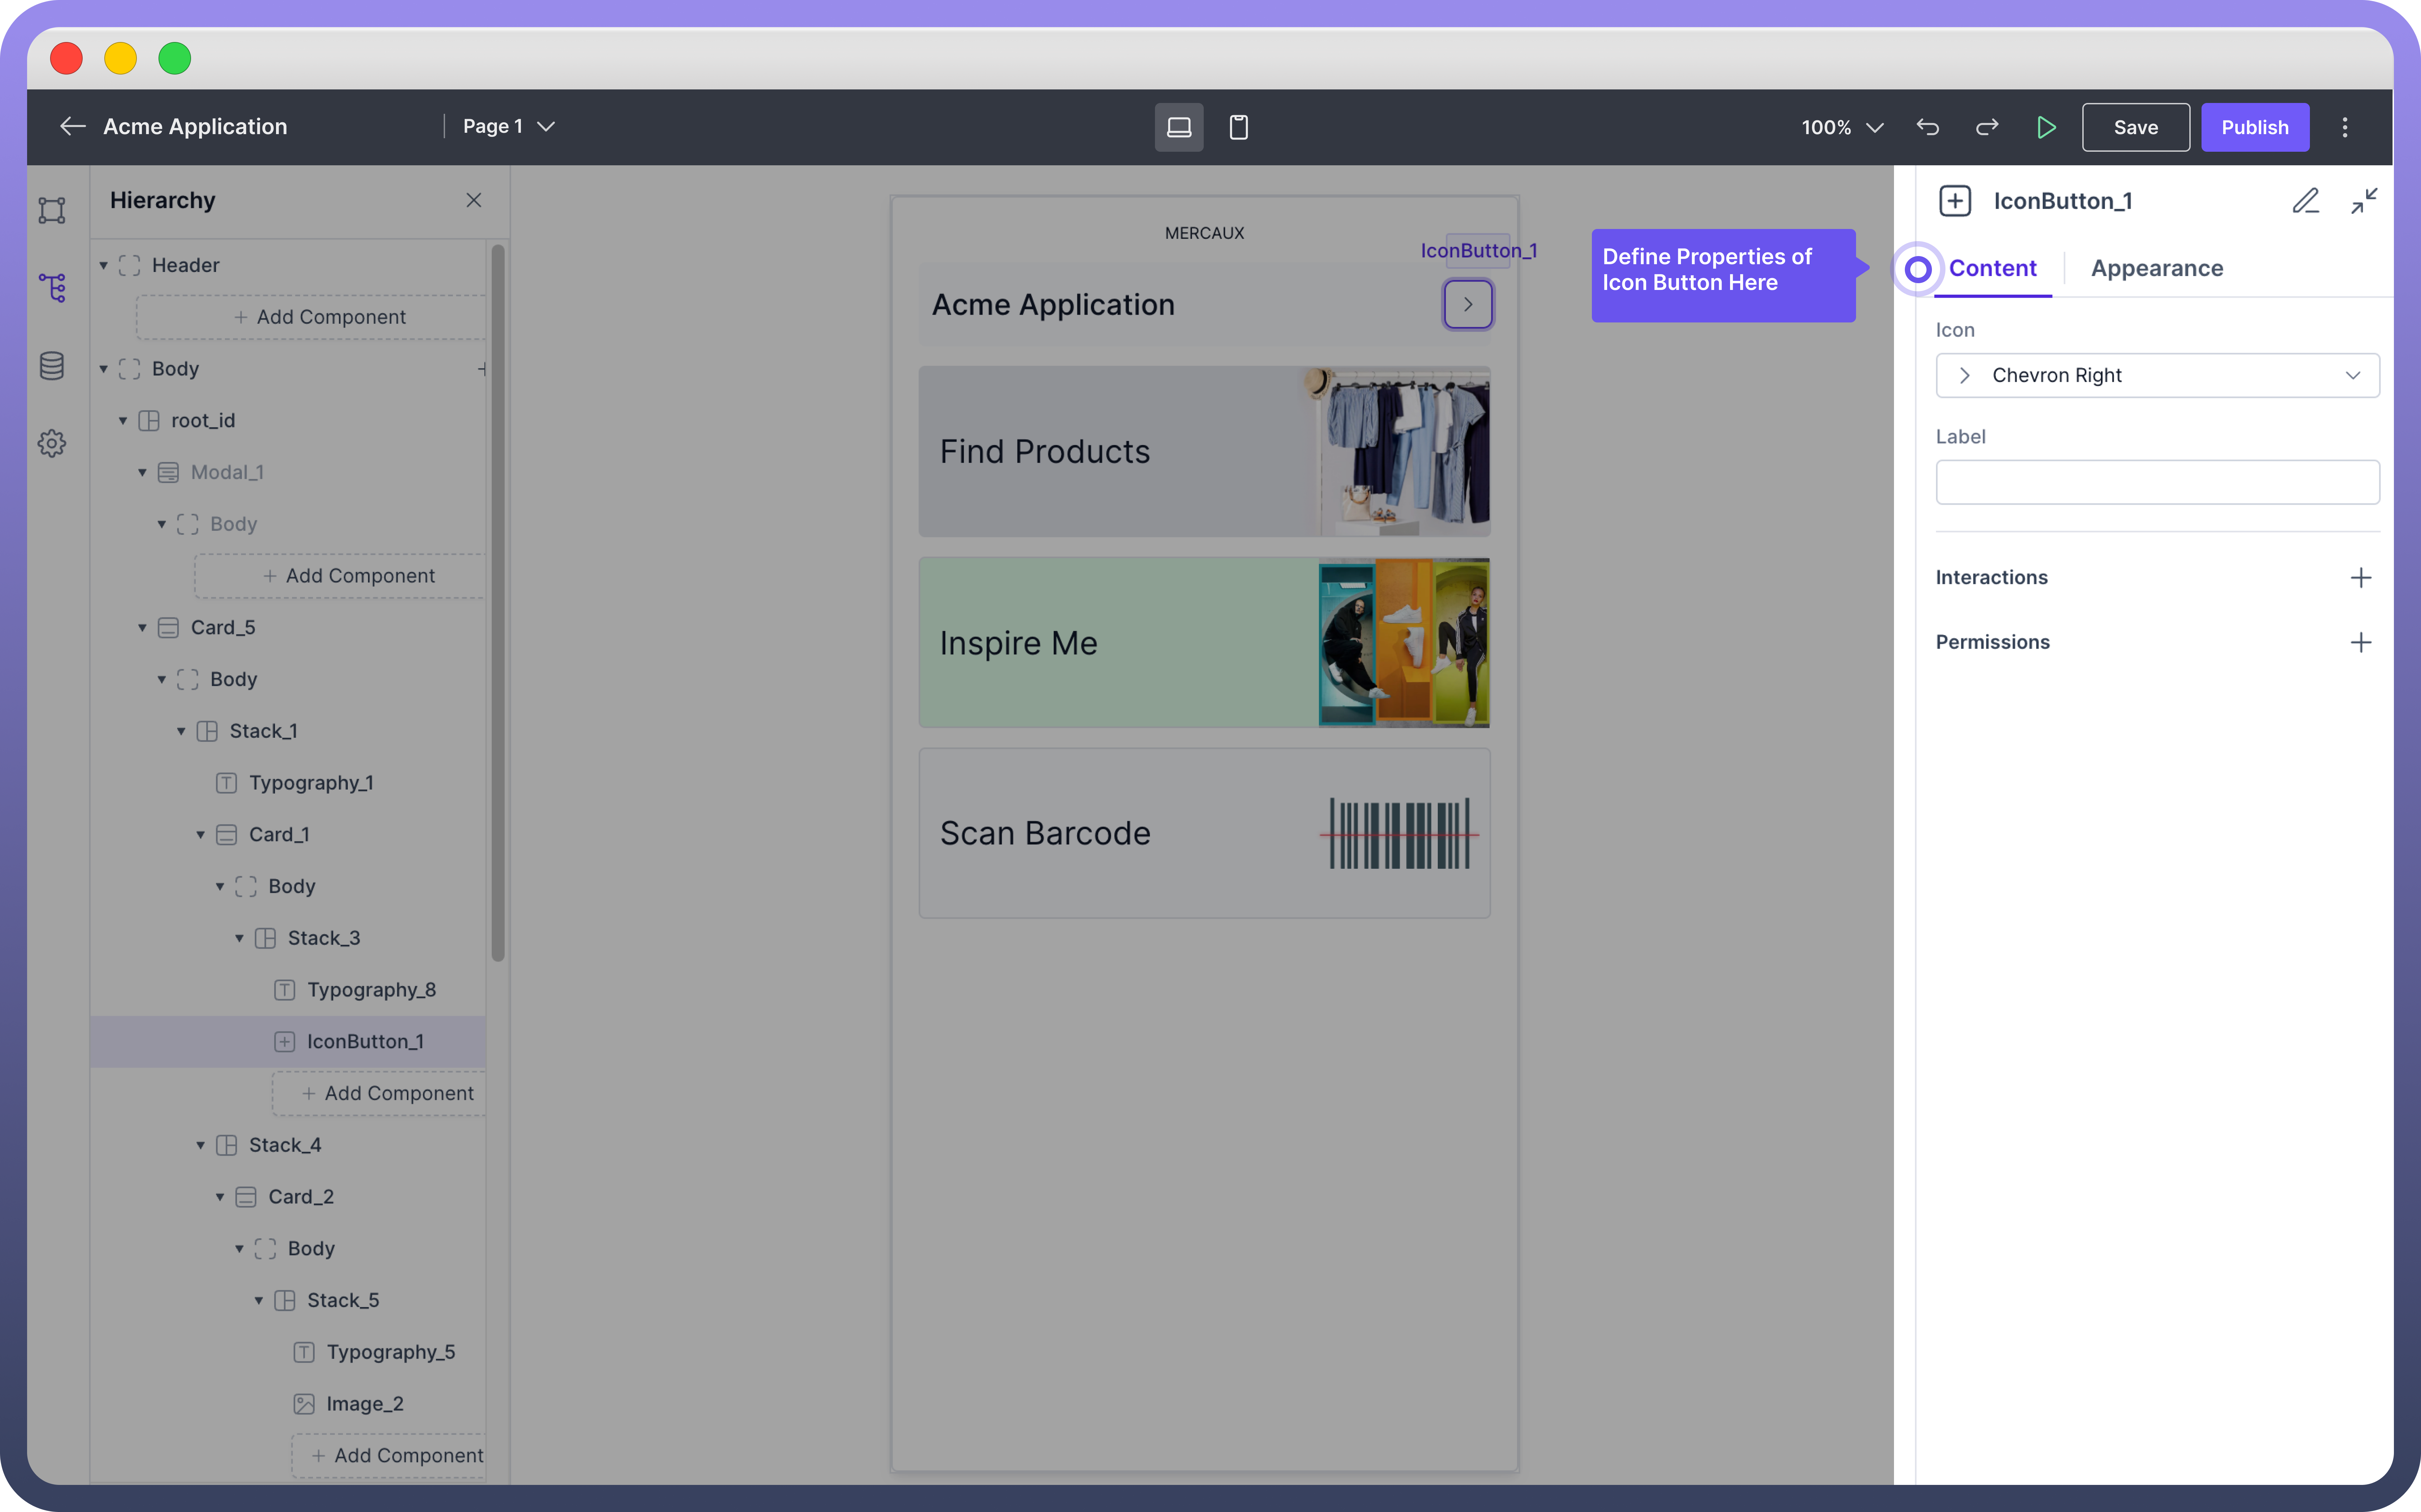
Once the Icon Button is added, you can customize it through the properties panel on the right side of the screen.
Icon: Choose an icon from the dropdown menu.Label: Add a label to your Icon Button. When the user will hover over the icon, they can read the label and know about it.Interactions: Define the interactions that should occur when the button is clicked. Click the "+" button under "Interactions" to add a new interaction, such as triggering a data source or navigating to another page & many more. Refer to Interactions article for more details.

Tip
Select an icon that clearly represents the action the icon button will perform. Ensure that the icons chosen are universally understood to avoid ambiguity.
Also, always include a label for easy user navigation. You can even use data pills for dynamic Label.
Appearance Customization
The Icon Button component can be styled to match your application's design:
Property | Description |
| Choose a color for your Icon Button. Options include brand colors, neutral (black) or danger color (red). |
| Adjust the size of the Icon Button. Options include Small (sm), Medium (md), and Large (lg) |
| Select the button variant from options like Solid (with background fill), Outline (with outline border), or Ghost (with just text). |
| Add or adjust padding to change the spacing around the icon. You can find padding under Styles section |

Note
Icon Buttons are effective for actions that are easily understood by icons alone, like a trash icon for delete actions or a magnifying glass for search.
In contrast, Normal Buttons are more suitable when the action benefits from accompanying text, such as "Submit" or "Create Account".