
Using Salesforce streamlines managing customer relationships and sales processes. It helps track customer interactions, manage sales deals, and analyze data for better decisions.Salesforce ensures your customer data is protected with strong security. It's a tool for boosting sales efficiency and keeping customer information organized and safe.
Integrating your application with Salesforce allows you to leverage Salesforce's extensive CRM capabilities.
Authentication
Before you begin, make sure you have the following information:
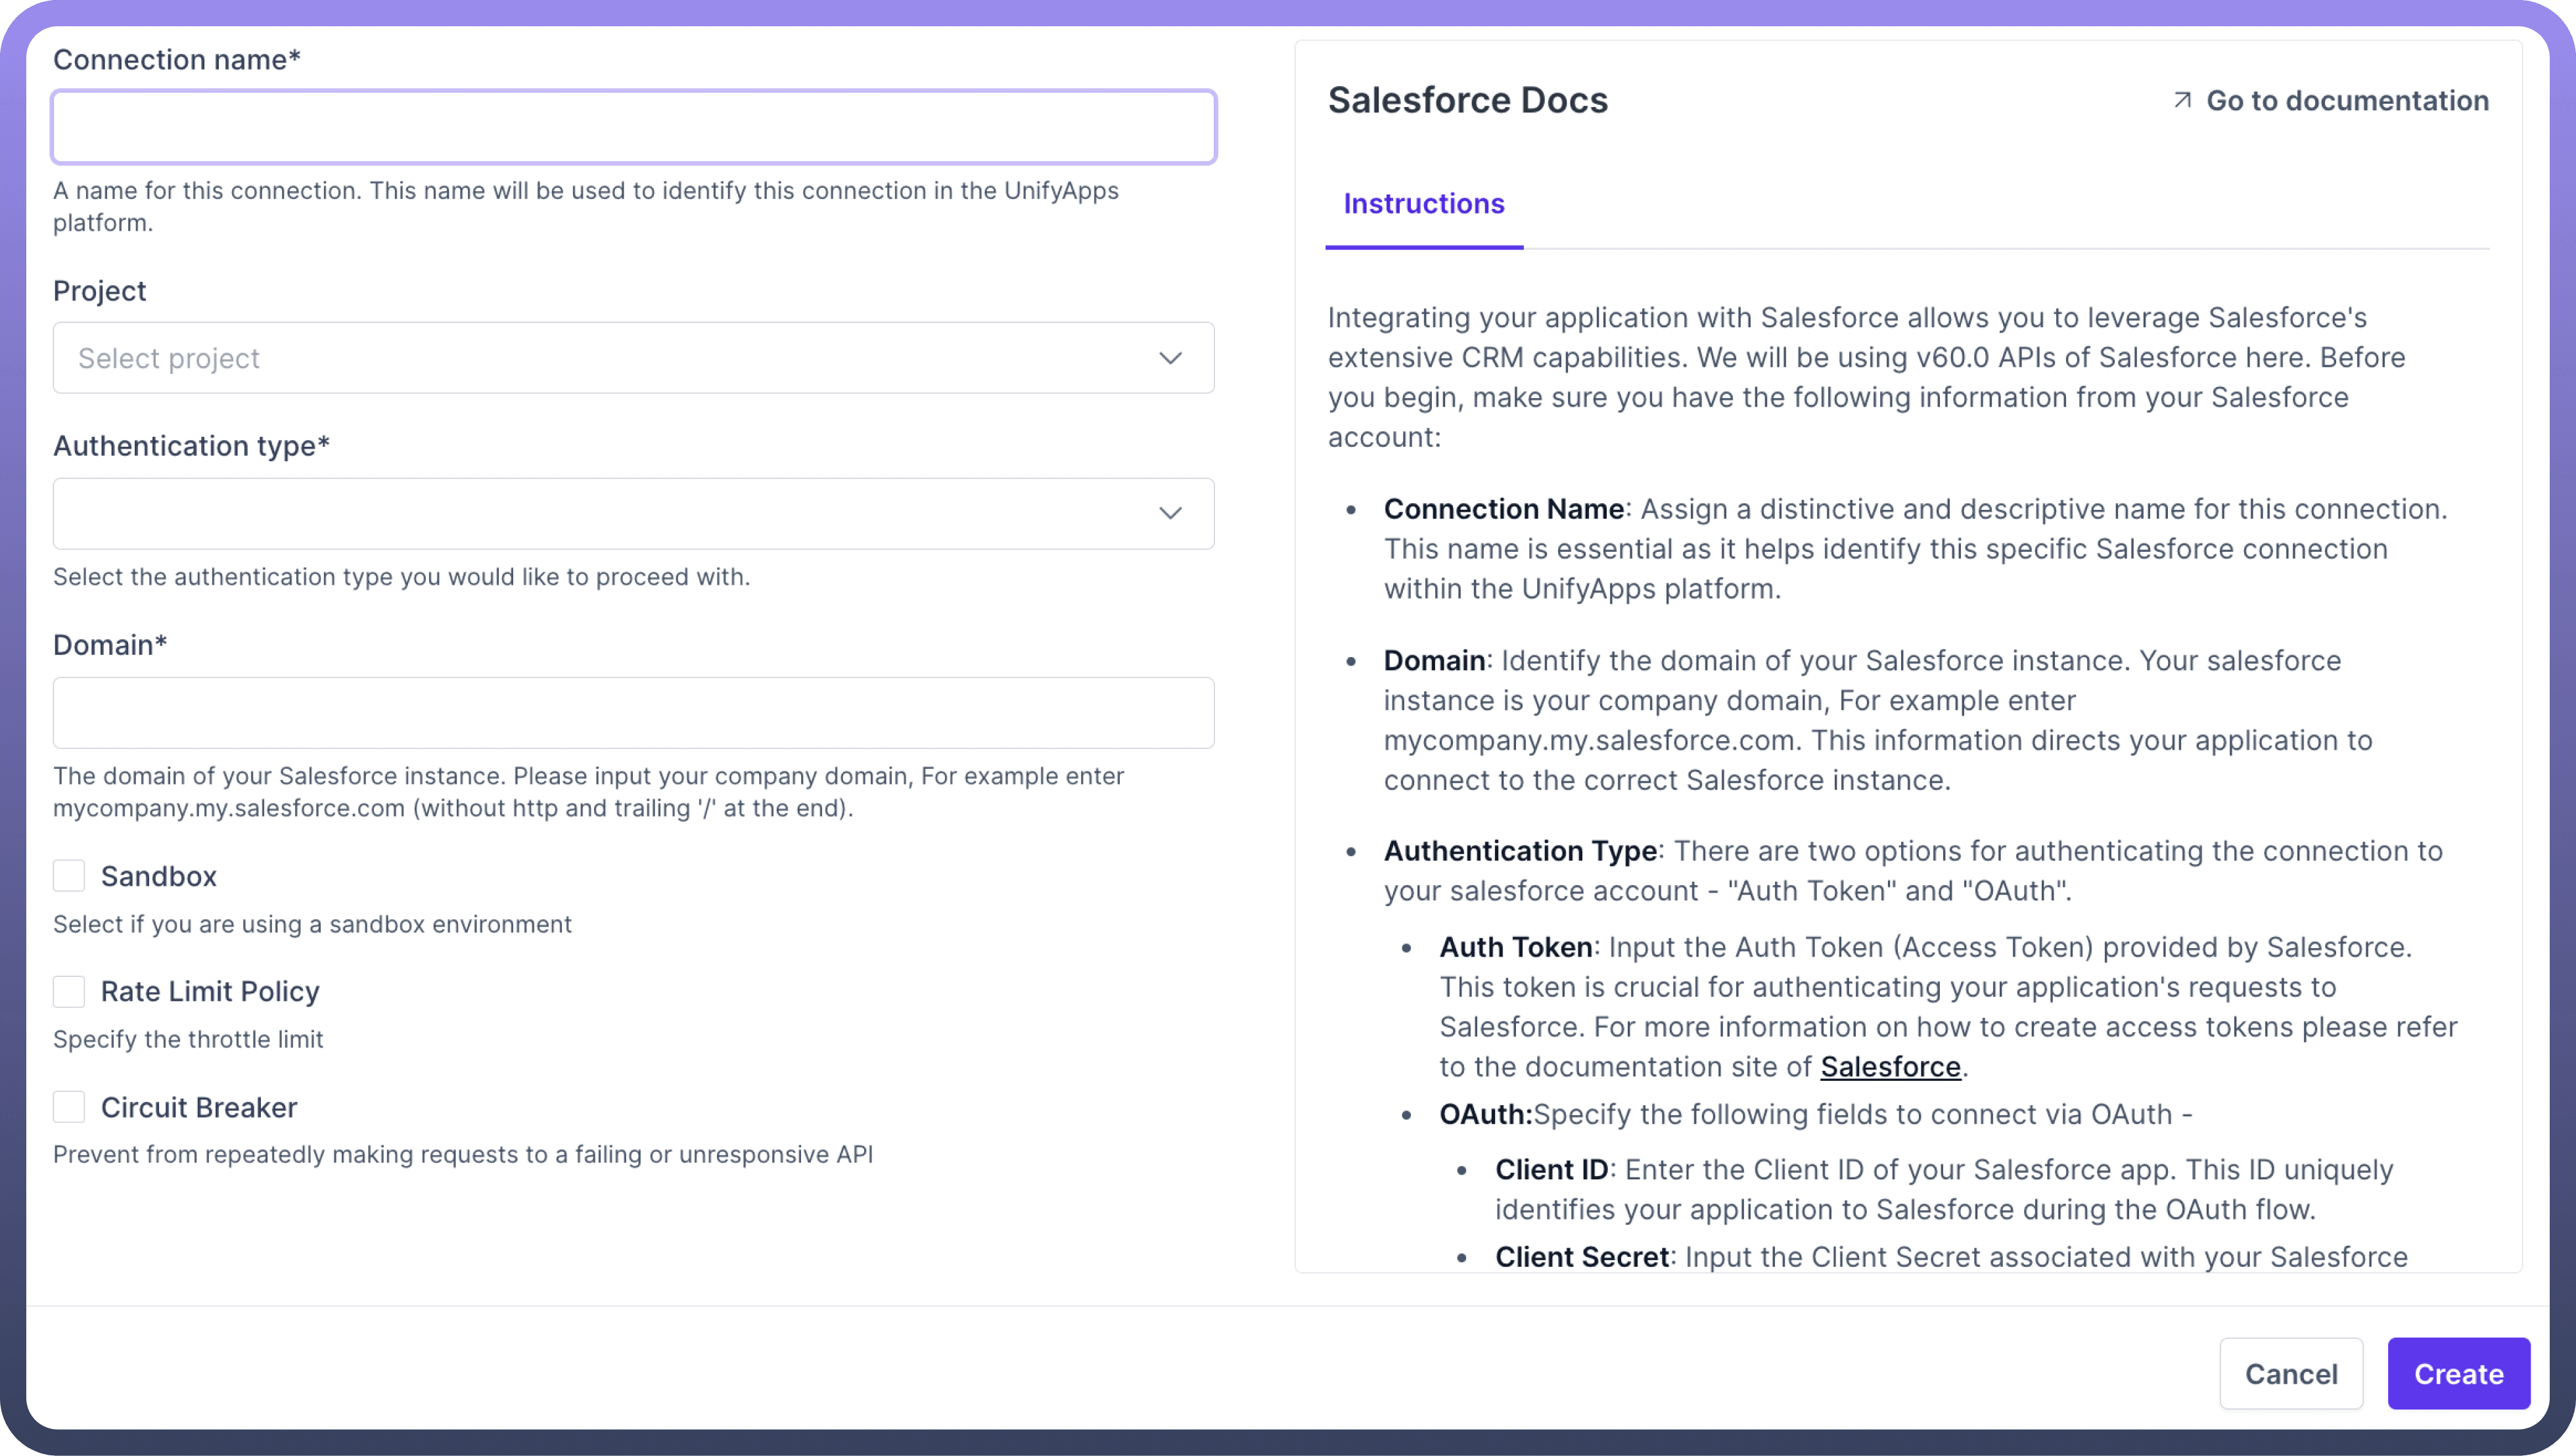
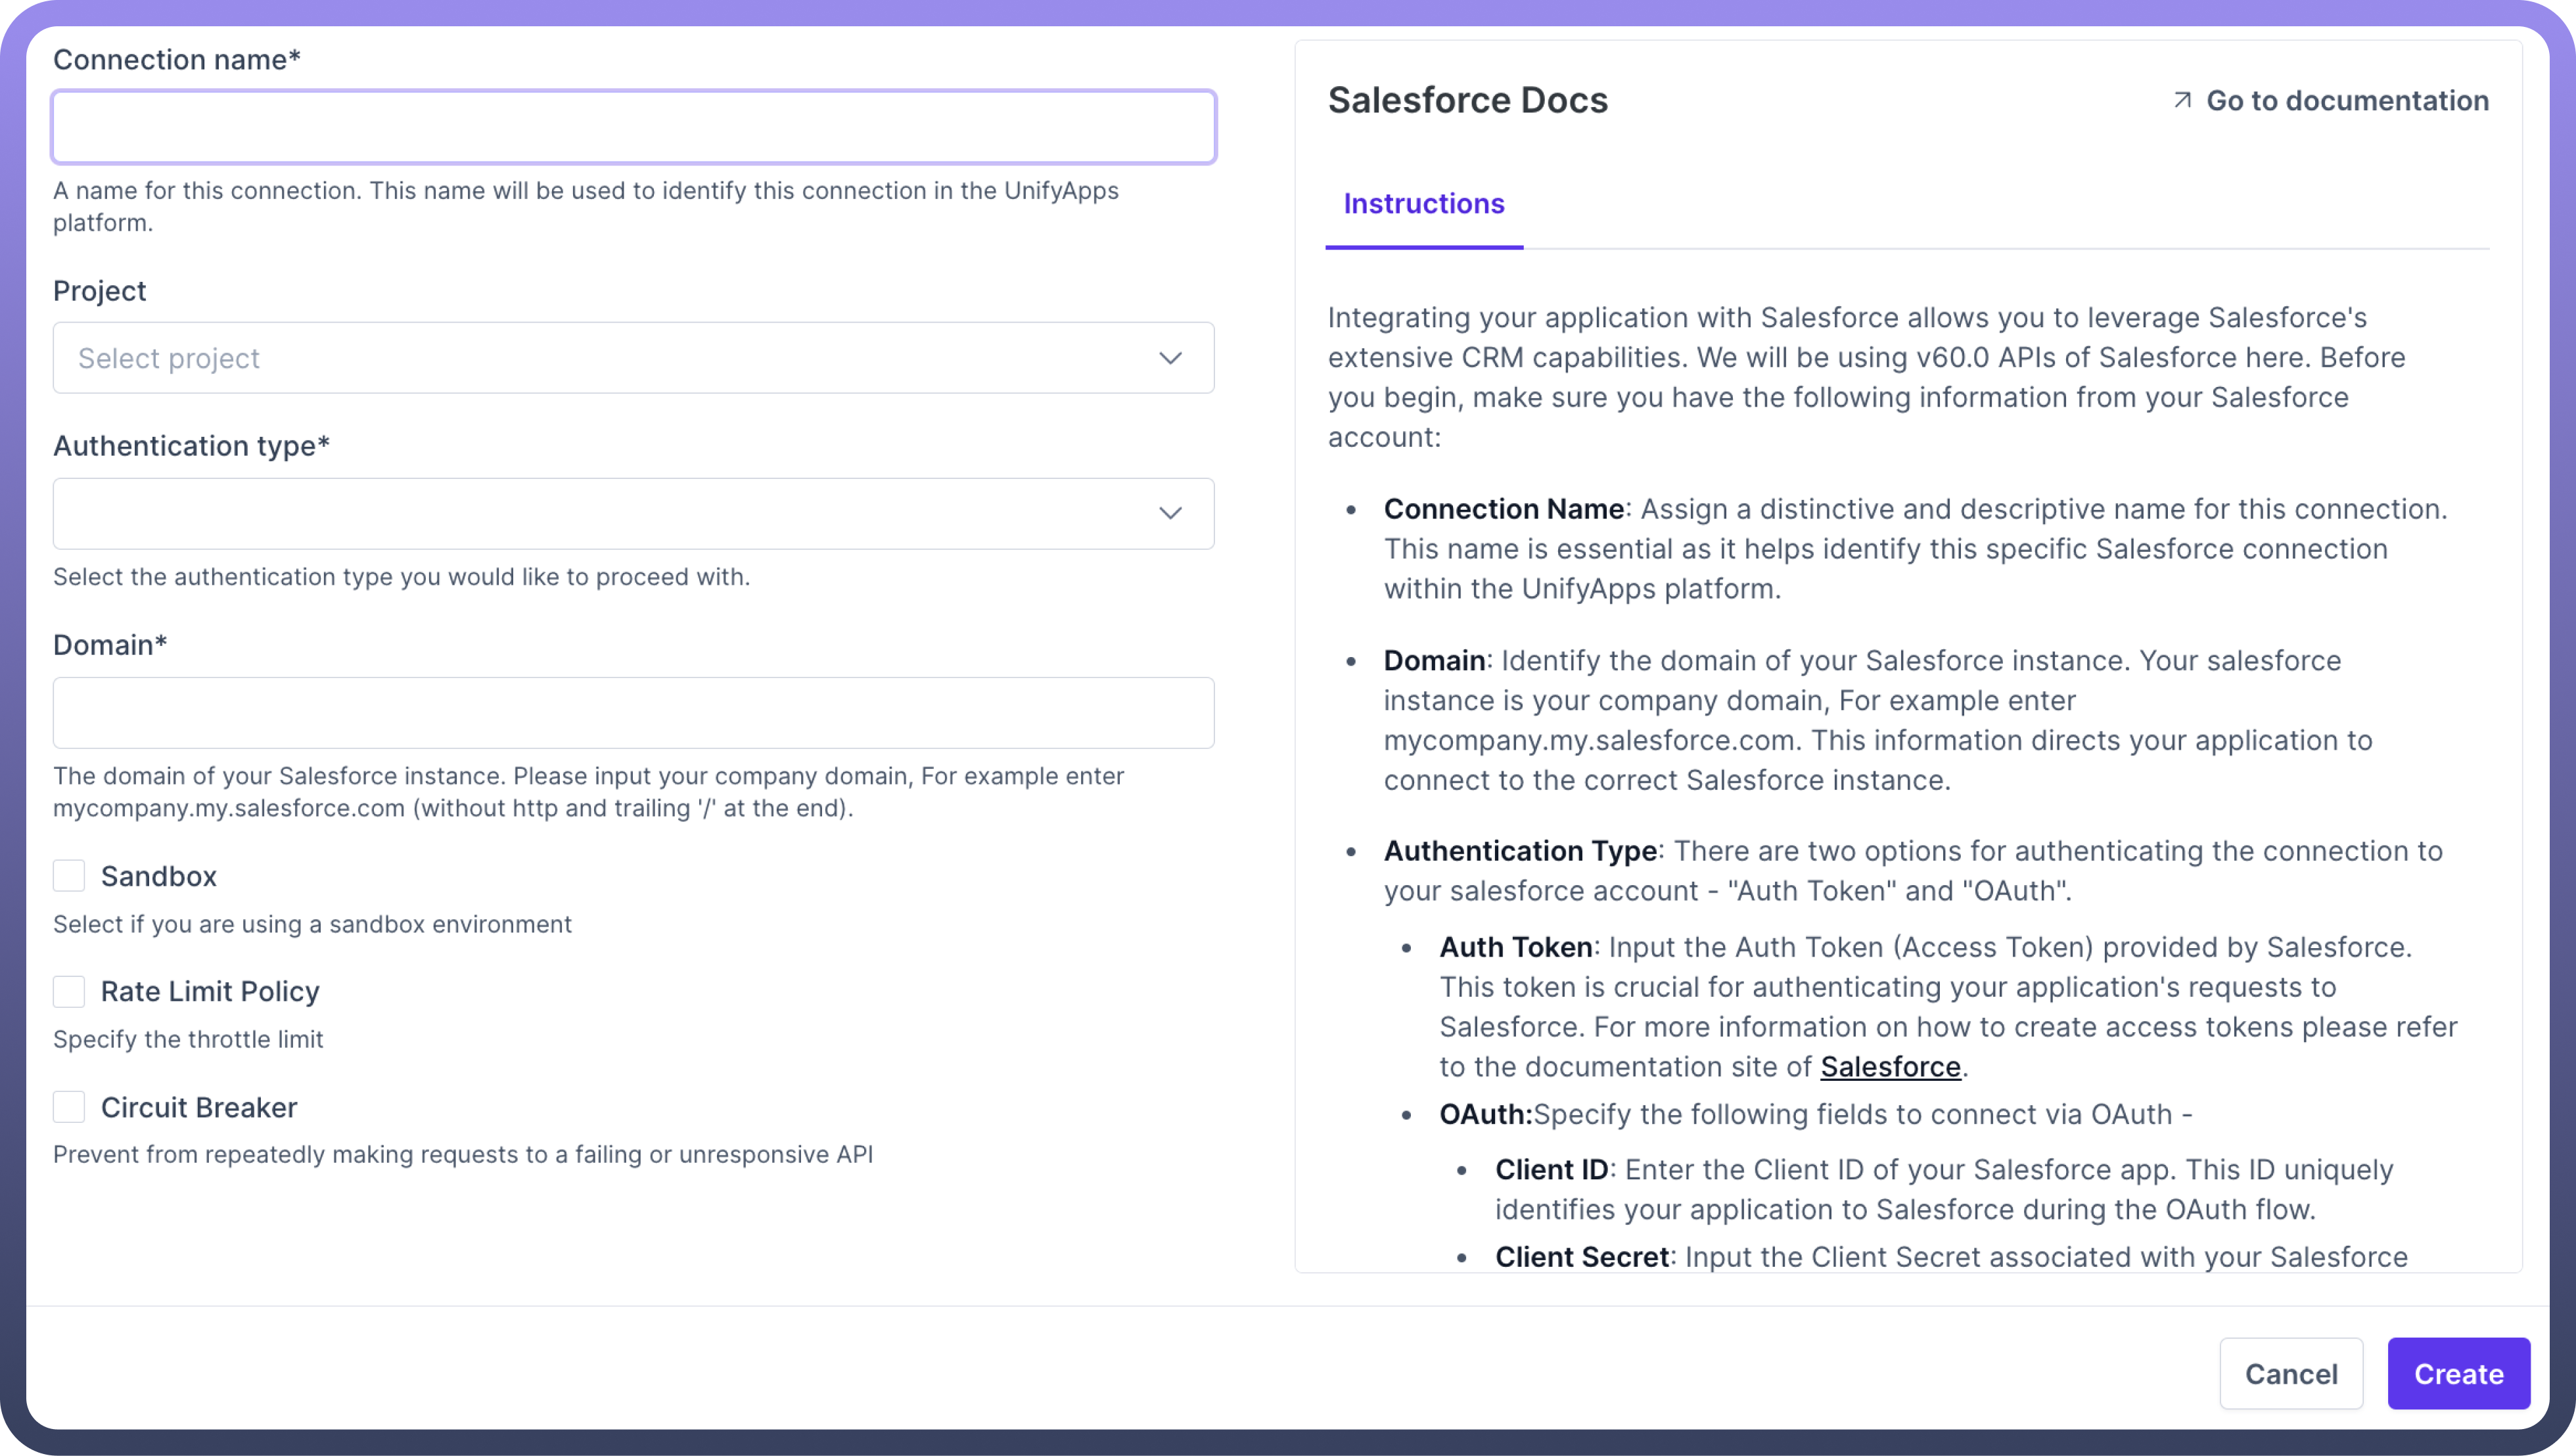
Connection Name: Assign a descriptive name for this connection. This name is essential as it helps identify this specific Salesforce connection within UnifyWorkflow.
Domain: This information directs your application to connect to the correct Salesforce instance. If your Salesforce instance URL is https://mycompany.my.salesforce.com, then your domain is mycompany.my.salesforce.com.
Authentication Type: There are two options for authenticating the connection to your salesforce account -
OAuth&JWT Token.
OAuth
After entering the Domain of your company, click Authorise.
It will redirect you to the login page of Salesforce, from where you can login to your Salesforce account to directly authorize and connect your salesforce account in UnifyApps.
Salesforce JWT Token
Step 1: Create a Private Key and Digital Cert
Authorizing an org with the org login jwt command requires a digital certificate and the private key used to sign the certificate. You can use your own private key and certificate issued by a certification authority.
Alternatively, you can use OpenSSL to create a key and a self-signed digital certificate. Using a private key and certificate is optional when you authorize an org by logging into a browser.
This process produces two files:
server.key—The private key. You specify this file when you authorize an org with the org login jwt command.server.crt—The digital certificate. You upload this file when you create the required connected app.
Open a terminal (macOS and Linux) or command prompt (Windows).
If necessary, install
OpenSSLon your computer. To check whether OpenSSL is installed on your computer, run the which command on macOS or Linux or the where command on Windows.which opensslCreate a directory for storing the generated files, and change to the directory.
mkdir /Users/jdoe/JWTcd /Users/jdoe/JWTGenerate a private key, and store it in a file called
server.keyopenssl genpkey -des3 -algorithm RSA -pass pass:SomePassword -out server.pass.key -pkeyopt rsa_keygen_bits:2048openssl rsa -passin pass:SomePassword -in server.pass.key -out server.keyYou can delete the
server.pass.keyfile because you no longer need it.Generate a certificate signing request using the server.key file. Store the certificate signing request in a file called
server.csr. Enter information about your company when prompted.openssl req -new -key server.key -out server.csrGenerate a self-signed digital certificate from the
server.keyandserver.csrfiles. Store the certificate in a file calledserver.crt.openssl x509 -req -sha256 -days 365 -in server.csr -signkey server.key -out server.crt
Refer
For more information, kindly lookup the Salesforce documentation.
Step 2 : Create a Connected App
Salesforce CLI requires a connected app in the org that you're authorizing. A connected app is a framework that enables an external application, in this case Salesforce CLI, to integrate with Salesforce using APIs and standard protocols, such as OAuth.
We provide a default connected app when you authorize an org with the org login web command. For extra security, you can create your own connected app in your org using Setup and configure it with the settings of your choice.
You're required to create a connected app when authorizing the org with the org login jwt command.
Log in to your org.
From
Setup, enterApp Managerin the Quick Find box, then selectApp Manager.In the top-right corner, click
New Connected App.Update the basic information as needed, such as the connected app name and your email address.
Select
Enable OAuth Settings.For the callback URL, enter http://localhost:1717/OauthRedirect.
fIf port 1717
Then update your sfdx-project.json file by setting the oauthLocalPort property to the new port.
For example, if you set the callback URL to http://localhost:1919/OauthRedirect:"oauthLocalPort" : "1919"(Required for JWT) Select
Use digital signatures.(Required for JWT) Click Choose File and upload file that contains your digital certificate, such as
server.crt.Add these OAuth scopes:
Manage user data via APIs (
api)Manage user data via Web browsers (
web)Perform requests at any time (
refresh_token,offline_access)
Click
Save, thenContinue.Click
Manage Consumer Details.If prompted, verify your identity by entering the verification code that was automatically sent to your email address.
Click
Copy next to Consumer Keybecause you need it later when you run an org login command.Click
Back to Manage Connected Apps.Click
Manage.Click
Edit Policies.In the OAuth Policies section, for the Refresh Token Policy field, click
Expire refreshtoken after: and enter 90 days or less.
Setting a maximum of 90 days for the refresh token expiration is a security best practice. To continue running CLI commands against an org whose refresh tokens have expired, reauthorize it with the org login web or org login jwt command.In the Session Policies section, set
Timeout Valueto 15 minutes.
Setting a timeout for access tokens is a security best practice. Salesforce CLI automatically handles an expired access token by referring to the refresh token.(Required for JWT) In the OAuth Policies section, select Admin approved users are pre-authorized for permitted users, and click
OK.Click
Save.(Required for JWT) Click
Manage Profiles, select the profiles that are pre-authorized to use this connected app, and clickSave. Similarly, click Manage Permission Sets to select the permission sets. Create permission sets if necessary.
Refer
For more information you can lookup the Salesforce documentation.
Step 3: Login with JWT
Logging into an org authorizes the CLI to run other commands that connect to that org, such as deploying or retrieving a project.
You can log into many types of orgs, such as sandboxes, Dev Hubs, Env Hubs, production orgs, and scratch orgs.
Complete these steps before you run this command:
Create a
digital certificate(also called digital signature) and the private key to sign the certificate. You can use your own key and certificate issued by a certification authority. Or use OpenSSL to create a key and a self-signed digital certificate.Store the
private keyin a file on your computer. When you run this command, you set the--jwt-key-fileflag to this file.Create a
custom connected appin your org using the digital certificate. Make note of the consumer key (also called client id) that’s generated for you. Be sure the username of the user logging in is approved to use the connected app. When you run this command, you set the--client-idflag to the consumer key.
Refer
See https://developer.salesforce.com/docs/atlas.en-us.sfdx_dev.meta/sfdx_dev/sfdx_dev_auth_jwt_flow.htm for more information.
We recommend that you set an alias when you log into an org. Aliases make it easy to later reference this org when running commands that require it. If you don’t set an alias, you use the username that you specified when you logged in to the org.
If you run multiple commands that reference the same org, consider setting the org as your default. Use --set-default for your default scratch org or sandbox, or --set-default-dev-hub for your default Dev Hub.
Examples for org login jwt
Log into an org with username jdoe@example.org and on the default instance URL (https://login.salesforce.com). The private key is stored in the file /Users/jdoe/JWT/server.key and the command uses the connected app with consumer key (client id) 04580y4051234051.
sf org login jwt --username jdoe@example.org --jwt-key-file /Users/jdoe/JWT/server.key --client-id 04580y4051234051Set the org as the default and give it an alias:
sf org login jwt --username jdoe@example.org --jwt-key-file /Users/jdoe/JWT/server.key --client-id 04580y4051234051 --alias ci-org --set-defaultSet the org as the default Dev Hub and give it an alias:
sf org login jwt --username jdoe@example.org --jwt-key-file /Users/jdoe/JWT/server.key --client-id 04580y4051234051 --alias ci-dev-hub --set-default-dev-hubLog in to a sandbox using URL : https://MyDomainName-SandboxName.sandbox.my.salesforce.com
sf org login jwt --username jdoe@example.org --jwt-key-file /Users/jdoe/JWT/server.key --client-id 04Refer
For more information you can lookup the Salesforce documentation.
Triggers
Triggers | Description |
| Use this trigger to start the automation when selected fields in a record are changed, utilizing Salesforce Change data capture events. |
| Use this trigger to start the automation when a Salesforce outbound message is retrieved |
| Use this trigger to start the automation when a record is created in Salesforce |
| Use this trigger to start the automation when a record is updated in Salesforce |
| Use this trigger to start the automation when a record is Deleted in Salesforce |
| Use this polling trigger to start the automation when a record is created or updated in Salesforce |
| Use this polling trigger to start the automation when a event is created in Salesforce |
| Use this polling trigger to start the automation when a record is created in Salesforce |
Actions
Actions | Description |
| Use this action to create a new record in Salesforce |
| Use this action to delete a record from Salesforce |
| Use this action to get object schema in Salesforce |
| Use this action to get details of any standard or custom object in Salesforce |
| Use this action to get details of a report in Salesforce |
| Use this action to update an existing record in Salesforce |
| Use this action to approve the objects that are in the approval process in Salesforce |
| Use this action to reject the objects that are in the approval process in Salesforce |
| Use this action to subject a record for approval in Salesforce |
| Use this action to create records from a CSV file content in Salesforce |
| Use this action to download an attachment attached to an object in Salesforce |
| Use this action to execute a SOQL query and return its results from salesforce |
| Use this action to retrieve the metadata for a dashboard in Salesforce |
| Use this action to get all the dashboard associated to your Salesforce account |
| Use this action to get all the fields associated to an object in Salesforce |
| Use this action to fetch the metadata for a object in Salesforce |
| Use this action to fetch the metadata for a organization in Salesforce |
| Use this action to fetch the metadata for a report in Salesforce |
| Use this action to get details of a record from its ID in Salesforce |
| Use this action to publish platform events in Salesforce |
| Use this action to search your Salesforce data for specific records using SOQL query |
| Use this action to search records in Bulk from your Salesforce data |
| Use this action to update the record in Salesforce |
| Use this action to update the records from CSV file content in Salesforce |


