Overview
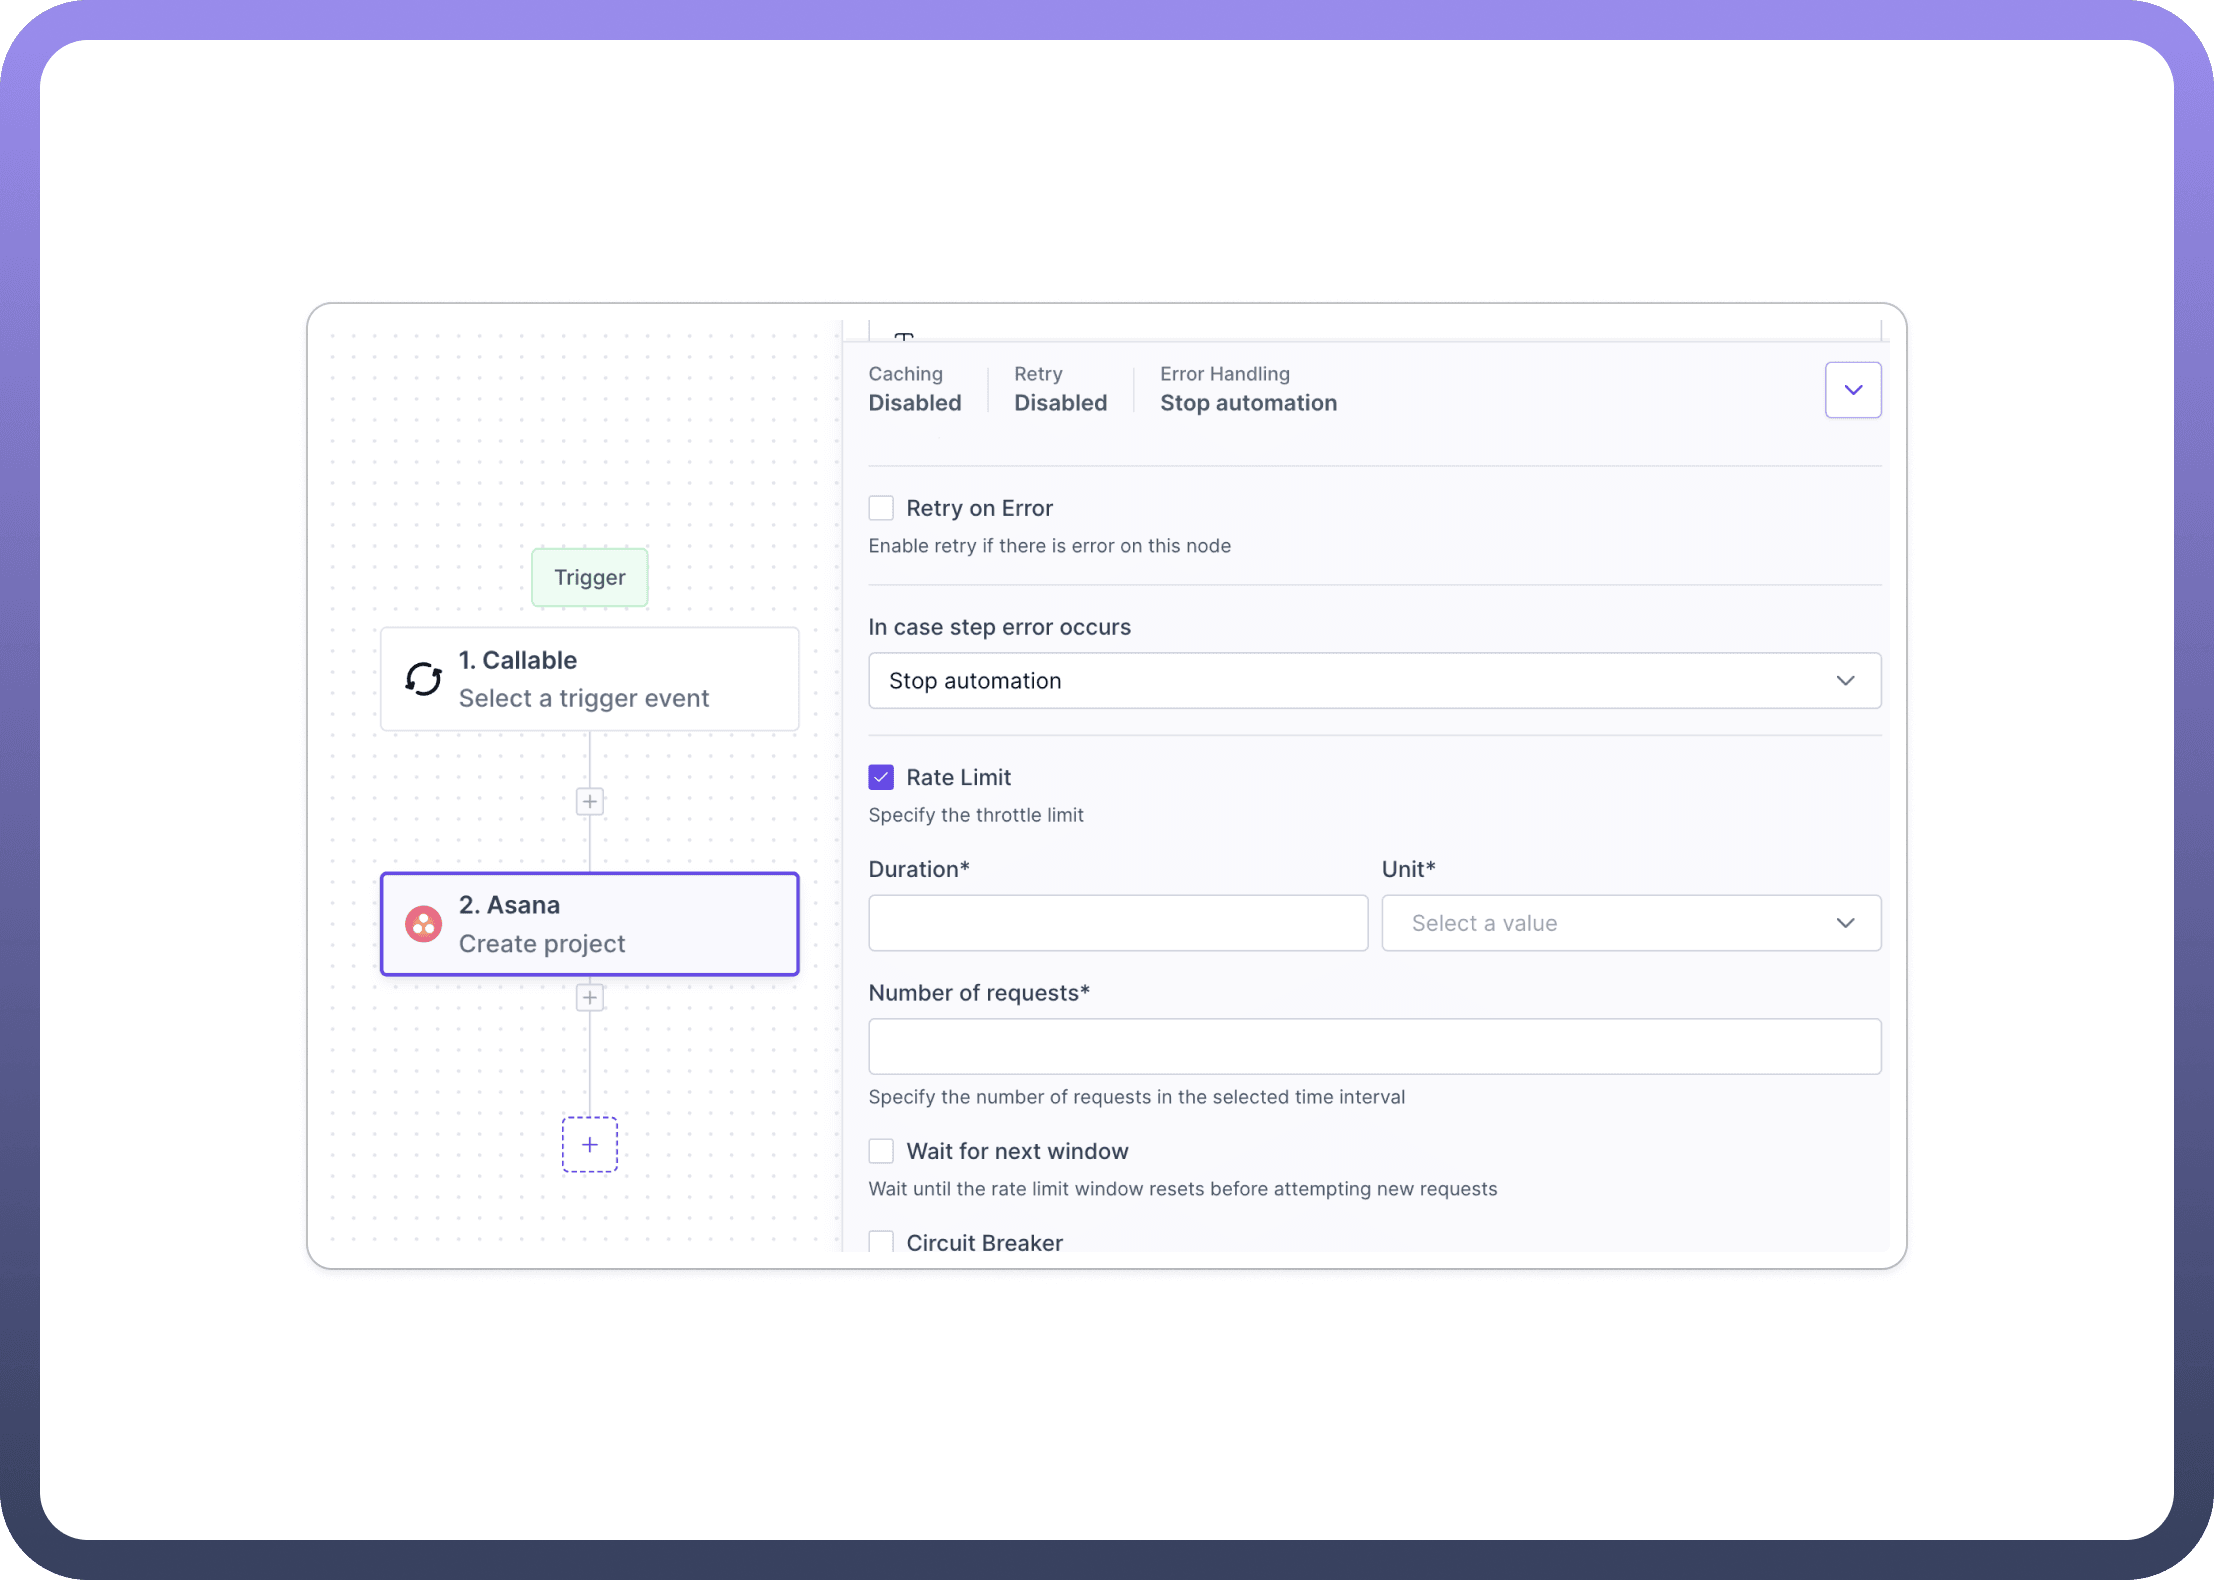
Rate Limiting allows you to control the frequency of requests made by your automations, ensuring compliance with API rate limits, preventing overload, and maintaining stable operations.


Use Cases
API Compliance
Your automation needs to interact with an external API with strict rate limits. For example. Asana has a standard rate limit policy of 1500 requests per minute.
In such cases we need to Configure rate limiting to match the API's restrictions, ensuring your automation doesn't exceed allowed request quotas.
Detailed Breakdown
Rate Limit Toggle
Users can independently enable or disable the rate-limiting functionality for each node. This granular control allows for optimized request management across different parts of a workflow.
Duration and Unit
Set the time interval for the rate limit. The duration is a numeric value, and the unit can be selected from options like seconds, minutes, or hours, allowing for flexible rate limit configurations.
Number of Requests
Specify the maximum number of requests allowed within the defined time interval. This helps adhere to API quotas and prevent request overload.
Wait for the Next Window
This option causes the automation to pause and wait until the rate limit window resets before attempting new requests. This helps manage workflows that process large volumes of data over time.
Configuration Steps
Access Node Settings
Select the node you want to configure in your workflow for rate limiting.
Look for the
Rate Limitsection in the node's settings panel.
Enable Rate Limiting
Locate the
Rate Limitcheckbox and enable it.
Set Duration and Unit
Find the
Durationfield and enter a numeric value.In the
Unitdropdown, select the appropriate time unit (e.g., seconds, minutes, hours).
Configure Number of Requests
Enter the maximum number of allowed requests in the
Number of requestsfield.This value represents how many requests can be made within the specified duration.
Enable Wait for Next Window (Optional)
If you want the automation to pause and wait for the next rate limit window, check the
Wait for next windowoption.