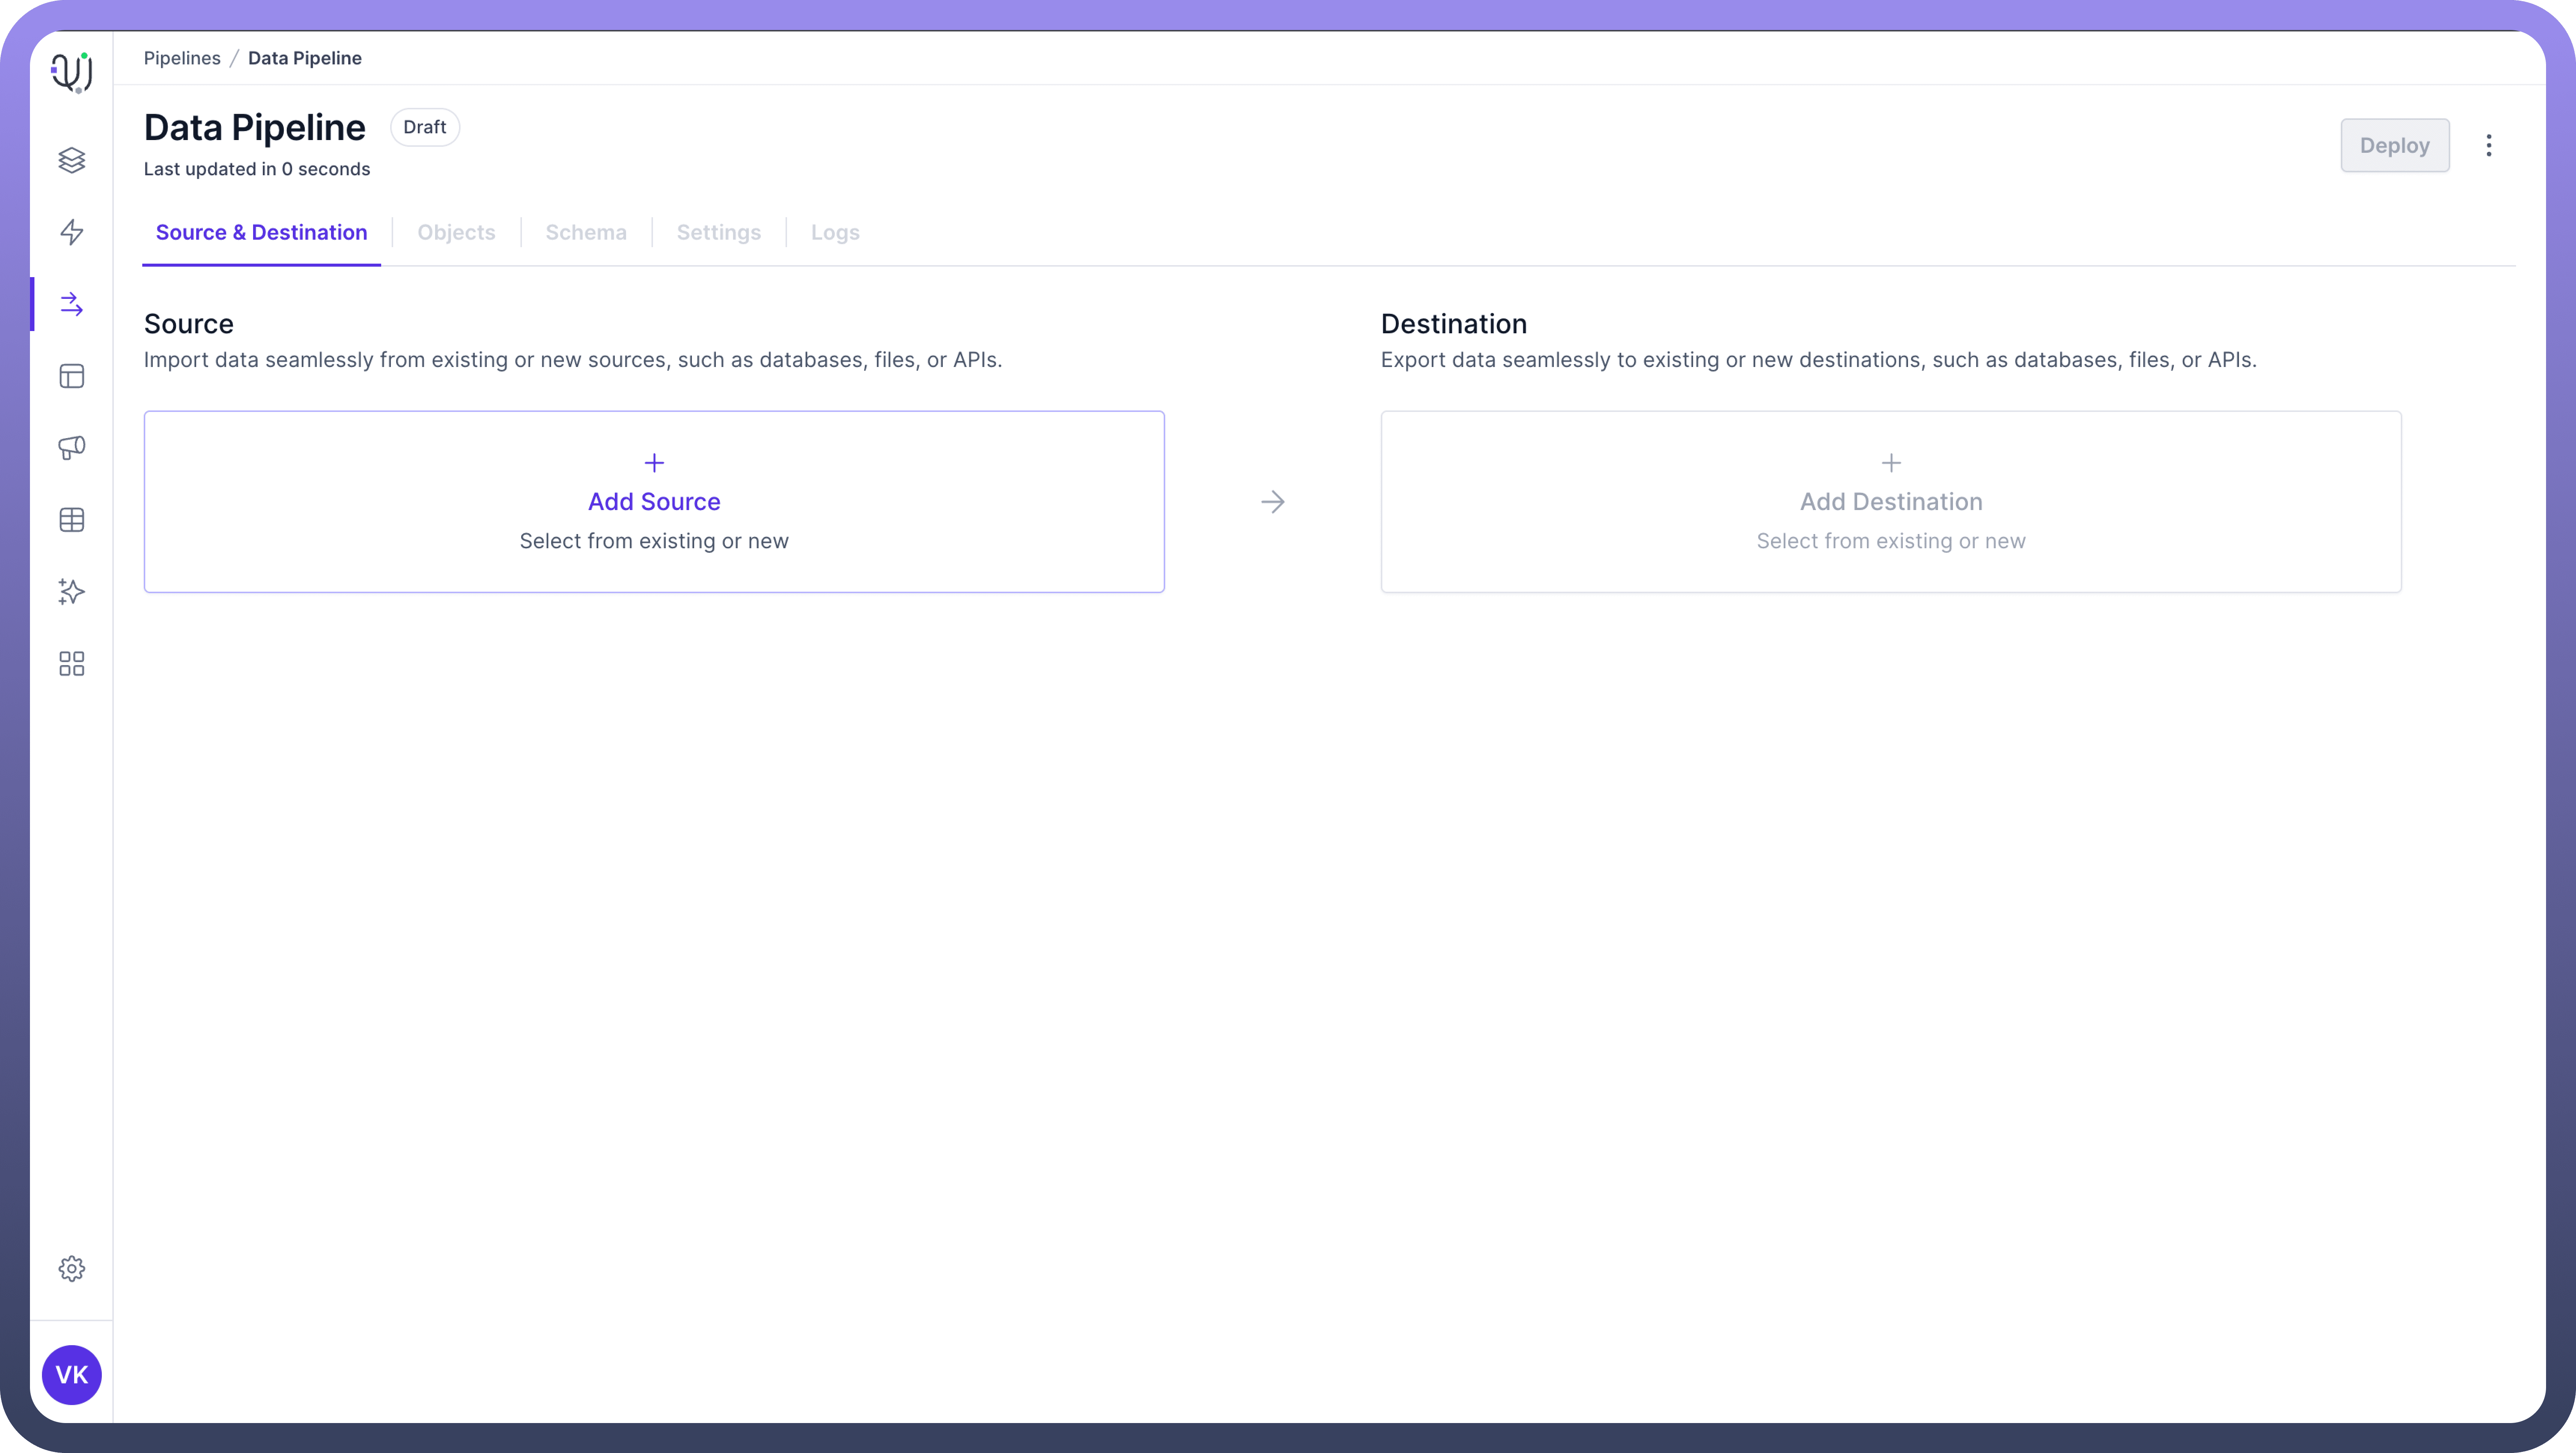
Contents

Cancel

Recommended Articles

  1. unify-apps

    Indexing

    Unify AI

    Transform raw content into searchable knowledge through AI-powered indexing and vector embeddings

  2. unify-apps

    JobNimbus

    Unify Integrations

    Integrate your application with JobNimbus to manage leads, track jobs, and streamline your workflow processes efficiently

  3. unify-apps

    IMAP

    Unify Integrations

    Integrate your app with IMAP to enable seamless email synchronization, real-time access, and enhanced communication workflows.

  4. unify-apps

    Preview Your Work

    Unify Automations

    Effortlessly review & monitor your automation’s performance

  5. unify-apps

    QuickBooks

    Unify Integrations

    Integrate your app with QuickBooks to streamline accounting, automate invoicing, and manage finances effortlessly

  6. unify-apps

    FTP/FTPS

    Unify Integrations

    Connect your app with FTP/FTPS to automate secure file transfers and streamline data exchange across systems.

  7. unify-apps

    Filters

    Unify Applications

    Enable users to refine, search, and sort data effortlessly across dashboards and datasets

  8. unify-apps

    Insided

    Unify Integrations

    Integrate your app with Insided to enhance customer engagement, streamline community management, and drive self-service support.

  9. unify-apps

    Facebook Ads

    Unify Integrations

    Connect your app with Facebook Ads to automate campaign management, optimize ad performance, and track marketing success.

  10. unify-apps

    Gainsight

    Unify Integrations

    Integrate your app with Gainsight to enhance customer success, automate engagement workflows, and drive retention

  11. unify-apps

    Livestorm

    Unify Integrations

    Integrate your app with Livestorm to streamline webinar hosting, automate event management, and enhance audience engagement.

  12. unify-apps

    Snowflake

    Unify Automations

    Connect to Snowflake for fast, scalable cloud data warehousing and analytics

  13. unify-apps

    Cognito Forms

    Unify Integrations

    Integrate your app with Cognito Forms to create custom forms, automate data collection, and streamline workflows

  14. unify-apps

    Button

    Unify Applications

    Create interactive elements with ease using buttons

  15. unify-apps

    BambooHR

    Unify Automations

    Integrate your app with BambooHR to streamline HR management, automate employee data processing, and enhance onboarding workflows

  16. unify-apps

    Build your first automation

    Unify Automations

    Learn how to build your automation step by step

  17. unify-apps

    User Management

    Unify Applications

    Efficiently manage user roles and permissions

  18. unify-apps

    Microsoft Teams

    Unify Automations

    Connect your app with Microsoft Teams to enhance communication, automate workflows, and foster collaboration across your organization

#
Unify Data
Logo
Create your first Data Pipeline
Logo
Set up the Source & Destination

Set up the Source & Destination

Logo

5 mins READ

Overview

To create a data pipeline, you need to set up the source and destination of your data pipeline.

Setting up the source involves configuring secure connections, providing necessary authentication details, and ensuring access to the relevant data. 

Image
Image

Similarly, setting up the destination requires configuring the connection and ensuring that the data can be accurately transferred and stored in the desired format.

Proper configuration and testing of these connections are important to maintain data integrity and accuracy throughout the entire pipeline.
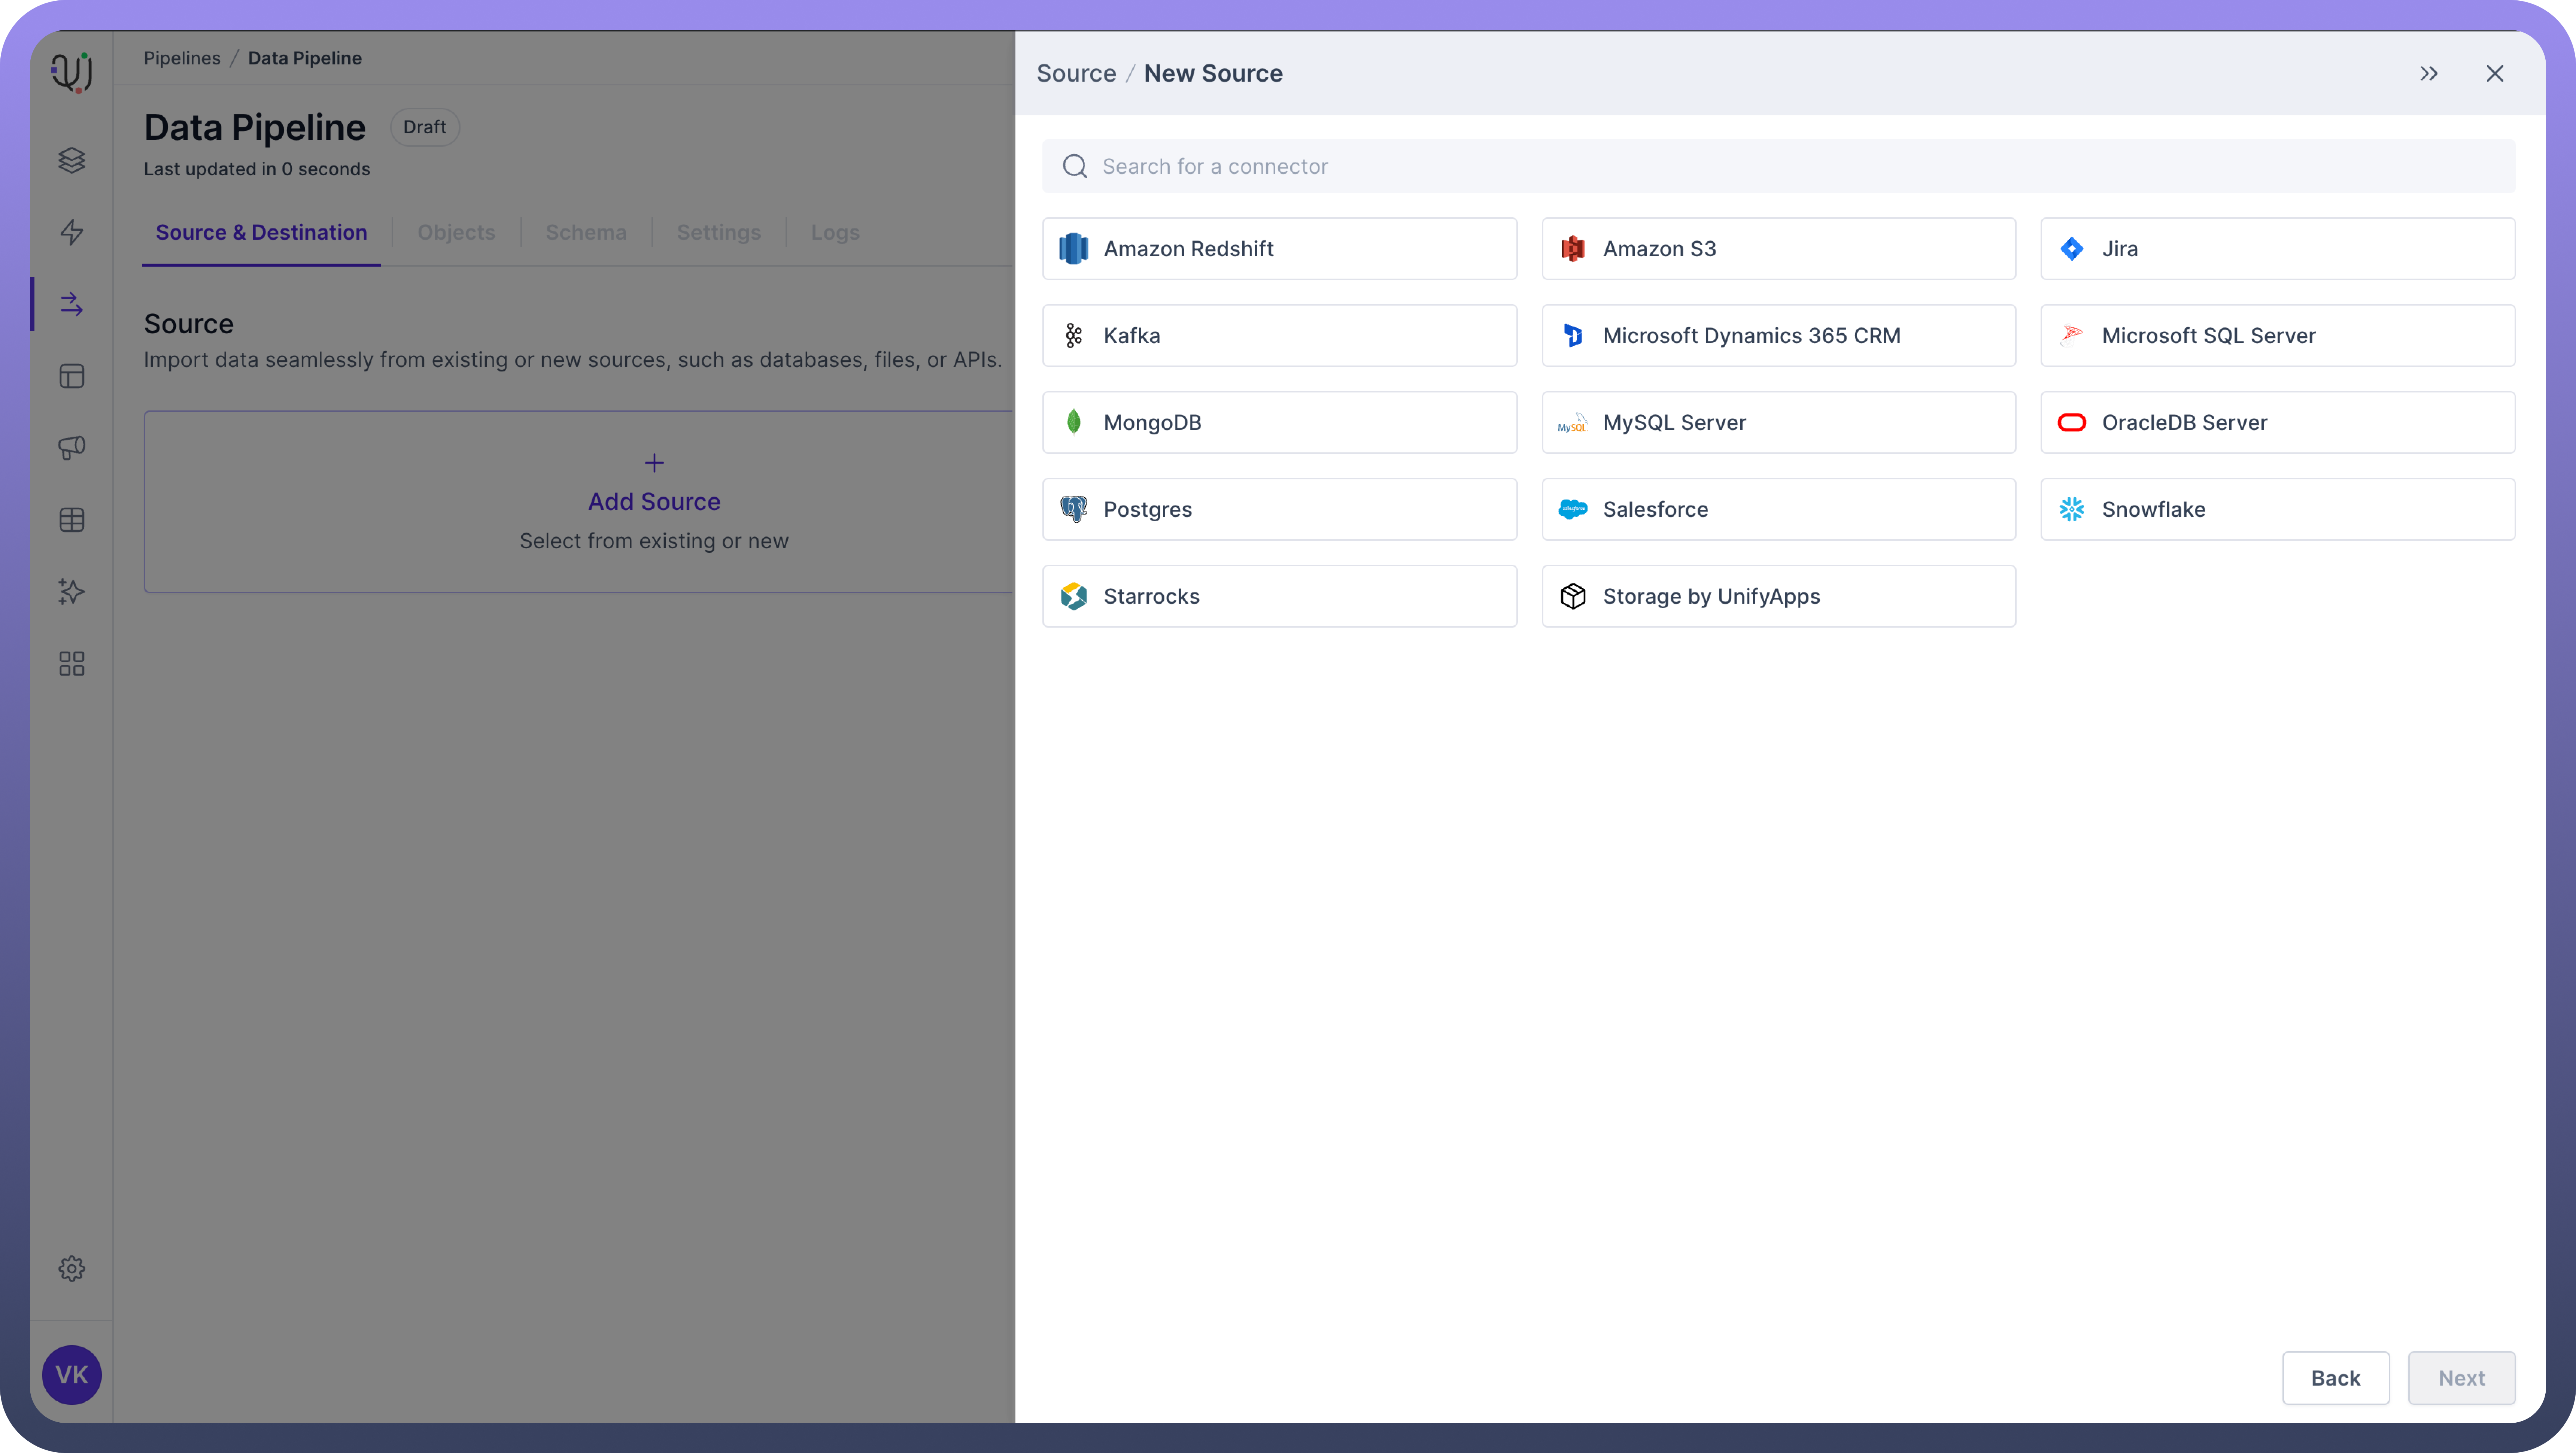
Set up the Source

This is where your data originates. It could be a database, cloud service, API, or even flat files.

To create a source connection, follow these steps -  

  1. Navigate to the "Source & Destination" tab in the UnifyData interface.

  2. Click on "Add Source".

    Image
    Image

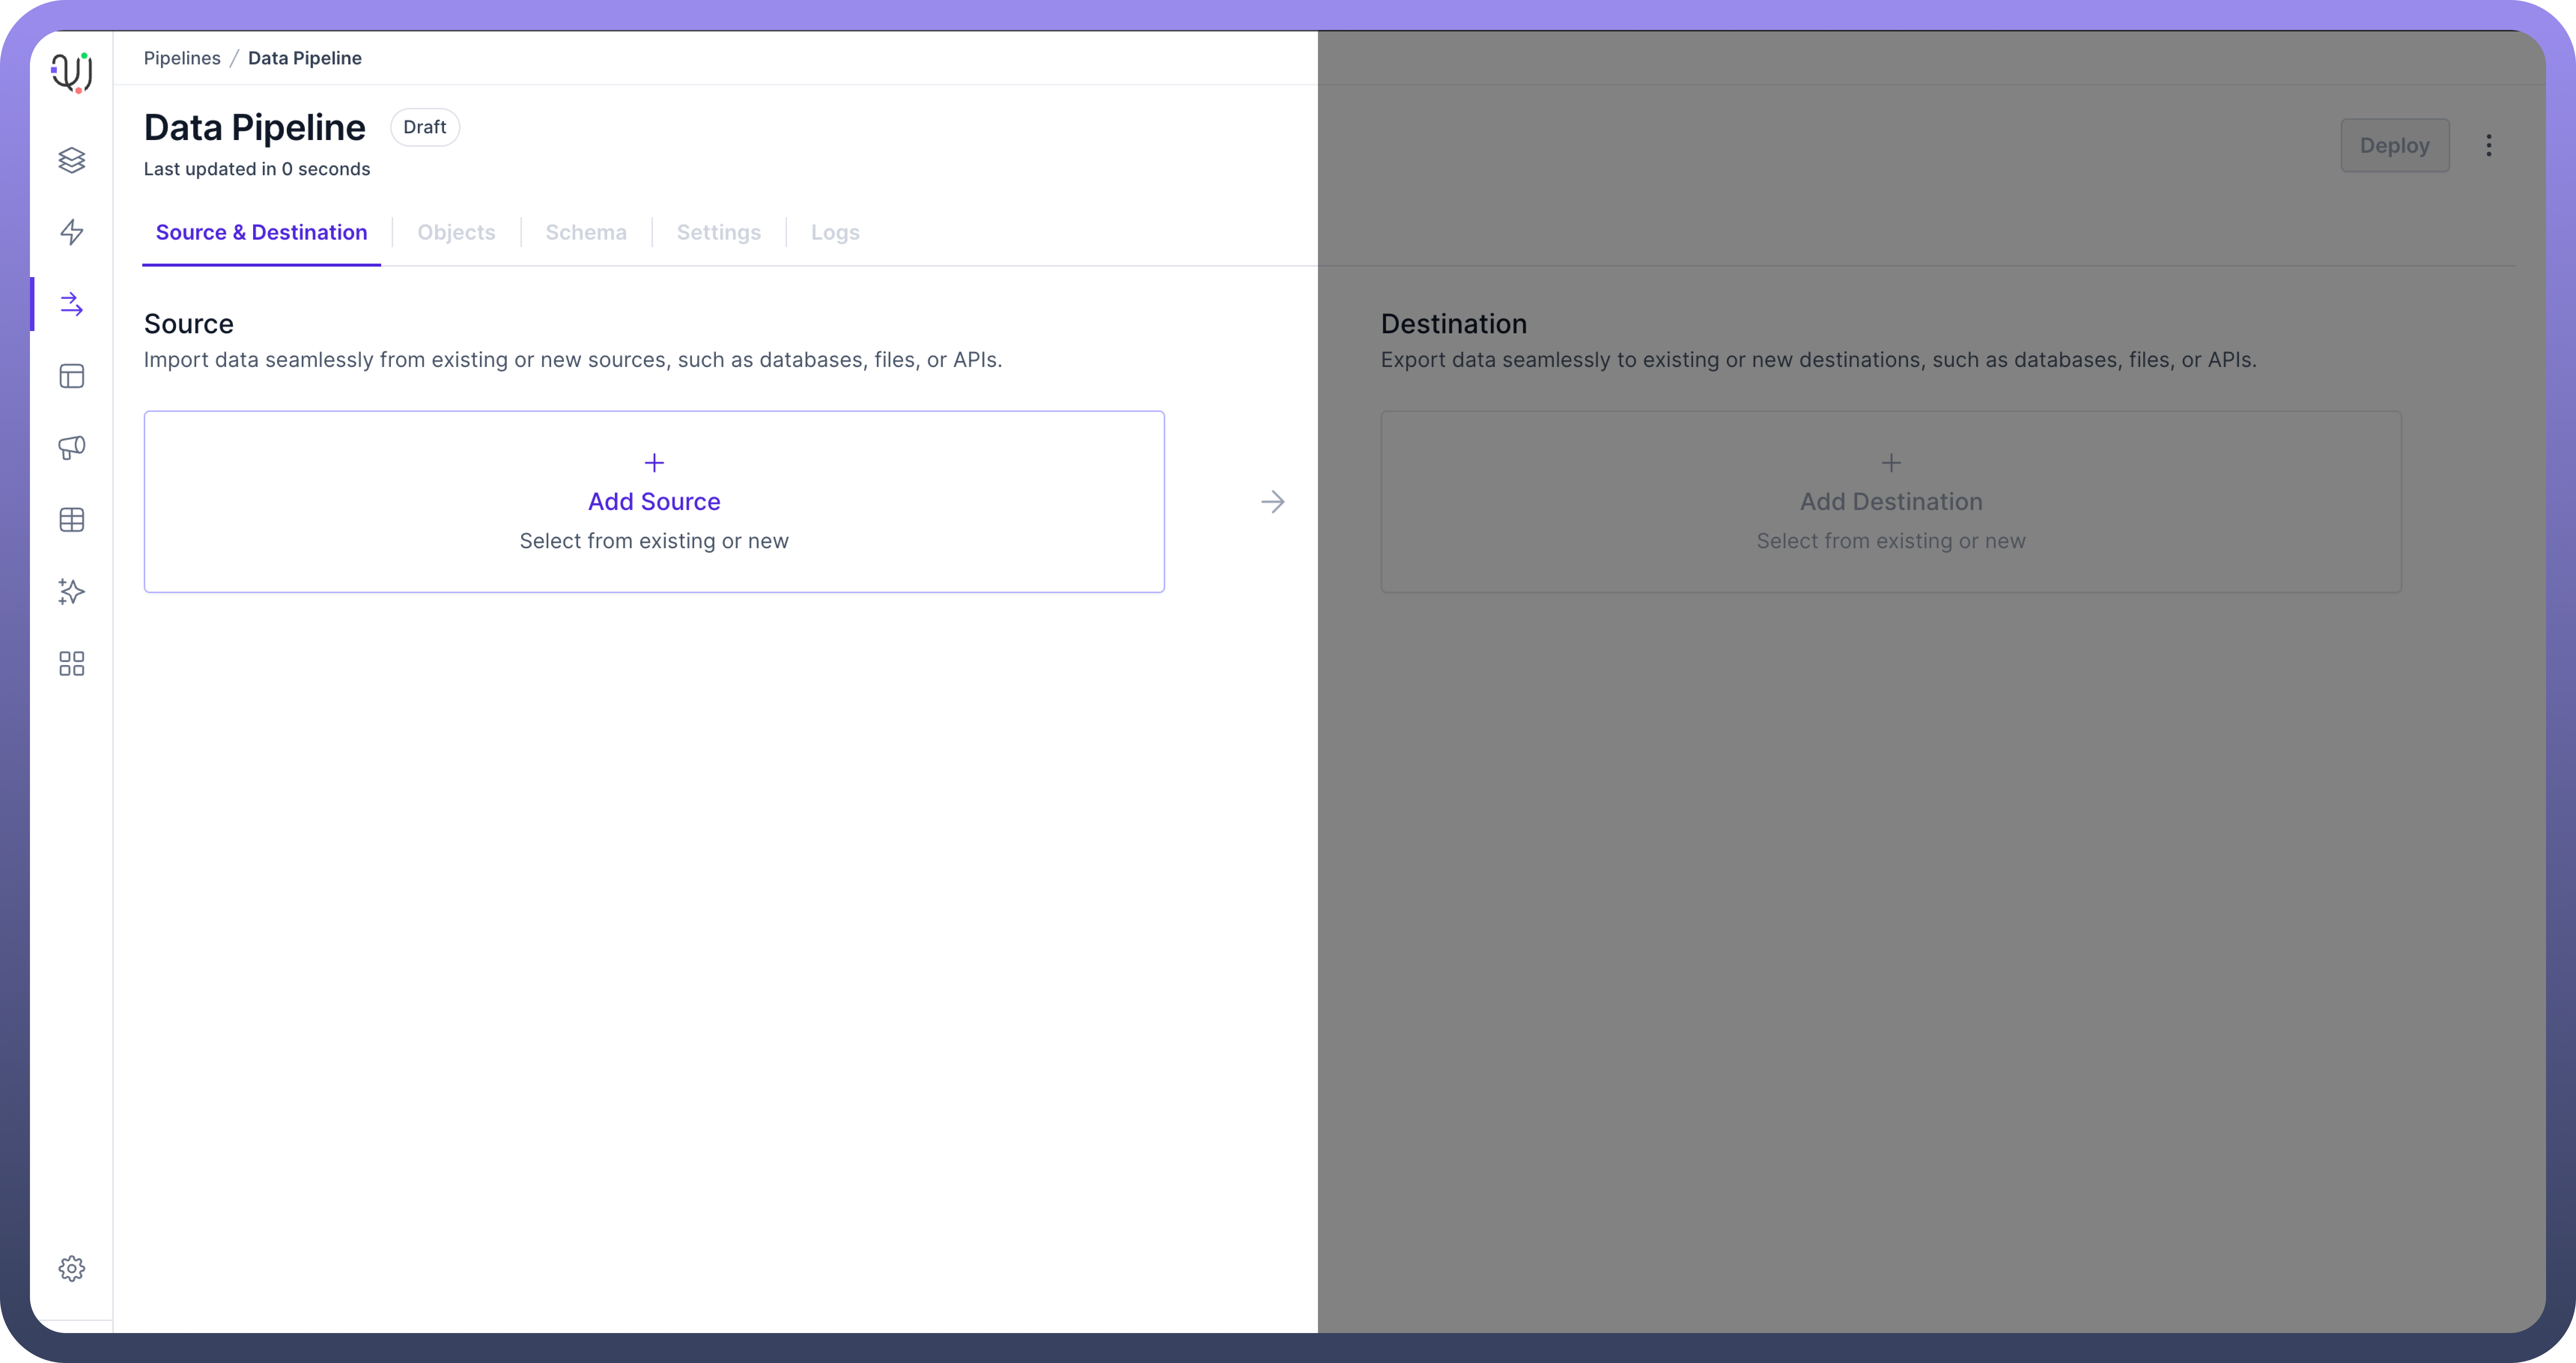
  3. Choose one of two options:

    • Select from existing connections

    • Add a new source

      Image
      Image
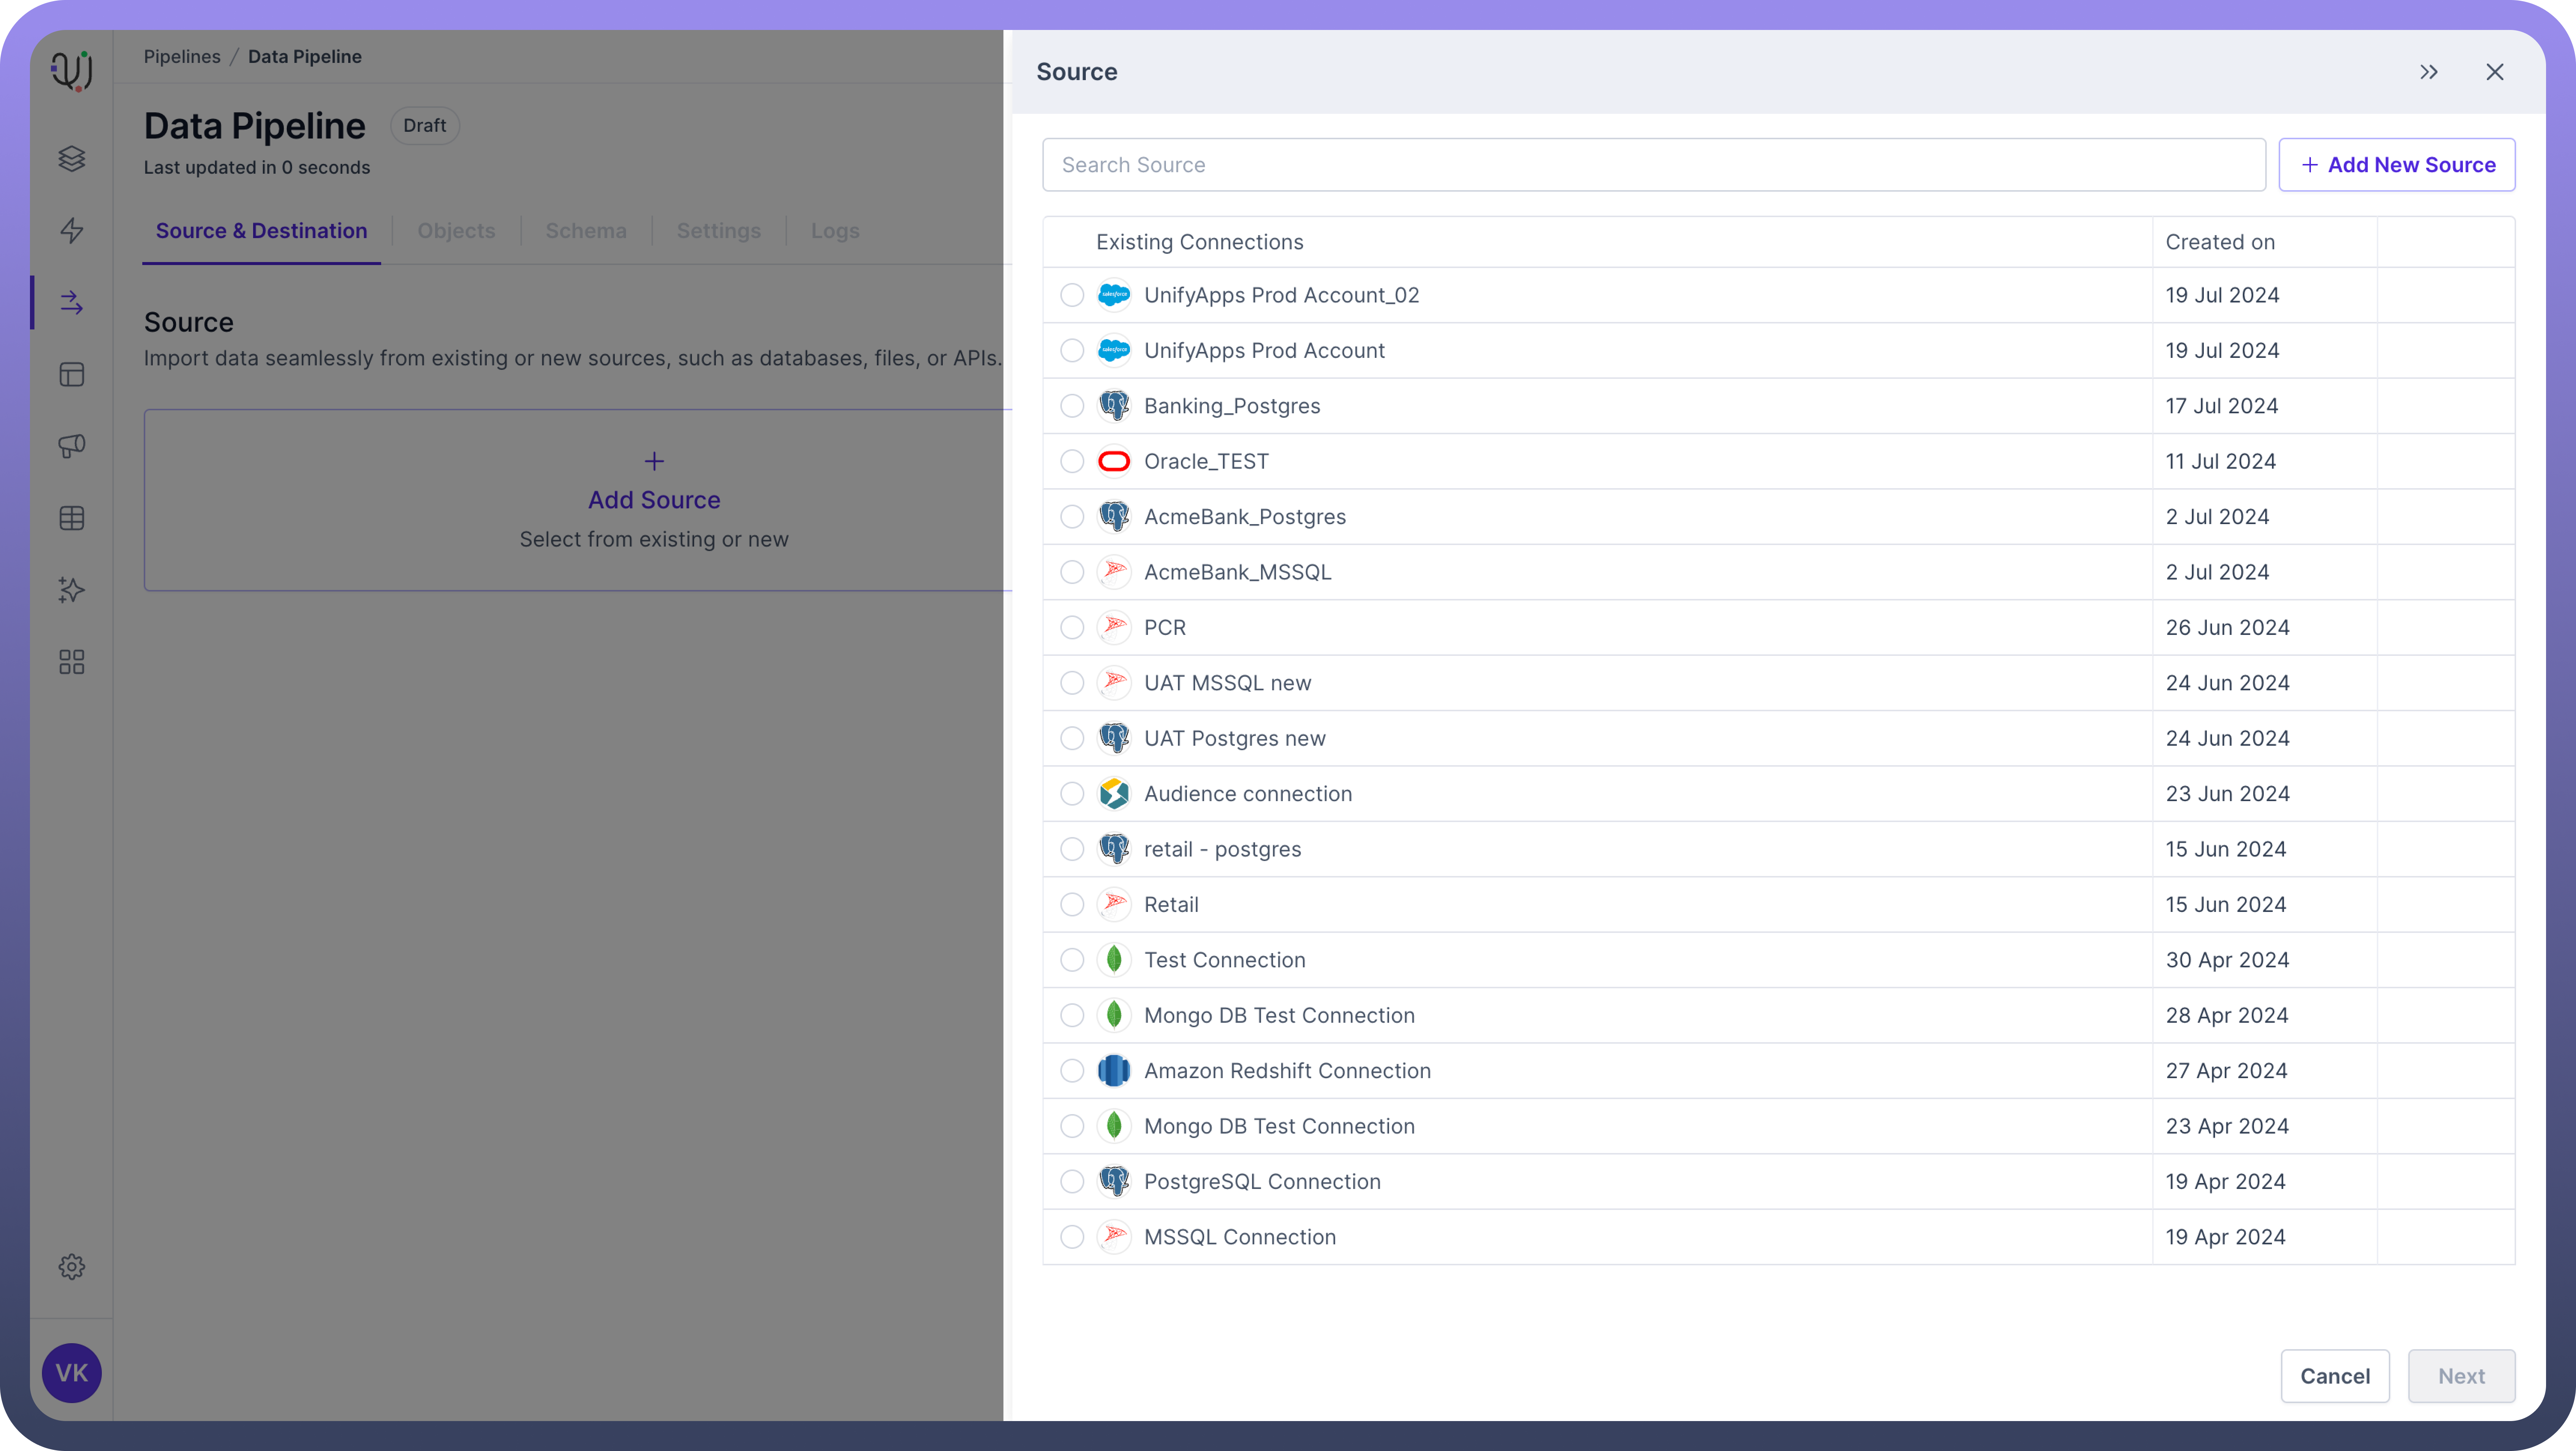
  4. If adding a new source, select a connection type from the list of supported databases or services.

  5. Click "Next" to proceed to the Authentication form.

    Image
    Image
  6. For example, for MSSQL, fill in the required details in the Authentication form. This typically includes:

    • Server address or endpoint URL

    • Port number

    • Username

    • Password

    • Database name (if applicable)
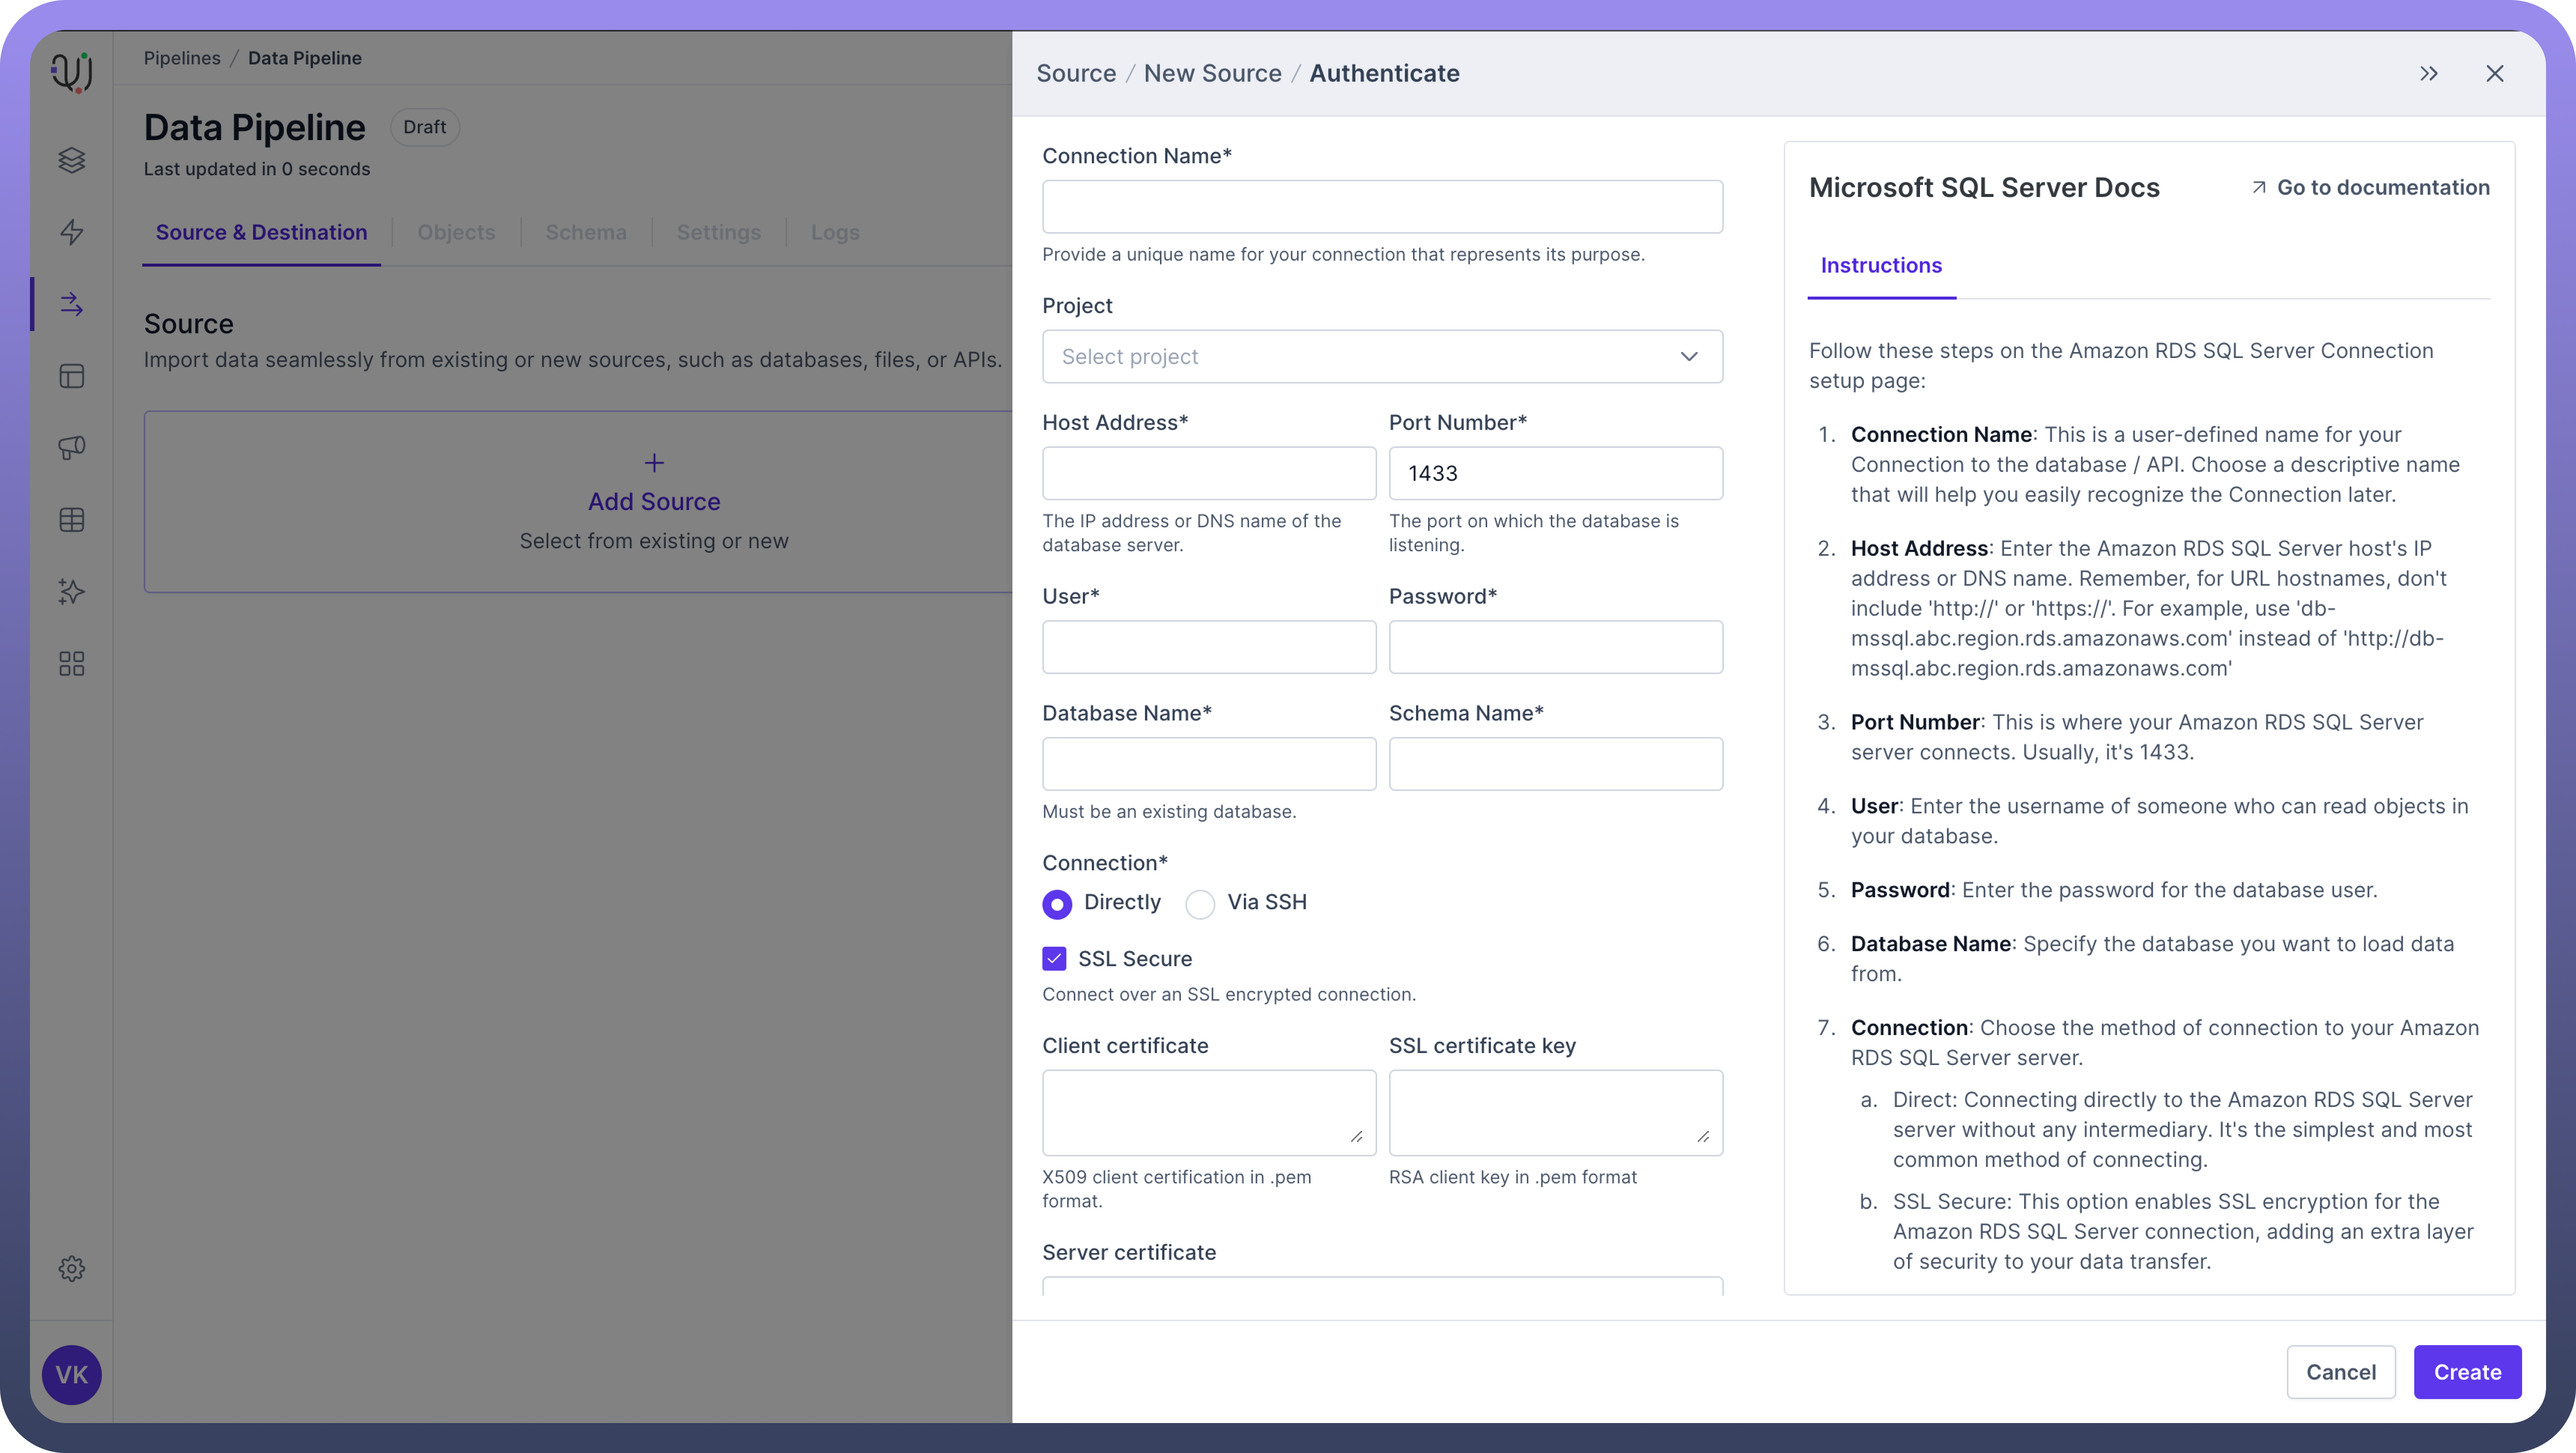
      Image
      Image
  7. Click the "Create" button to validate the connection.

  8. If the validation fails, review the error message, make necessary corrections, and click "Create" again.

Set up the Destination

This is where your data will end up after being processed. It could be another database, a data warehouse, or a business intelligence tool.

After setting up your source, follow these steps to set up your destination:

  1. In the same "Source & Destination" tab, click on "Add Destination".

  2. Choose to either select from existing connections or add a new destination.

  3. If adding a new destination, select from the list of supported connection types.

  4. Click "Next" to proceed to the Authentication form.

    Image
    Image

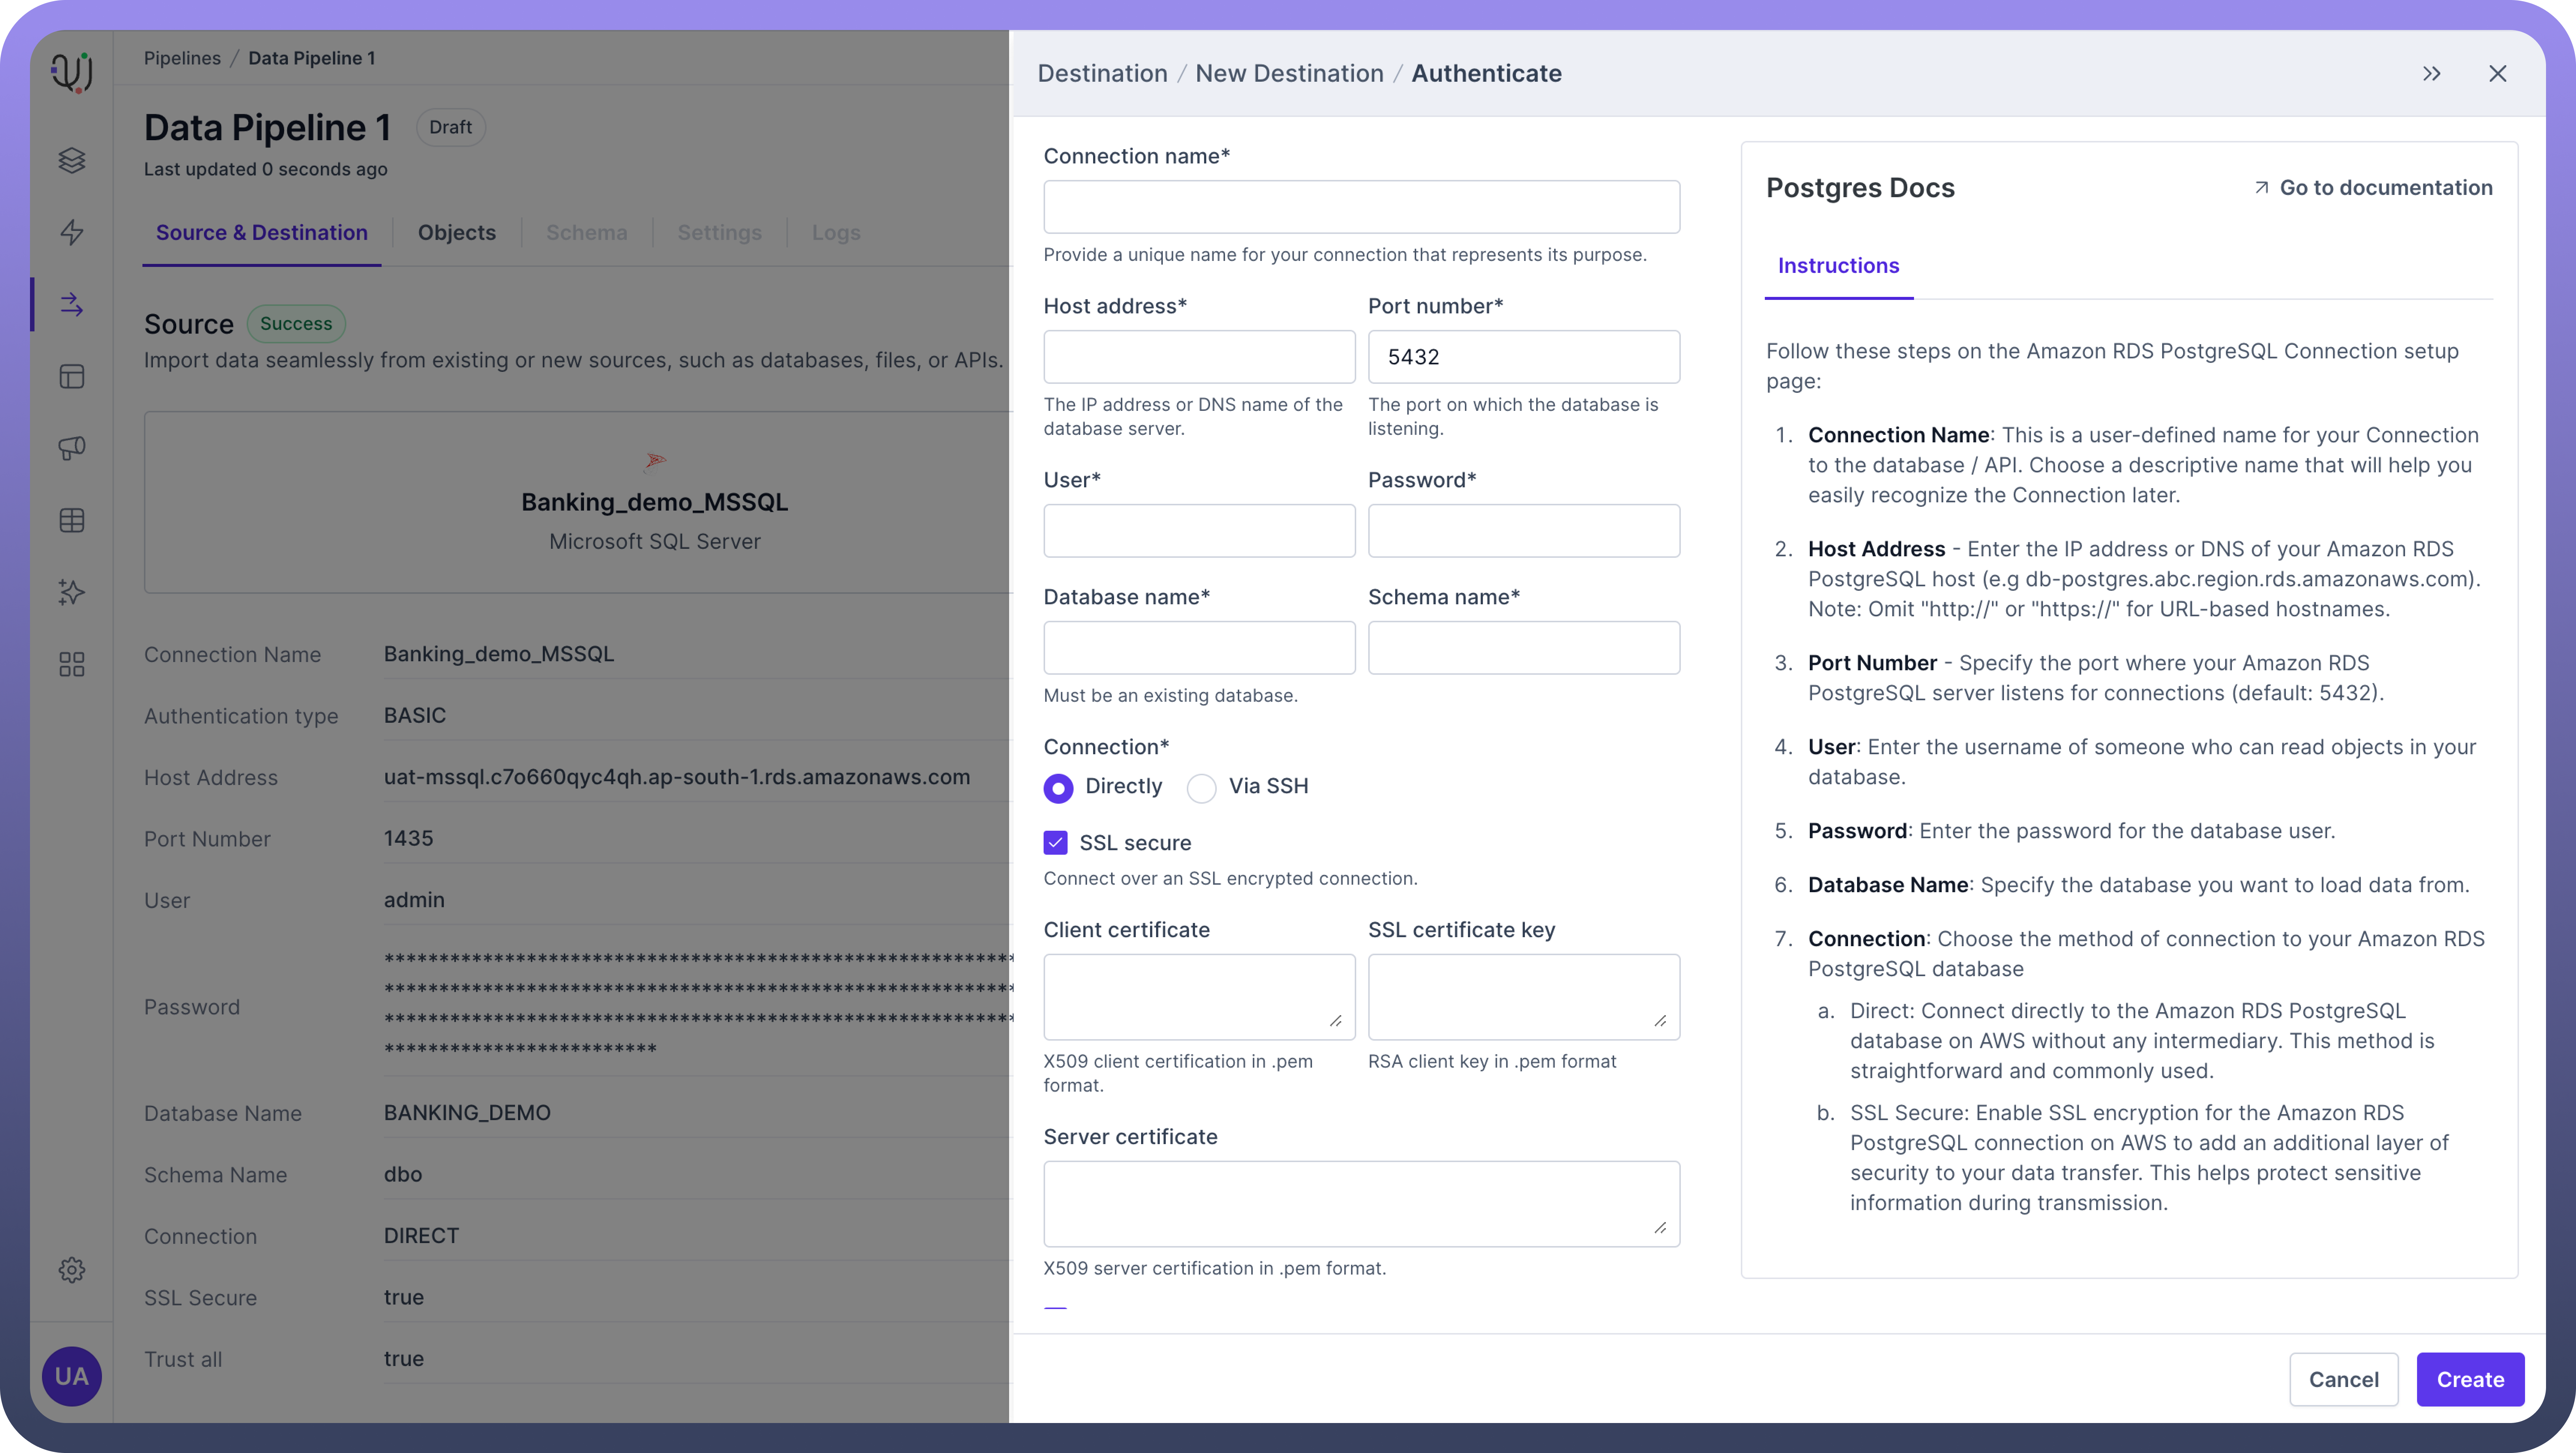
  5. Fill in the required details in the Authentication form.

  6. Click the "Create" button to validate the connection.

  7. If validation fails, review the error message, make necessary corrections, and retry.

Thumbnail

Tip

Do add an appropriate name for your source and destination connection since you can use the same connections in multiple data pipelines.

FAQs

What types of data sources can I connect to in UnifyData?

You can connect to different types of data sources:

  • Databases (e.g., Oracle, MySQL, SQL Server)

  • Cloud storage services (e.g., Amazon S3, Google Cloud Storage)

  • APIs

  • Other data repositories

How do I ensure the security of my data connections?

To ensure the security of your data connections,

  • UnifyData uses encryption protocols for data in transit and at rest

  • Provide authentication credentials (API keys, usernames, passwords, etc.)

  • Regularly update credentials

  • Use strong authentication methods

What should I do if my data connection fails?

If your data connection fails, 

  1. First verify that the connection details (such as server address, port, authentication credentials) are correct and up-to-date. 

  2. Ensure that network settings and firewall rules allow communication between UnifyData and the data source.

  3.  If the issue persists, check for any error messages or logs provided by UnifyData for further insights and consult the platform's support documentation or contact technical support for assistance.