Contents

Cancel

Recommended Articles

  1. unify-apps

    Indexing

    Unify AI

    Transform raw content into searchable knowledge through AI-powered indexing and vector embeddings

  2. unify-apps

    JobNimbus

    Unify Integrations

    Integrate your application with JobNimbus to manage leads, track jobs, and streamline your workflow processes efficiently

  3. unify-apps

    IMAP

    Unify Integrations

    Integrate your app with IMAP to enable seamless email synchronization, real-time access, and enhanced communication workflows.

  4. unify-apps

    Preview Your Work

    Unify Automations

    Effortlessly review & monitor your automation’s performance

  5. unify-apps

    QuickBooks

    Unify Integrations

    Integrate your app with QuickBooks to streamline accounting, automate invoicing, and manage finances effortlessly

  6. unify-apps

    FTP/FTPS

    Unify Integrations

    Connect your app with FTP/FTPS to automate secure file transfers and streamline data exchange across systems.

  7. unify-apps

    Filters

    Unify Applications

    Enable users to refine, search, and sort data effortlessly across dashboards and datasets

  8. unify-apps

    Insided

    Unify Integrations

    Integrate your app with Insided to enhance customer engagement, streamline community management, and drive self-service support.

  9. unify-apps

    Facebook Ads

    Unify Integrations

    Connect your app with Facebook Ads to automate campaign management, optimize ad performance, and track marketing success.

  10. unify-apps

    Gainsight

    Unify Integrations

    Integrate your app with Gainsight to enhance customer success, automate engagement workflows, and drive retention

  11. unify-apps

    Livestorm

    Unify Integrations

    Integrate your app with Livestorm to streamline webinar hosting, automate event management, and enhance audience engagement.

  12. unify-apps

    Snowflake

    Unify Automations

    Connect to Snowflake for fast, scalable cloud data warehousing and analytics

  13. unify-apps

    Cognito Forms

    Unify Integrations

    Integrate your app with Cognito Forms to create custom forms, automate data collection, and streamline workflows

  14. unify-apps

    Button

    Unify Applications

    Create interactive elements with ease using buttons

  15. unify-apps

    BambooHR

    Unify Automations

    Integrate your app with BambooHR to streamline HR management, automate employee data processing, and enhance onboarding workflows

  16. unify-apps

    Build your first automation

    Unify Automations

    Learn how to build your automation step by step

  17. unify-apps

    User Management

    Unify Applications

    Efficiently manage user roles and permissions

  18. unify-apps

    Microsoft Teams

    Unify Automations

    Connect your app with Microsoft Teams to enhance communication, automate workflows, and foster collaboration across your organization

#
Unify Data
Logo
Create your first Data Pipeline
Logo
Object Selection & Schema Mapping

Object Selection & Schema Mapping

Logo

5 mins READ

After setting up your source and destination, the next crucial steps in creating your data pipeline are selecting the objects you want to transfer and mapping the schemas between your source and destination.

These steps ensure that the right data is moved and properly structured in your destination.

Object Selection

This involves choosing which tables, views, or other data structures from your source you want to include in your pipeline.

Follow these steps to select the objects for your data pipeline:

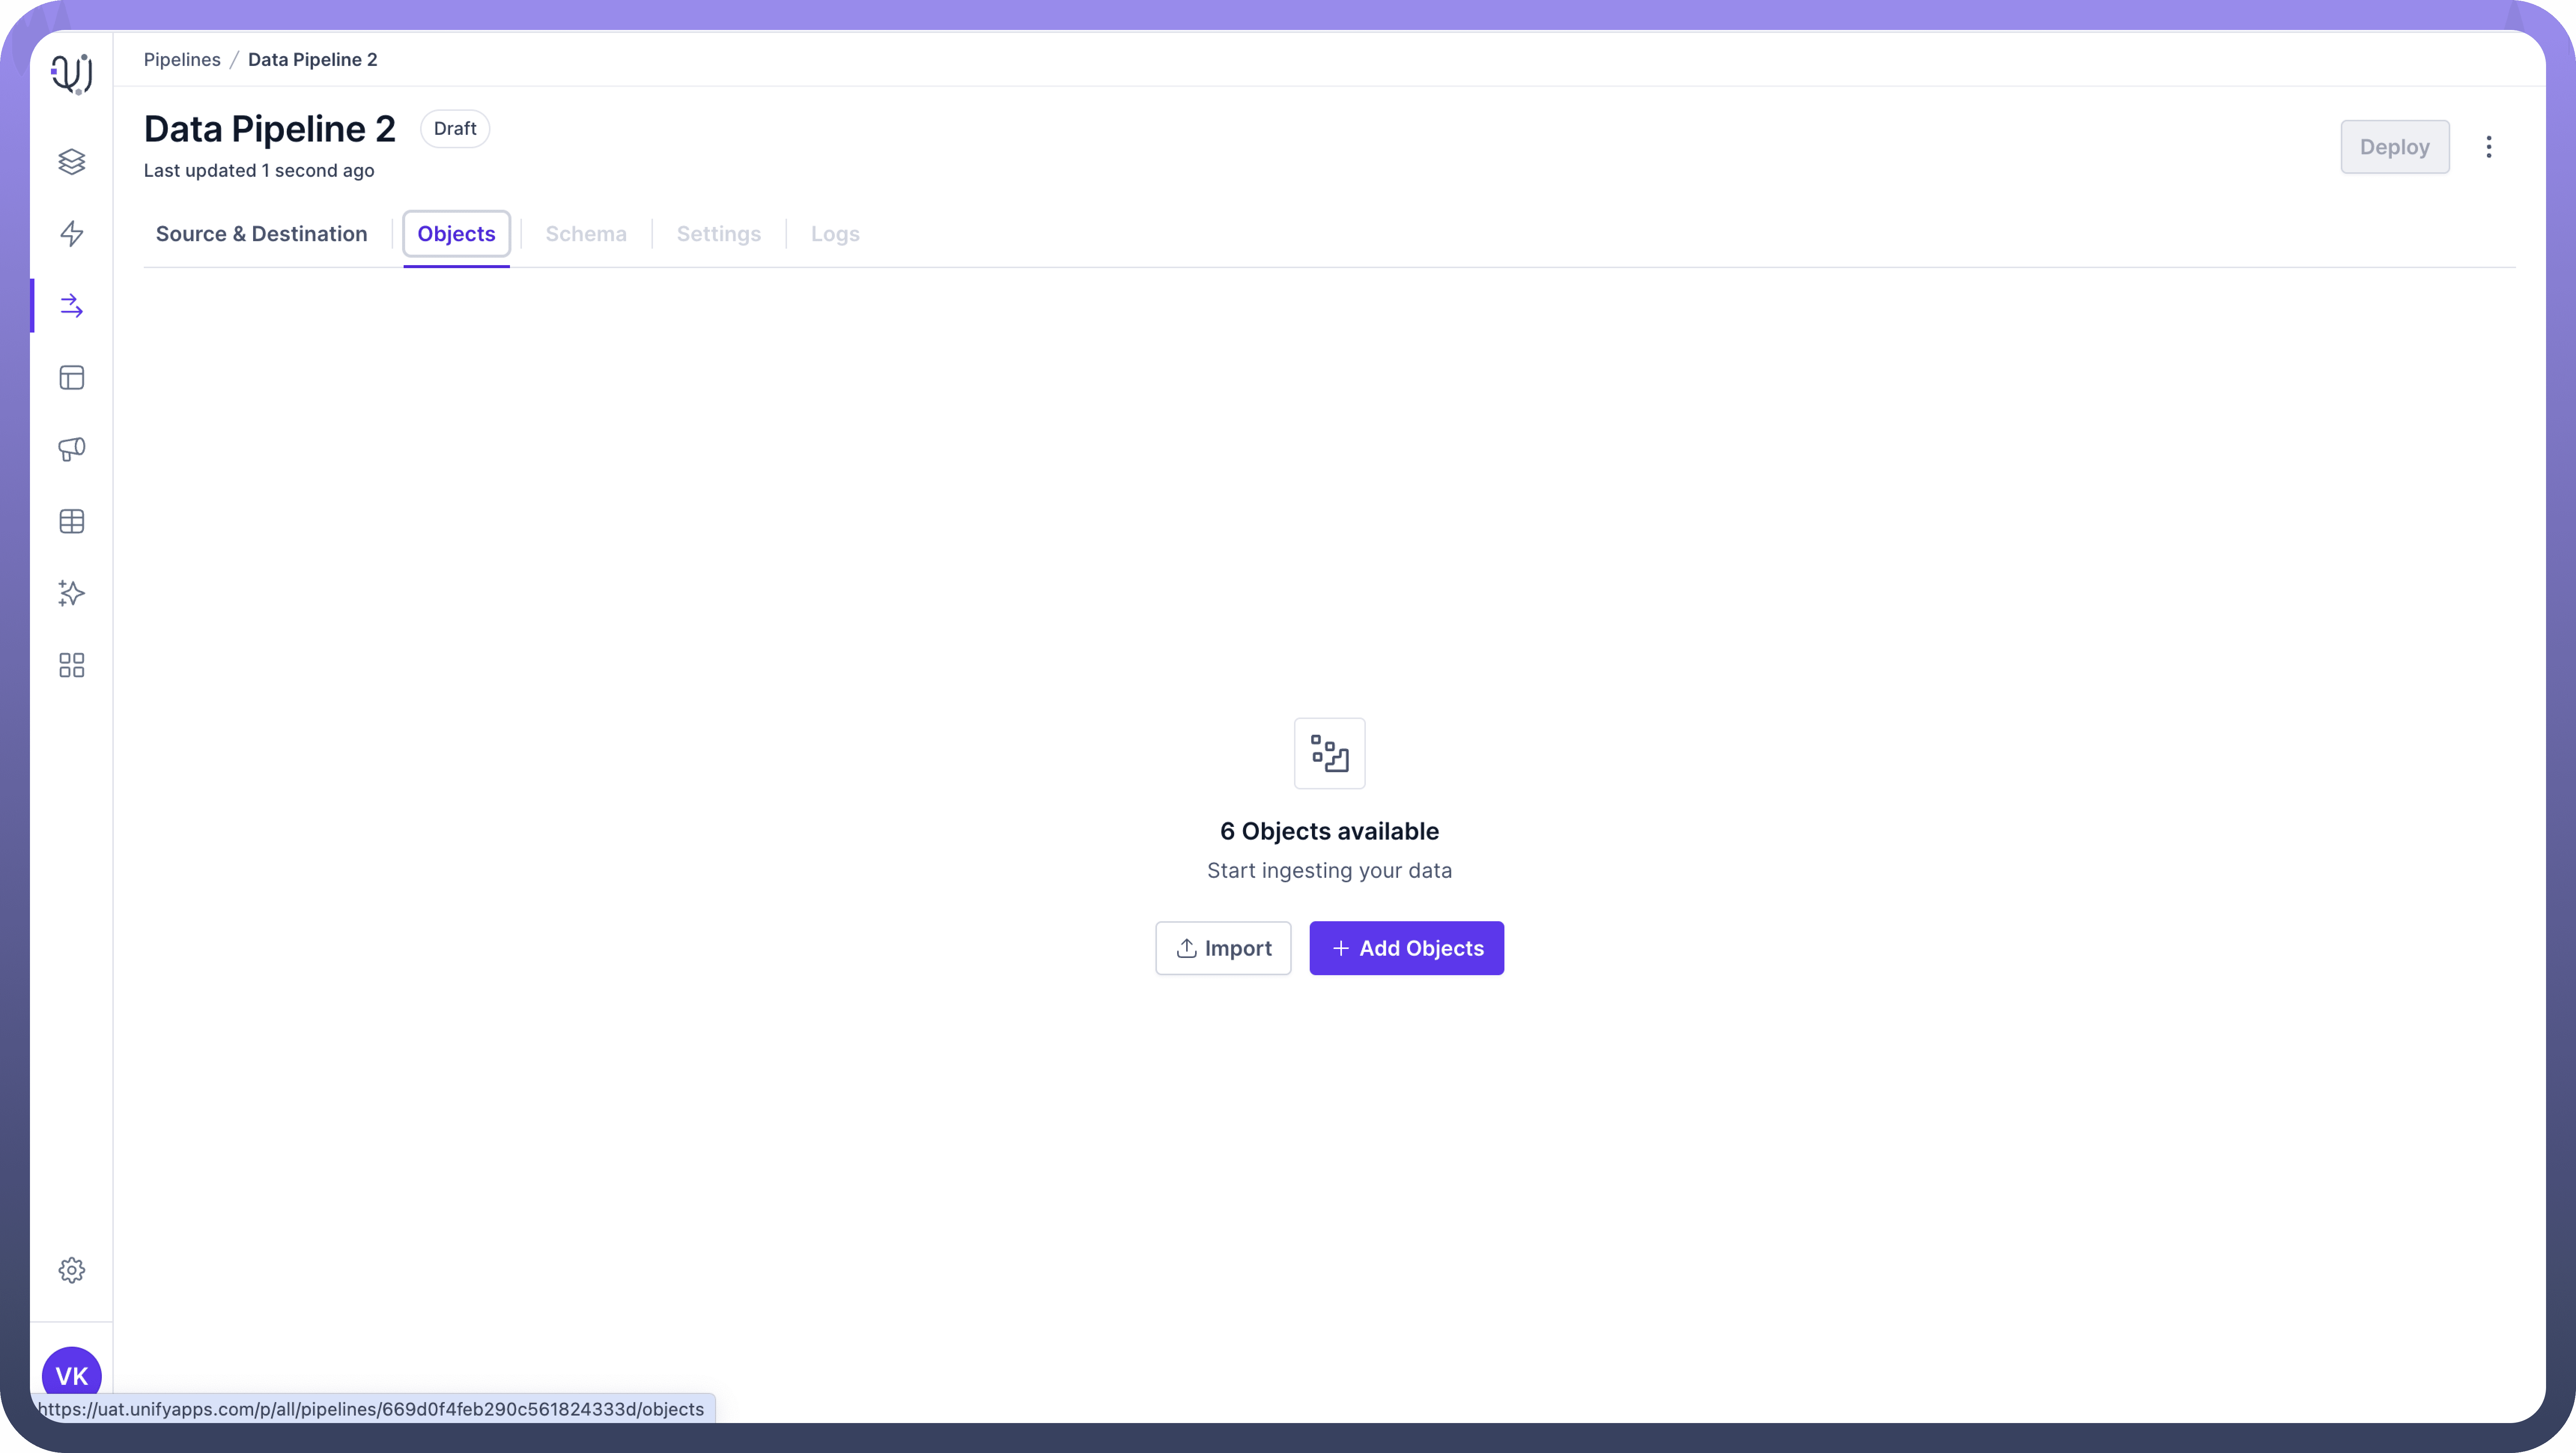
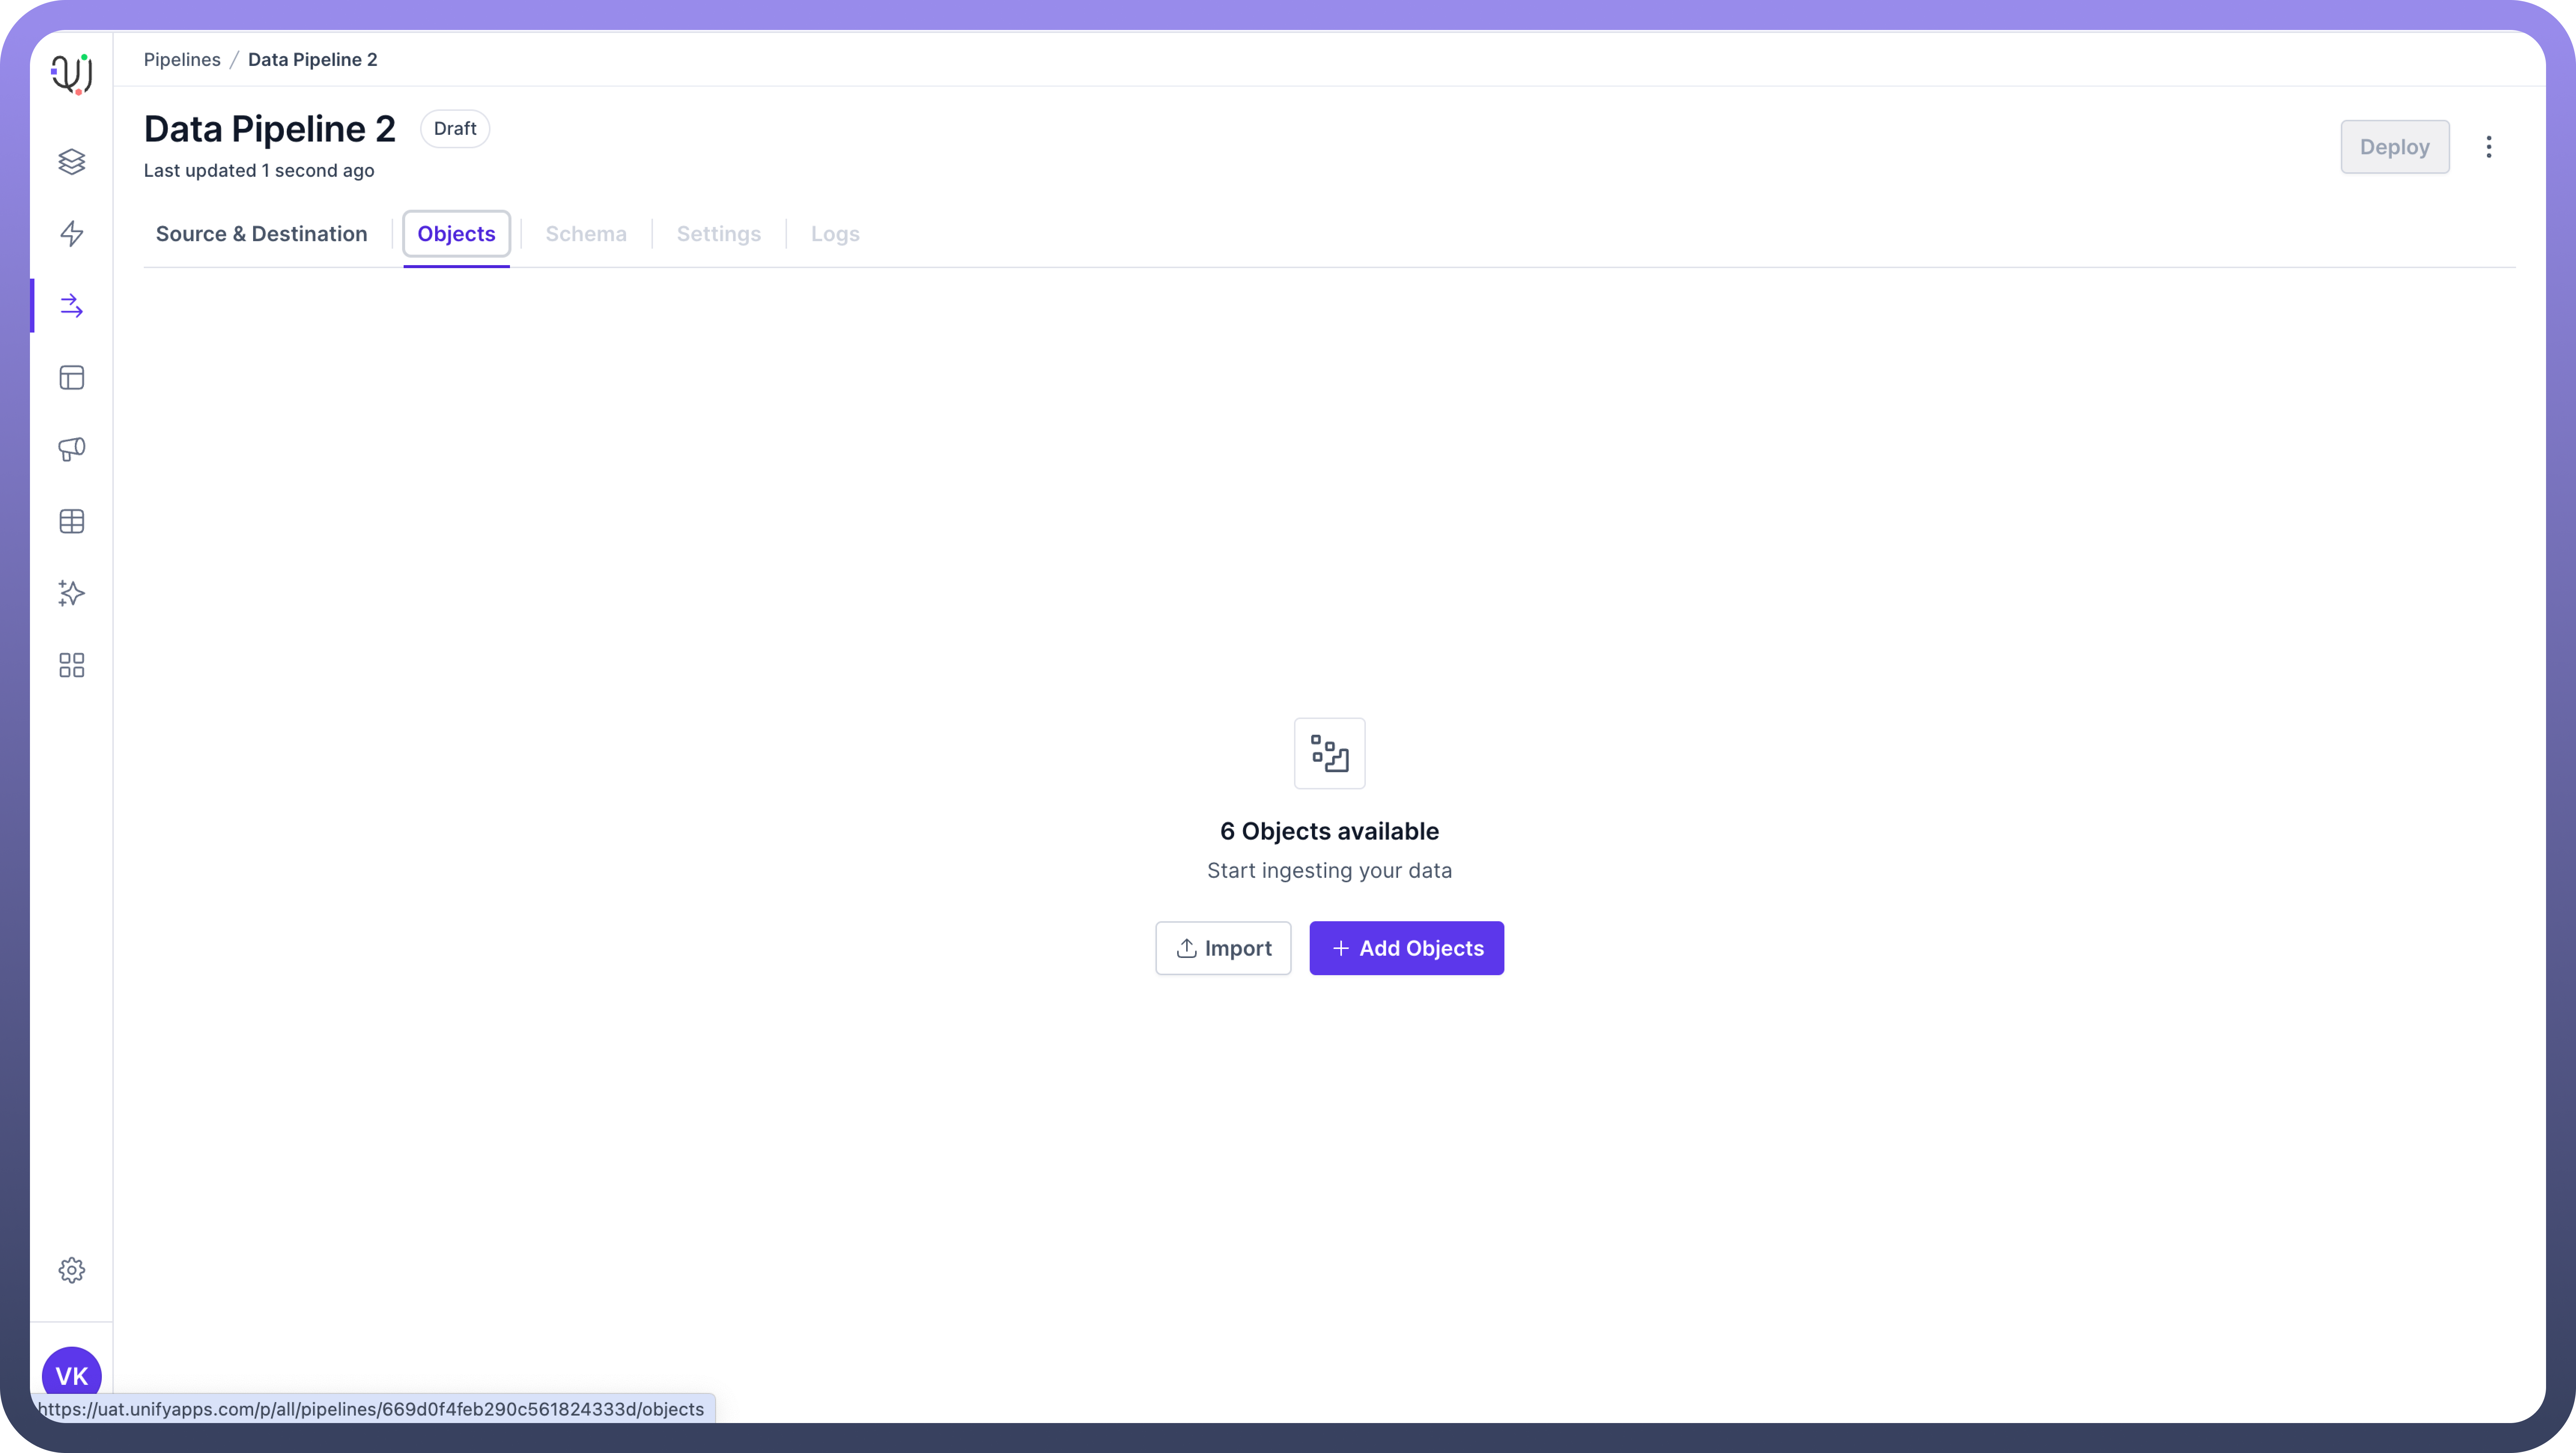
  1. Navigate to the "Objects" tab in the UnifyData interface.

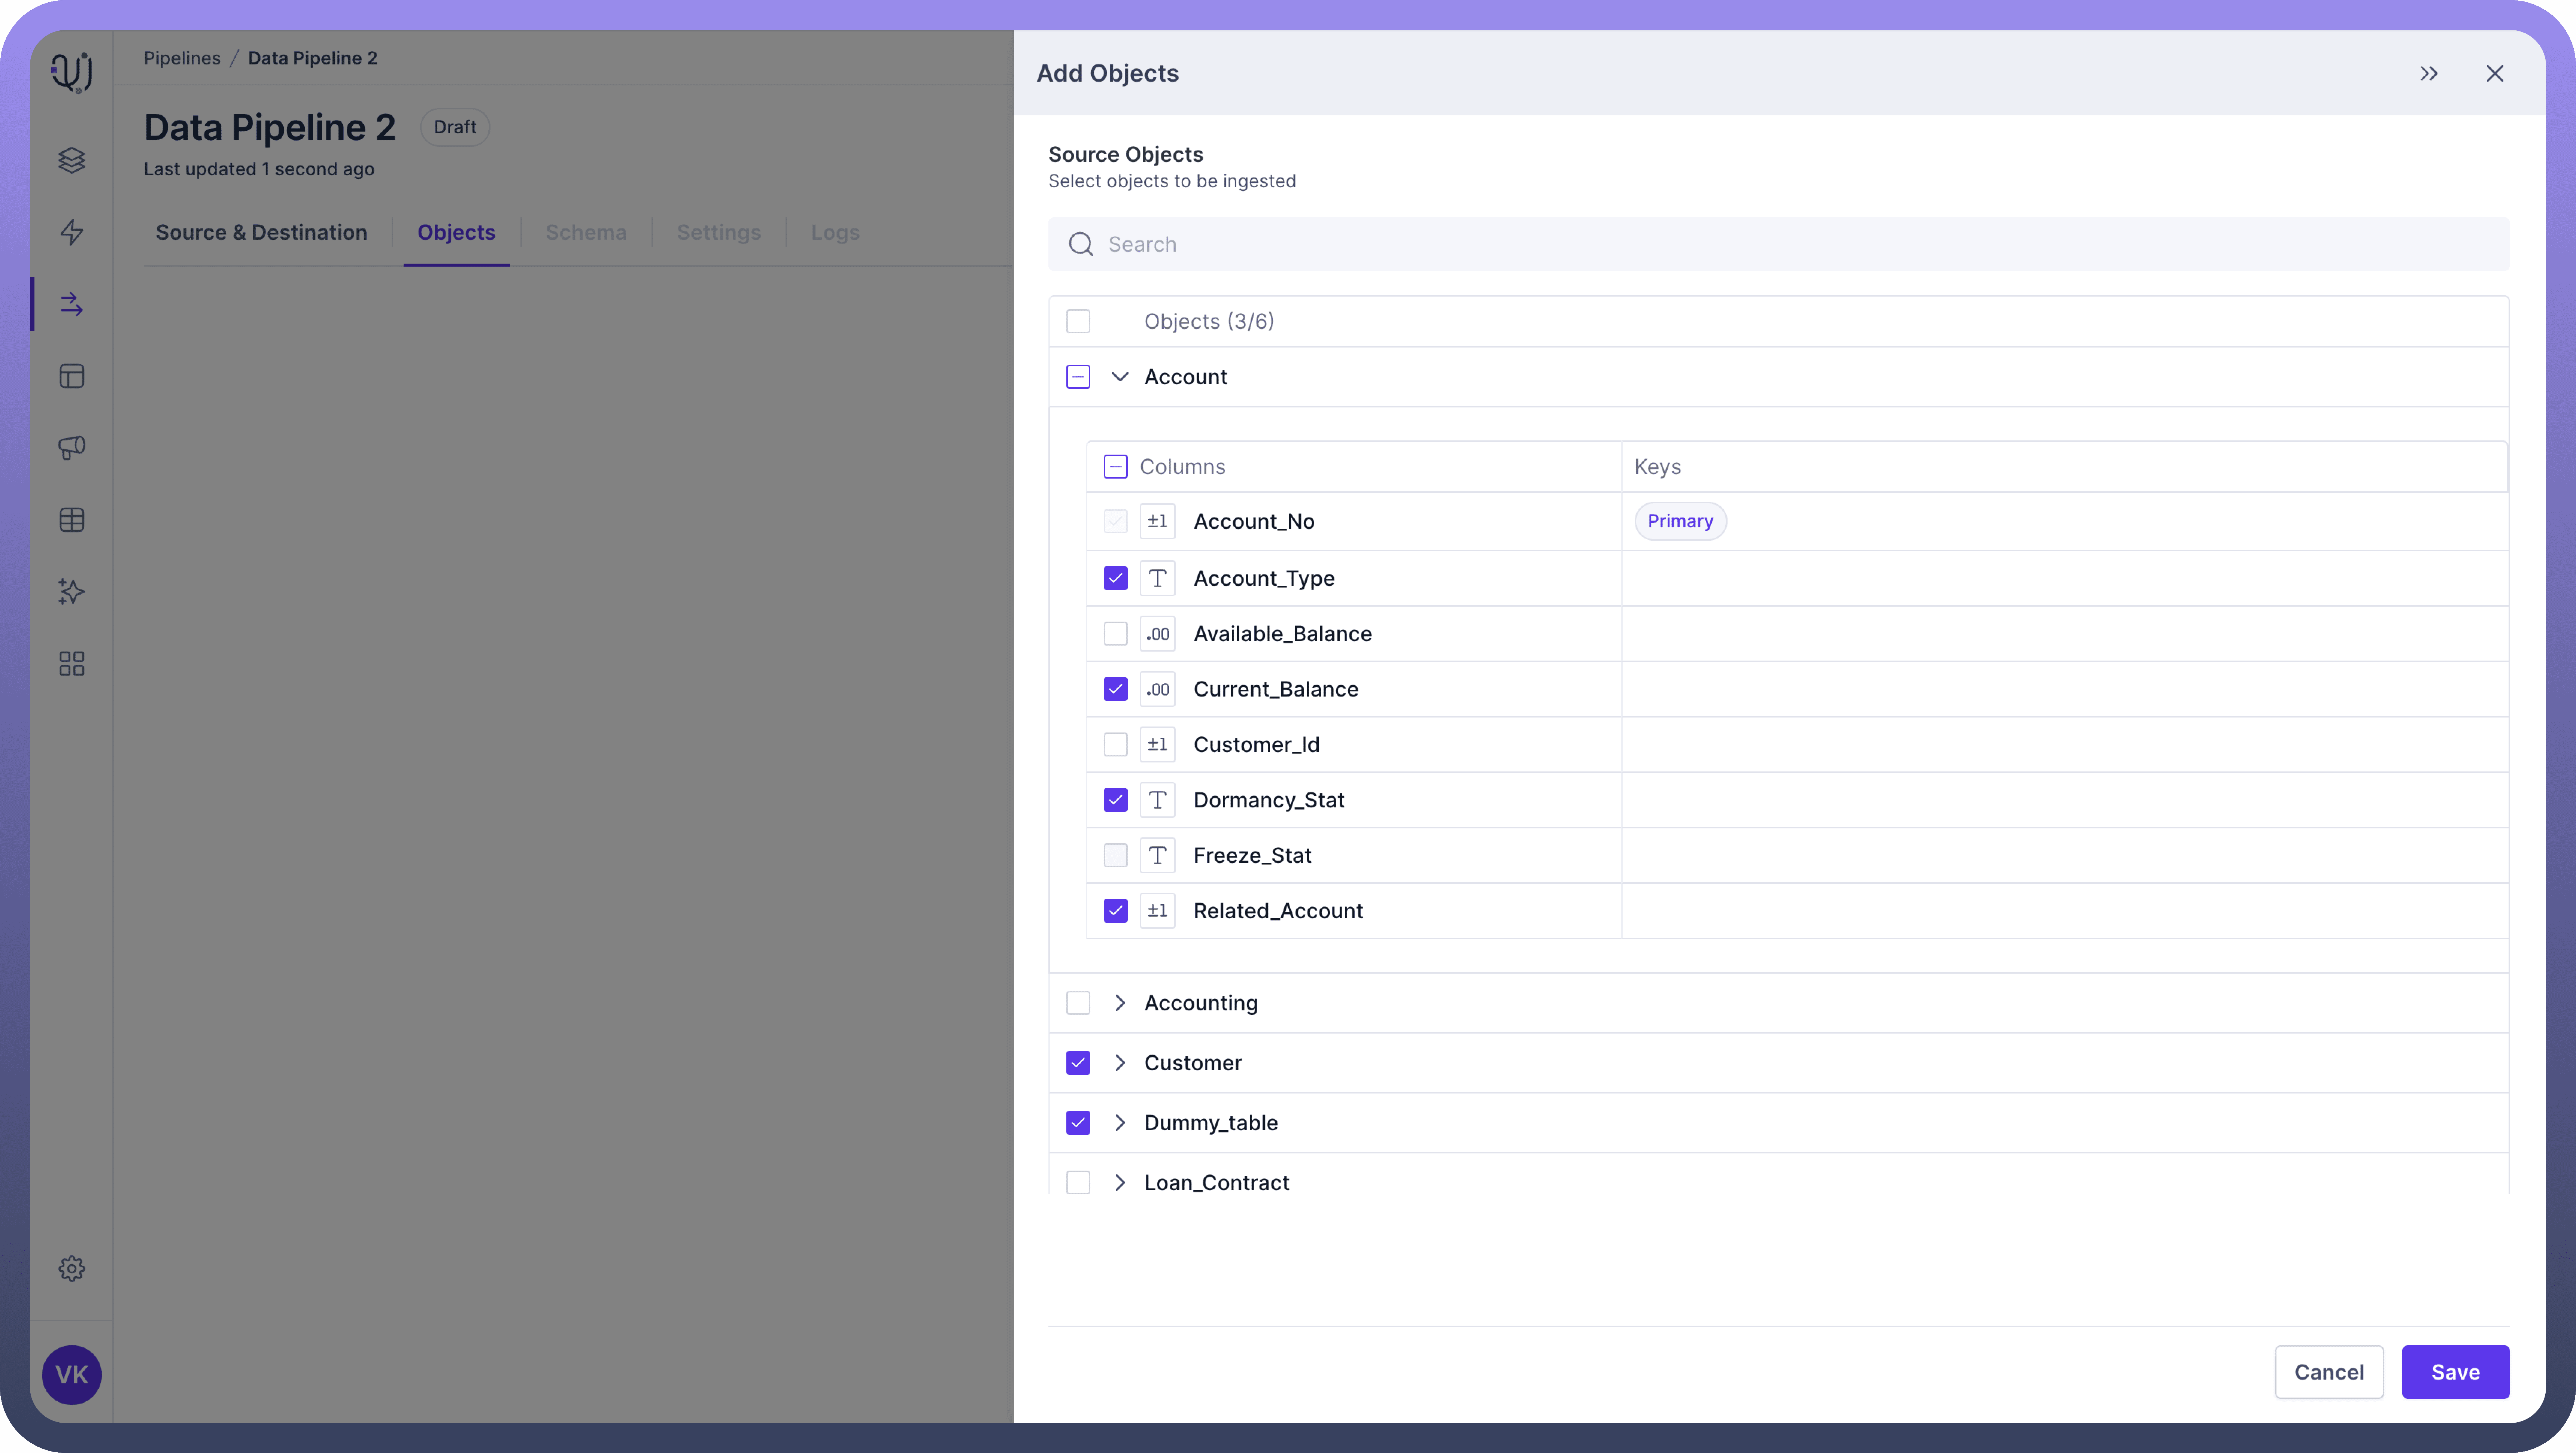
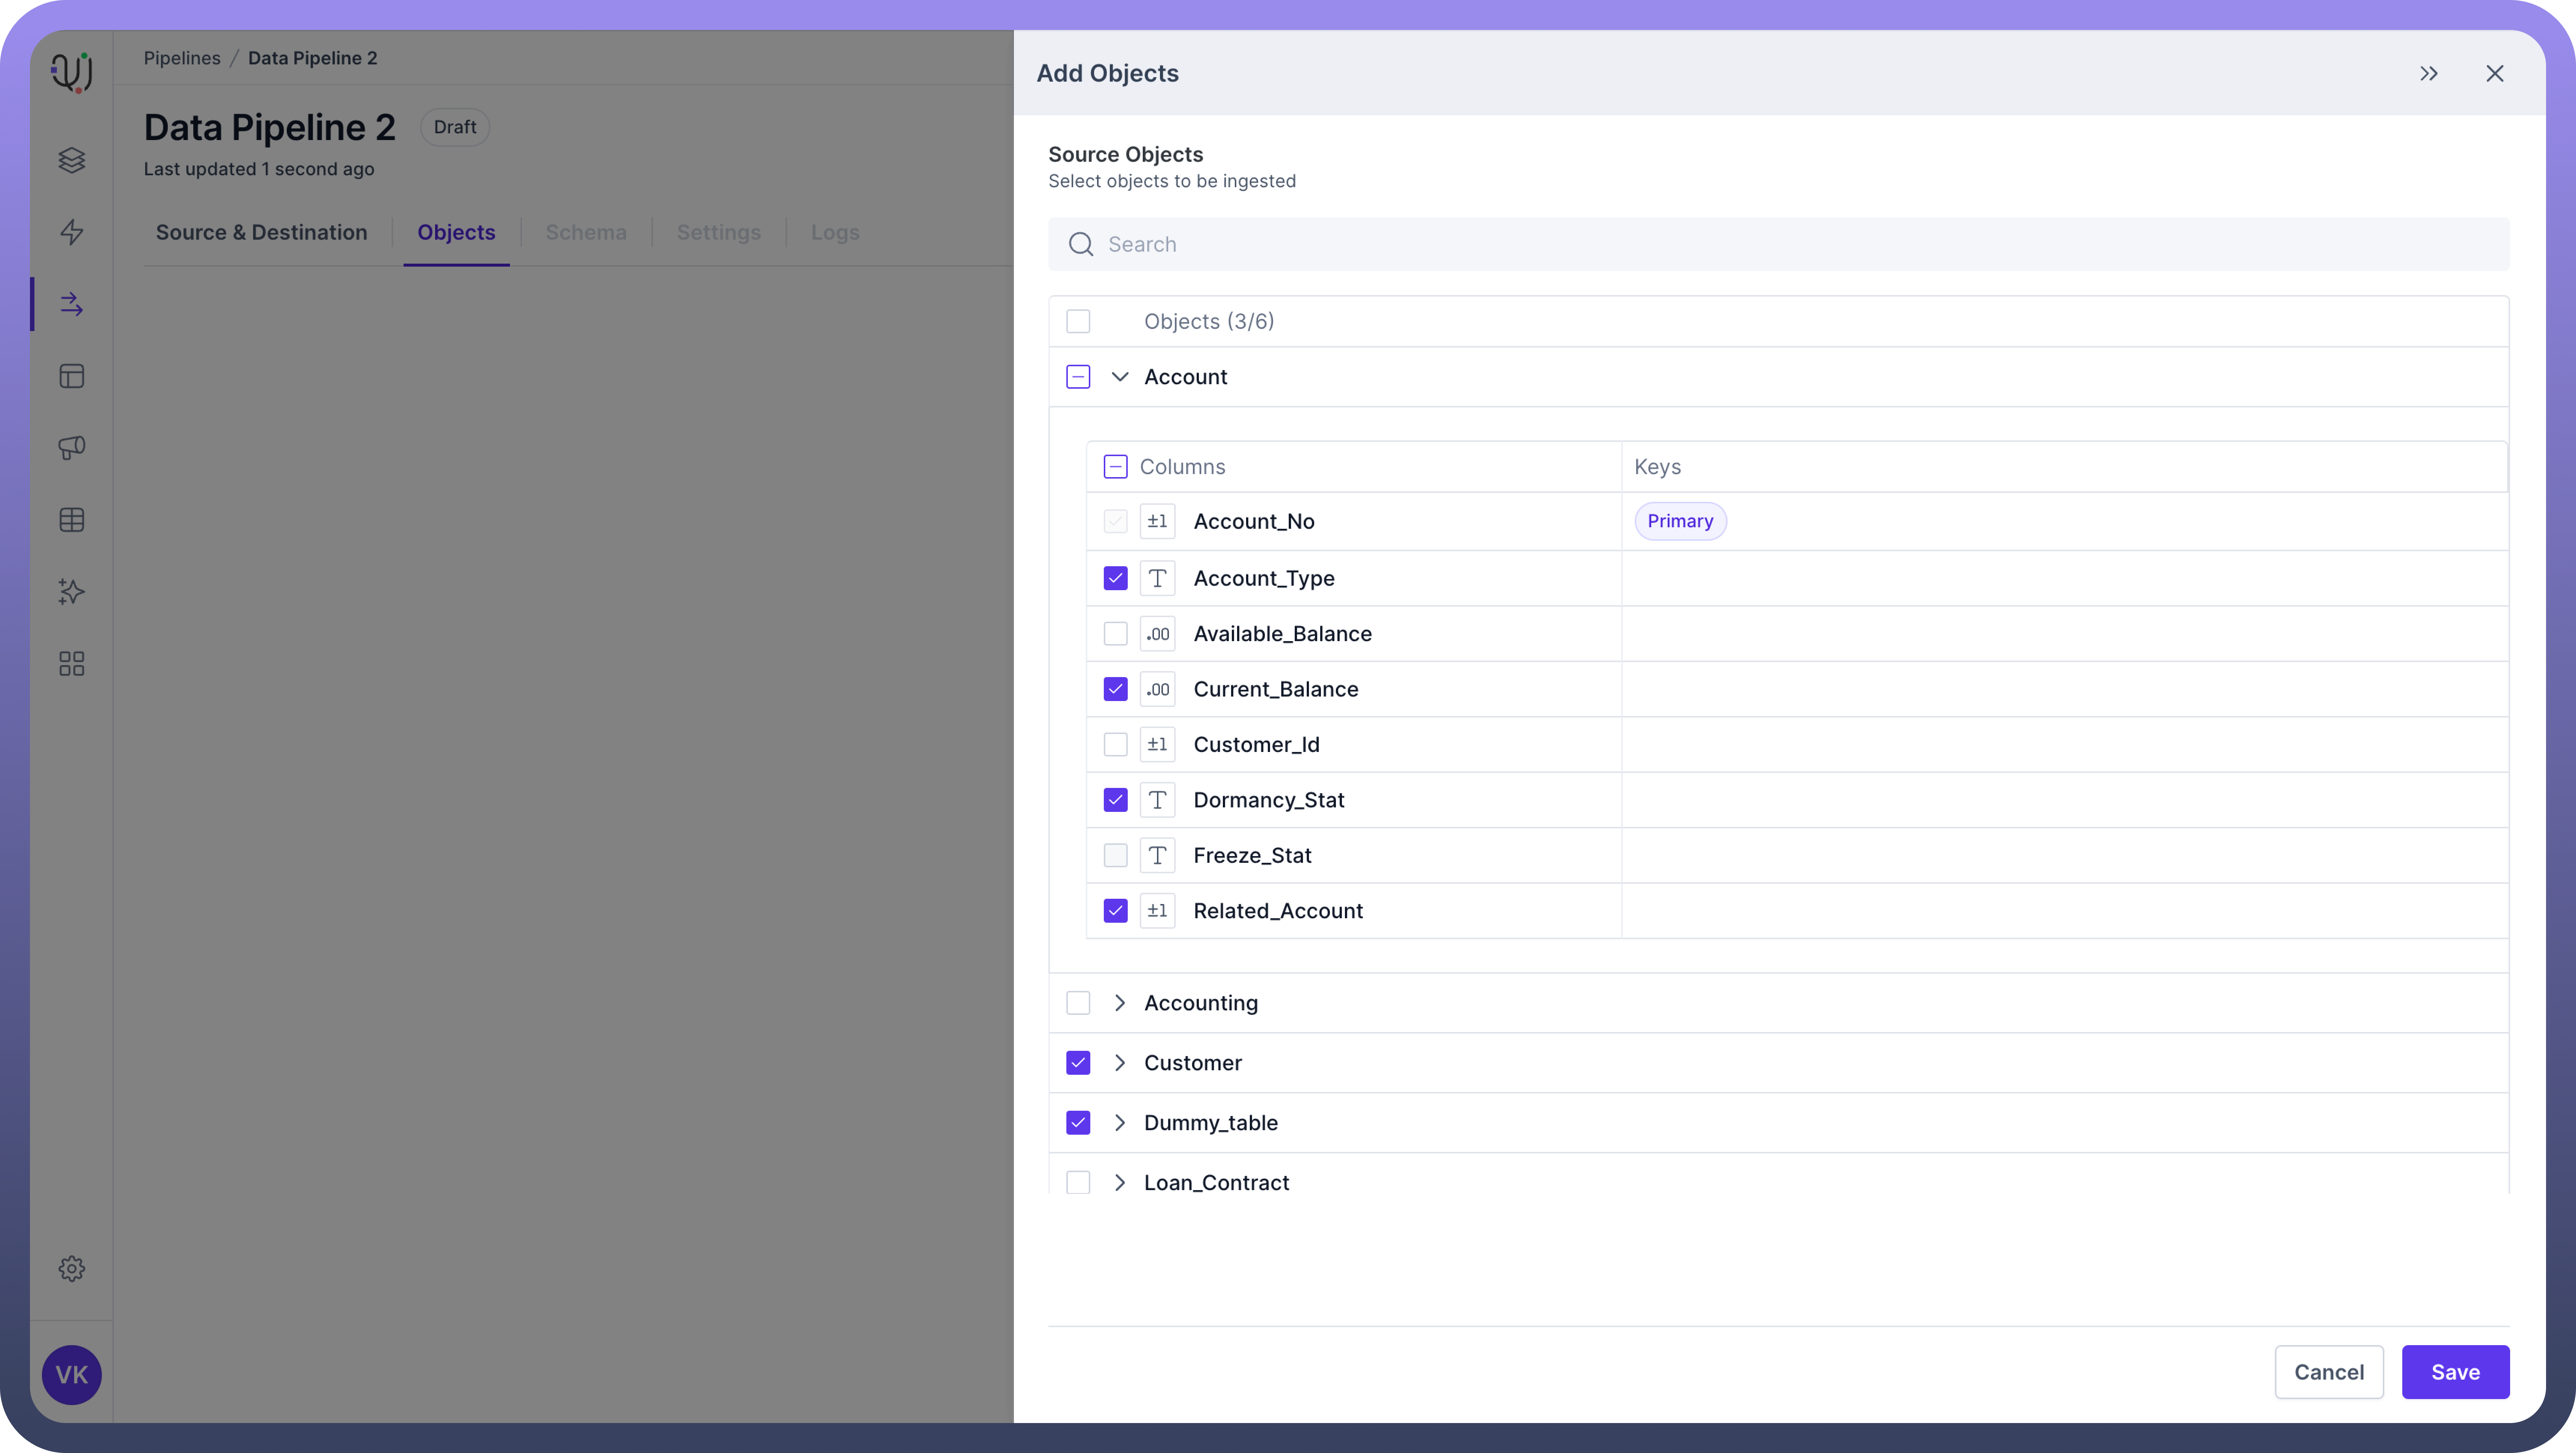
  2. Click on "Add Objects". This will open the object selection pane.
    Image
    Image
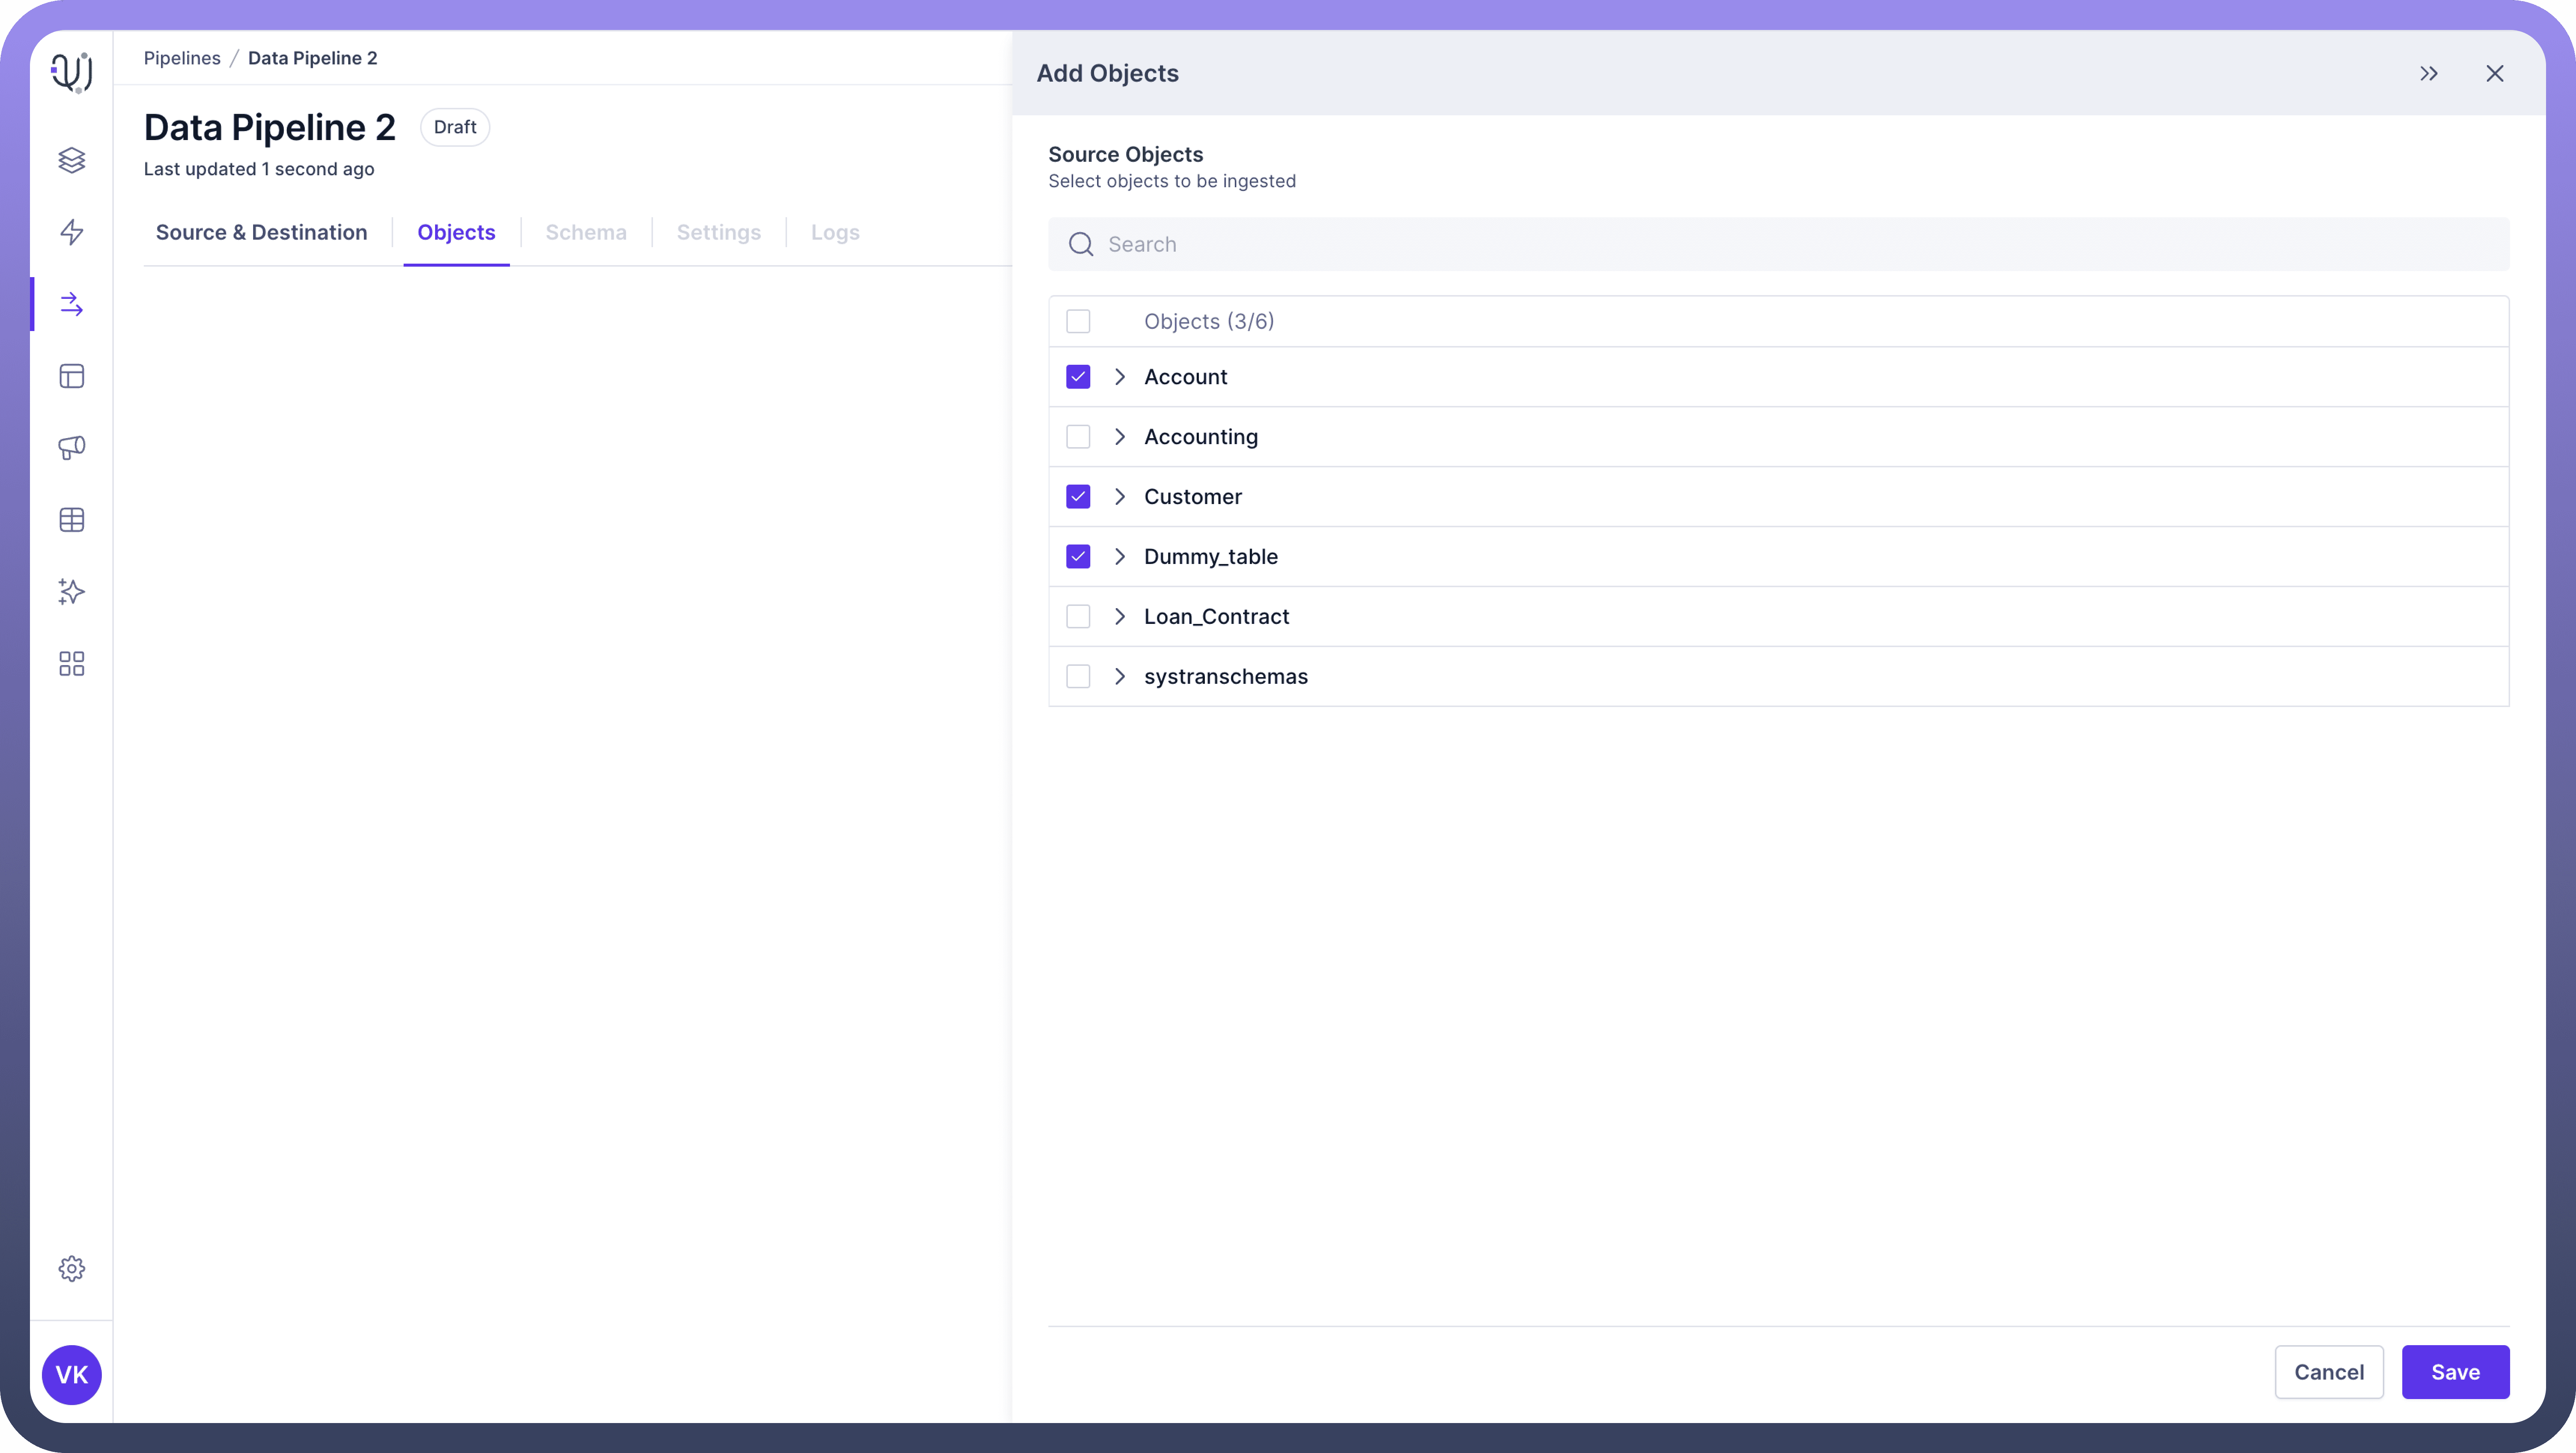
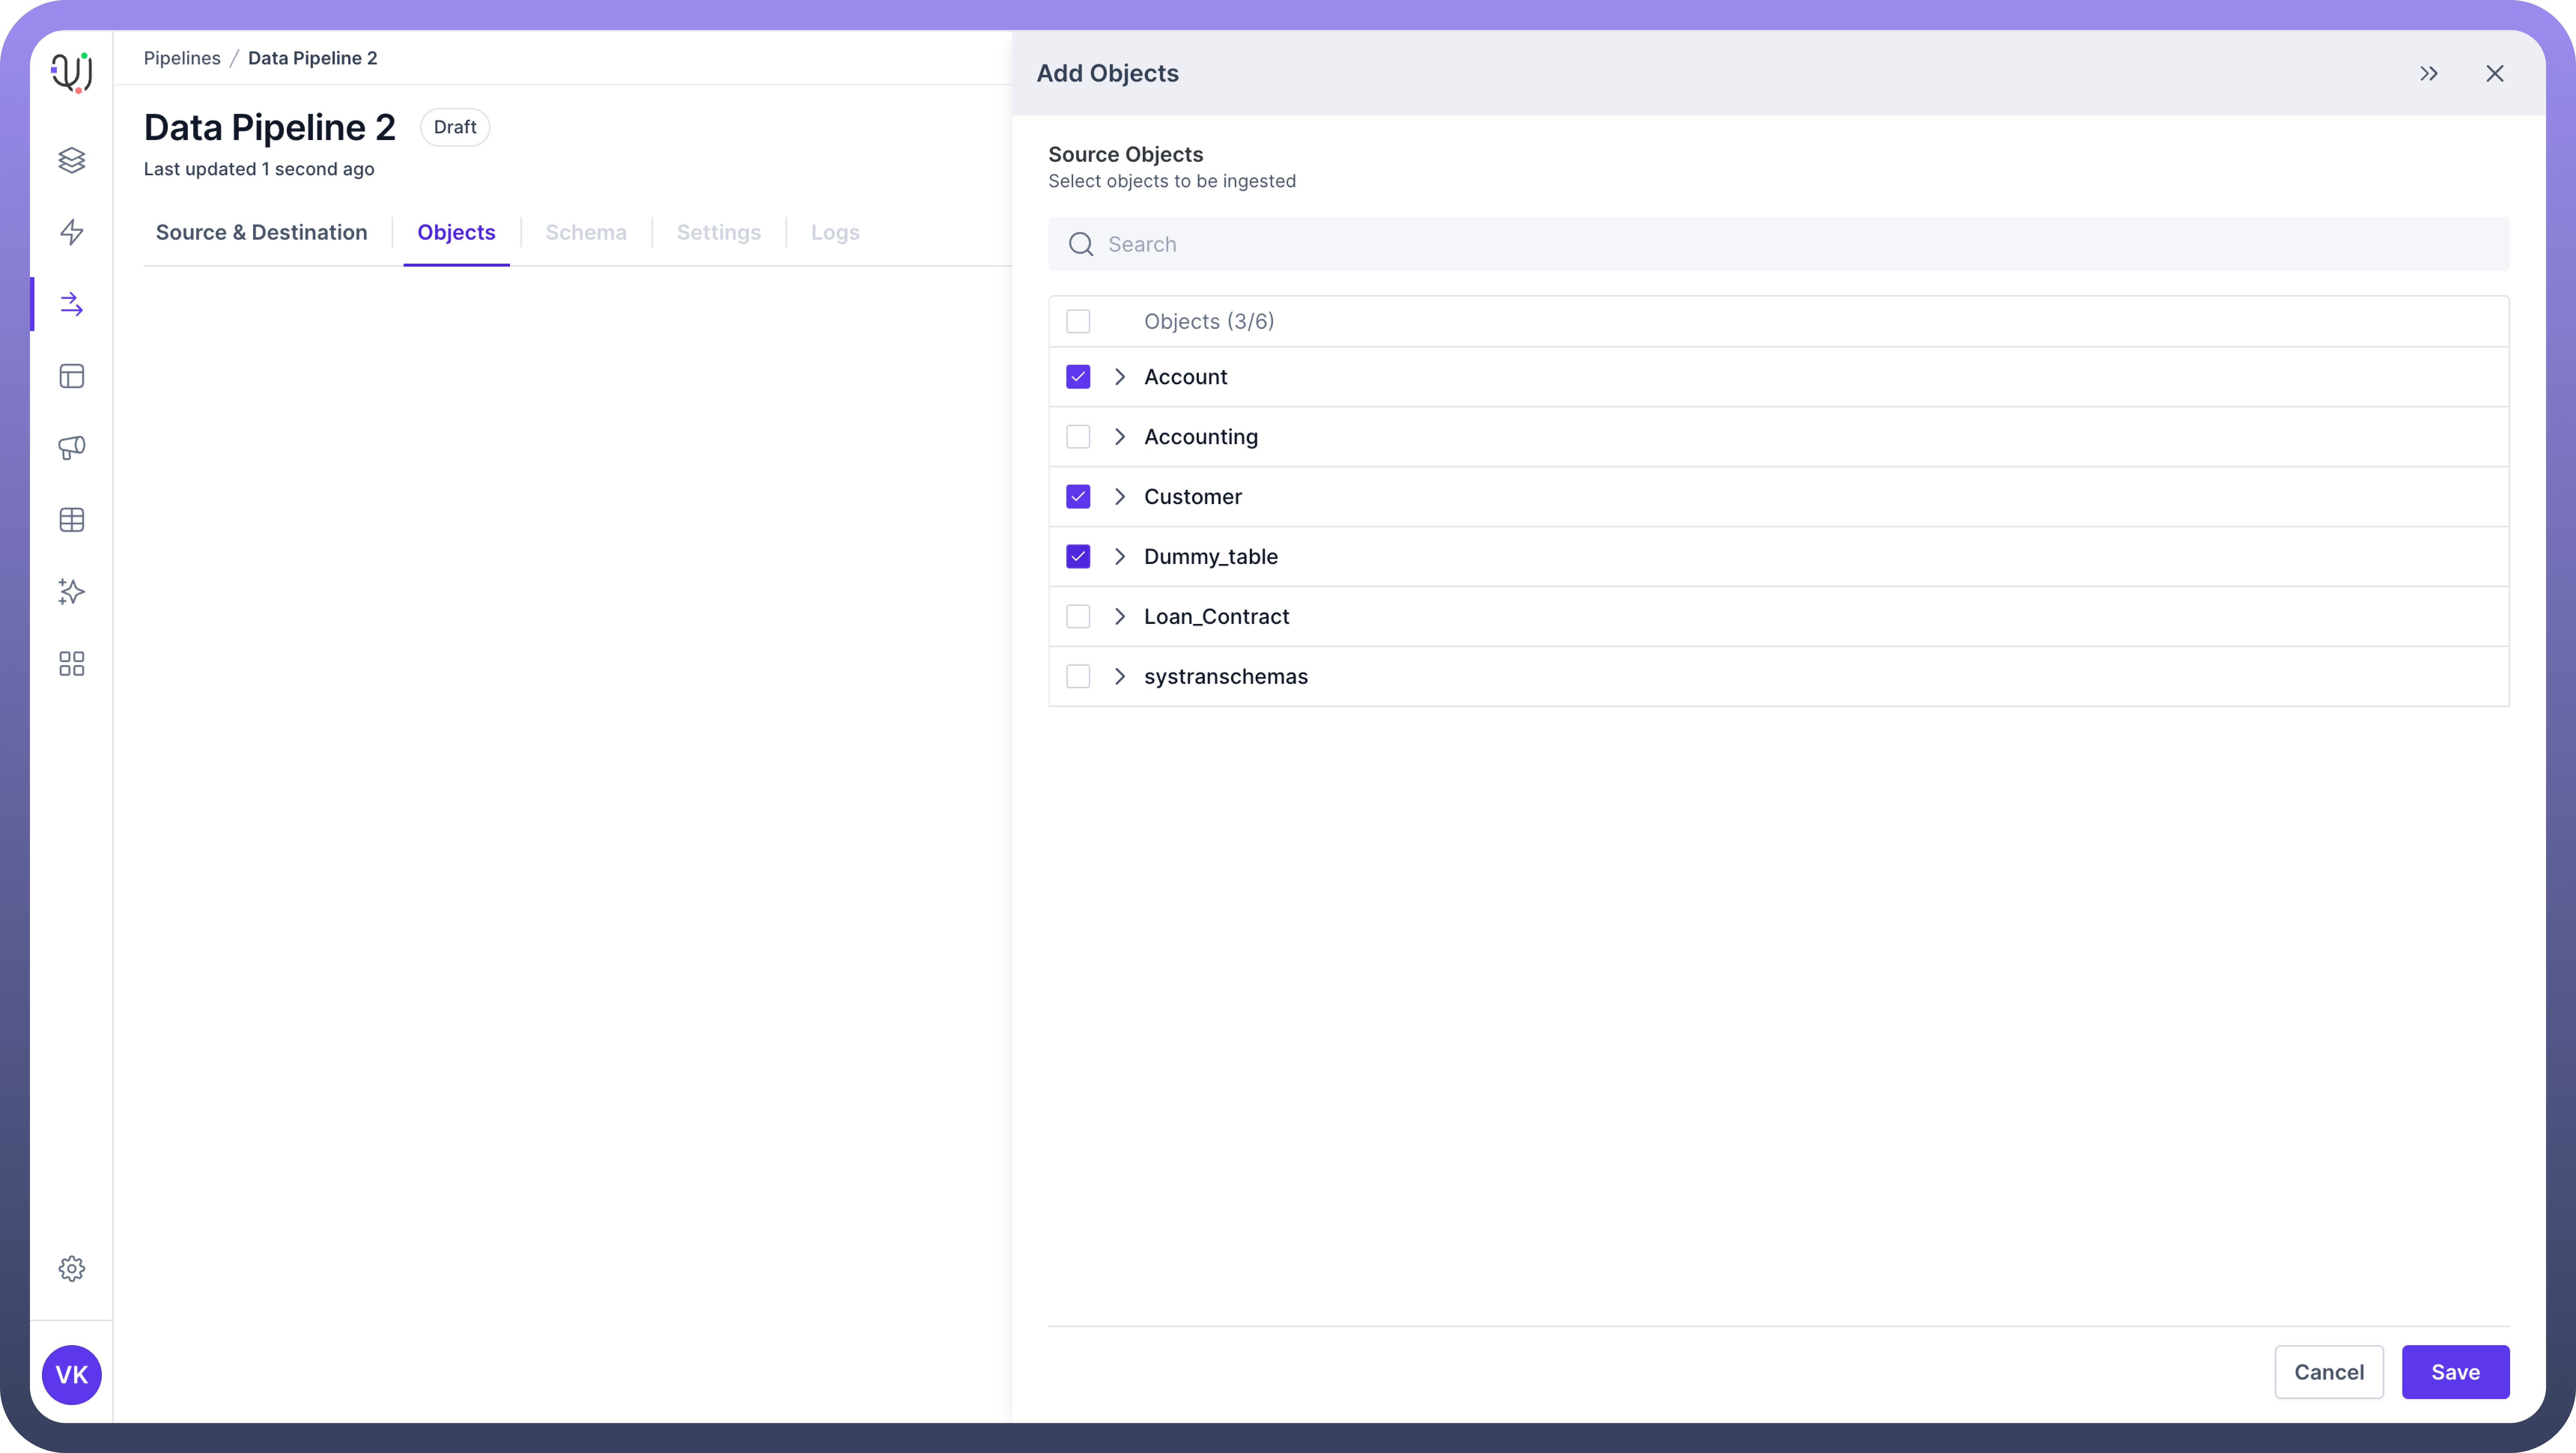
  3. You'll see a list of available objects from your source. Select the objects you want to include in your pipeline by clicking the checkbox next to each object name.
    Image
    Image

  4. To view the fields within an object, click on the object name to expand it.

  5. You can select specific fields within each object if you don't need all the data. This can help optimize your pipeline's performance.
    Image
    Image

  6. After selecting all necessary objects and fields, click "Save" to add them to your pipeline.

Thumbnail

Tip

If you want to select all the objects at once, just click on the top most checkbox. It will select all the objects with their respective fields.

Schema Mapping

This is the process of defining how fields in your source data correspond to fields in your destination. It's a critical part of the Data Pipeline process.

Once you've selected your objects, the next step is to map the schemas between your source and destination. UnifyData offers both automatic and manual mapping options.

Automatic Mapping

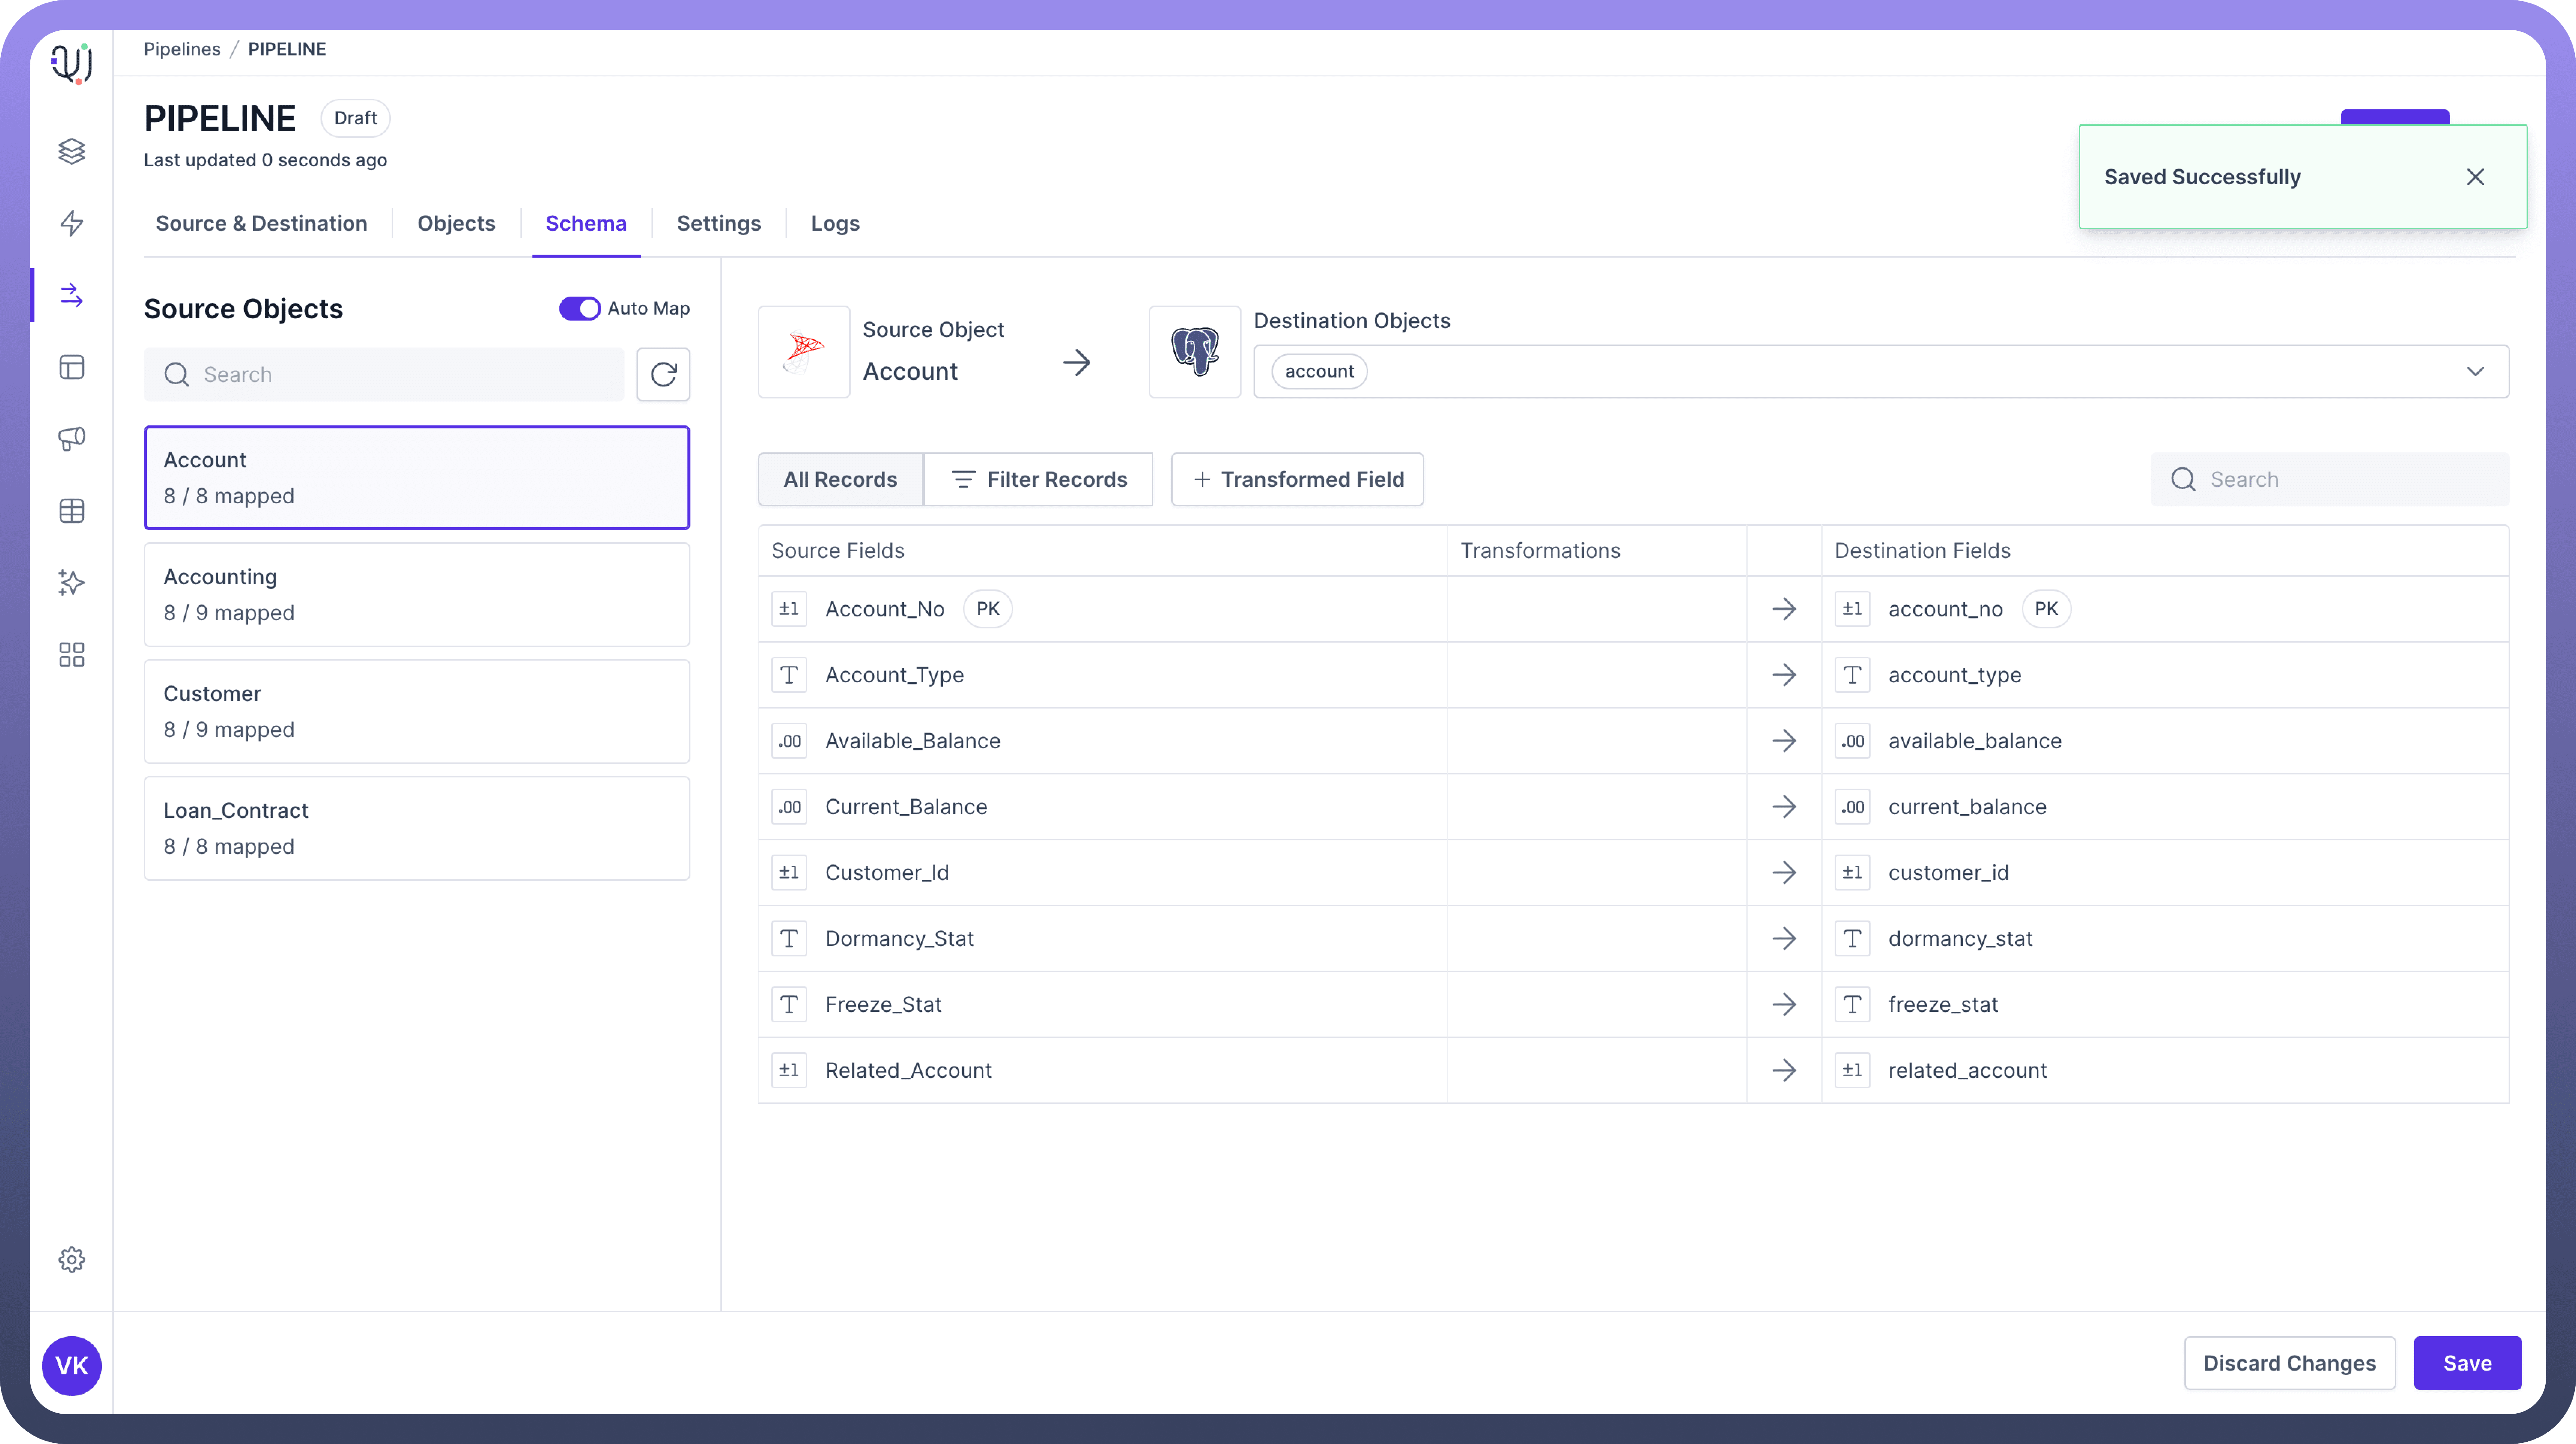
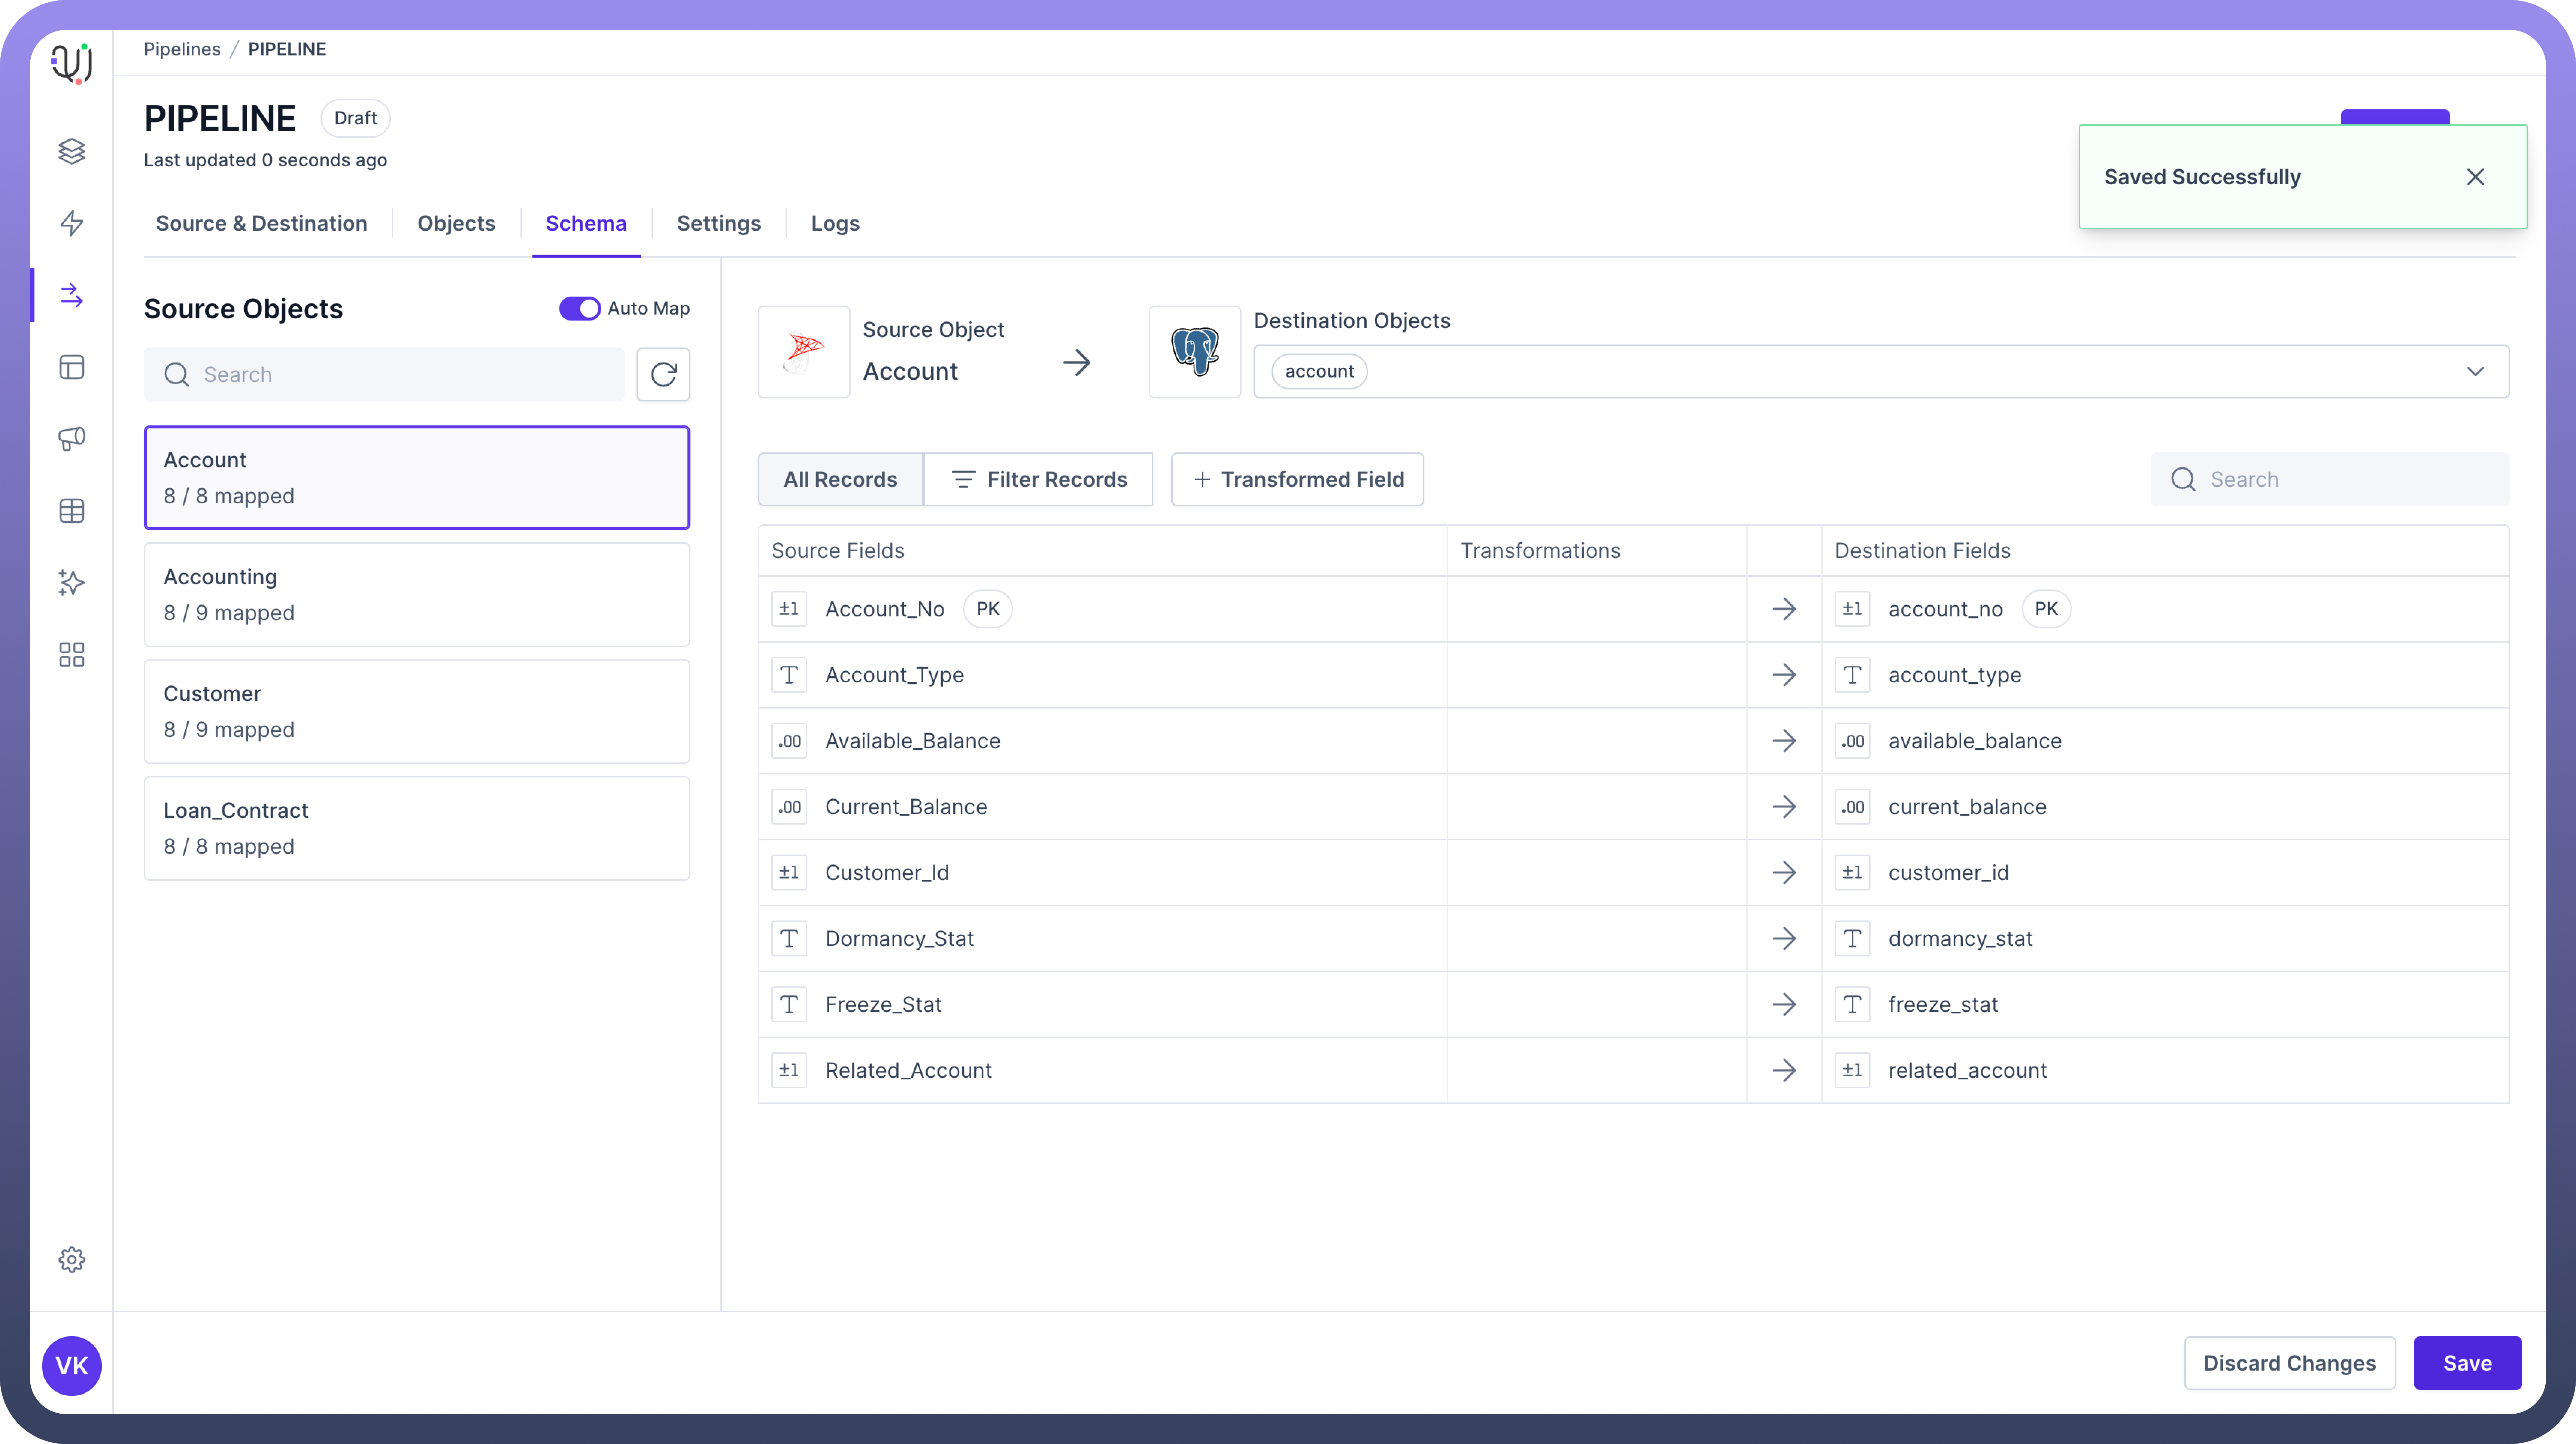
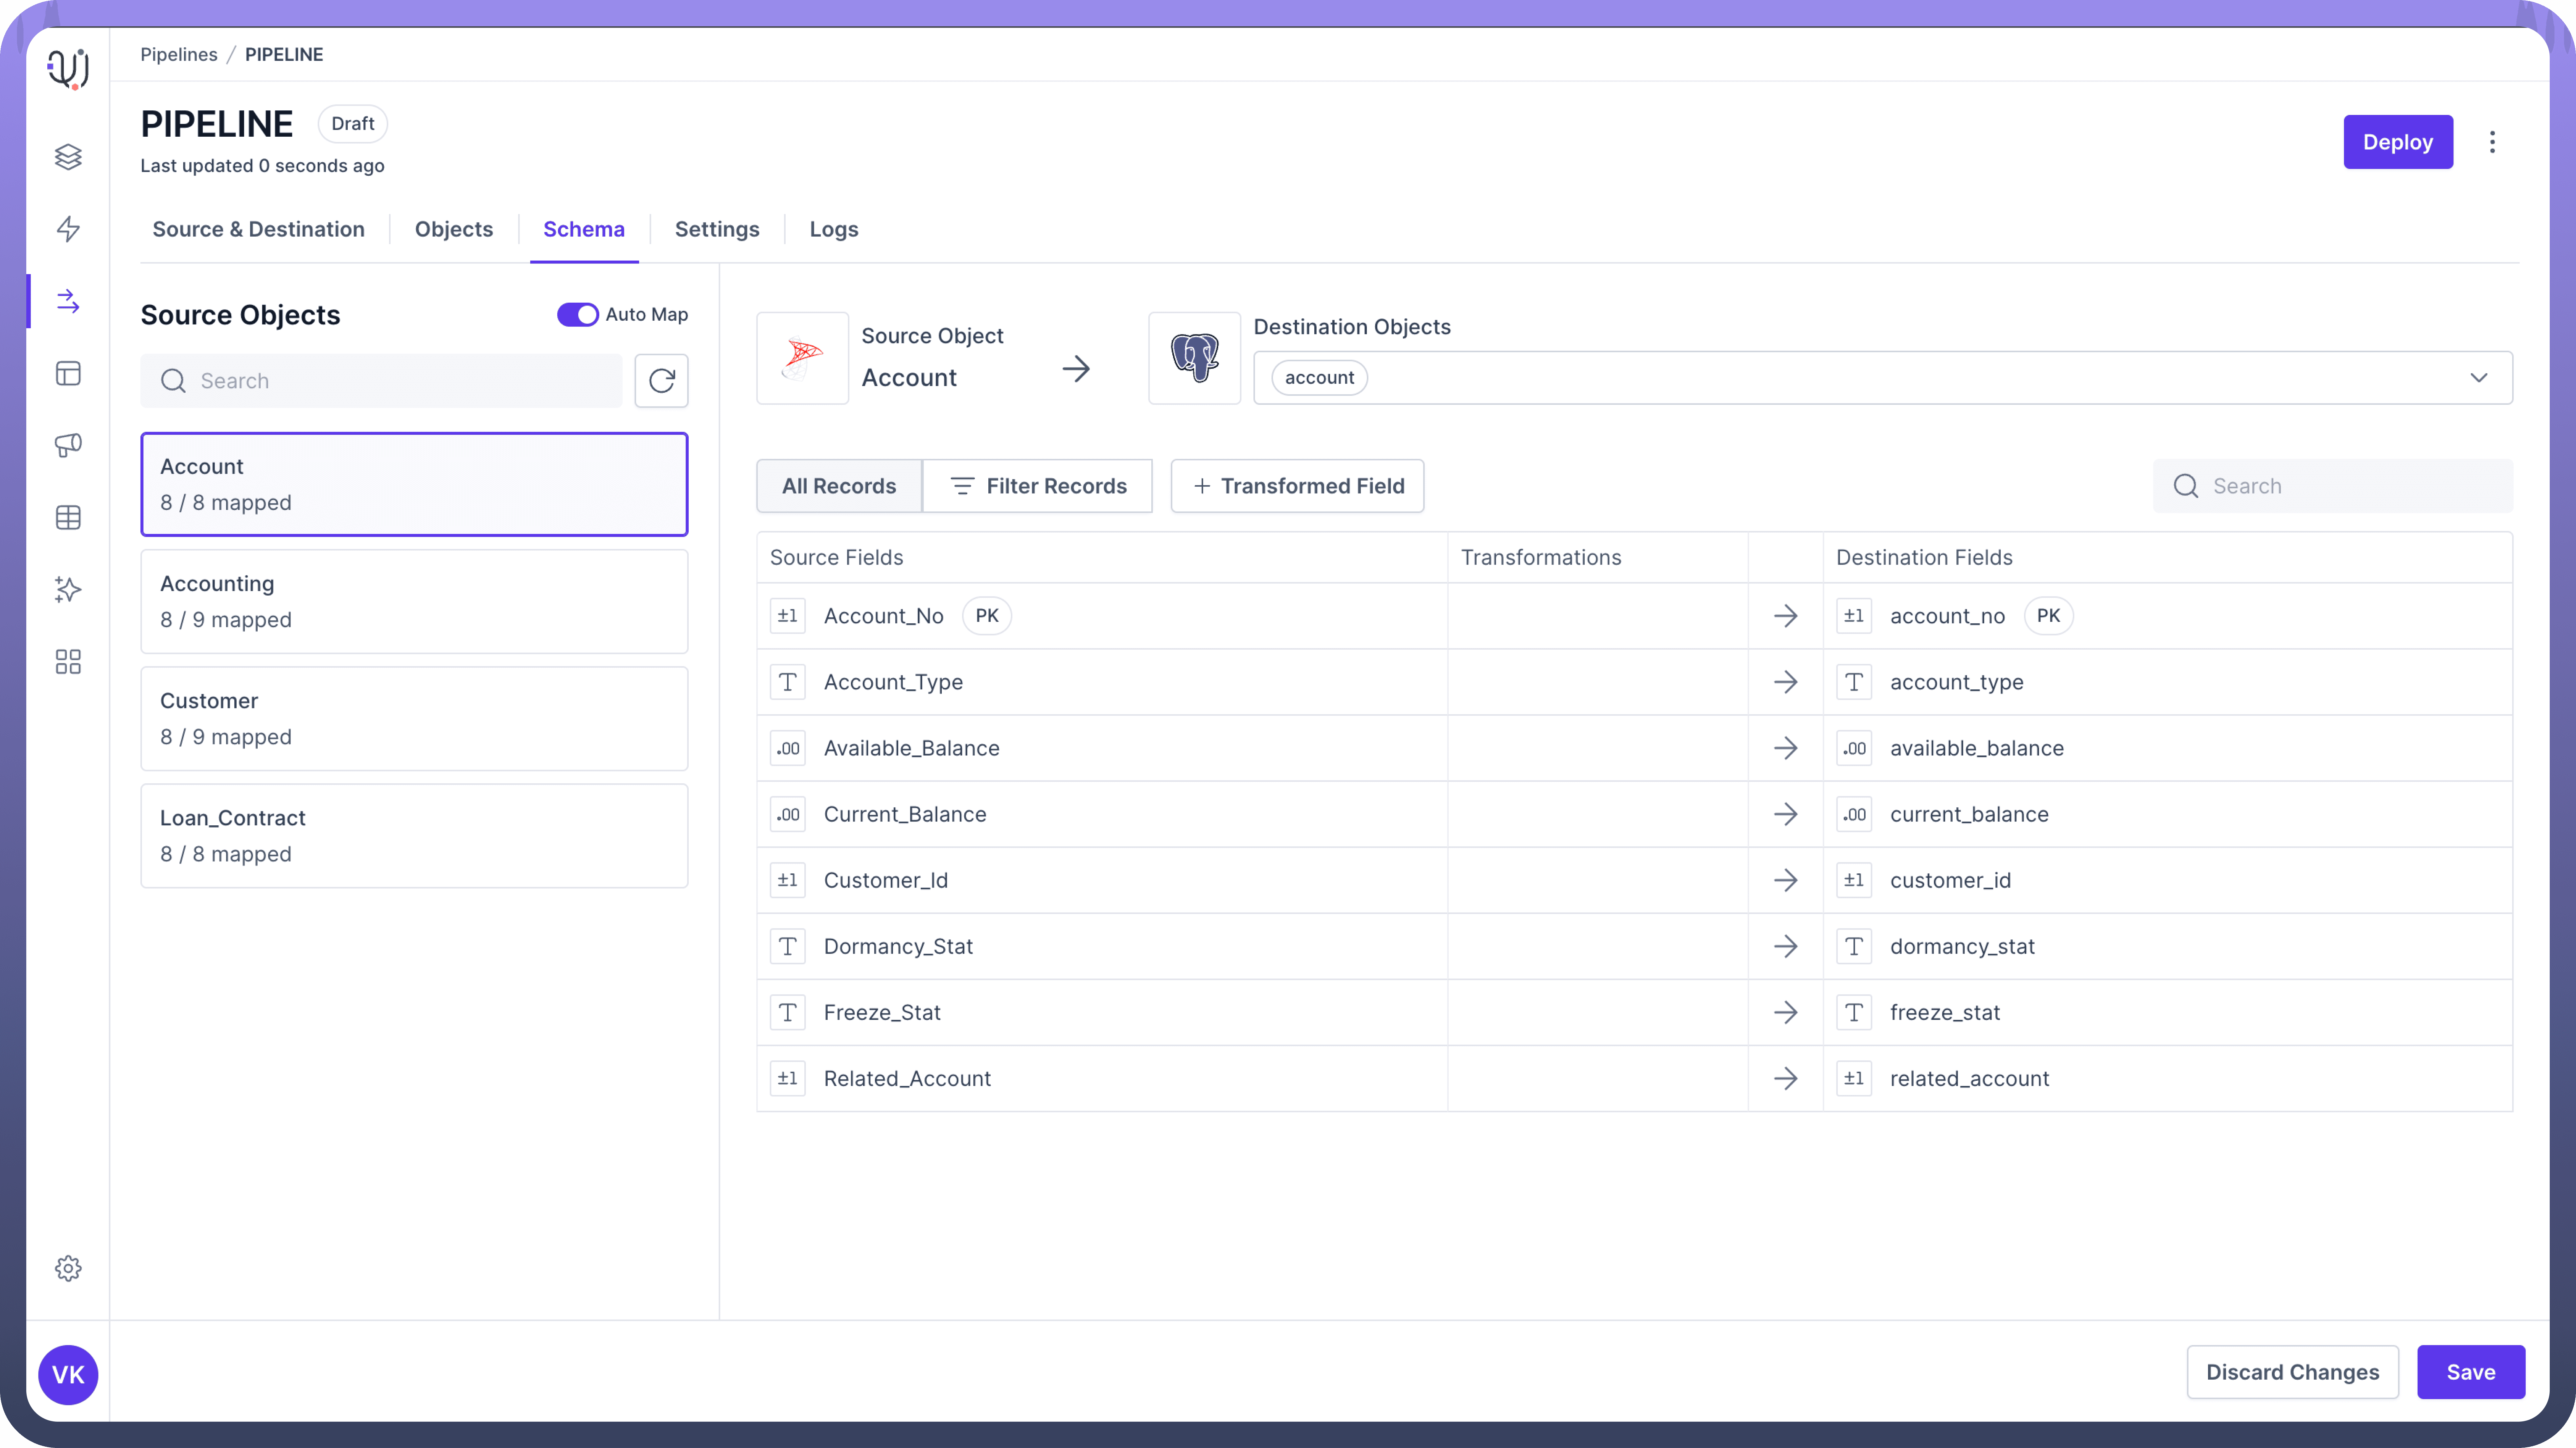
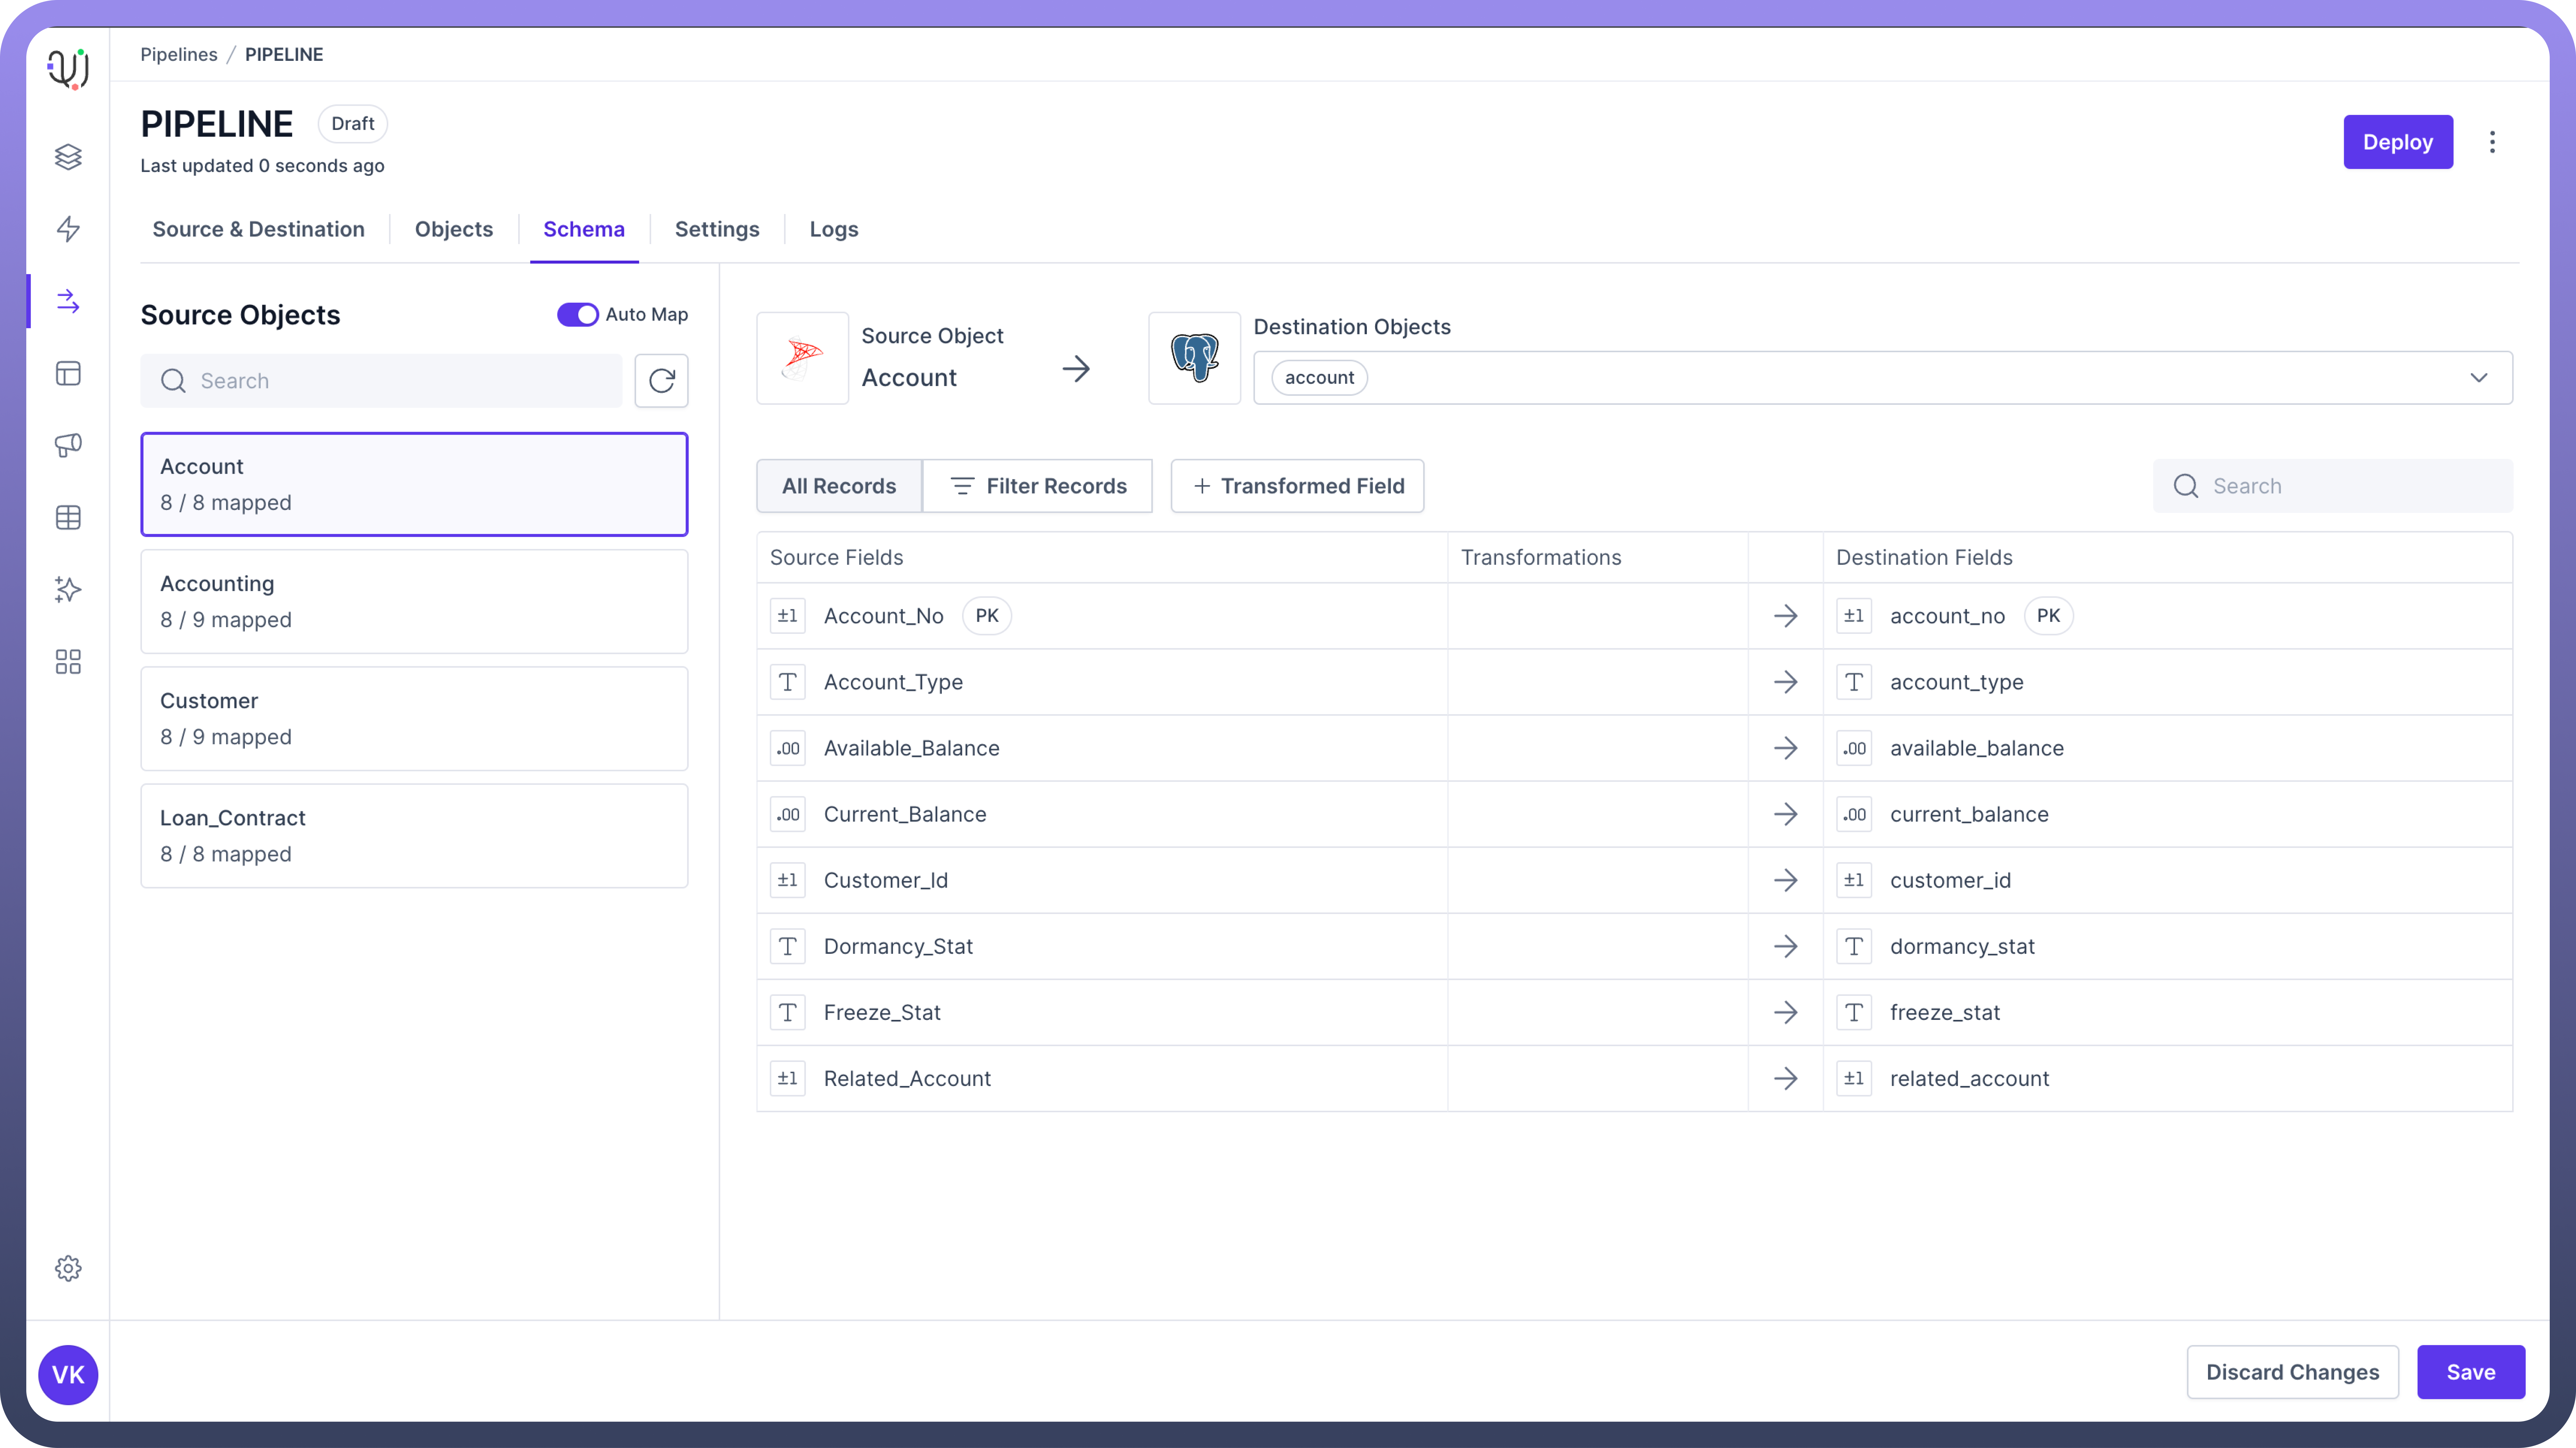
  1. In the Schema Mapping section, you'll see a toggle for "Auto Map".

  2. Turn on this toggle to let UnifyData automatically map source fields to destination fields based on name and data type similarities.
    Image
    Image

Thumbnail

Note

While auto-mapping can save time, always review the suggested mappings to ensure accuracy.

Manual Mapping

For more control or to adjust auto-mapped fields:

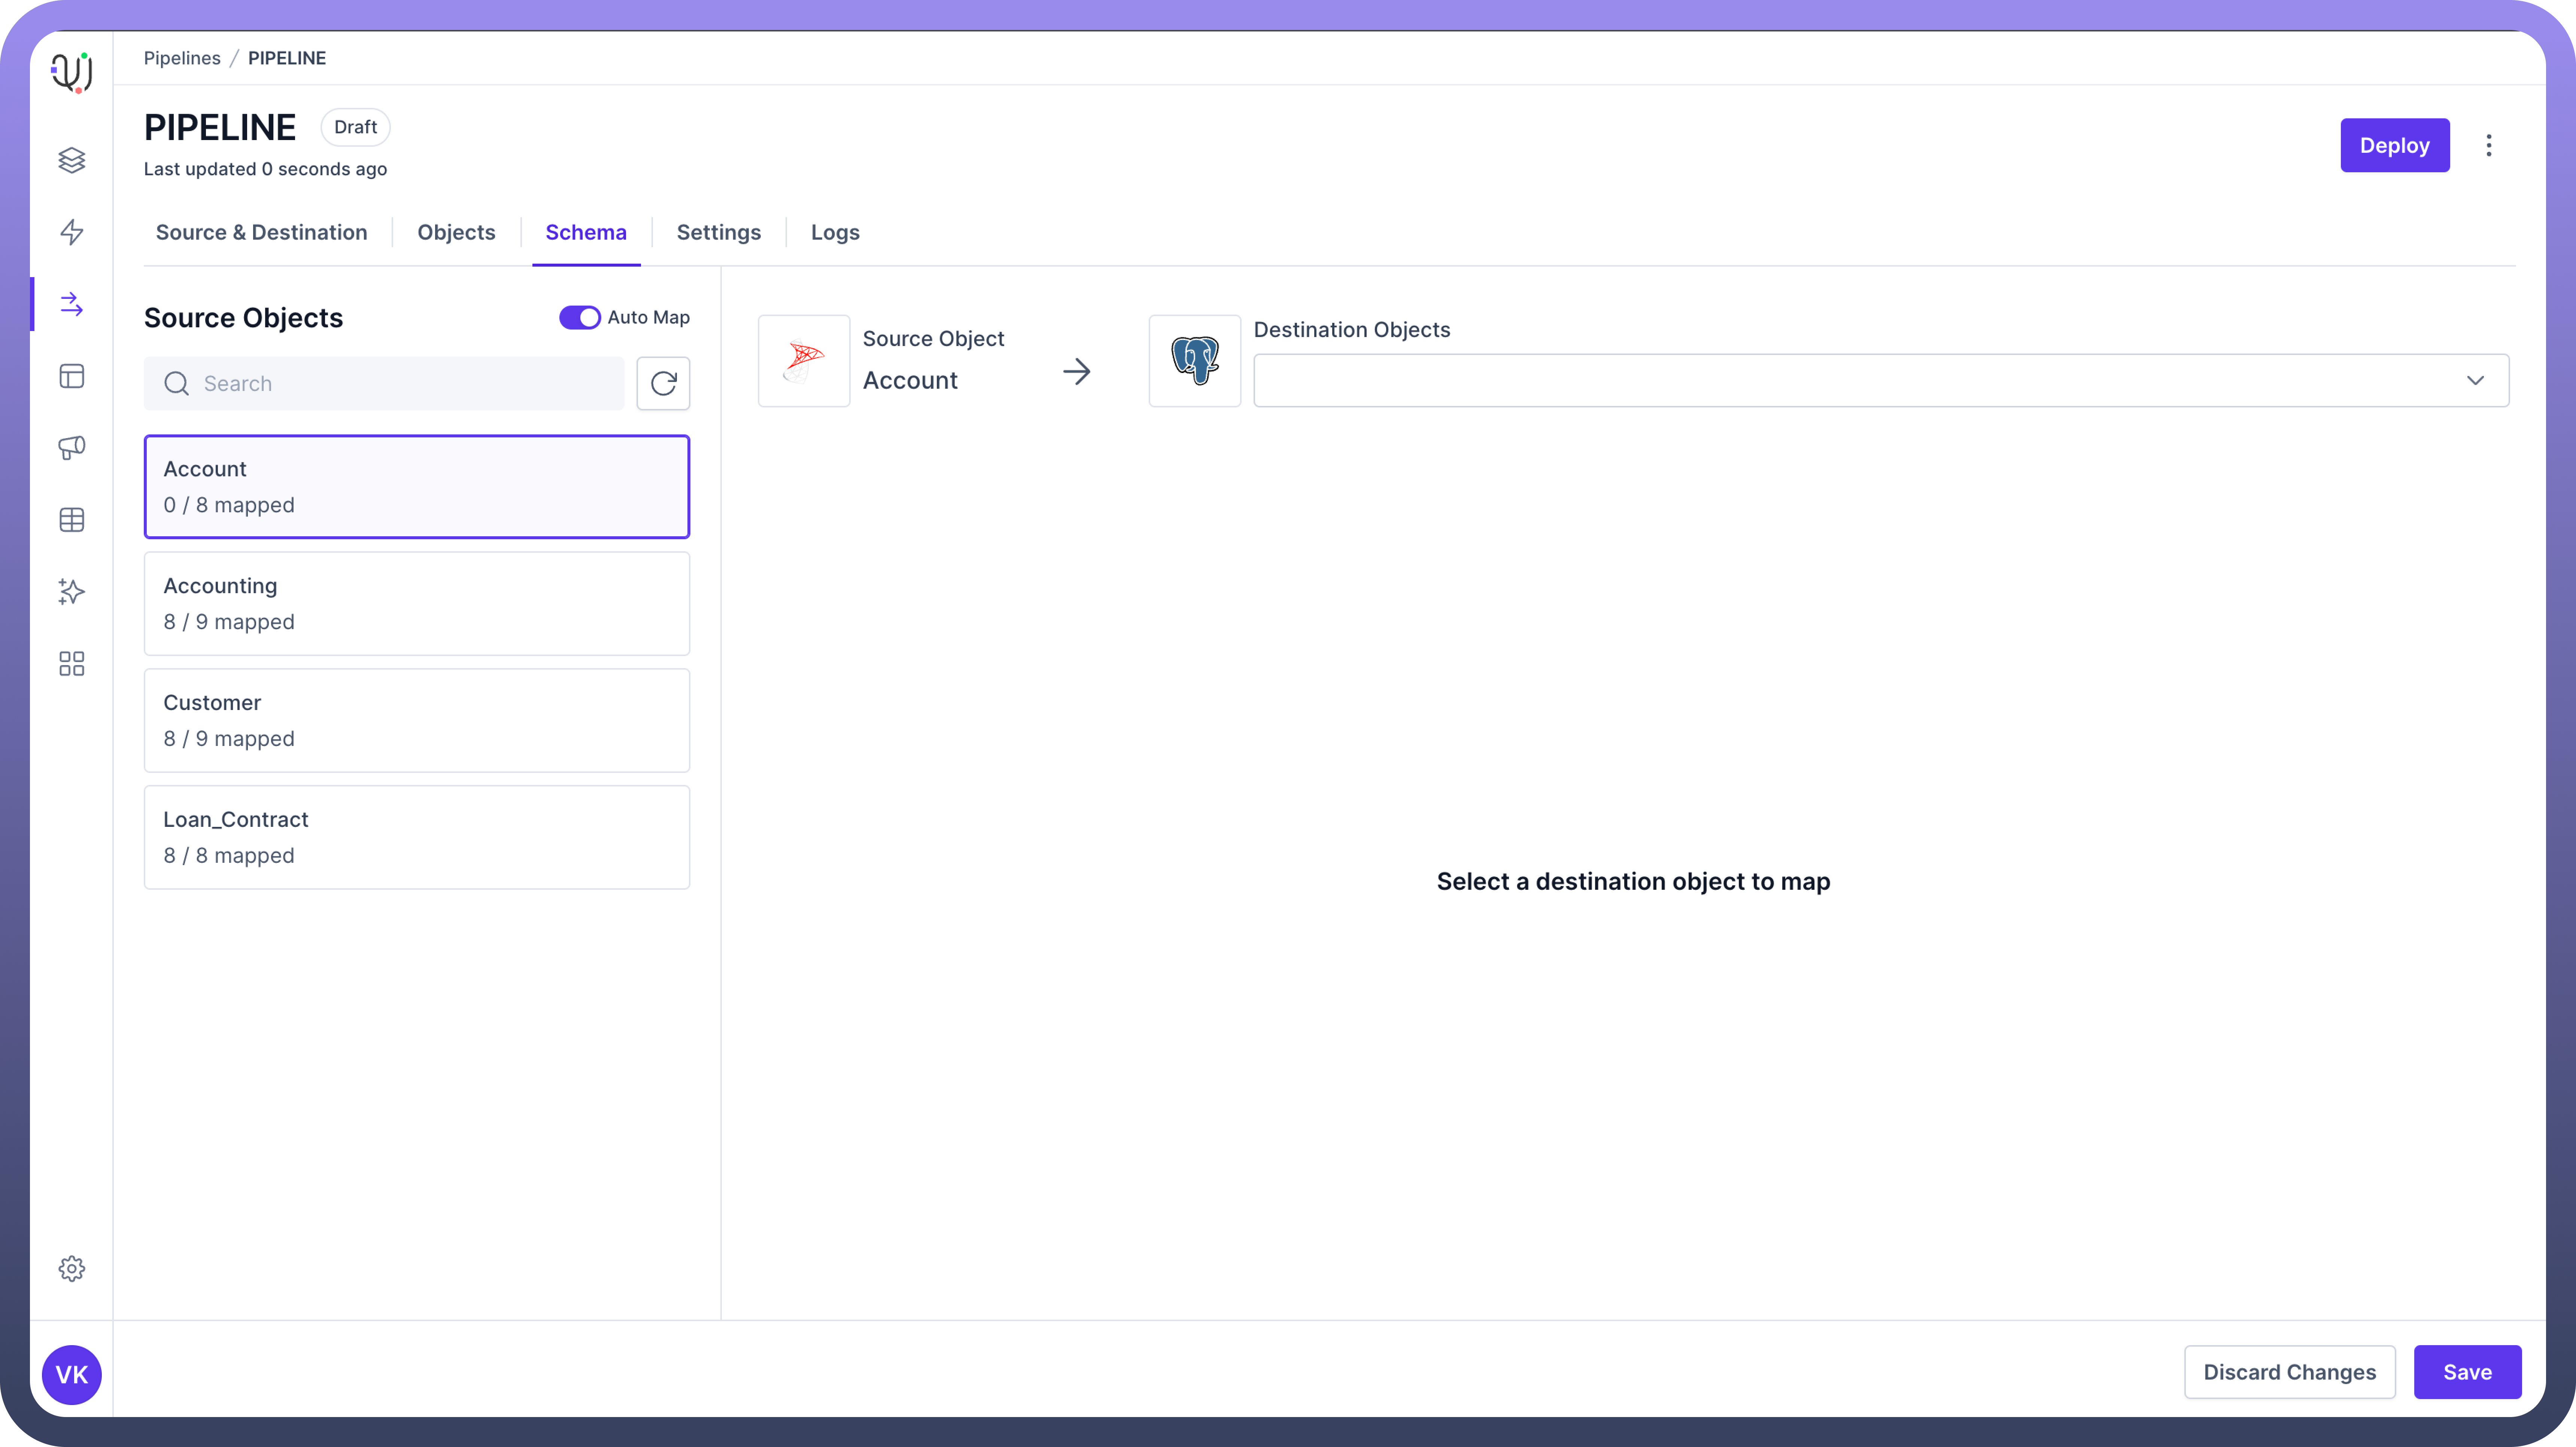
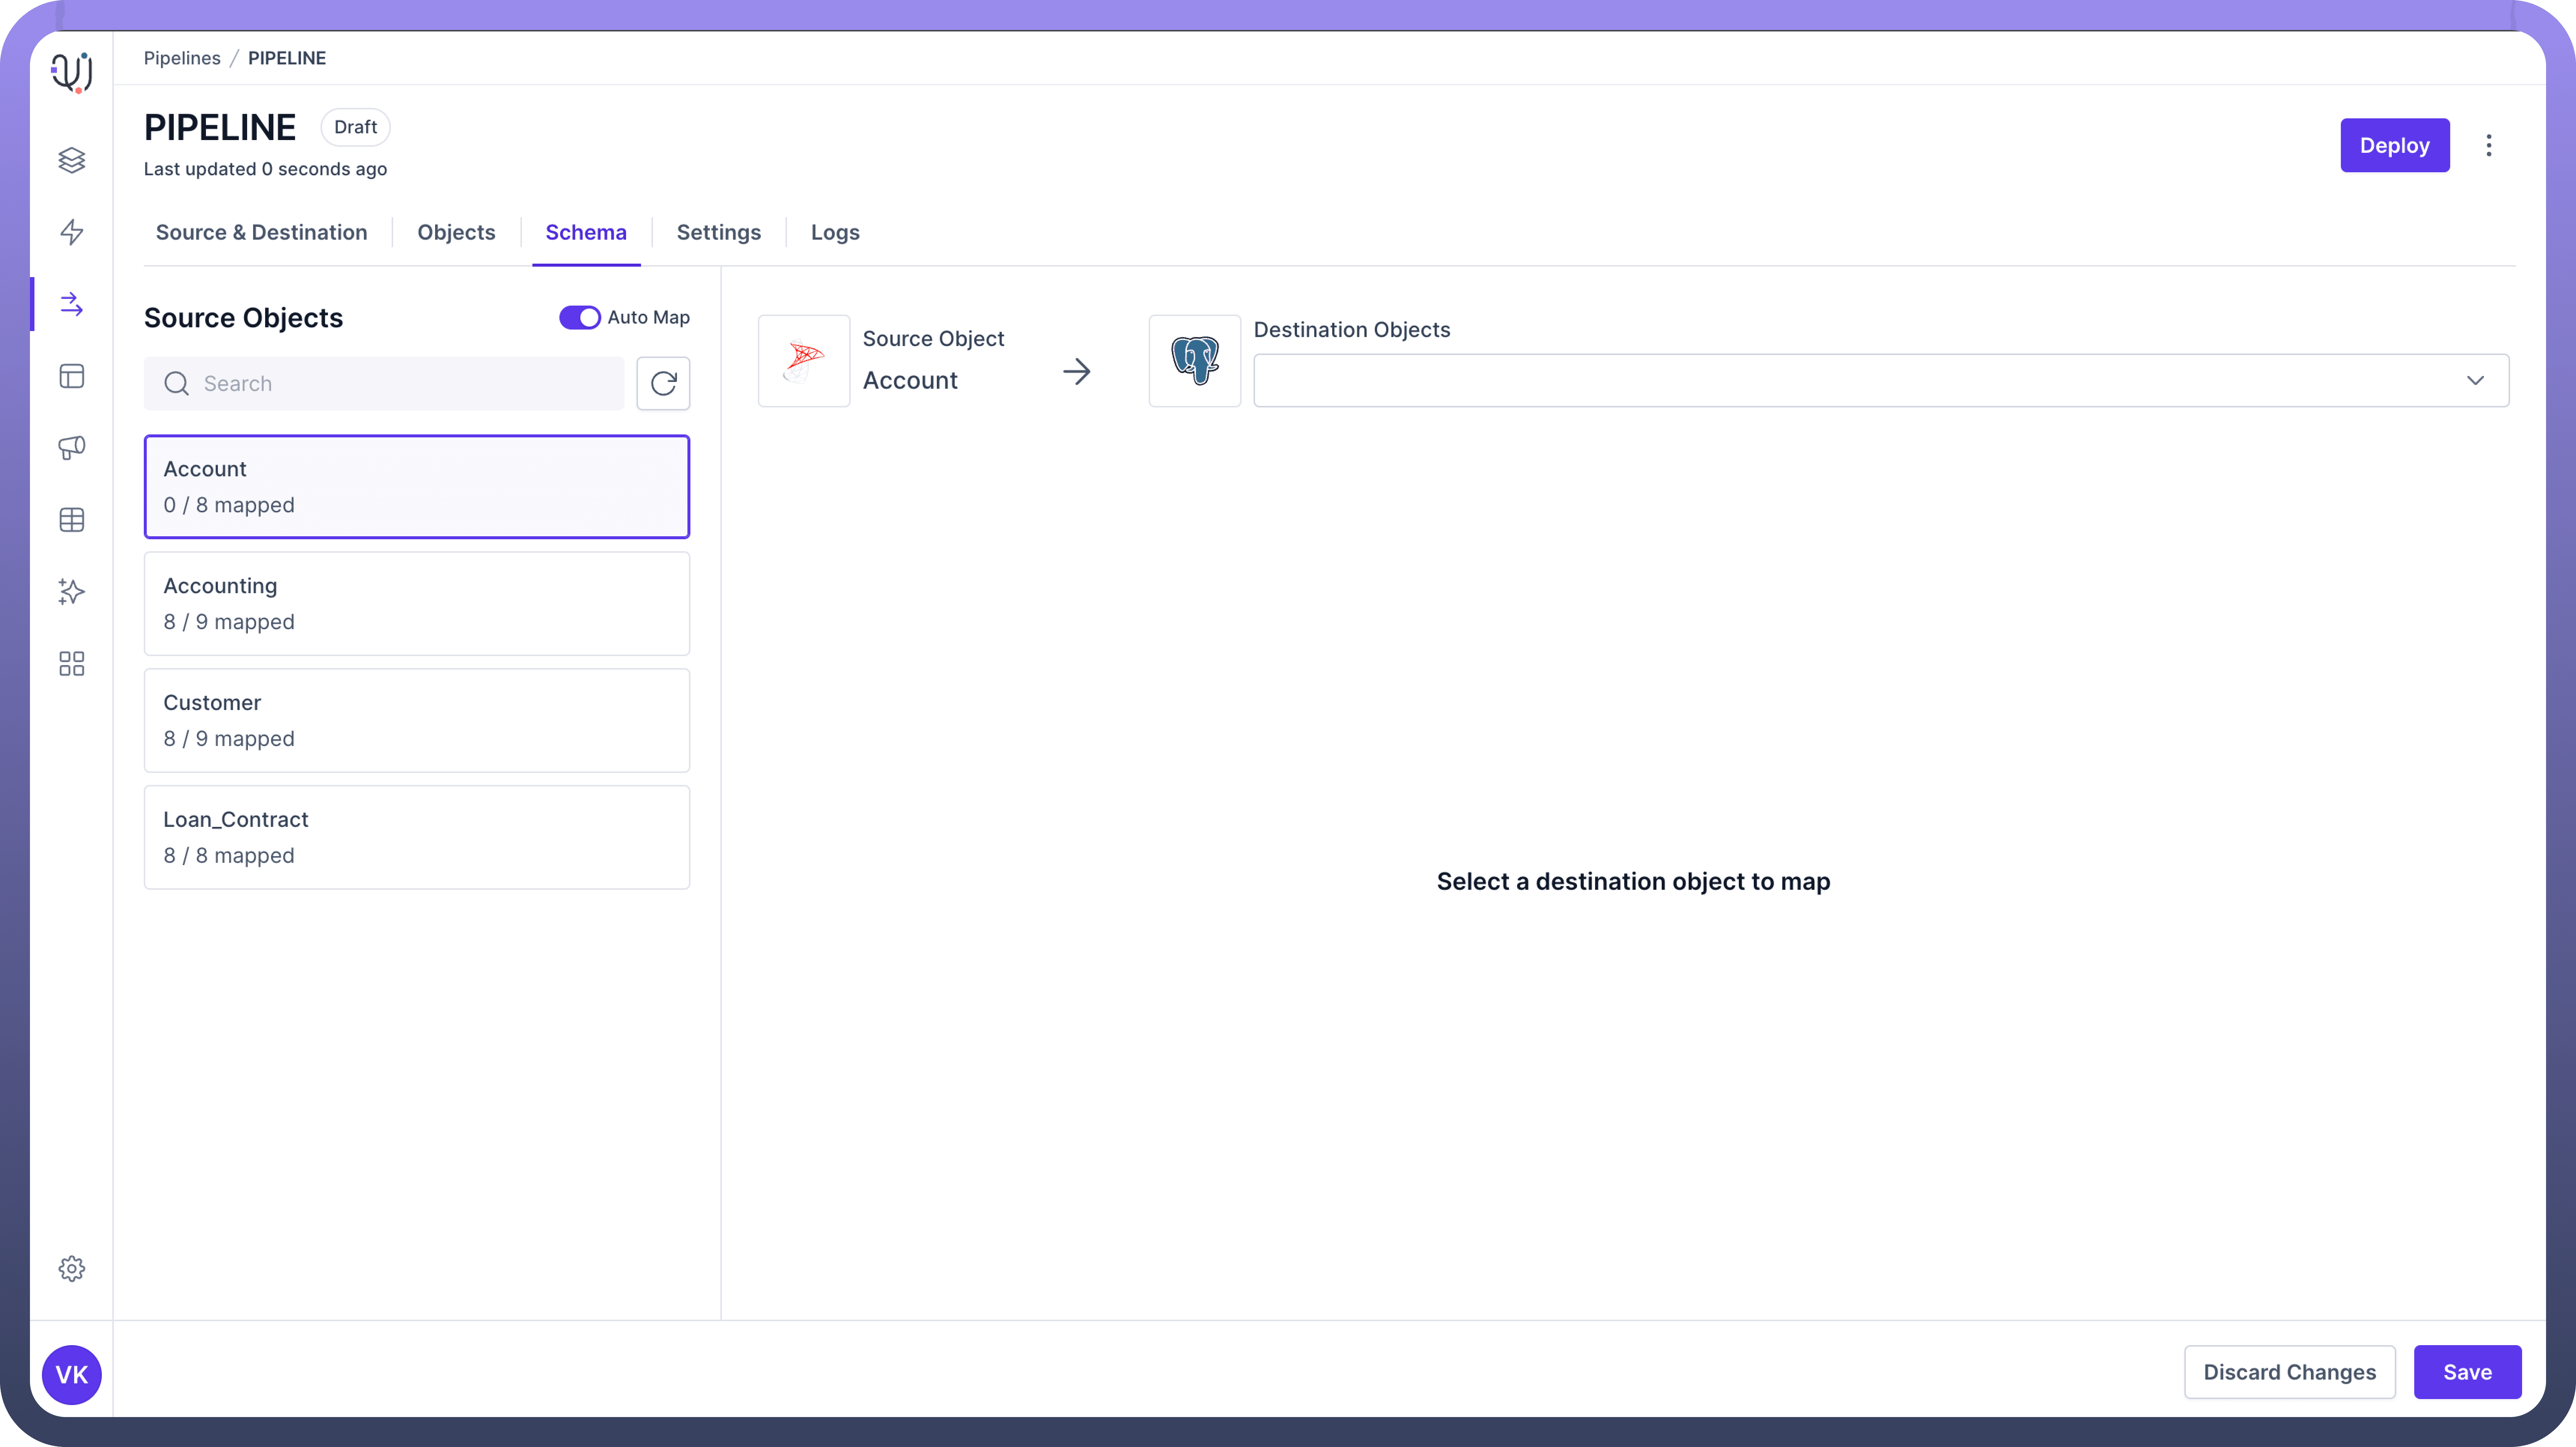
  1. Select the source object you want to map from the left panel.
    Image
    Image

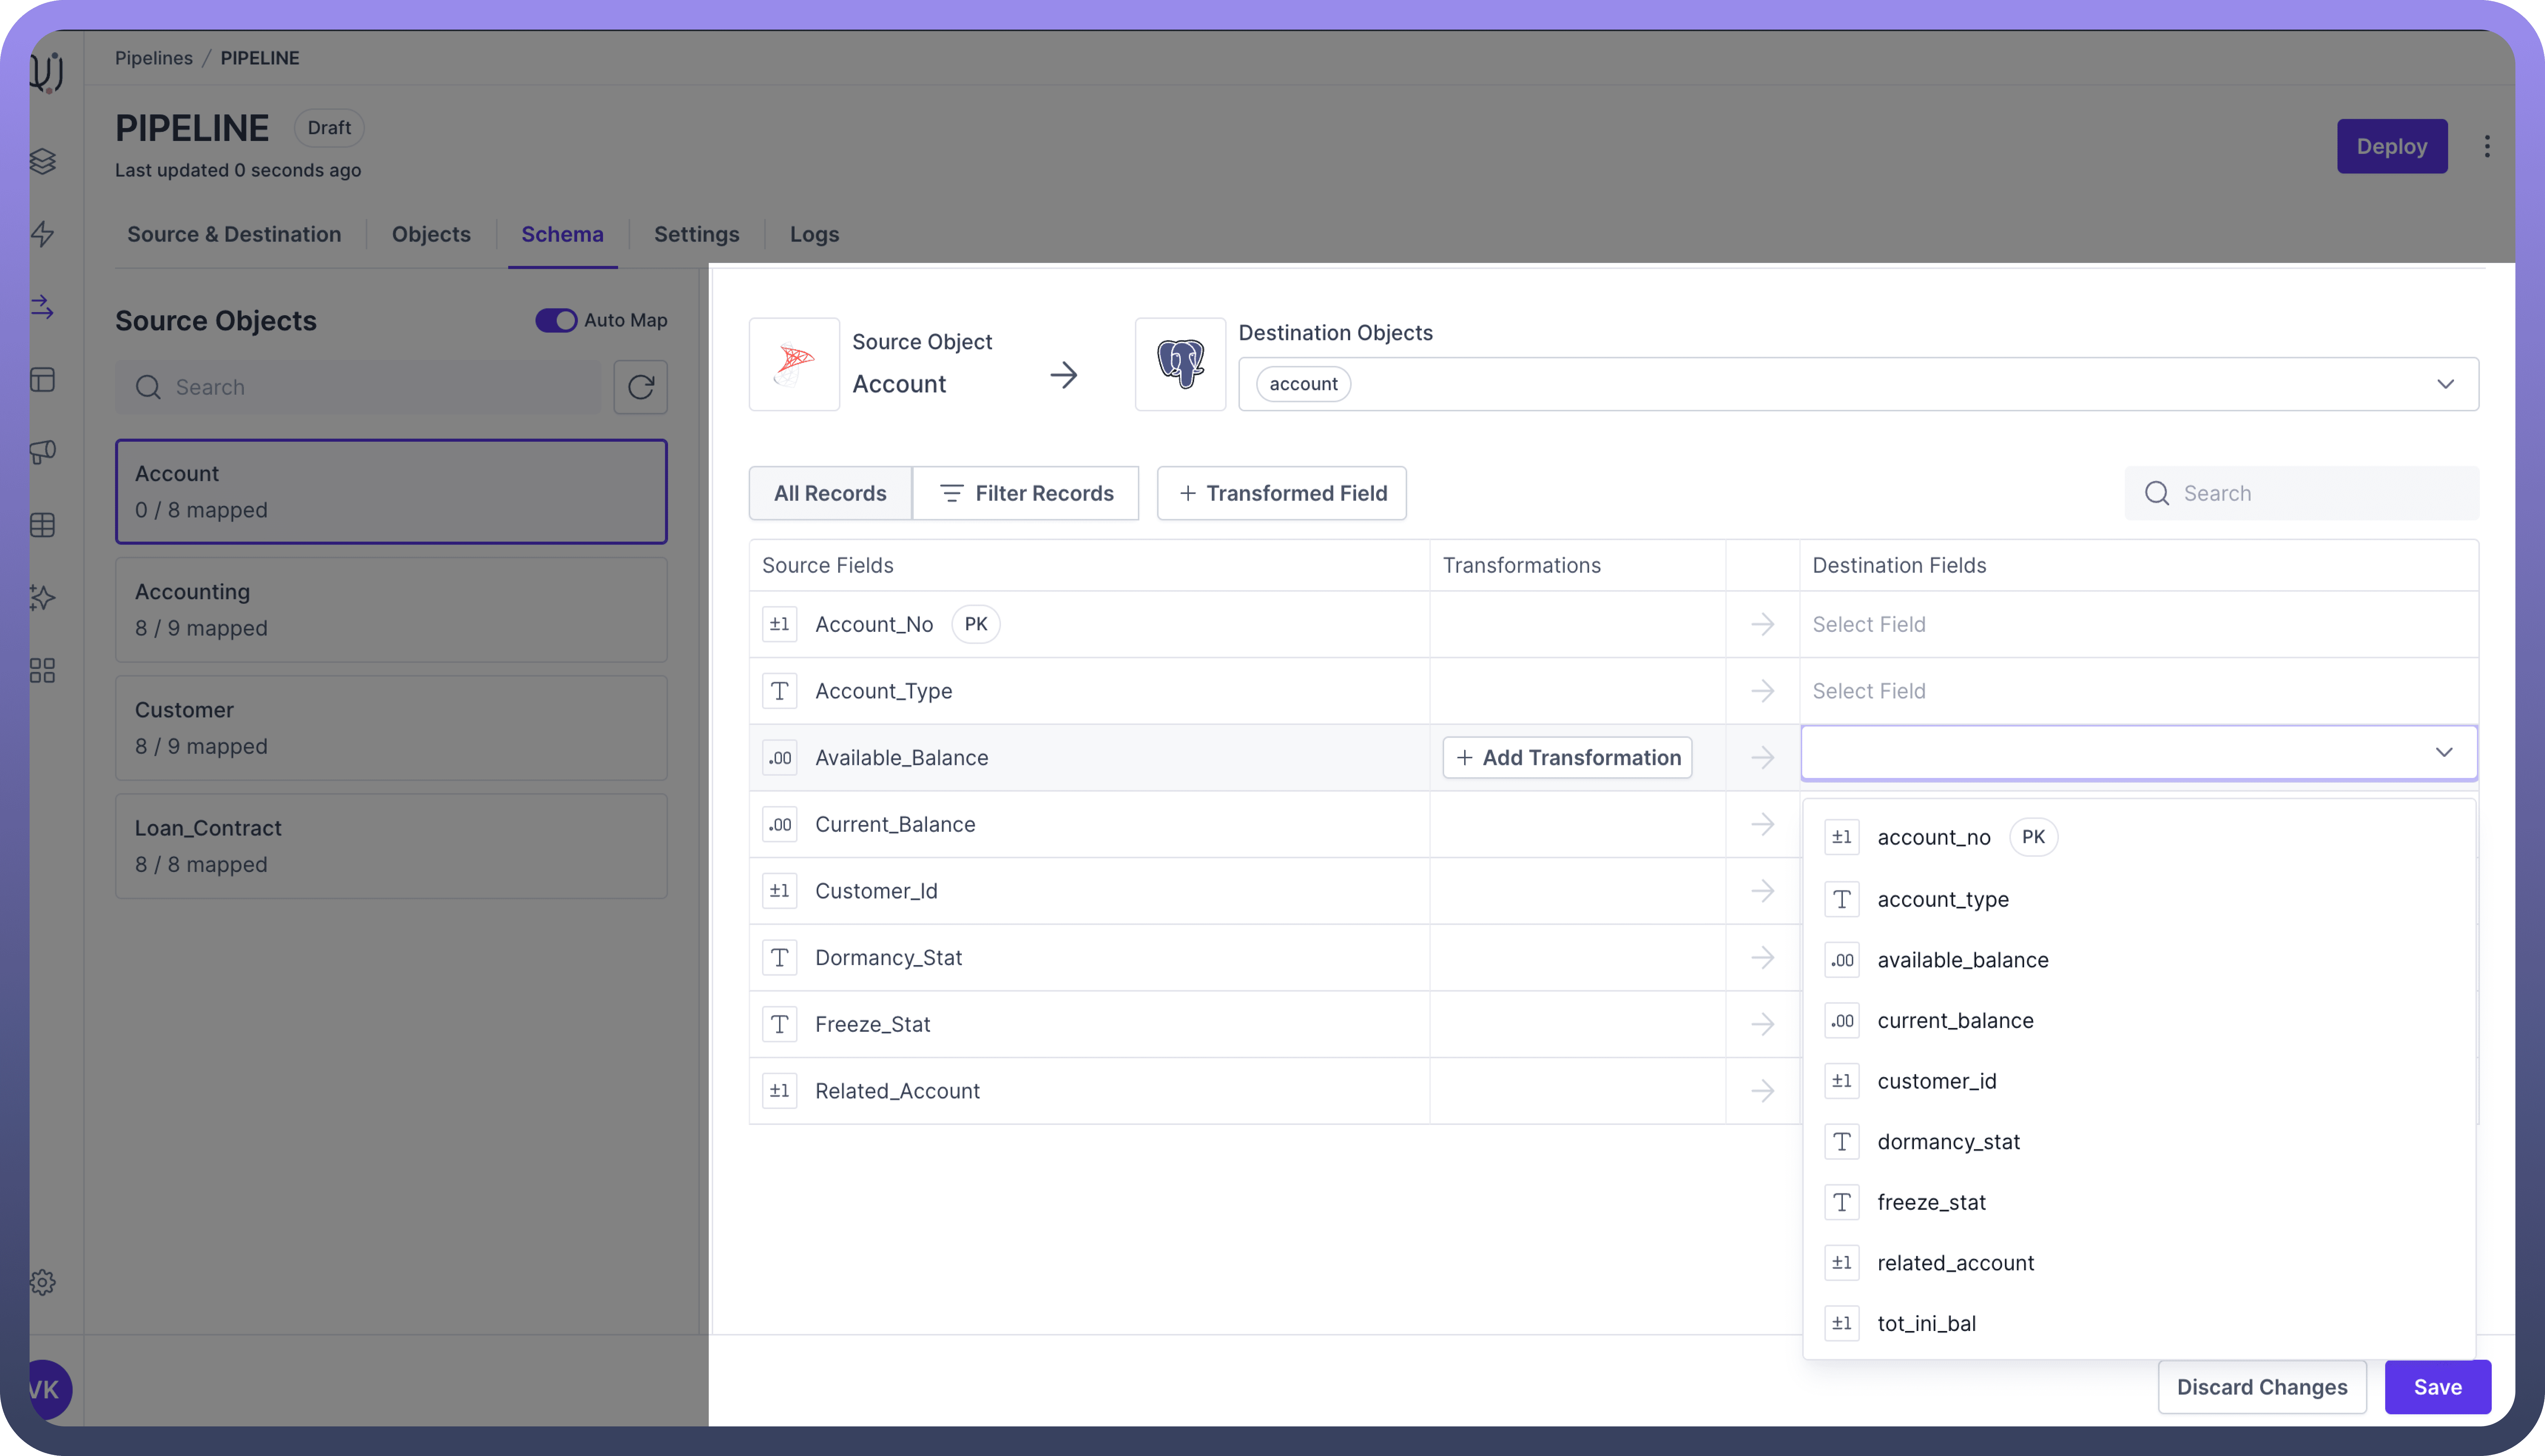
  2. Choose the corresponding destination object from the right panel.
    Image
    Image

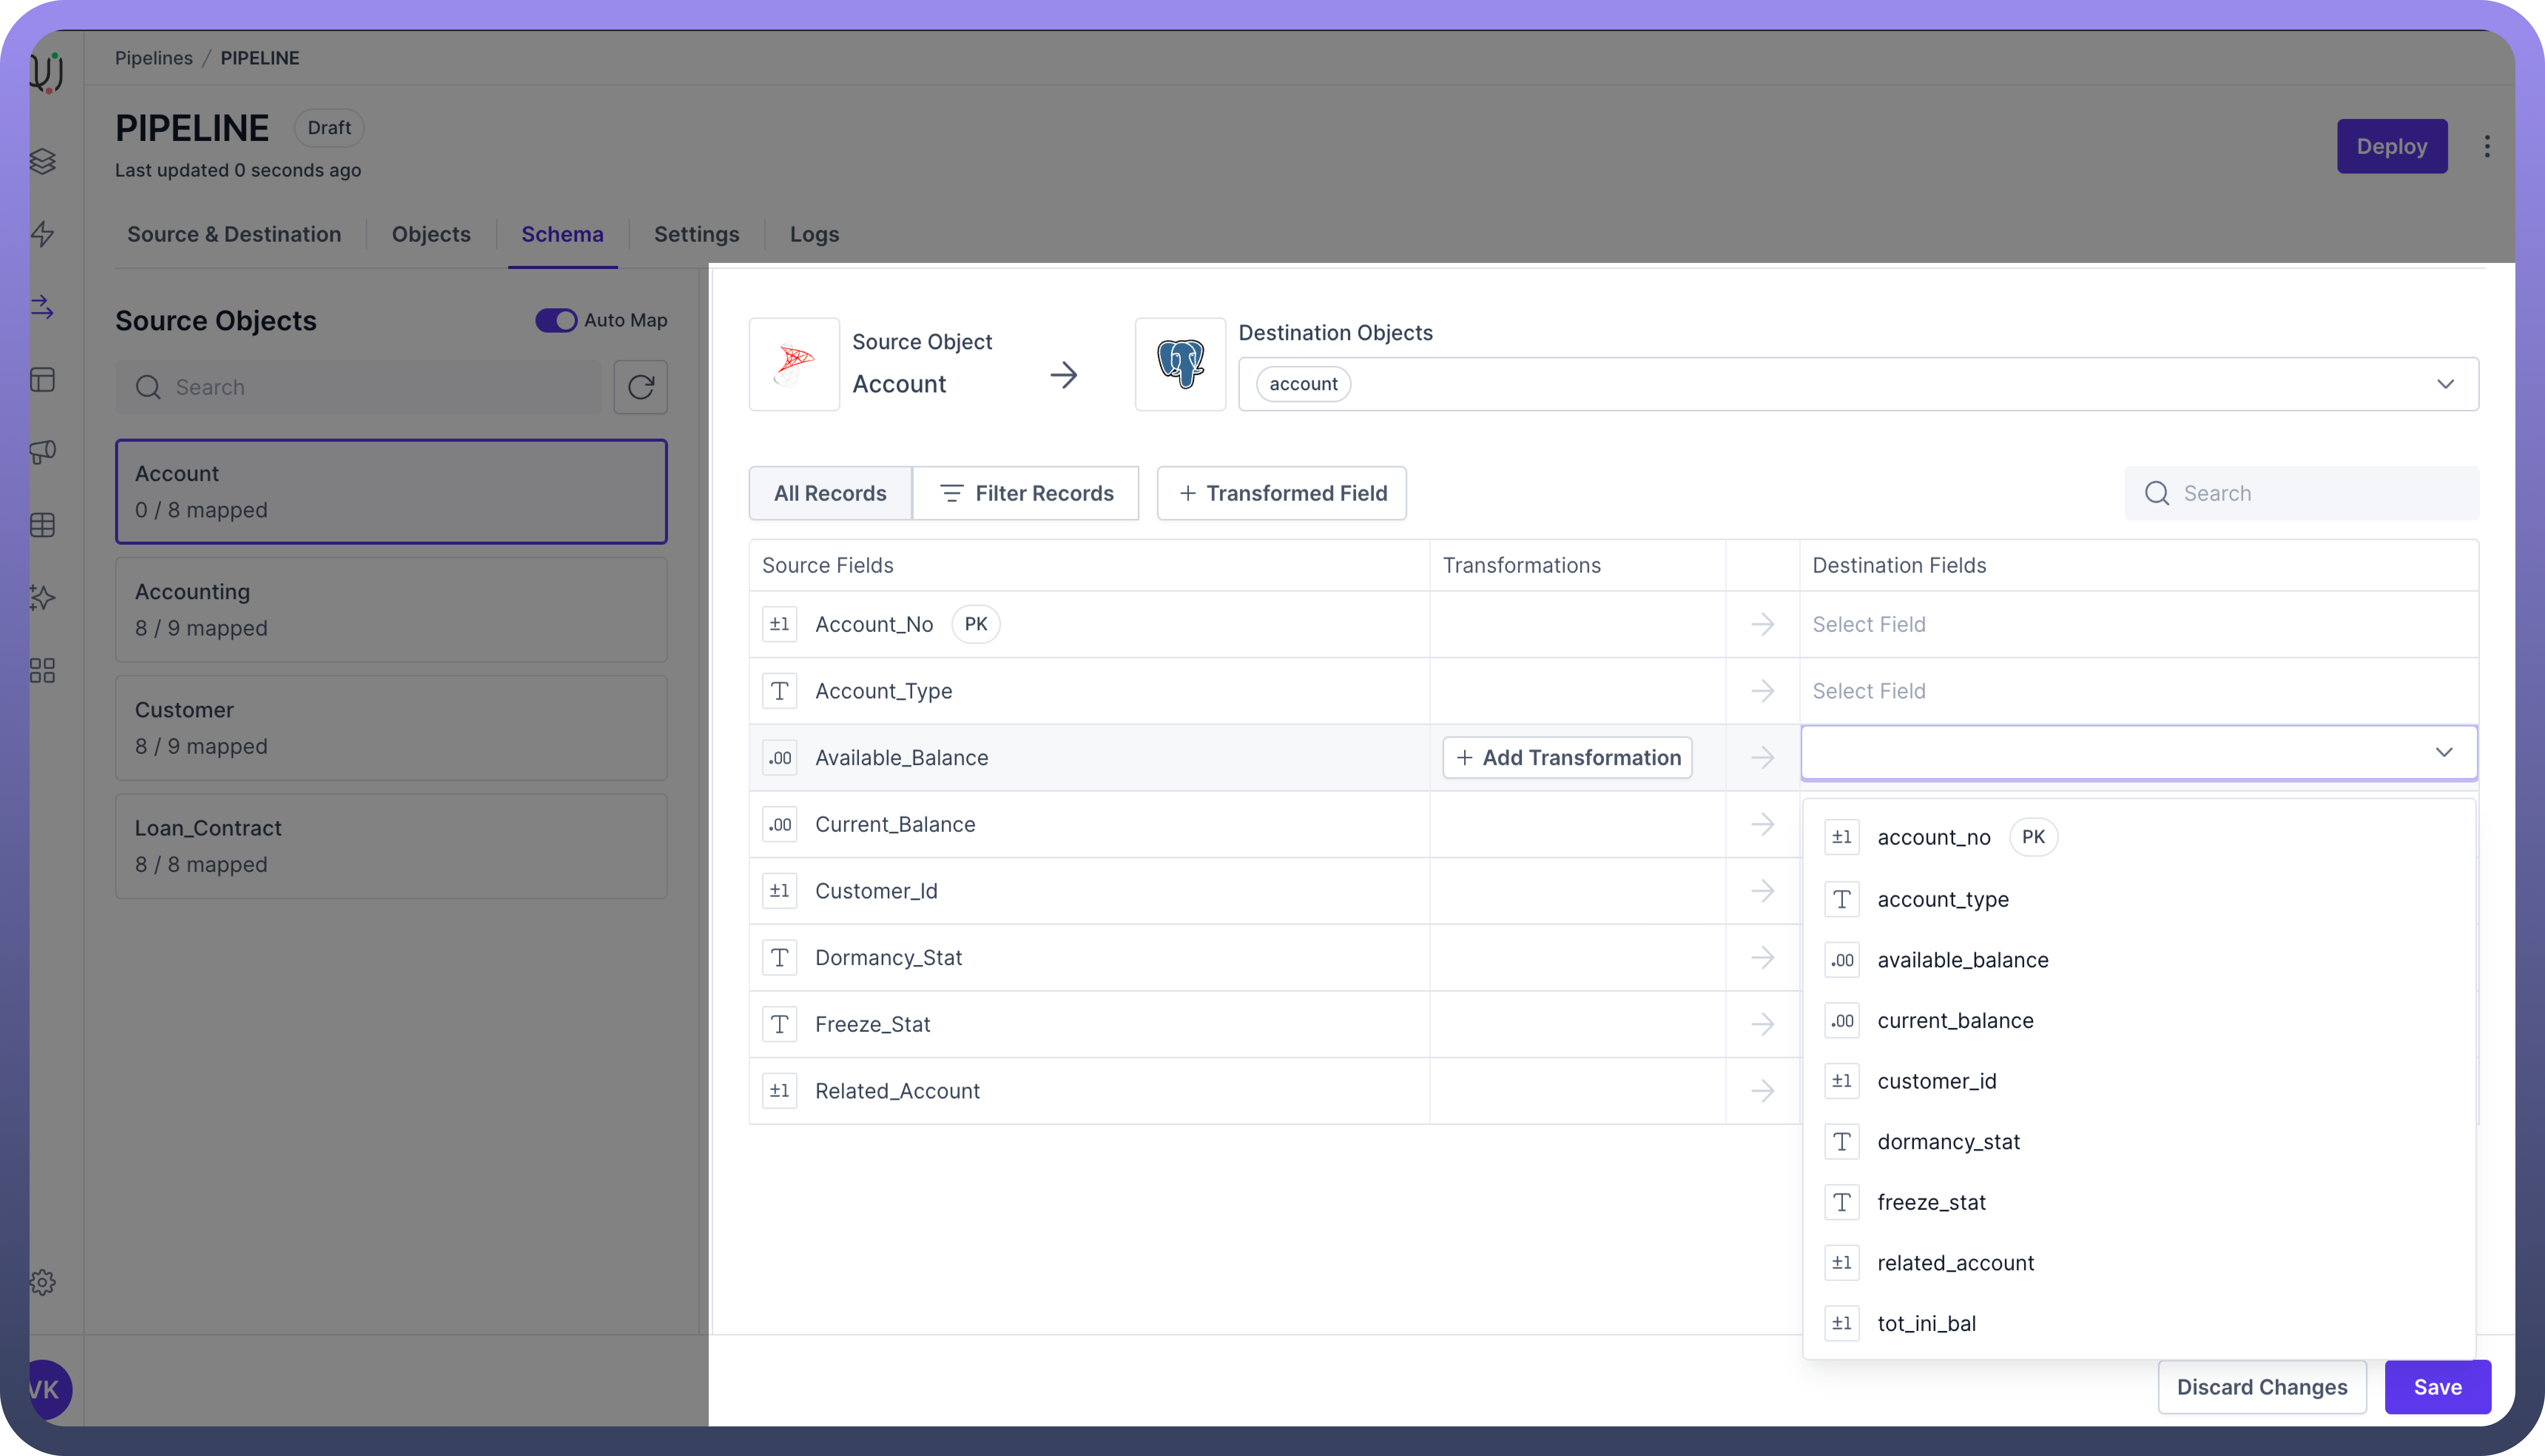
  3. You'll see a list of fields from the source object. For each field:

    • Select the matching destination field from the drop-down list.

    • If there's no match, you can choose to skip the field or create a new field in the destination.

  4. After mapping all fields, click "Save" to store your mappings.

Image
Image
Thumbnail

Tip

You can use the Search bar on the left to find source objects or the Search bar in each object view to find source fields.

FAQs

What should I do if there are schema mismatches between my source and destination?

If you encounter data type mismatches between source and destination fields, you have two options:

  • Remap the field to a compatible destination field.

  • Apply a transformation (like "Cast") to convert the data type. You can do this by clicking on the transformation icon next to the field mapping.

Is it possible to map multiple source objects to a single destination object?

Yes, it is possible to map multiple source objects to a single destination object.
This process, often referred to as many to one mapping, involves combining data from different source tables or views into a unified format in the destination.

This can be useful for creating comprehensive datasets that integrate information from various sources.