Contents

Cancel

Recommended Articles

  1. unify-apps

    Indexing

    Unify AI

    Transform raw content into searchable knowledge through AI-powered indexing and vector embeddings

  2. unify-apps

    IMAP

    Unify Integrations

    Integrate your app with IMAP to enable seamless email synchronization, real-time access, and enhanced communication workflows.

  3. unify-apps

    Preview Your Work

    Unify Automations

    Effortlessly review & monitor your automation’s performance

  4. unify-apps

    QuickBooks

    Unify Integrations

    Integrate your app with QuickBooks to streamline accounting, automate invoicing, and manage finances effortlessly

  5. unify-apps

    FTP/FTPS

    Unify Integrations

    Connect your app with FTP/FTPS to automate secure file transfers and streamline data exchange across systems.

  6. unify-apps

    Facebook Ads

    Unify Integrations

    Connect your app with Facebook Ads to automate campaign management, optimize ad performance, and track marketing success.

  7. unify-apps

    Snowflake

    Unify Automations

    Connect to Snowflake for fast, scalable cloud data warehousing and analytics

  8. unify-apps

    Button

    Unify Applications

    Create interactive elements with ease using buttons

  9. unify-apps

    BambooHR

    Unify Automations

    Integrate your app with BambooHR to streamline HR management, automate employee data processing, and enhance onboarding workflows

  10. unify-apps

    Build your first automation

    Unify Automations

    Learn how to build your automation step by step

  11. unify-apps

    User Management

    Unify Applications

    Efficiently manage user roles and permissions

  12. unify-apps

    Microsoft Teams

    Unify Automations

    Connect your app with Microsoft Teams to enhance communication, automate workflows, and foster collaboration across your organization

  13. unify-apps

    Jira

    Unify Automations

    Use Jira to plan, track, and manage your agile and software development projects

  14. unify-apps

    Pre Processing

    Unify AI

    Optimize query processing through intelligent rephrasing, retrieval, and ranking to deliver accurate AI responses

  15. unify-apps

    Google Calendar

    Unify Integrations

    Integrate your app with Google Calendar to streamline scheduling, automate event management, and improve team coordination

#
Release Notes
Logo
Logging

Logging

Logo

3 mins READ

Overview

Logging in UnifyApps enables users to track the functionality of a node in an automation. This feature allows the creation of logs that can capture details of a node execution, in the form of messages and provide insights into their execution history. 

Image
Image

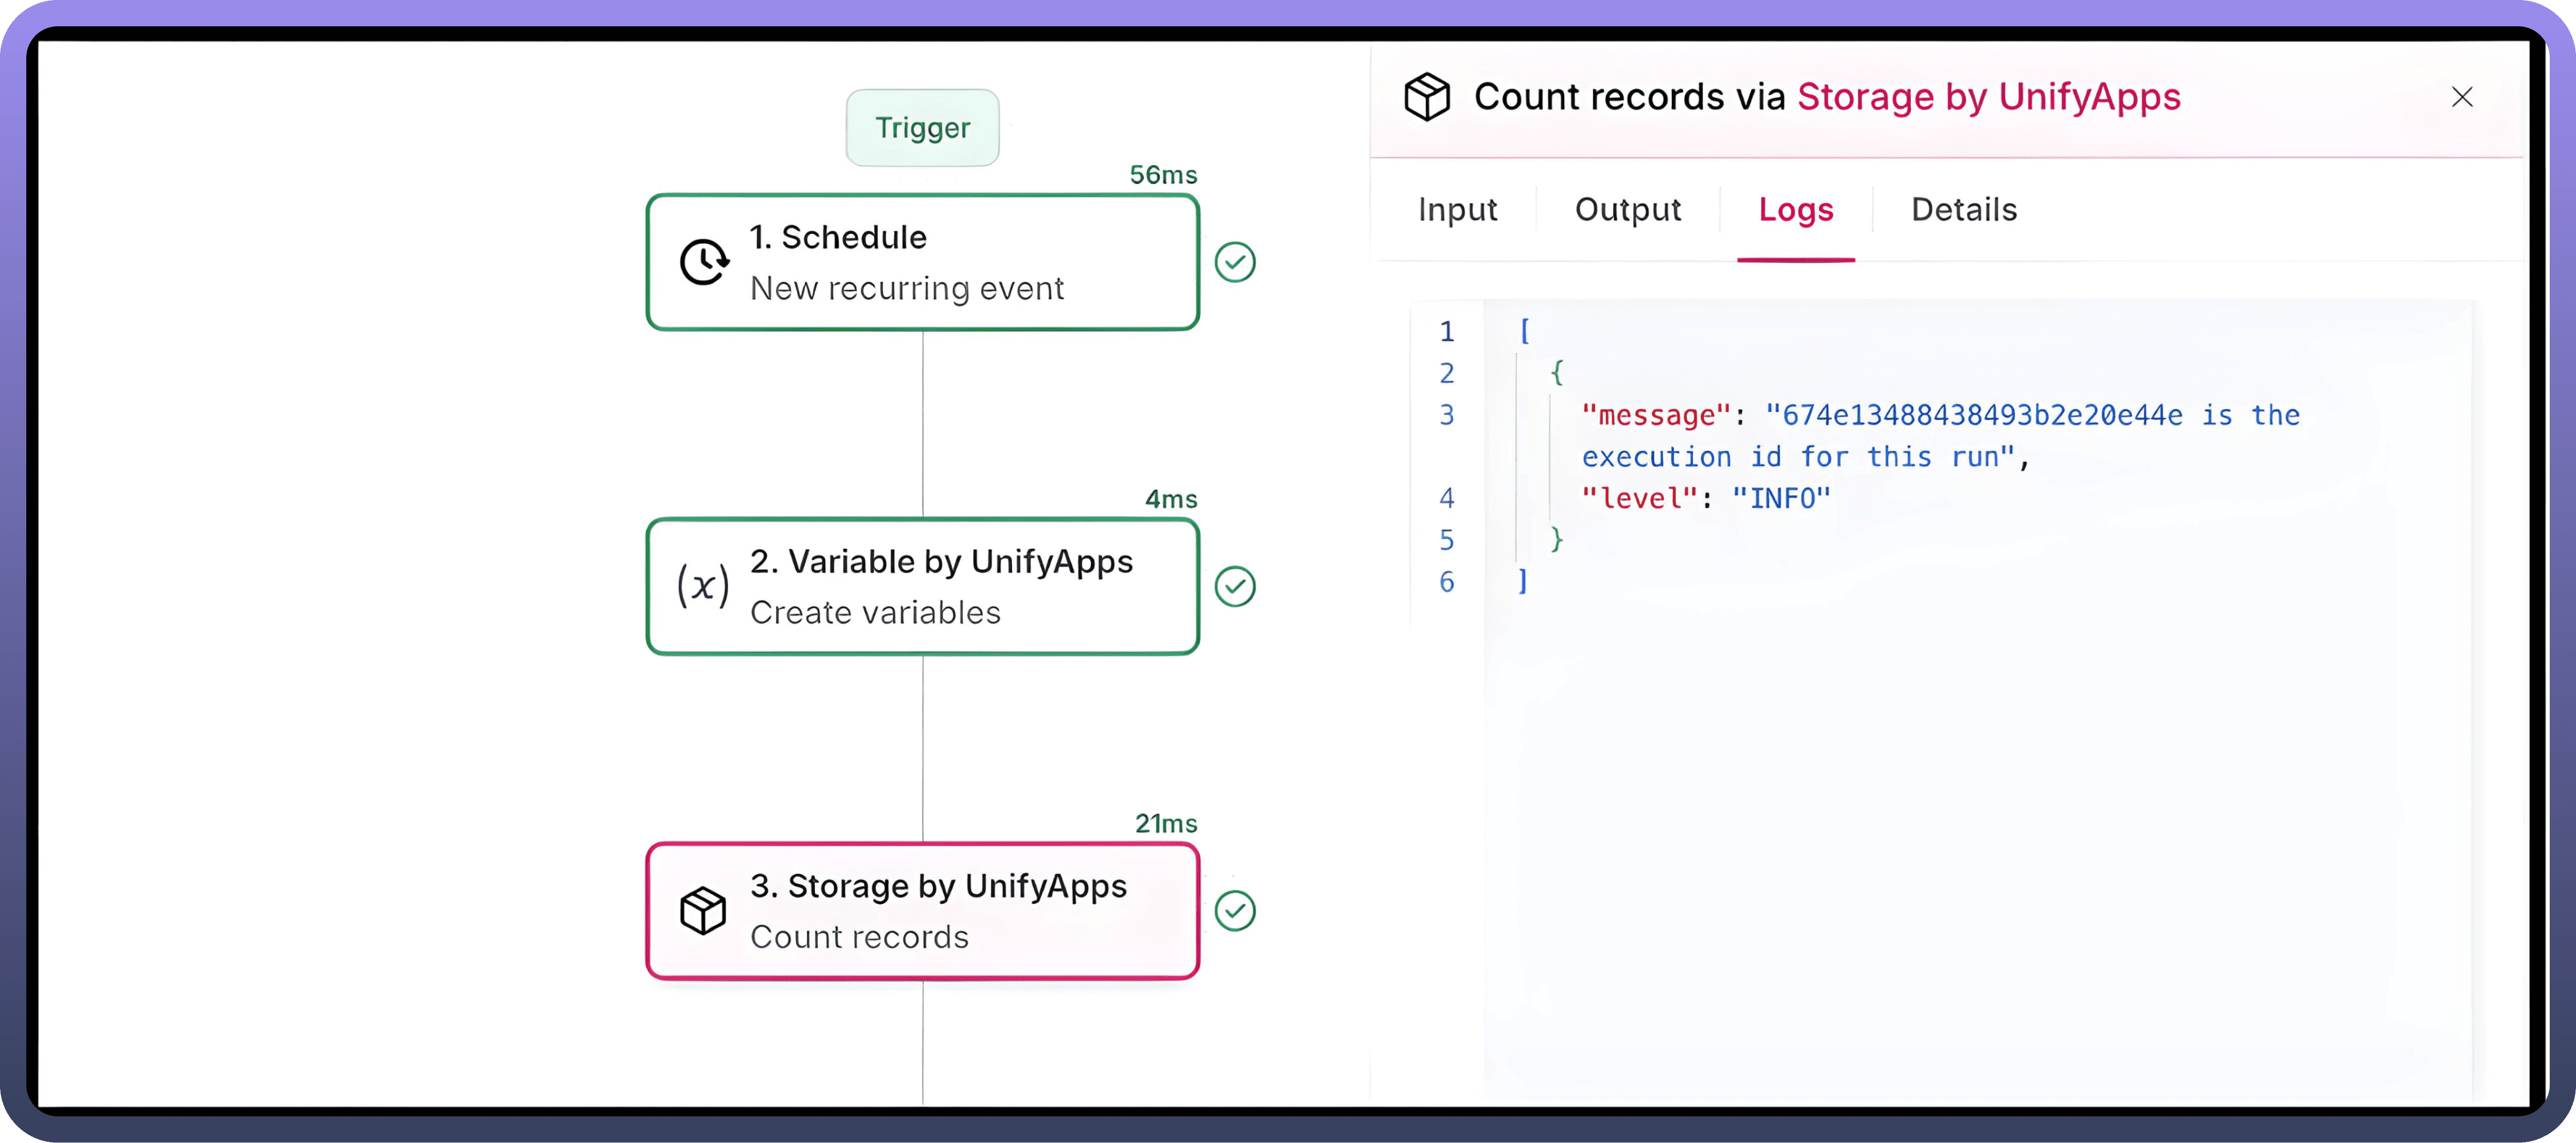
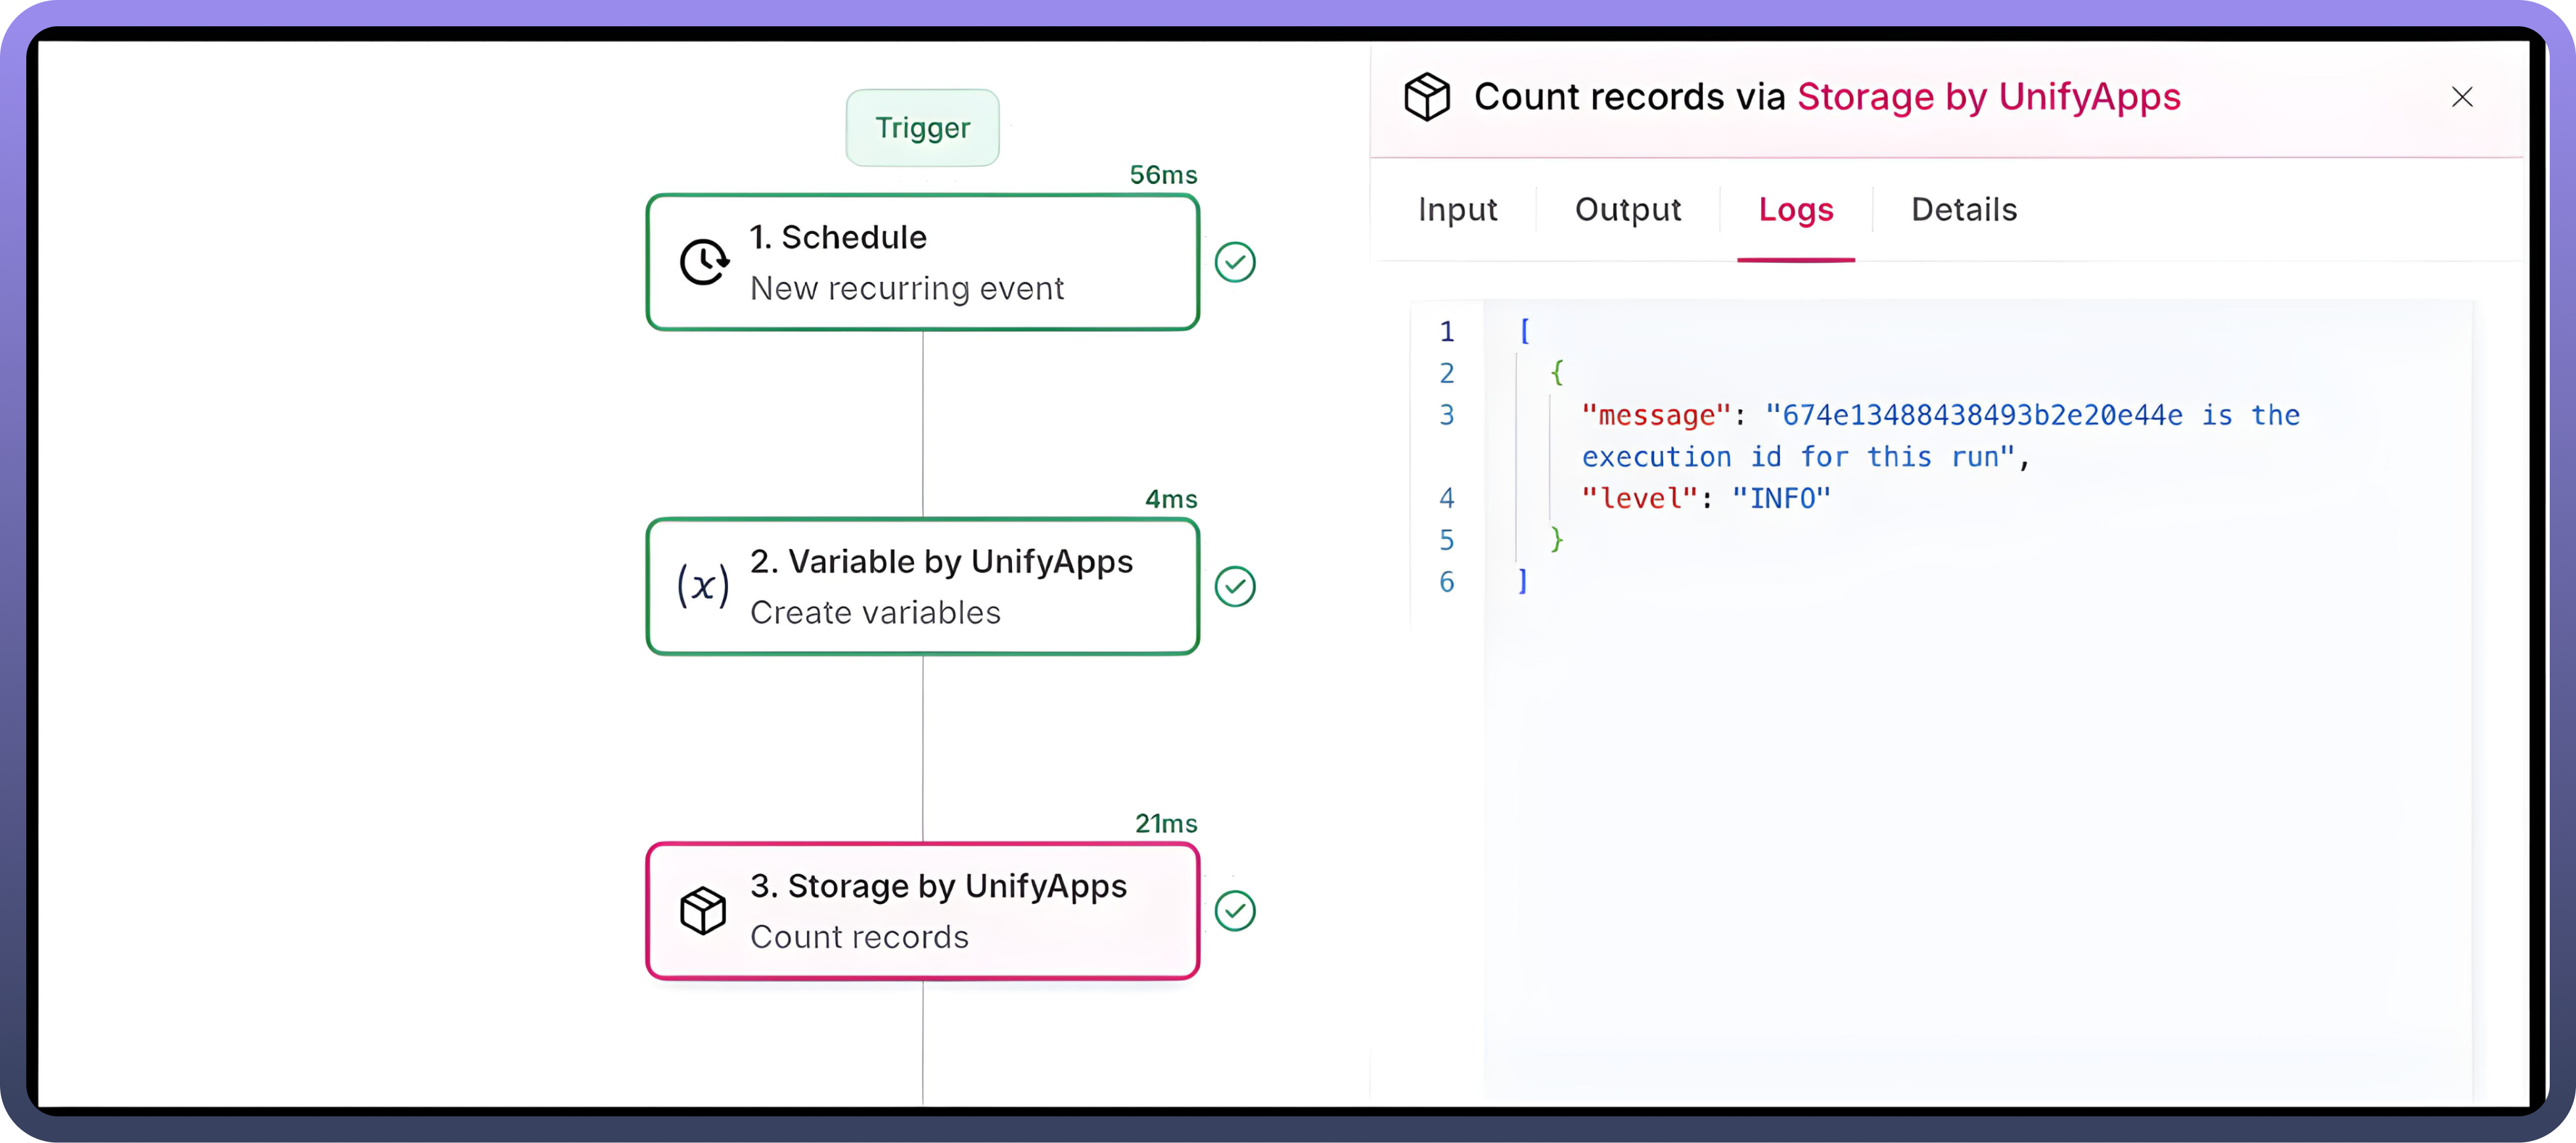
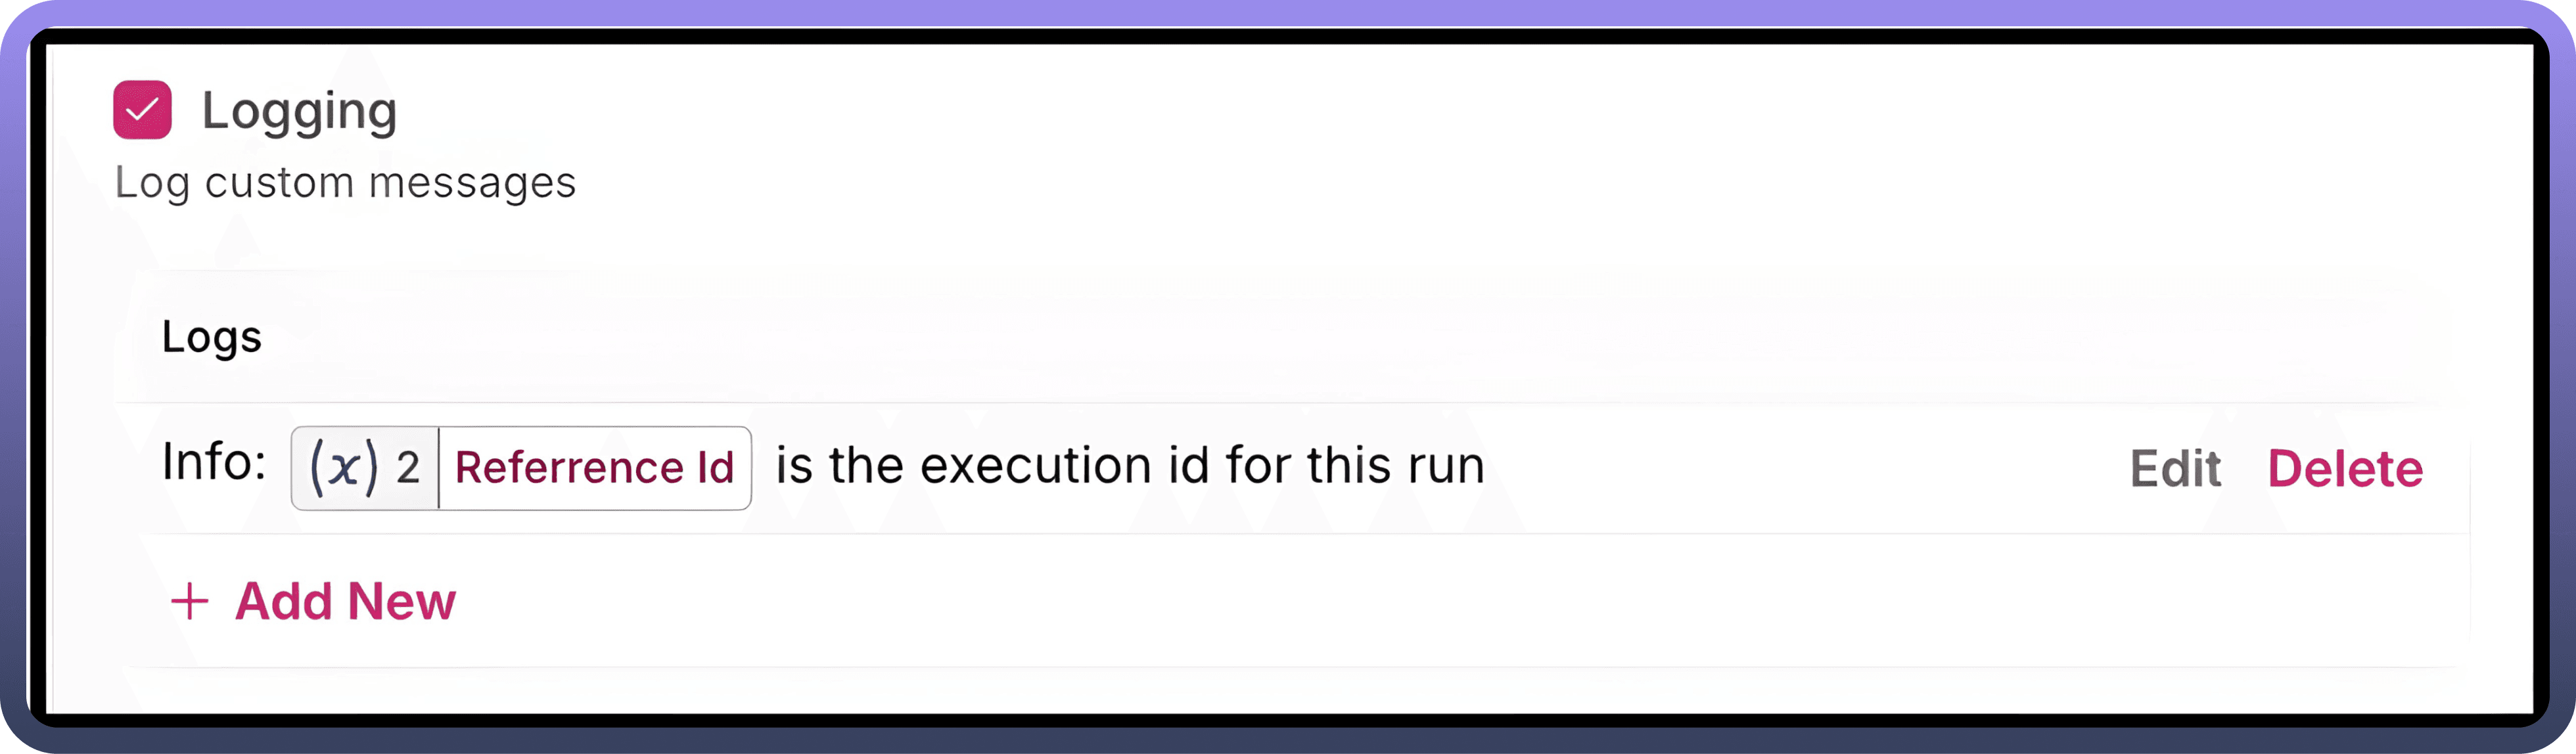
These recorded messages could be accessed in the runs of the automation, at the node level details, under the tab of Logs, along with the input and output tabs for the node.

Node level logs can be enabled through the extended configuration menu by checking the logging option. Users can set up multiple configurations to capture a range of messages across the same node.

Image
Image

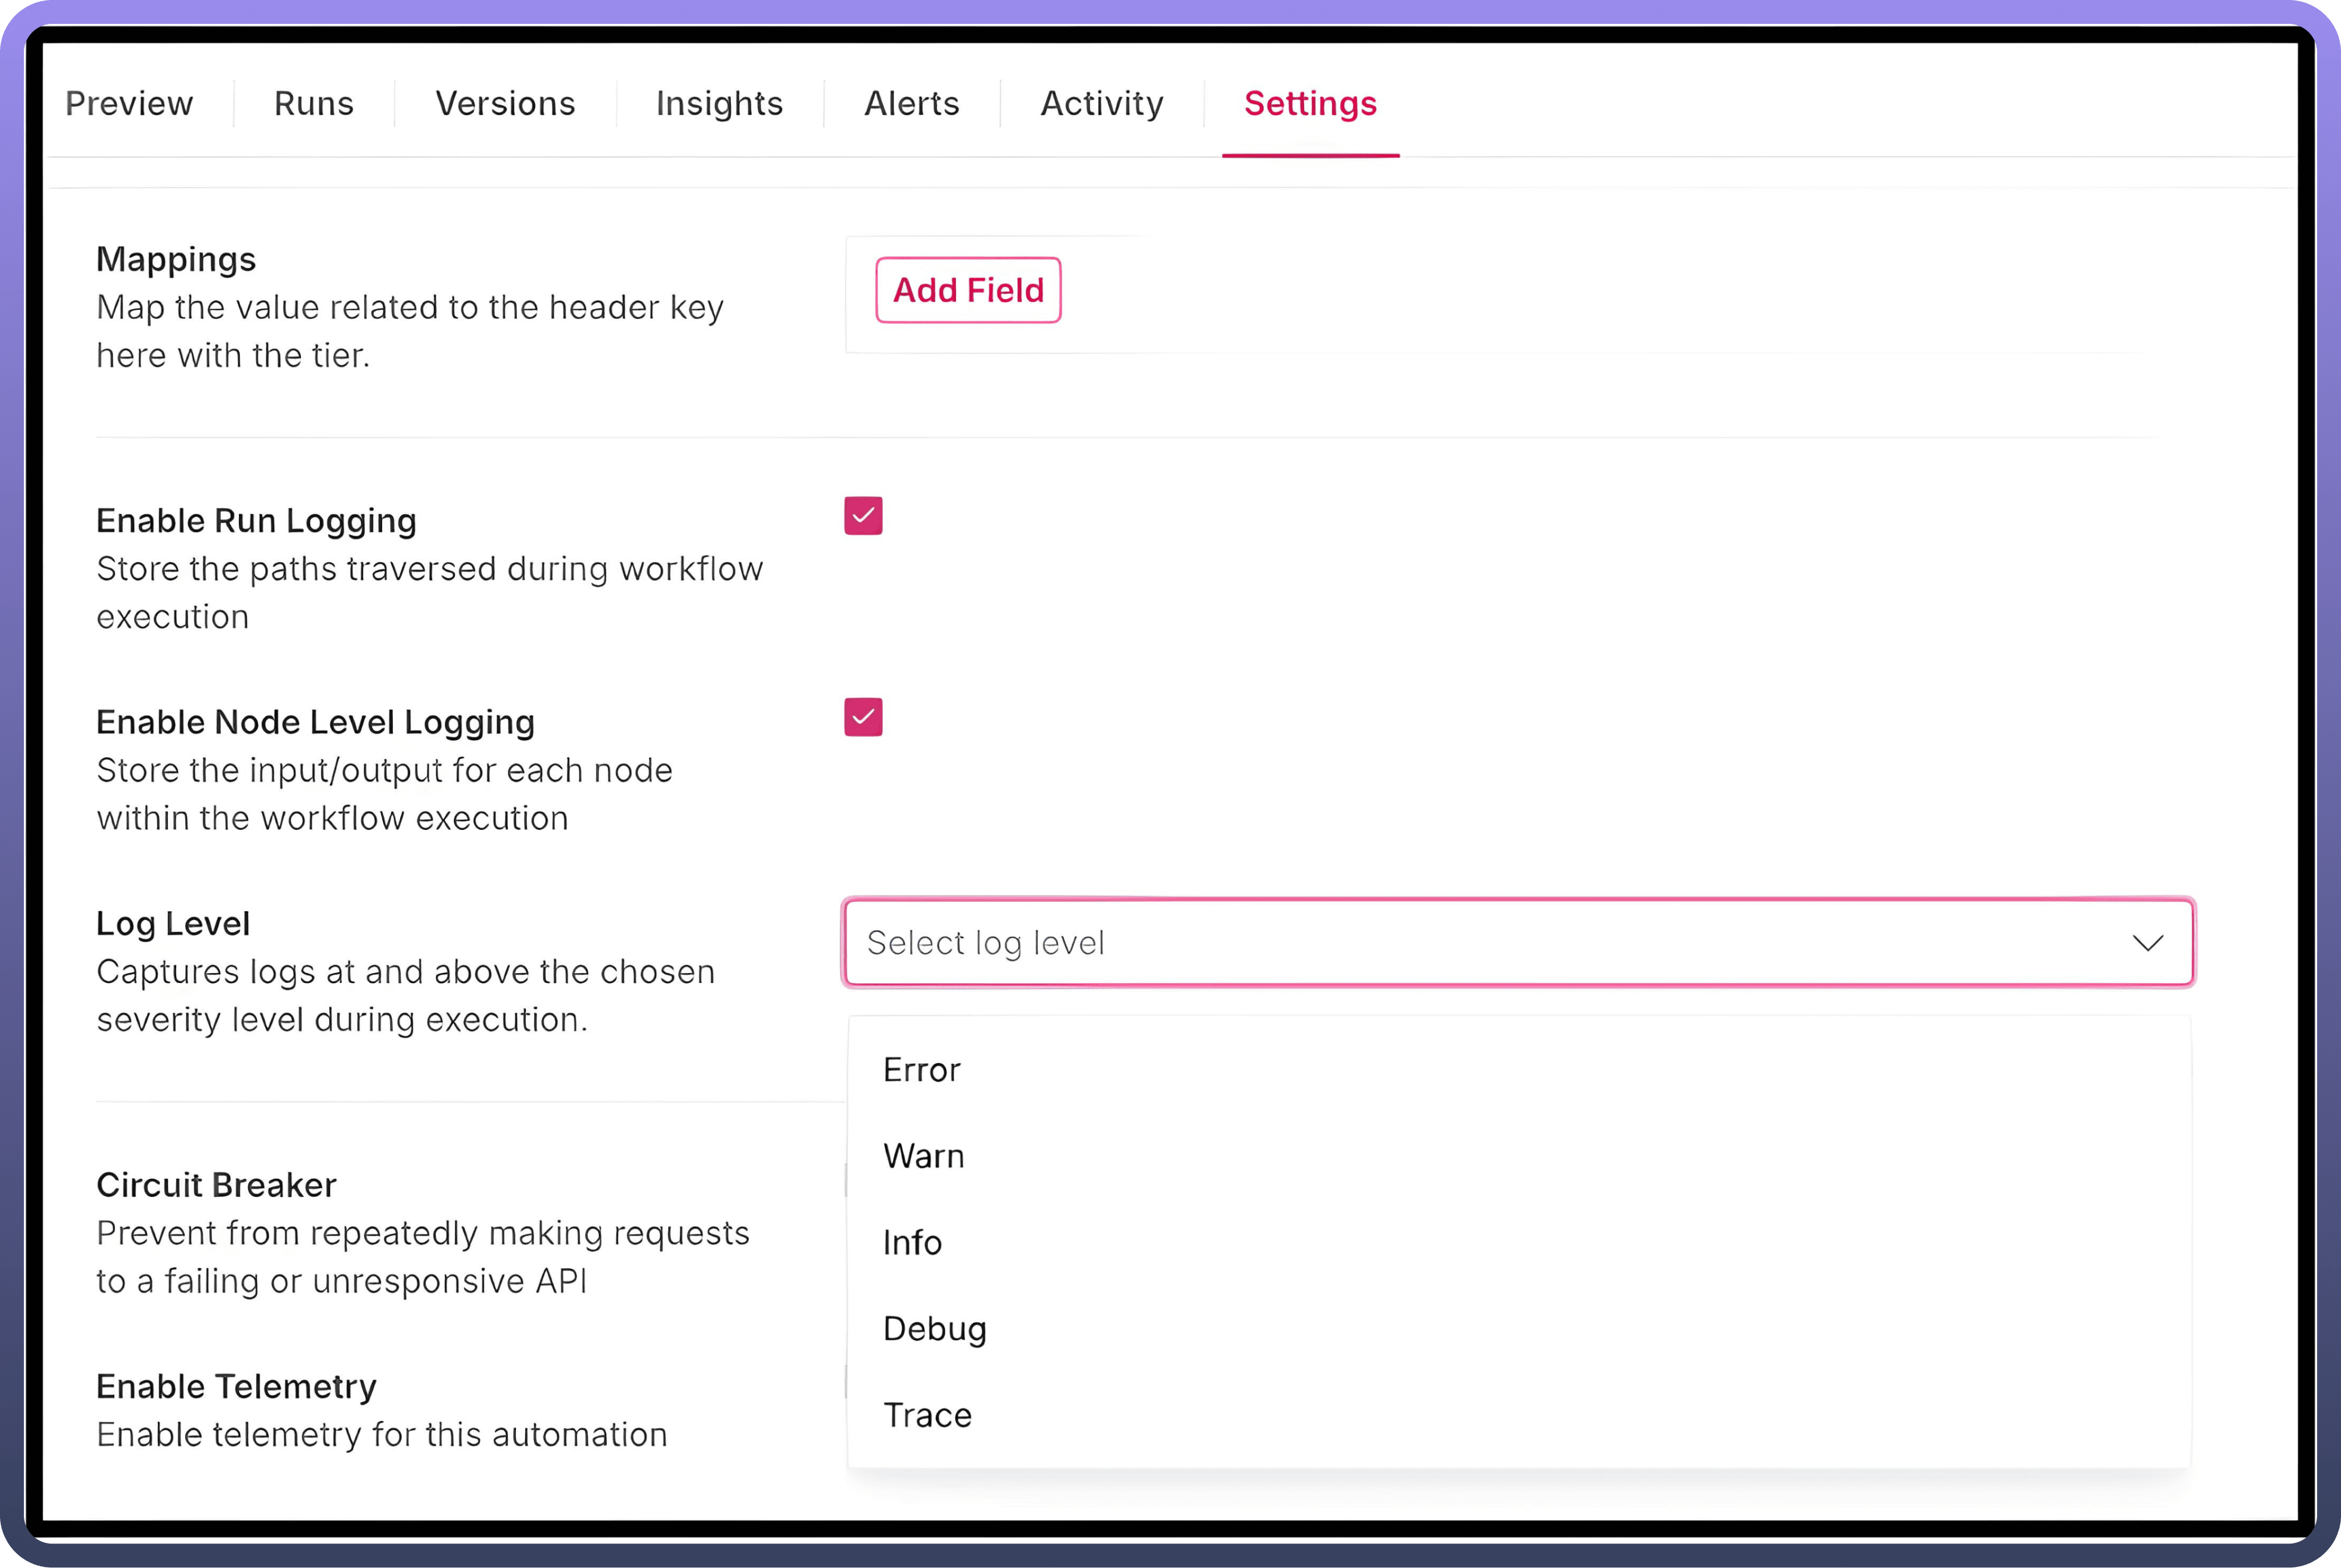
To enable logging at the node level, users must configure the logging level in the automation settings. The logging levels available for configuration are as follows:

  1. Error

  2. Warn

  3. Info

  4. Debug

  5. Trace

How Logging Levels Work?

  • The logging level defined in the automation settings determines the maximum extent of logging detail available for the nodes.

  • Node-level logging can only be set to the level chosen in the automation settings or levels above it in the hierarchy.

Image
Image

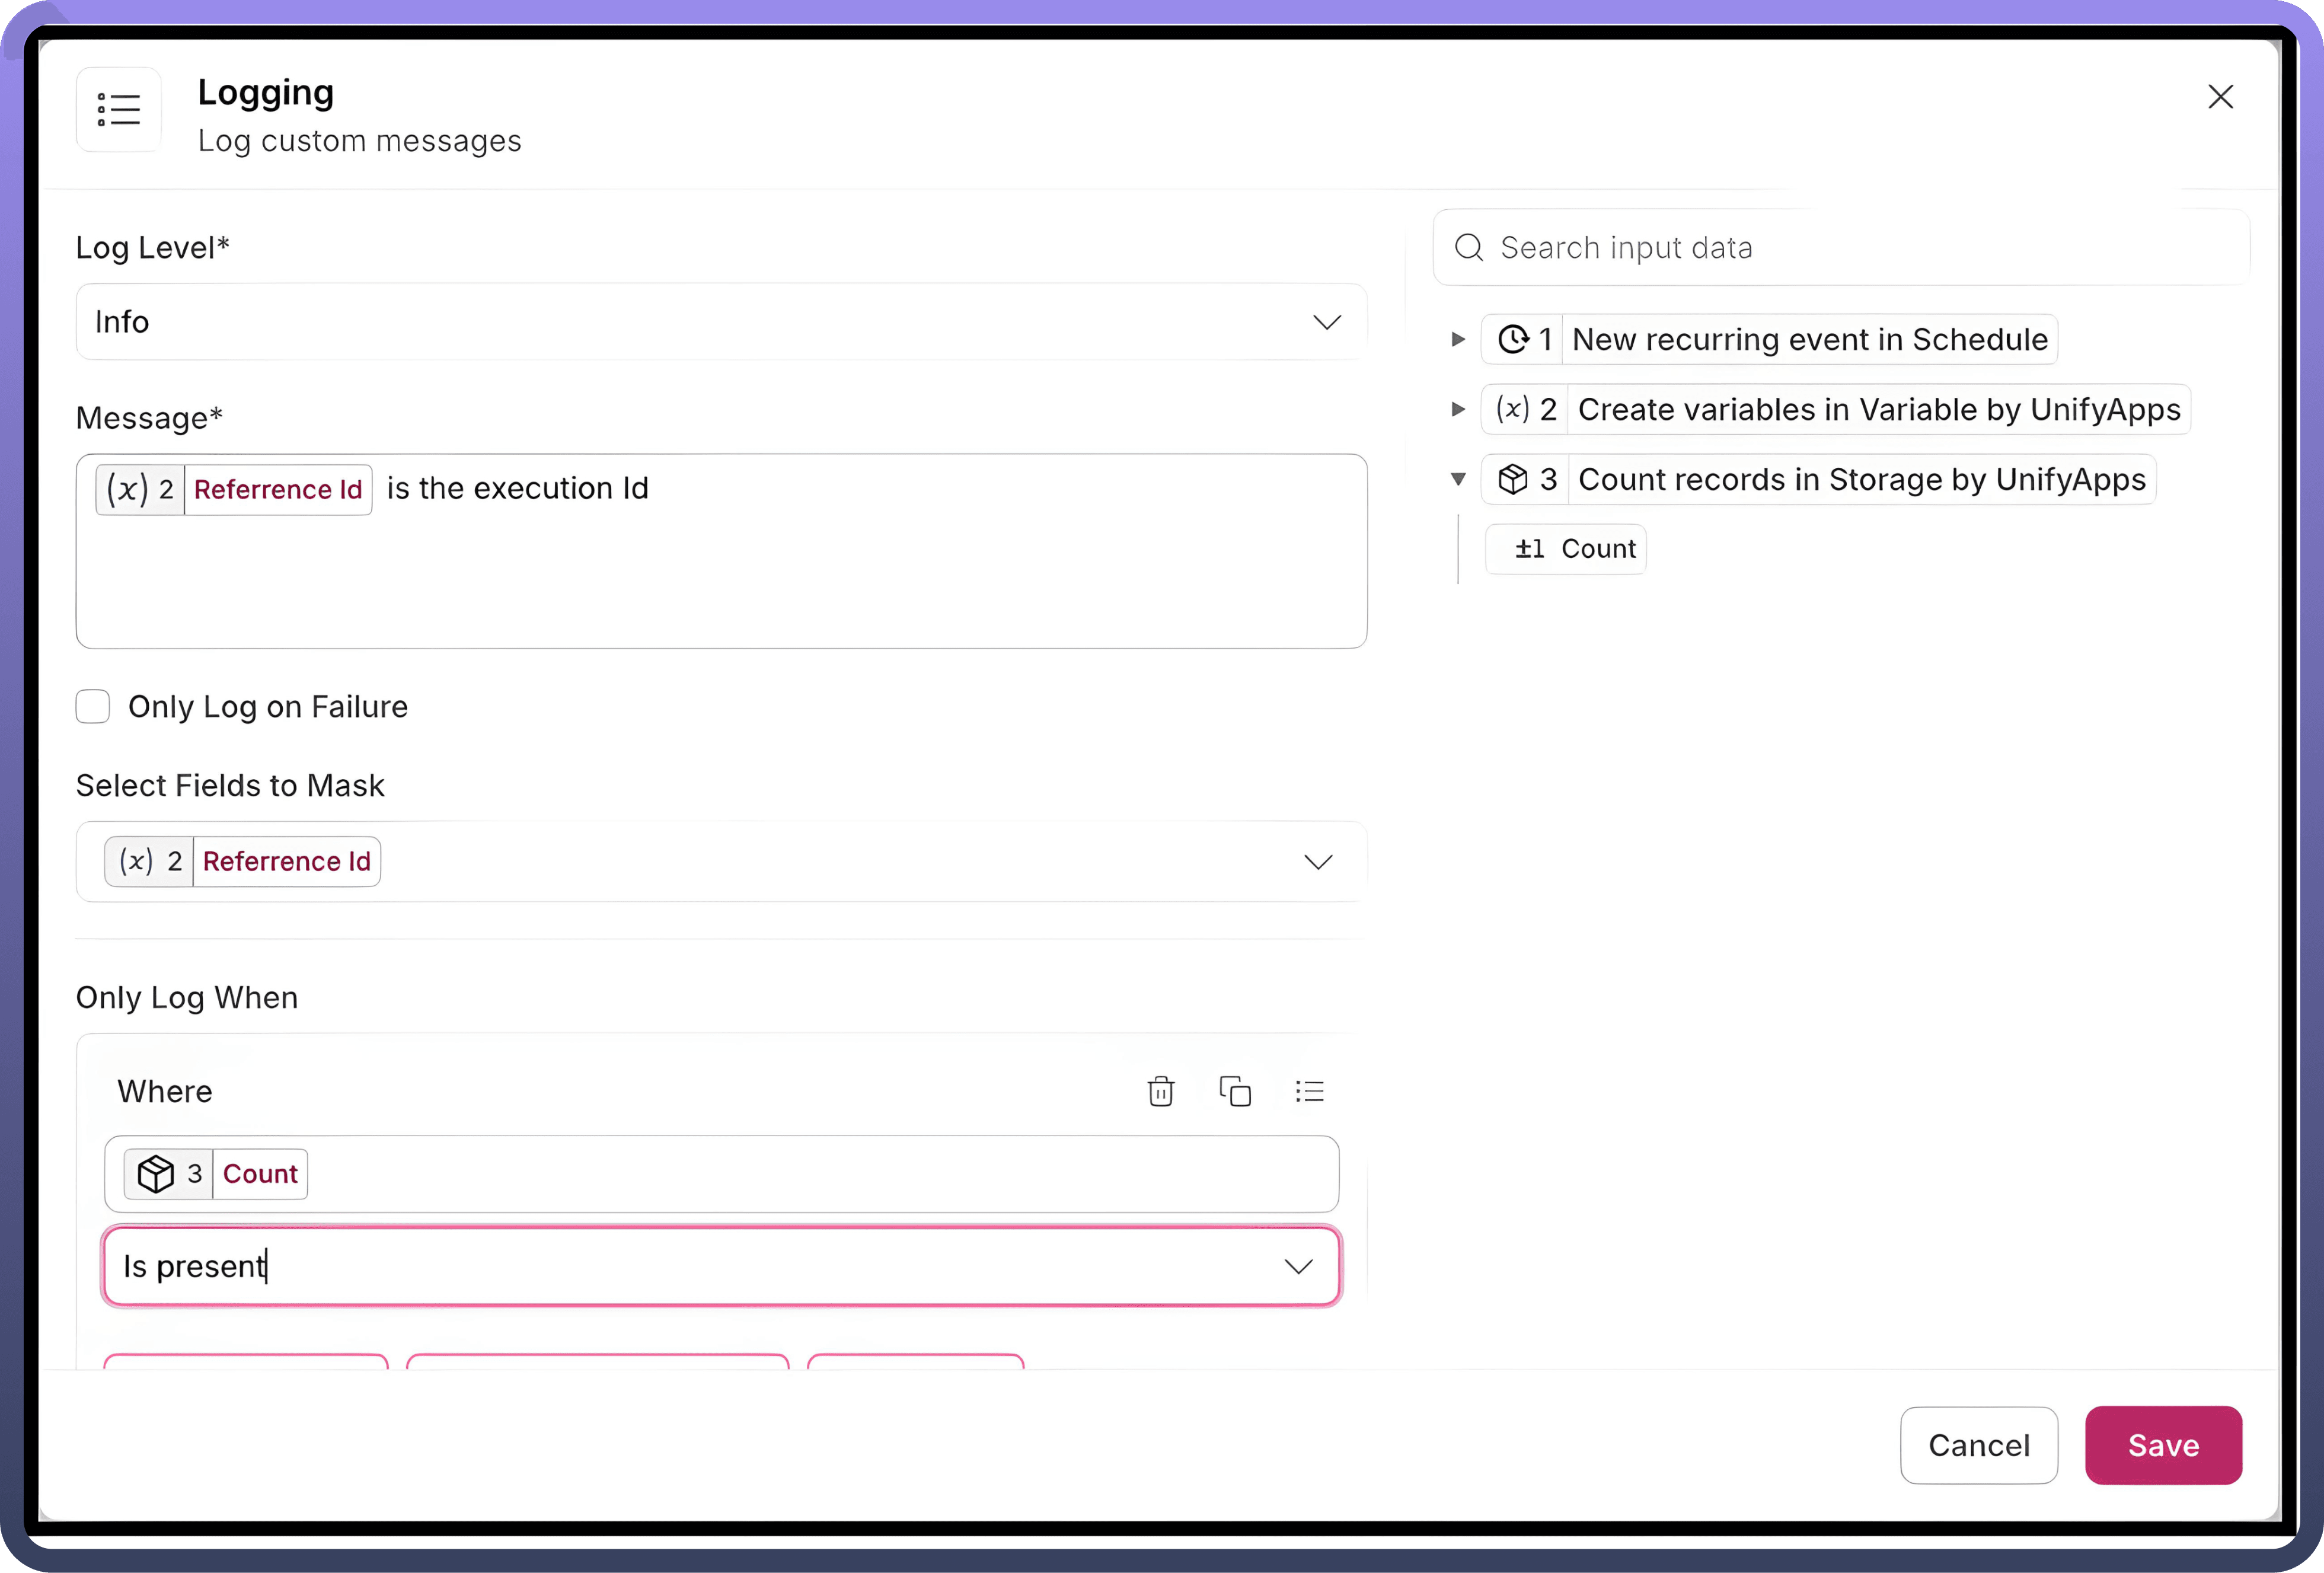
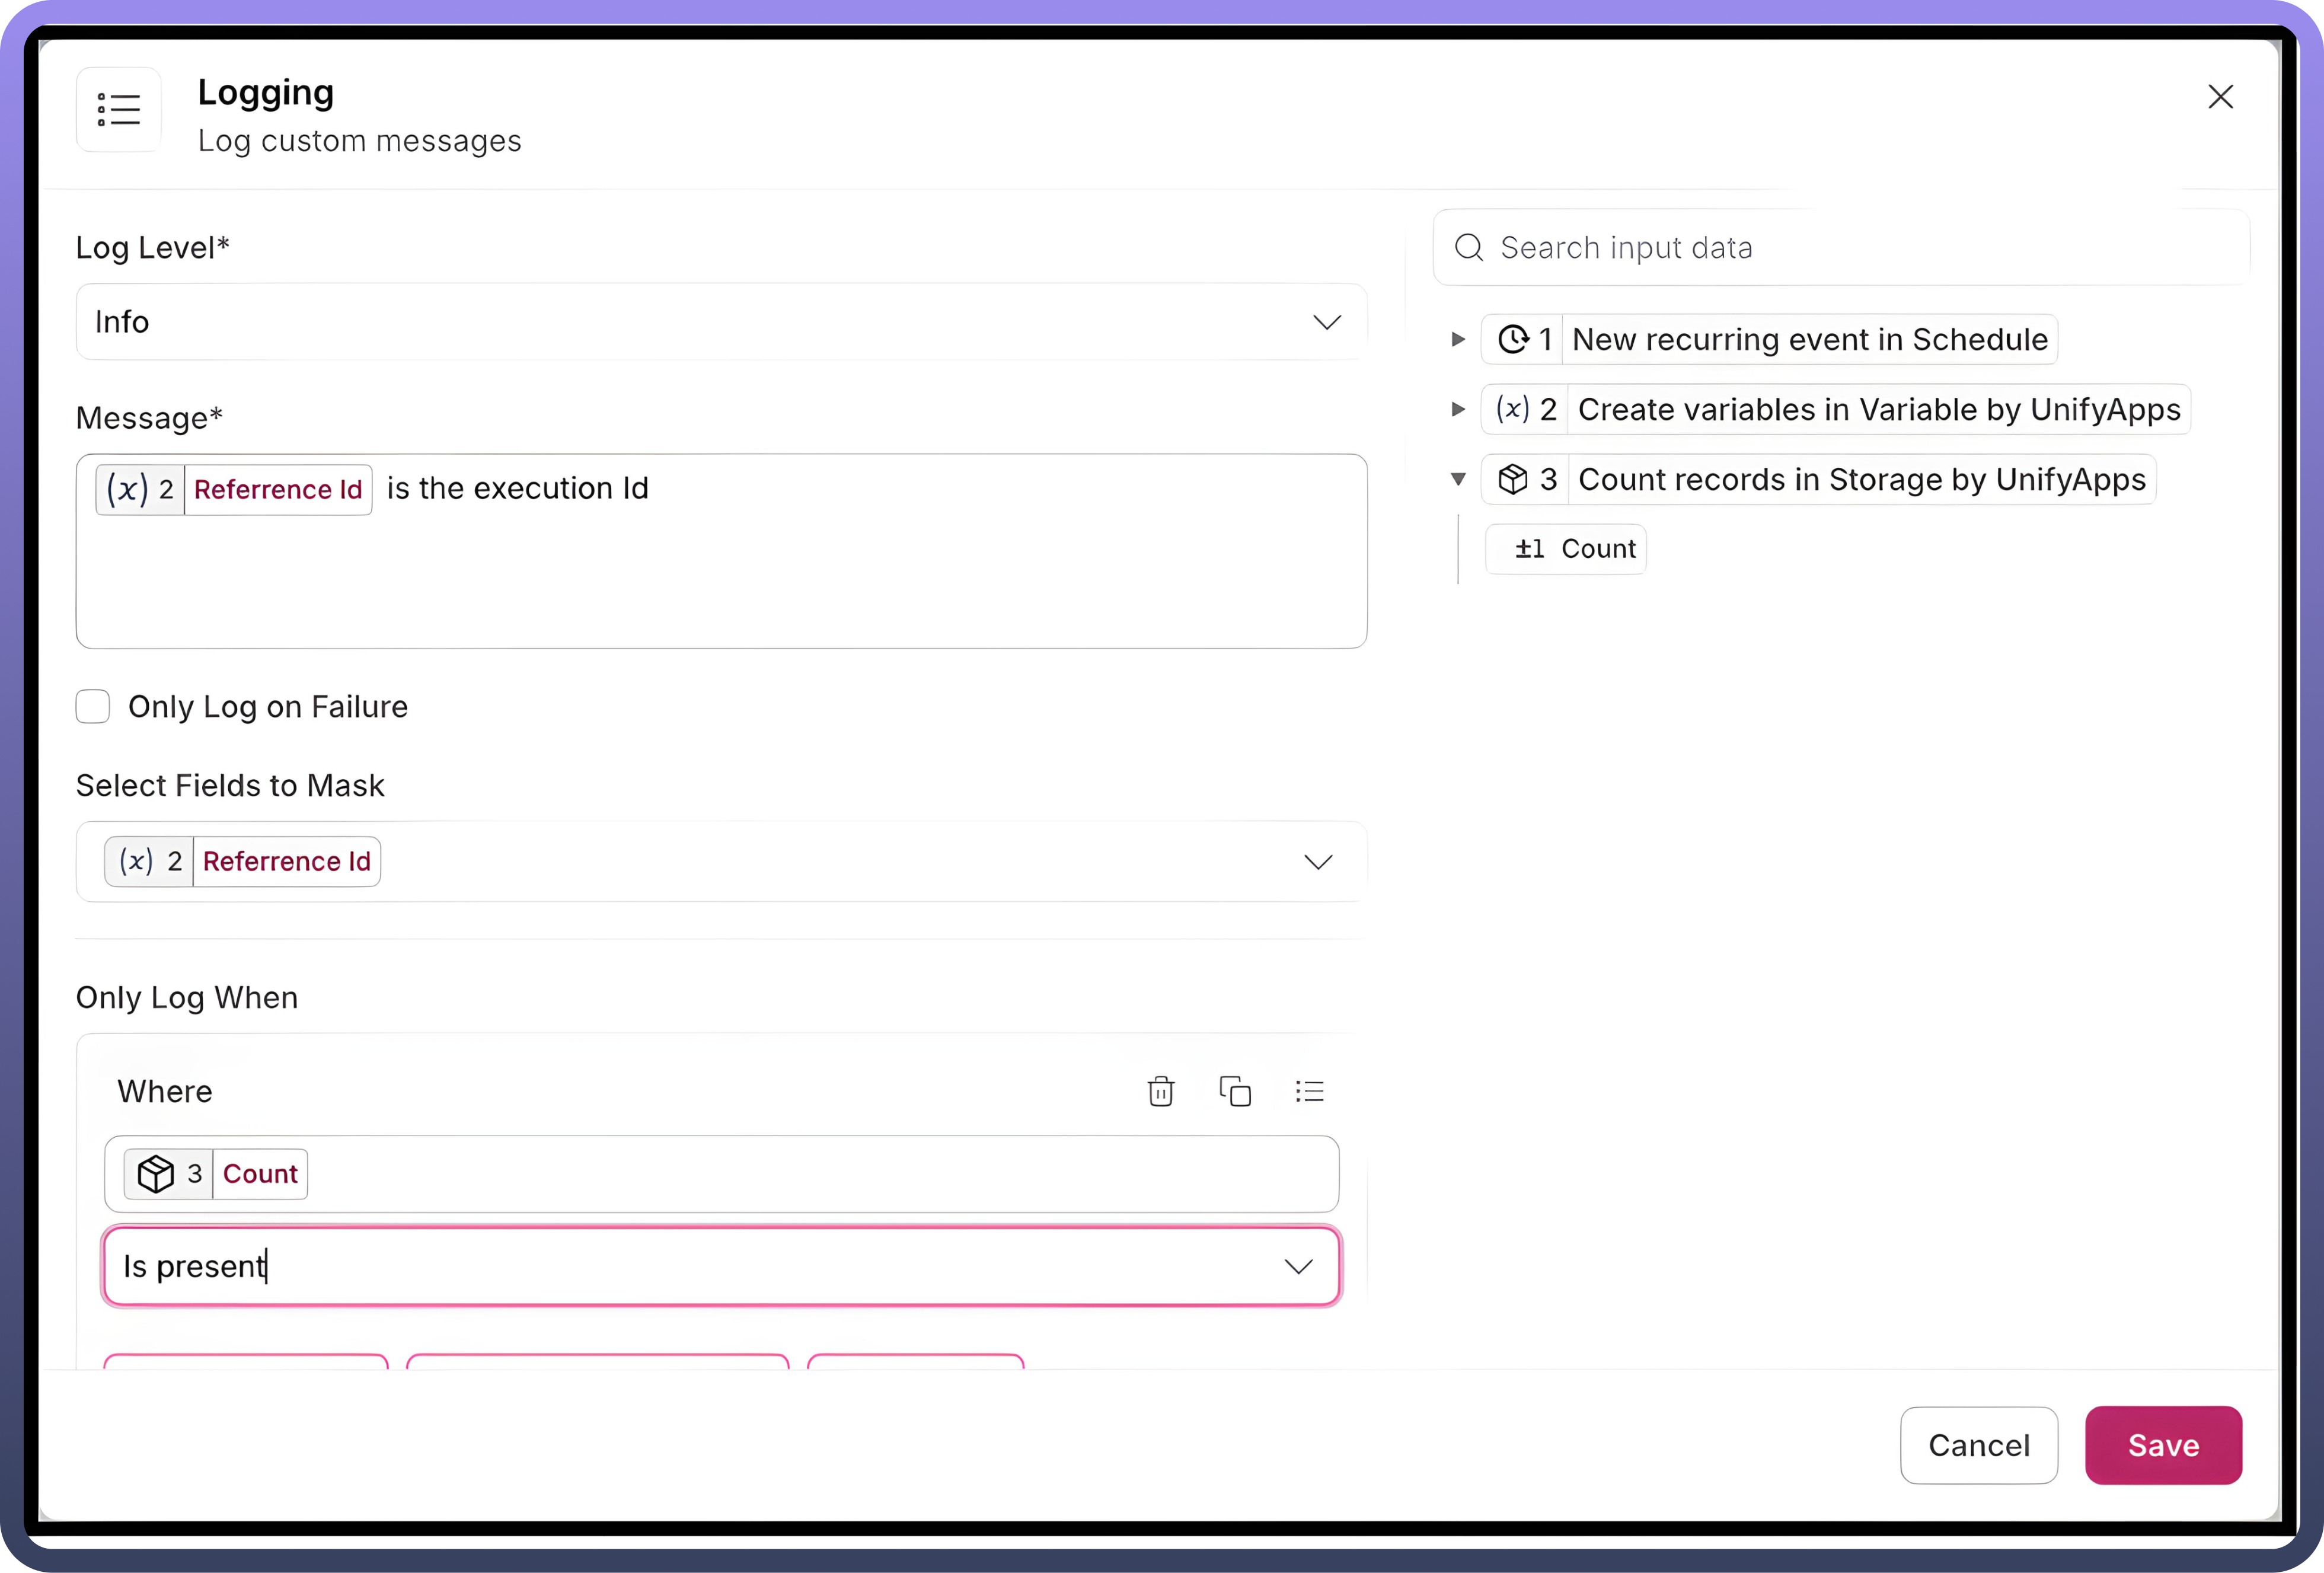
Steps to Configure a Log Message

  1. Define the Log Type Select the type of log you want to register from the Log Level dropdown. Options include:

    • Error: Logs critical issues preventing the node from functioning.

    • Warn: Logs potential issues that might lead to errors.

    • Info: Logs general information about the node's execution.

    • Debug: Logs detailed information useful for debugging.

    • Trace: Logs granular details such as execution flow and variable states.

  2. Configure the Log Message

    • Enter a custom message in the Message text field to describe what is being logged.

    • Add dynamic data-pills from the right panel to include input data from preceding nodes in your message.

  3. Set Conditions for Logging (Optional) If you want to register logs only under certain conditions:

    • Use the Only Log When section.

    • Define the field, the condition (e.g., equals to), and the value to ensure the log triggers only when the specified condition is met.

  4. Mask Sensitive Fields in Logs (Optional) If your log message contains sensitive information:

    • Use the Select Fields to Mask dropdown to choose the fields to obfuscate.

    • Masked fields will appear as hidden in the logs to protect data privacy.

  5. Enable Logging on Failure Only (Optional) If you only want to log messages when the node fails:

    • Check the Only Log on Failure box to ensure logs are created only for failed executions.

  6. Save the Configuration After defining the log type, message, and any optional settings, click Save to apply your logging configuration.

Image
Image