


Overview
The Changeset feature streamlines the migration of environment-specific assets, from lower to higher environments without requiring asset recreation. Users can transfer any asset class across environments using this feature in the settings menu. In case of errors or issues, the Changeset feature supports rollbacks, allowing users to restore the destination environment to its original state. This ensures smooth transitions and minimizes the risk of disruptions during environment updates.
Changeset in Unify Apps consists of three key components:
Component | Definition |
| The set of environments across which the assets can be moved to/from the user’s environment |
| Operates on a send-receive format, where the Changeset is configured in the source environment and sent to the destination environment for receipt. |
| Operates on a pull format, where the Changeset is configured in the destination environment to pull assets from the source environment. |
Connected Environments
Connected Environments define the permissible set of environments between which assets can be moved to or from a user's environment. Establishing these connections is a prerequisite for asset migration across environments.
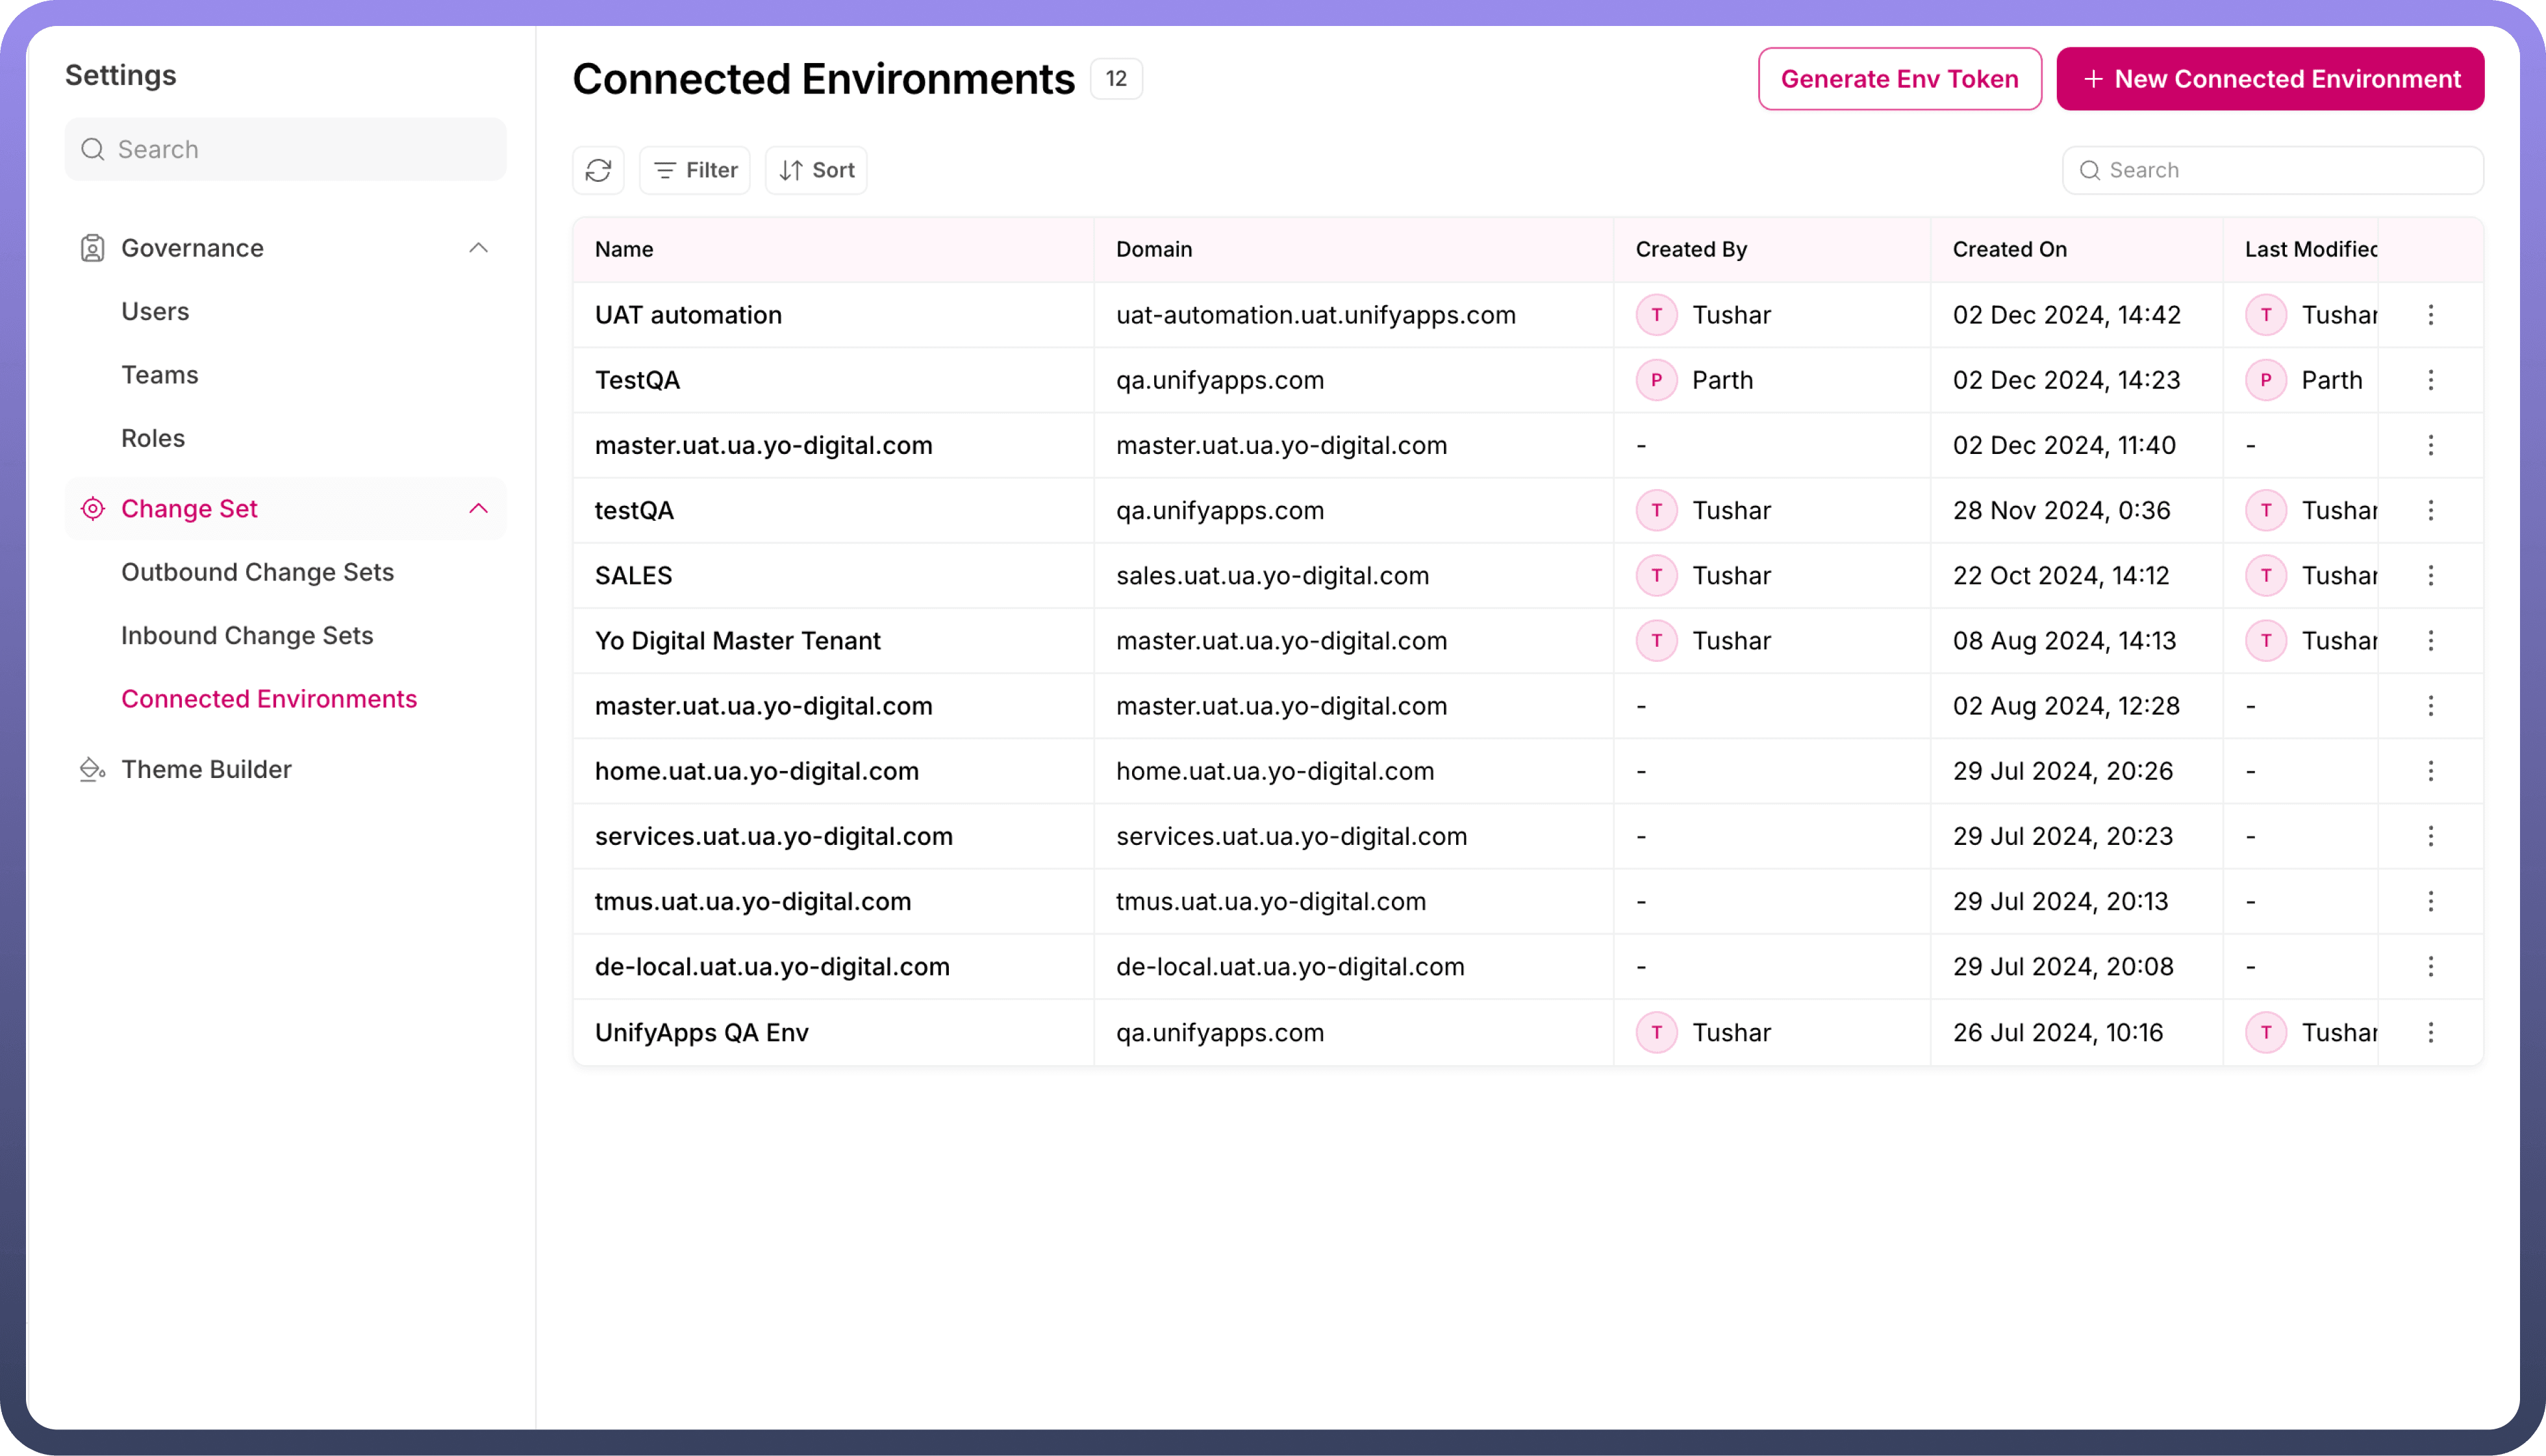
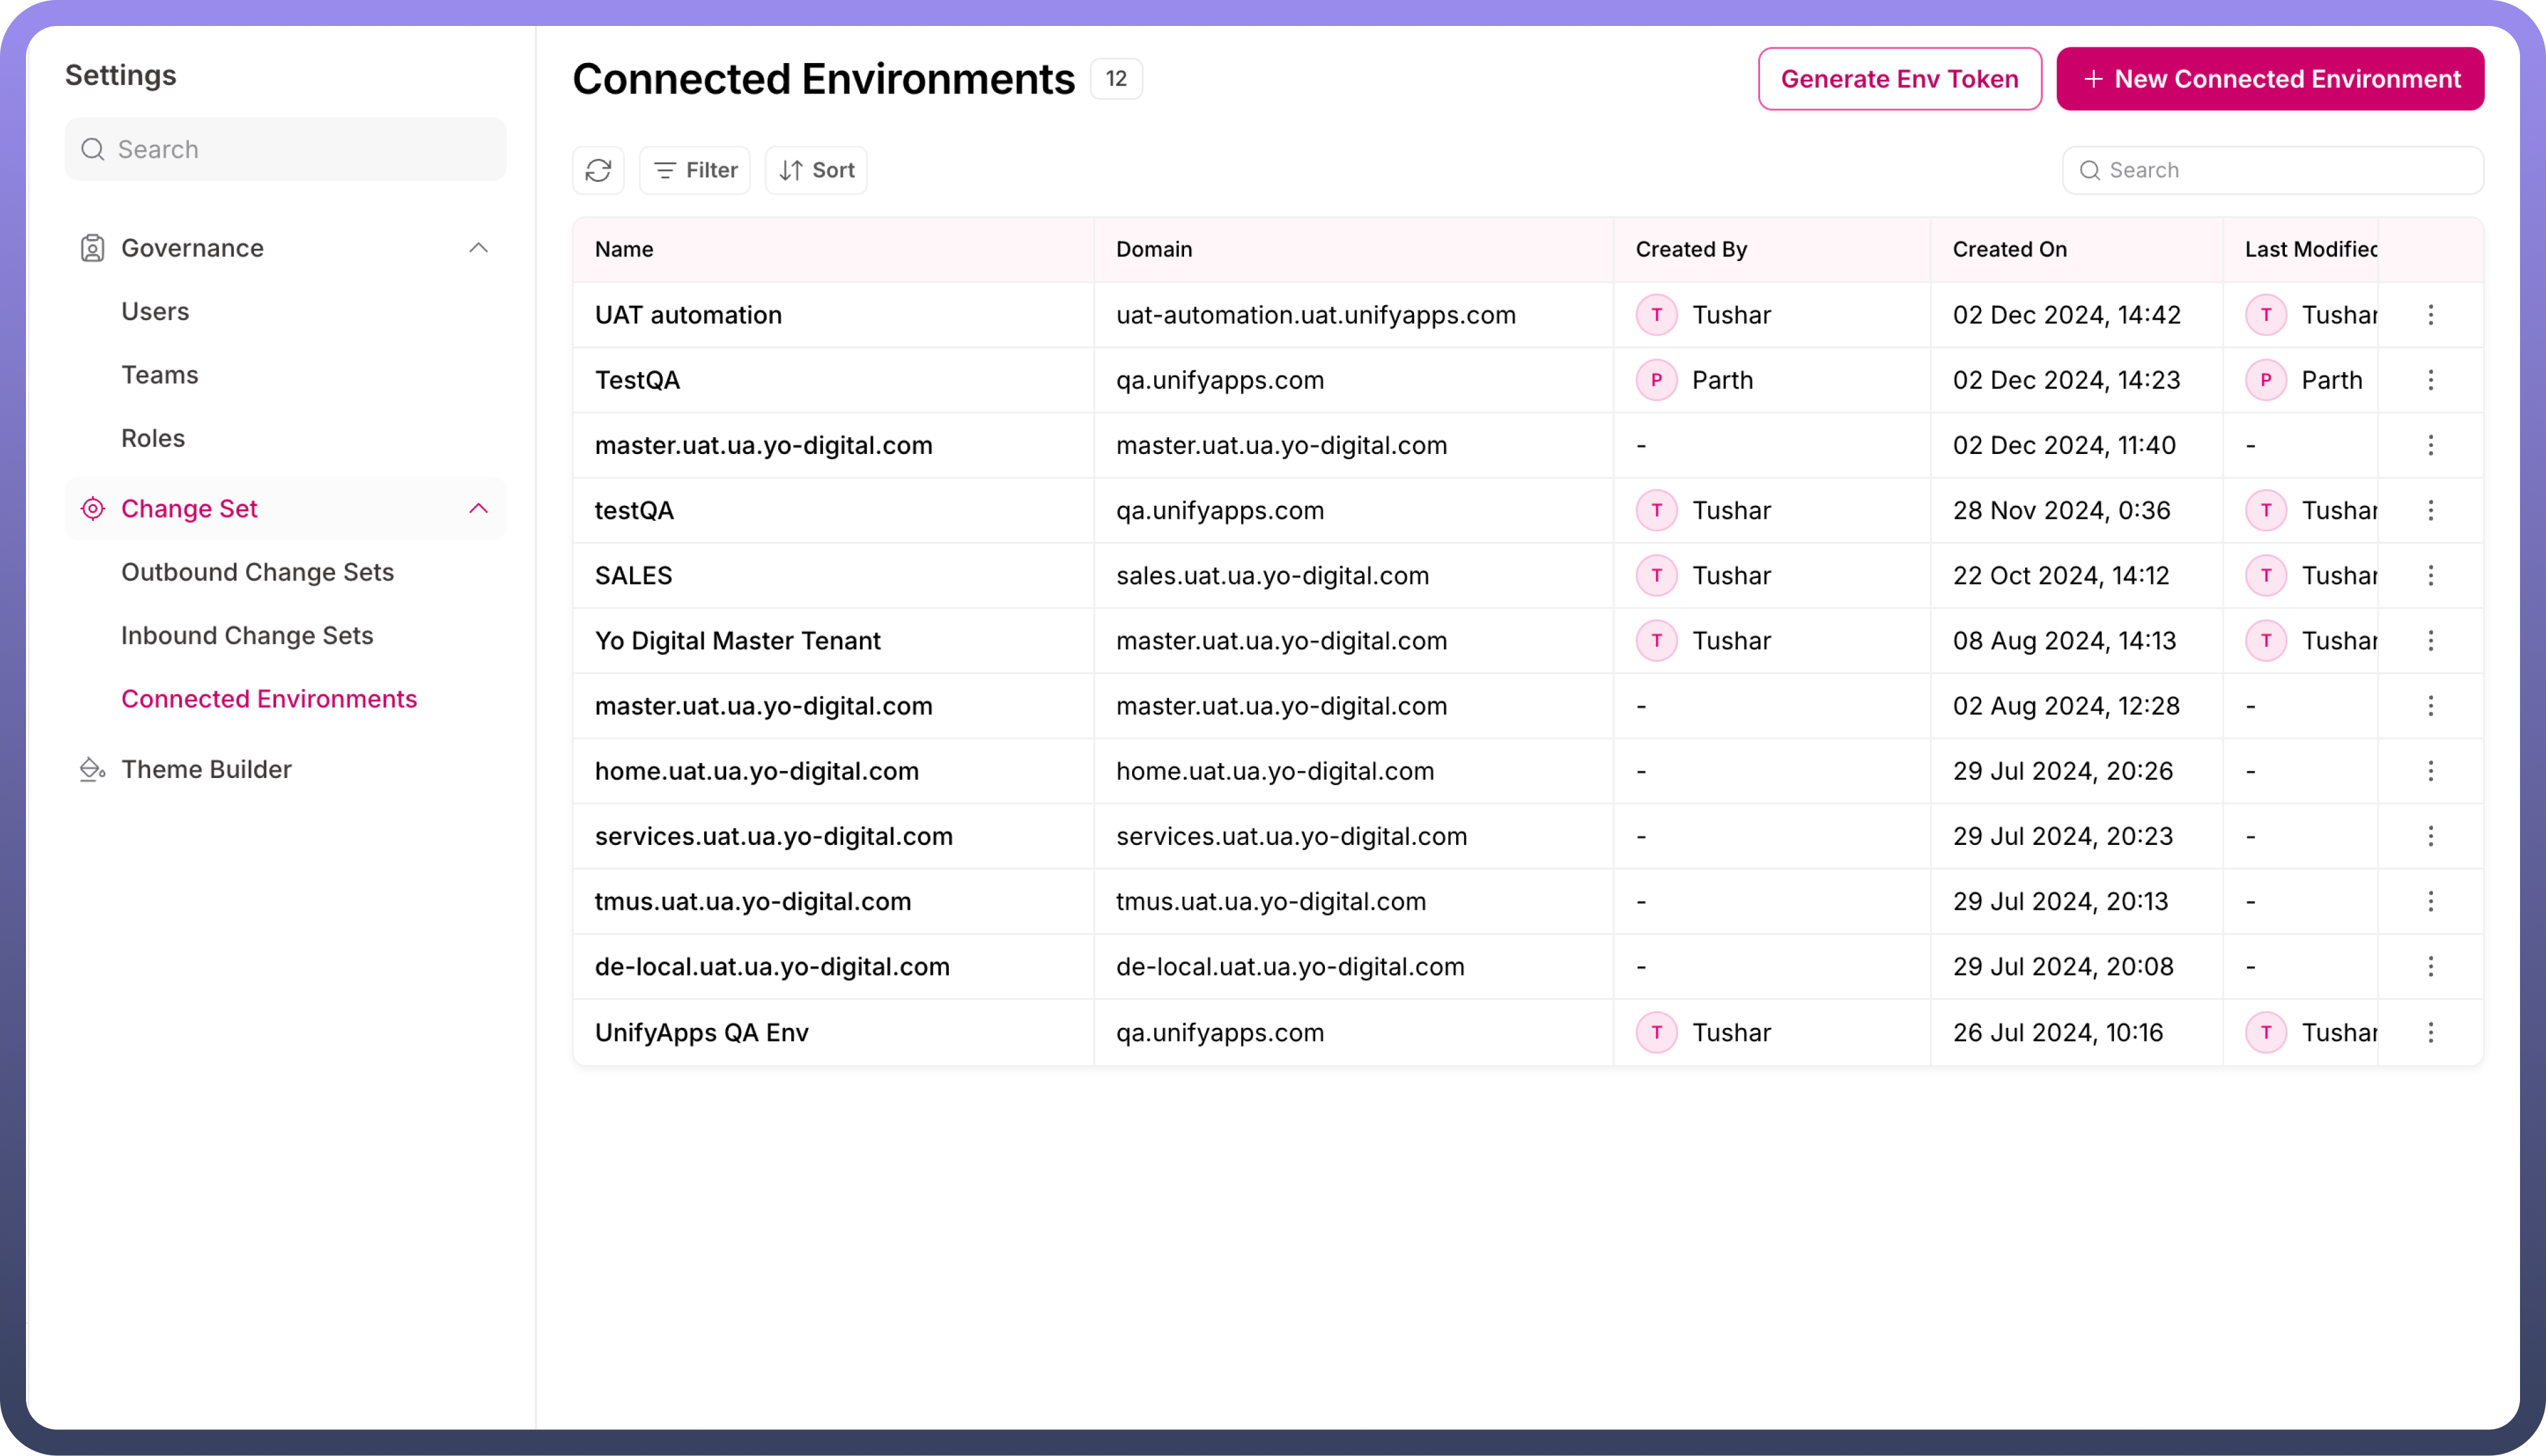
Follow these steps to set up a connected environment:
Click on the "
+New Connected Environment" button.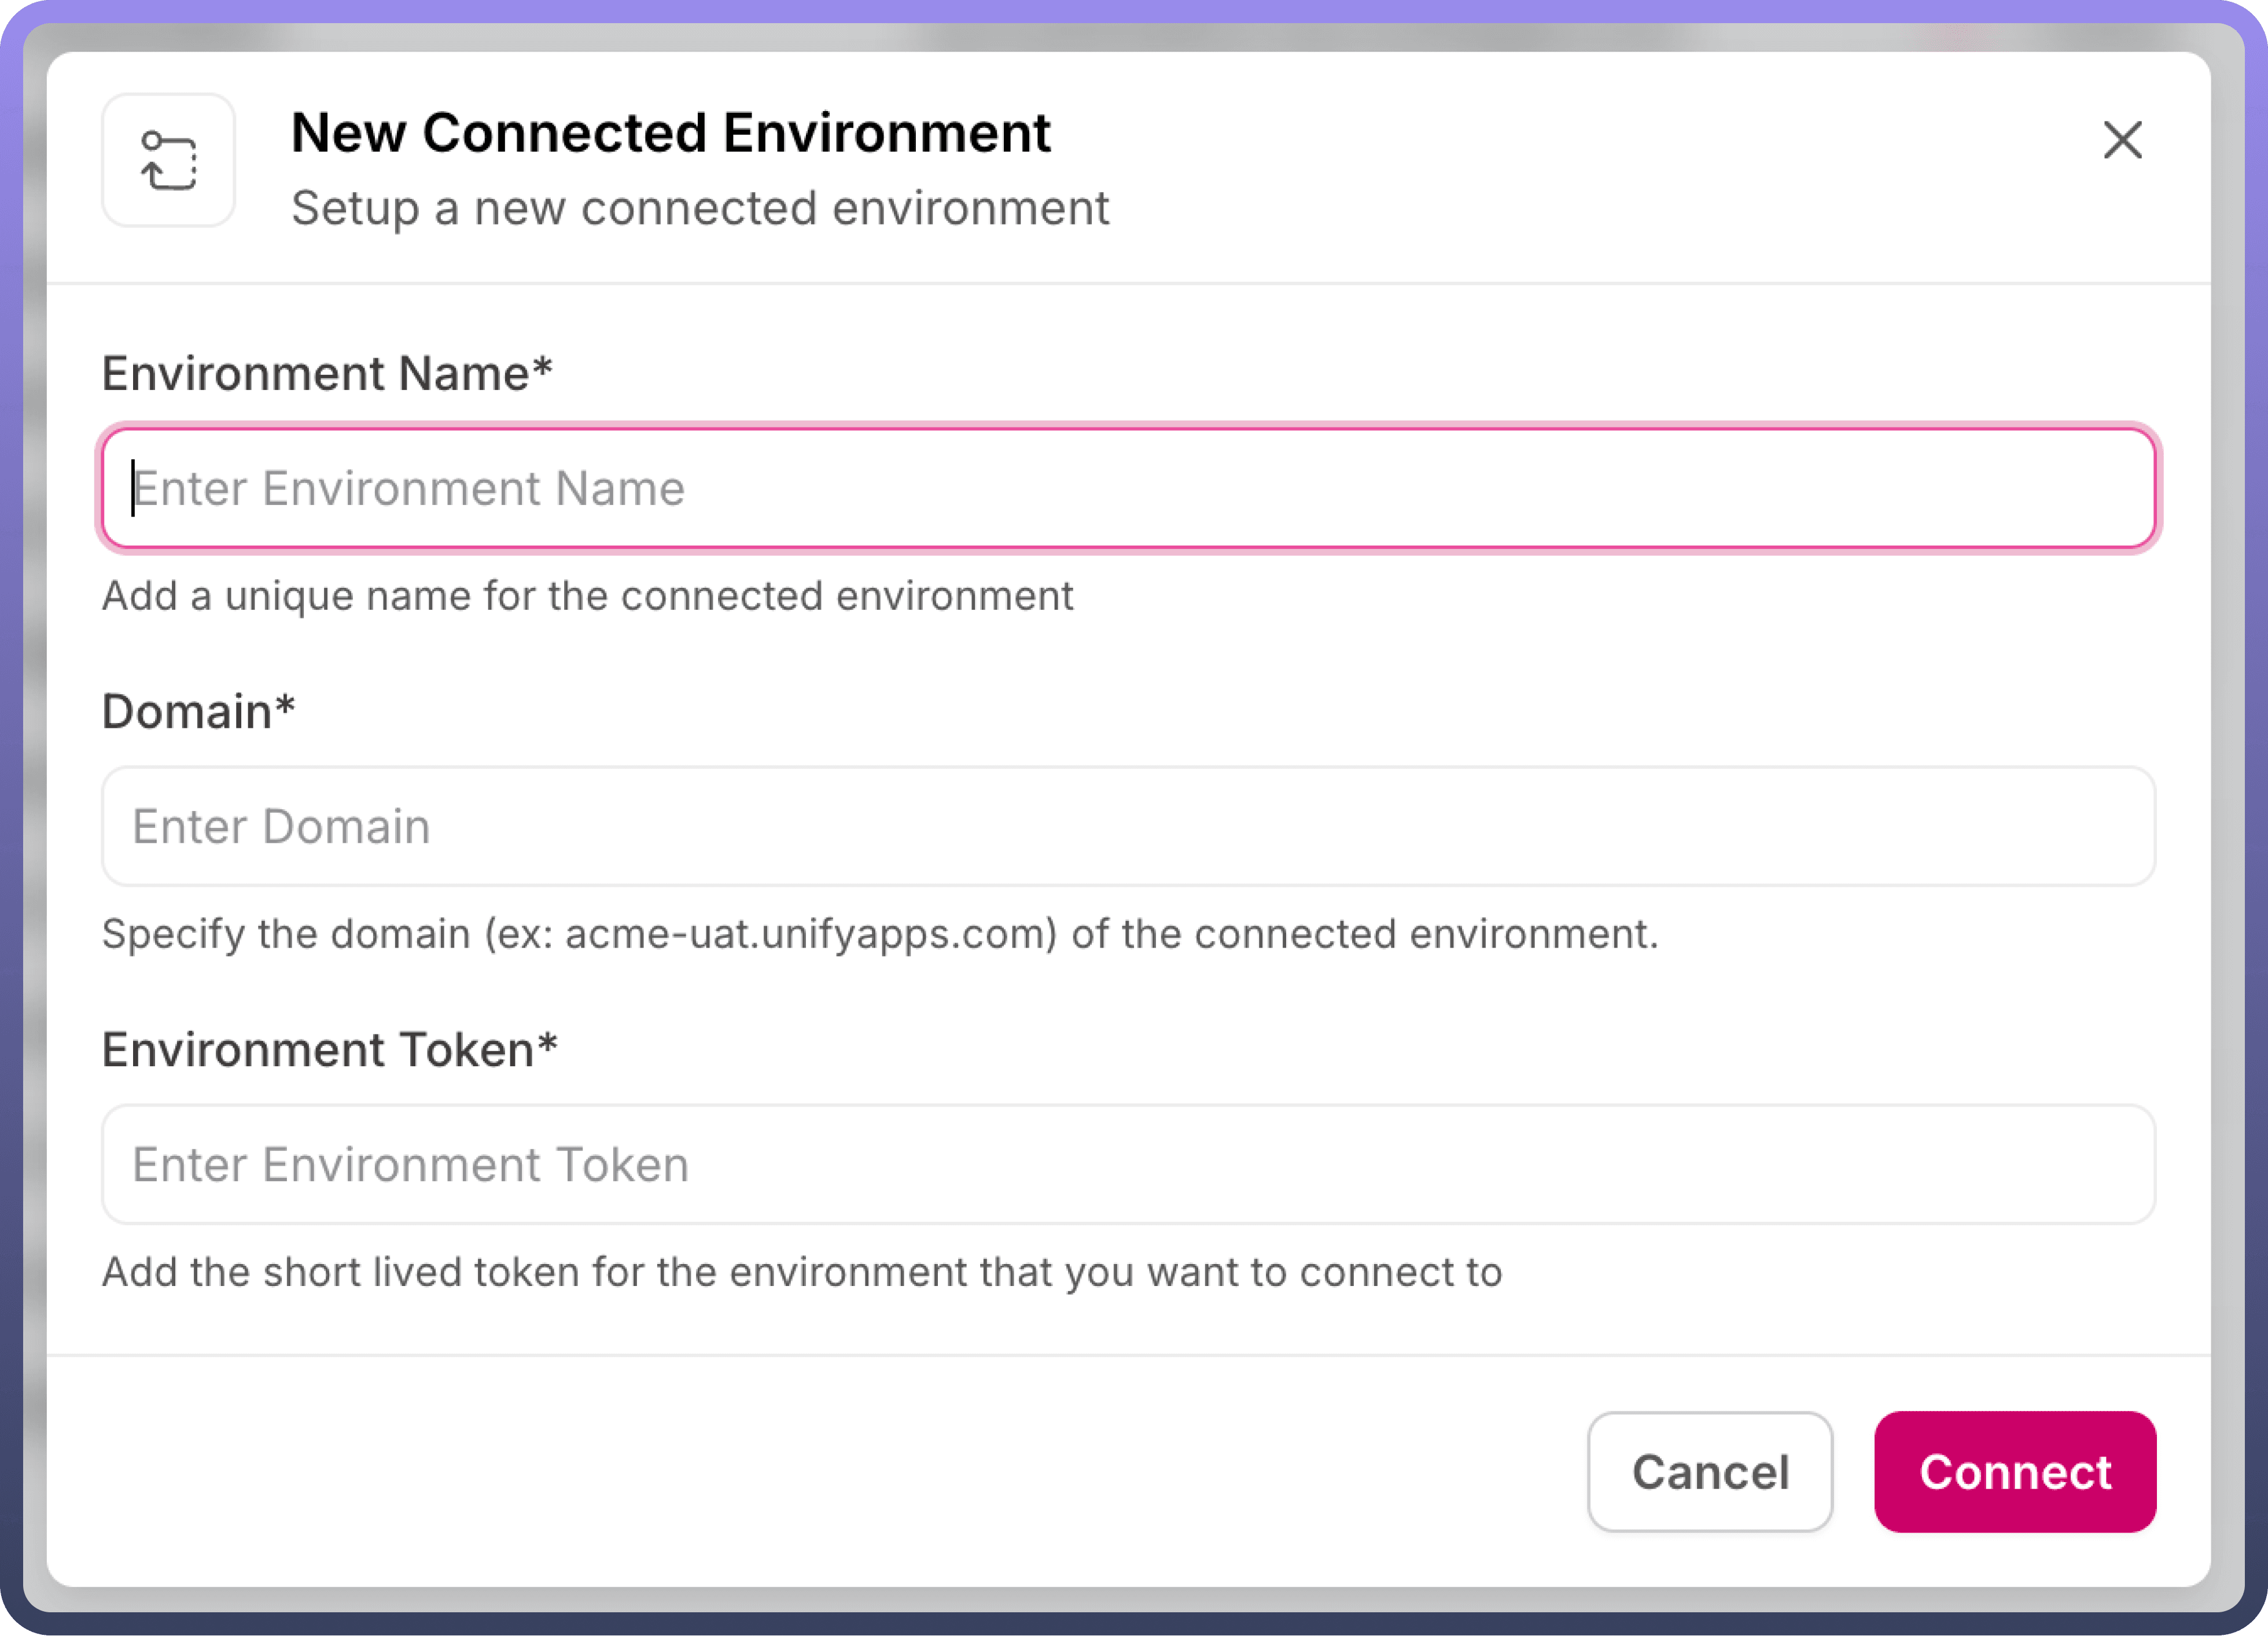
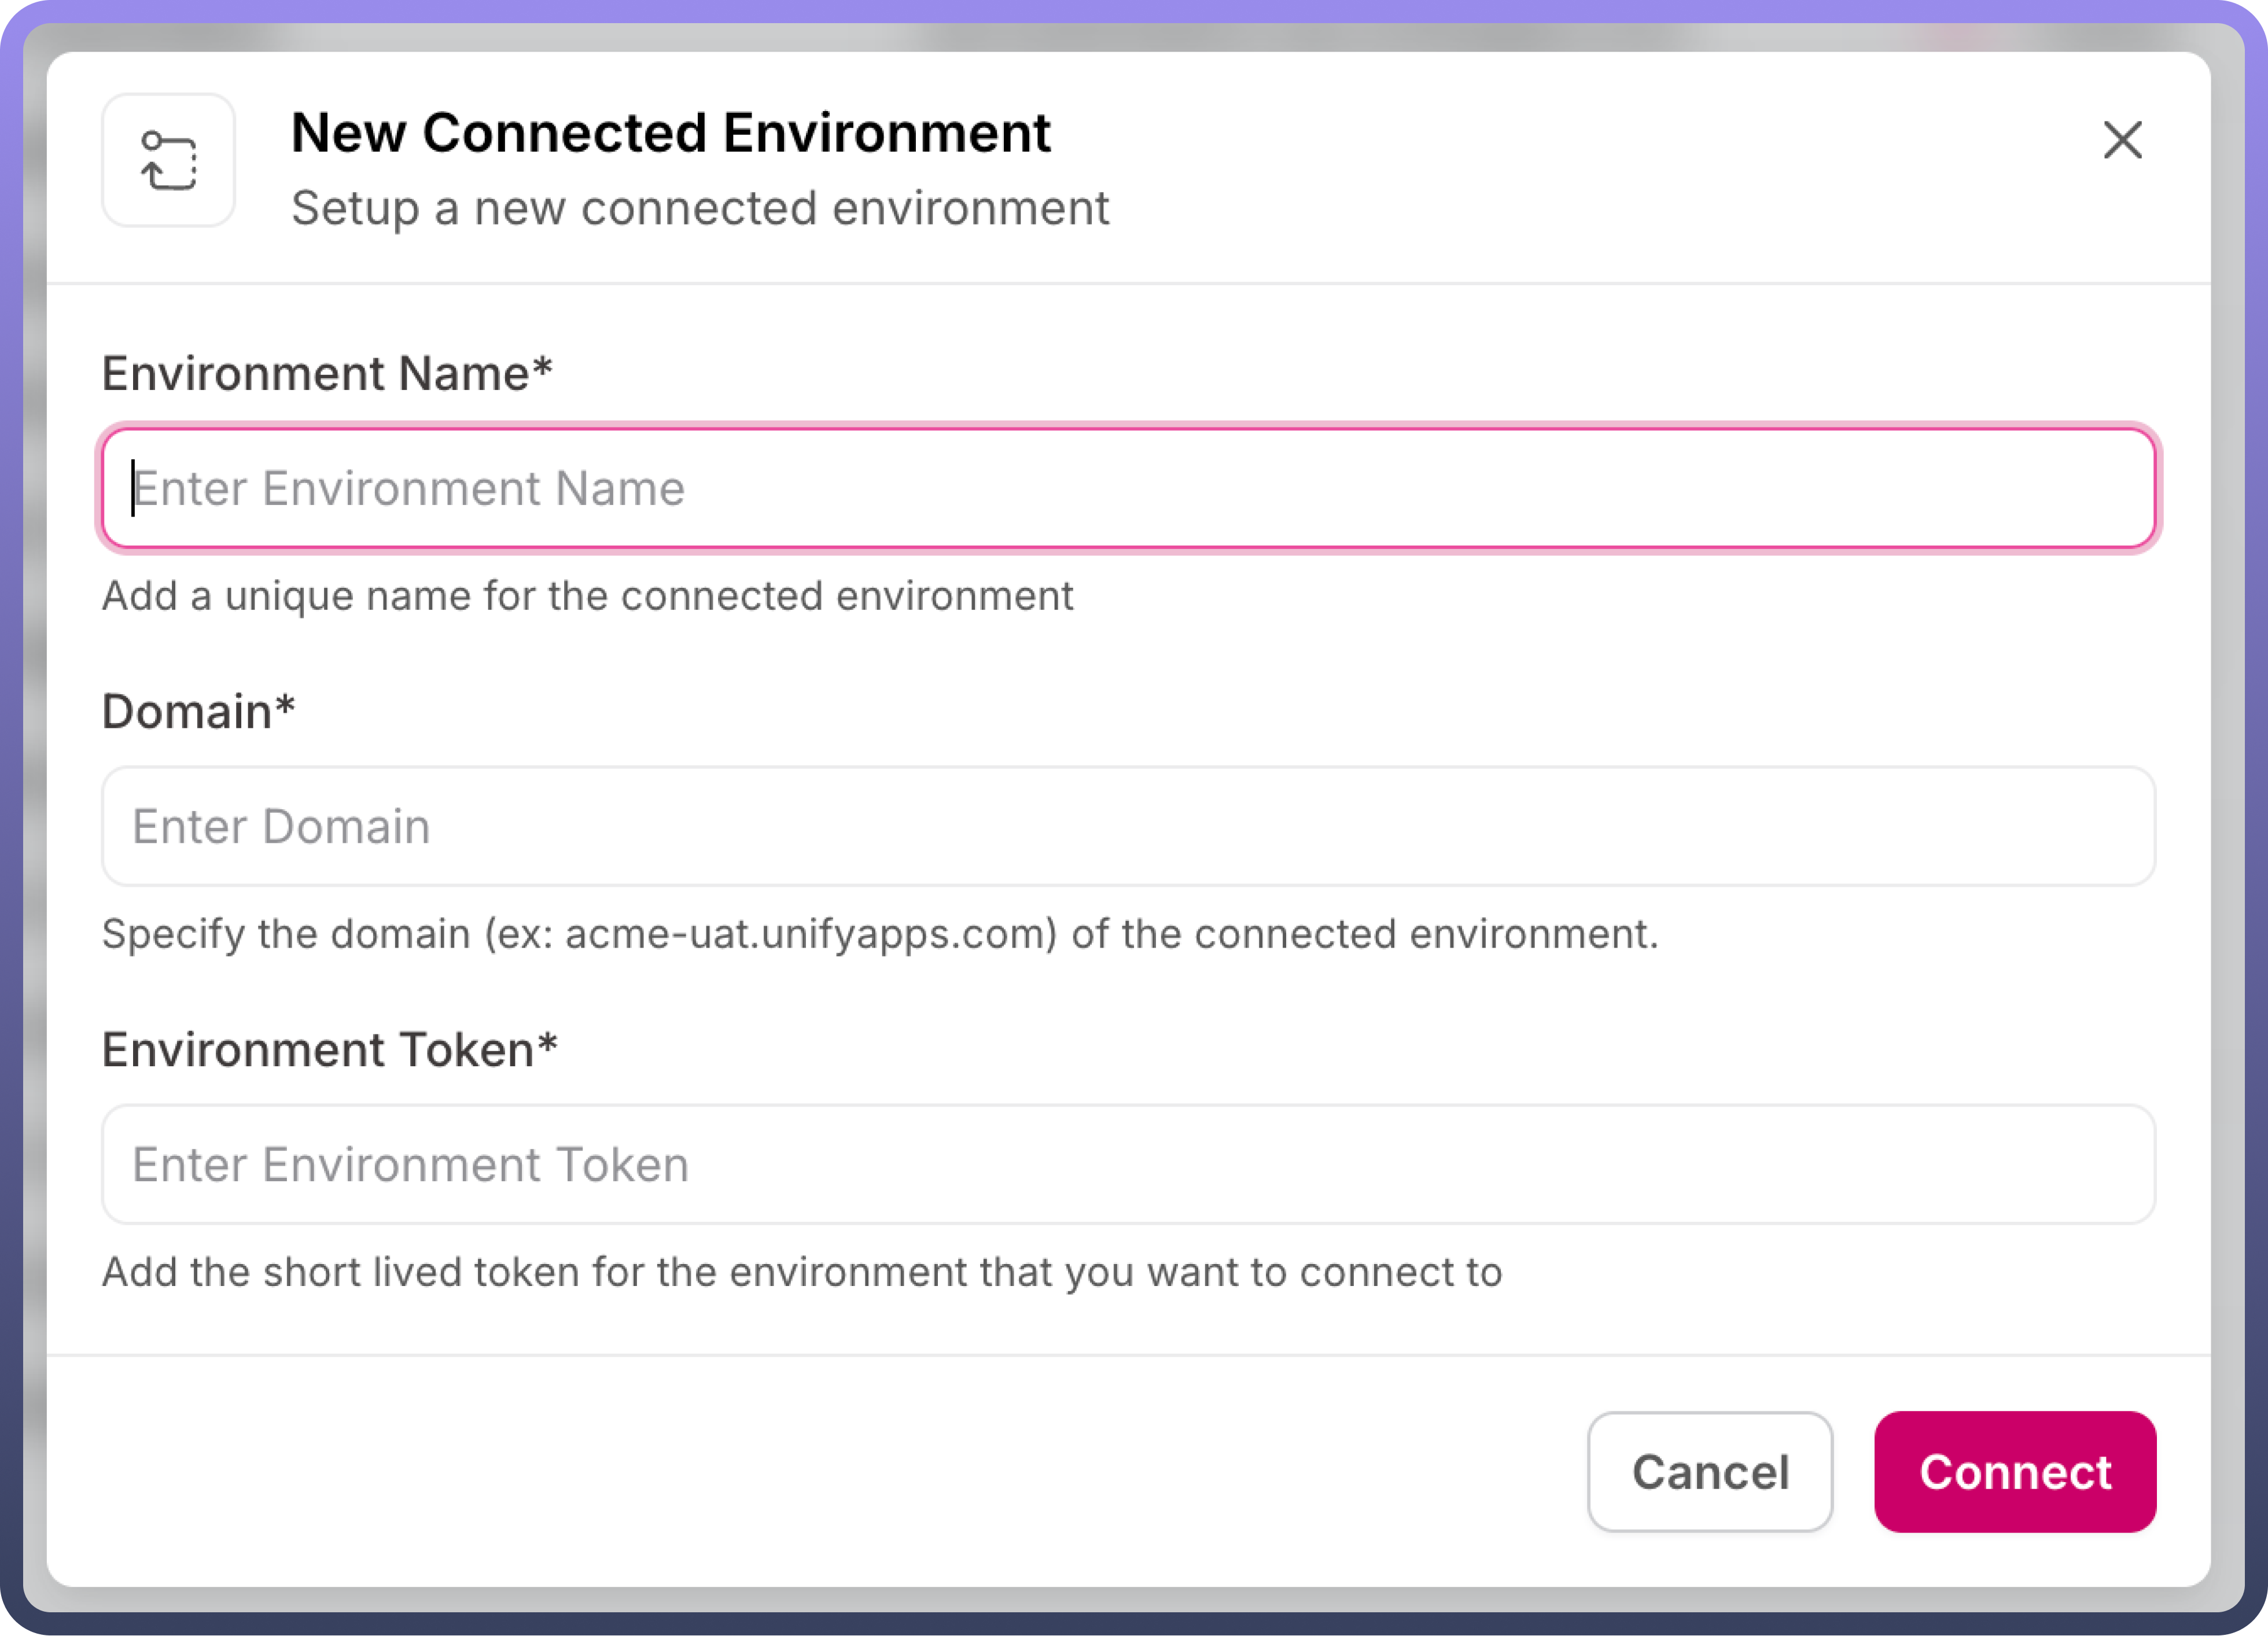
Fill in the required details in the form:
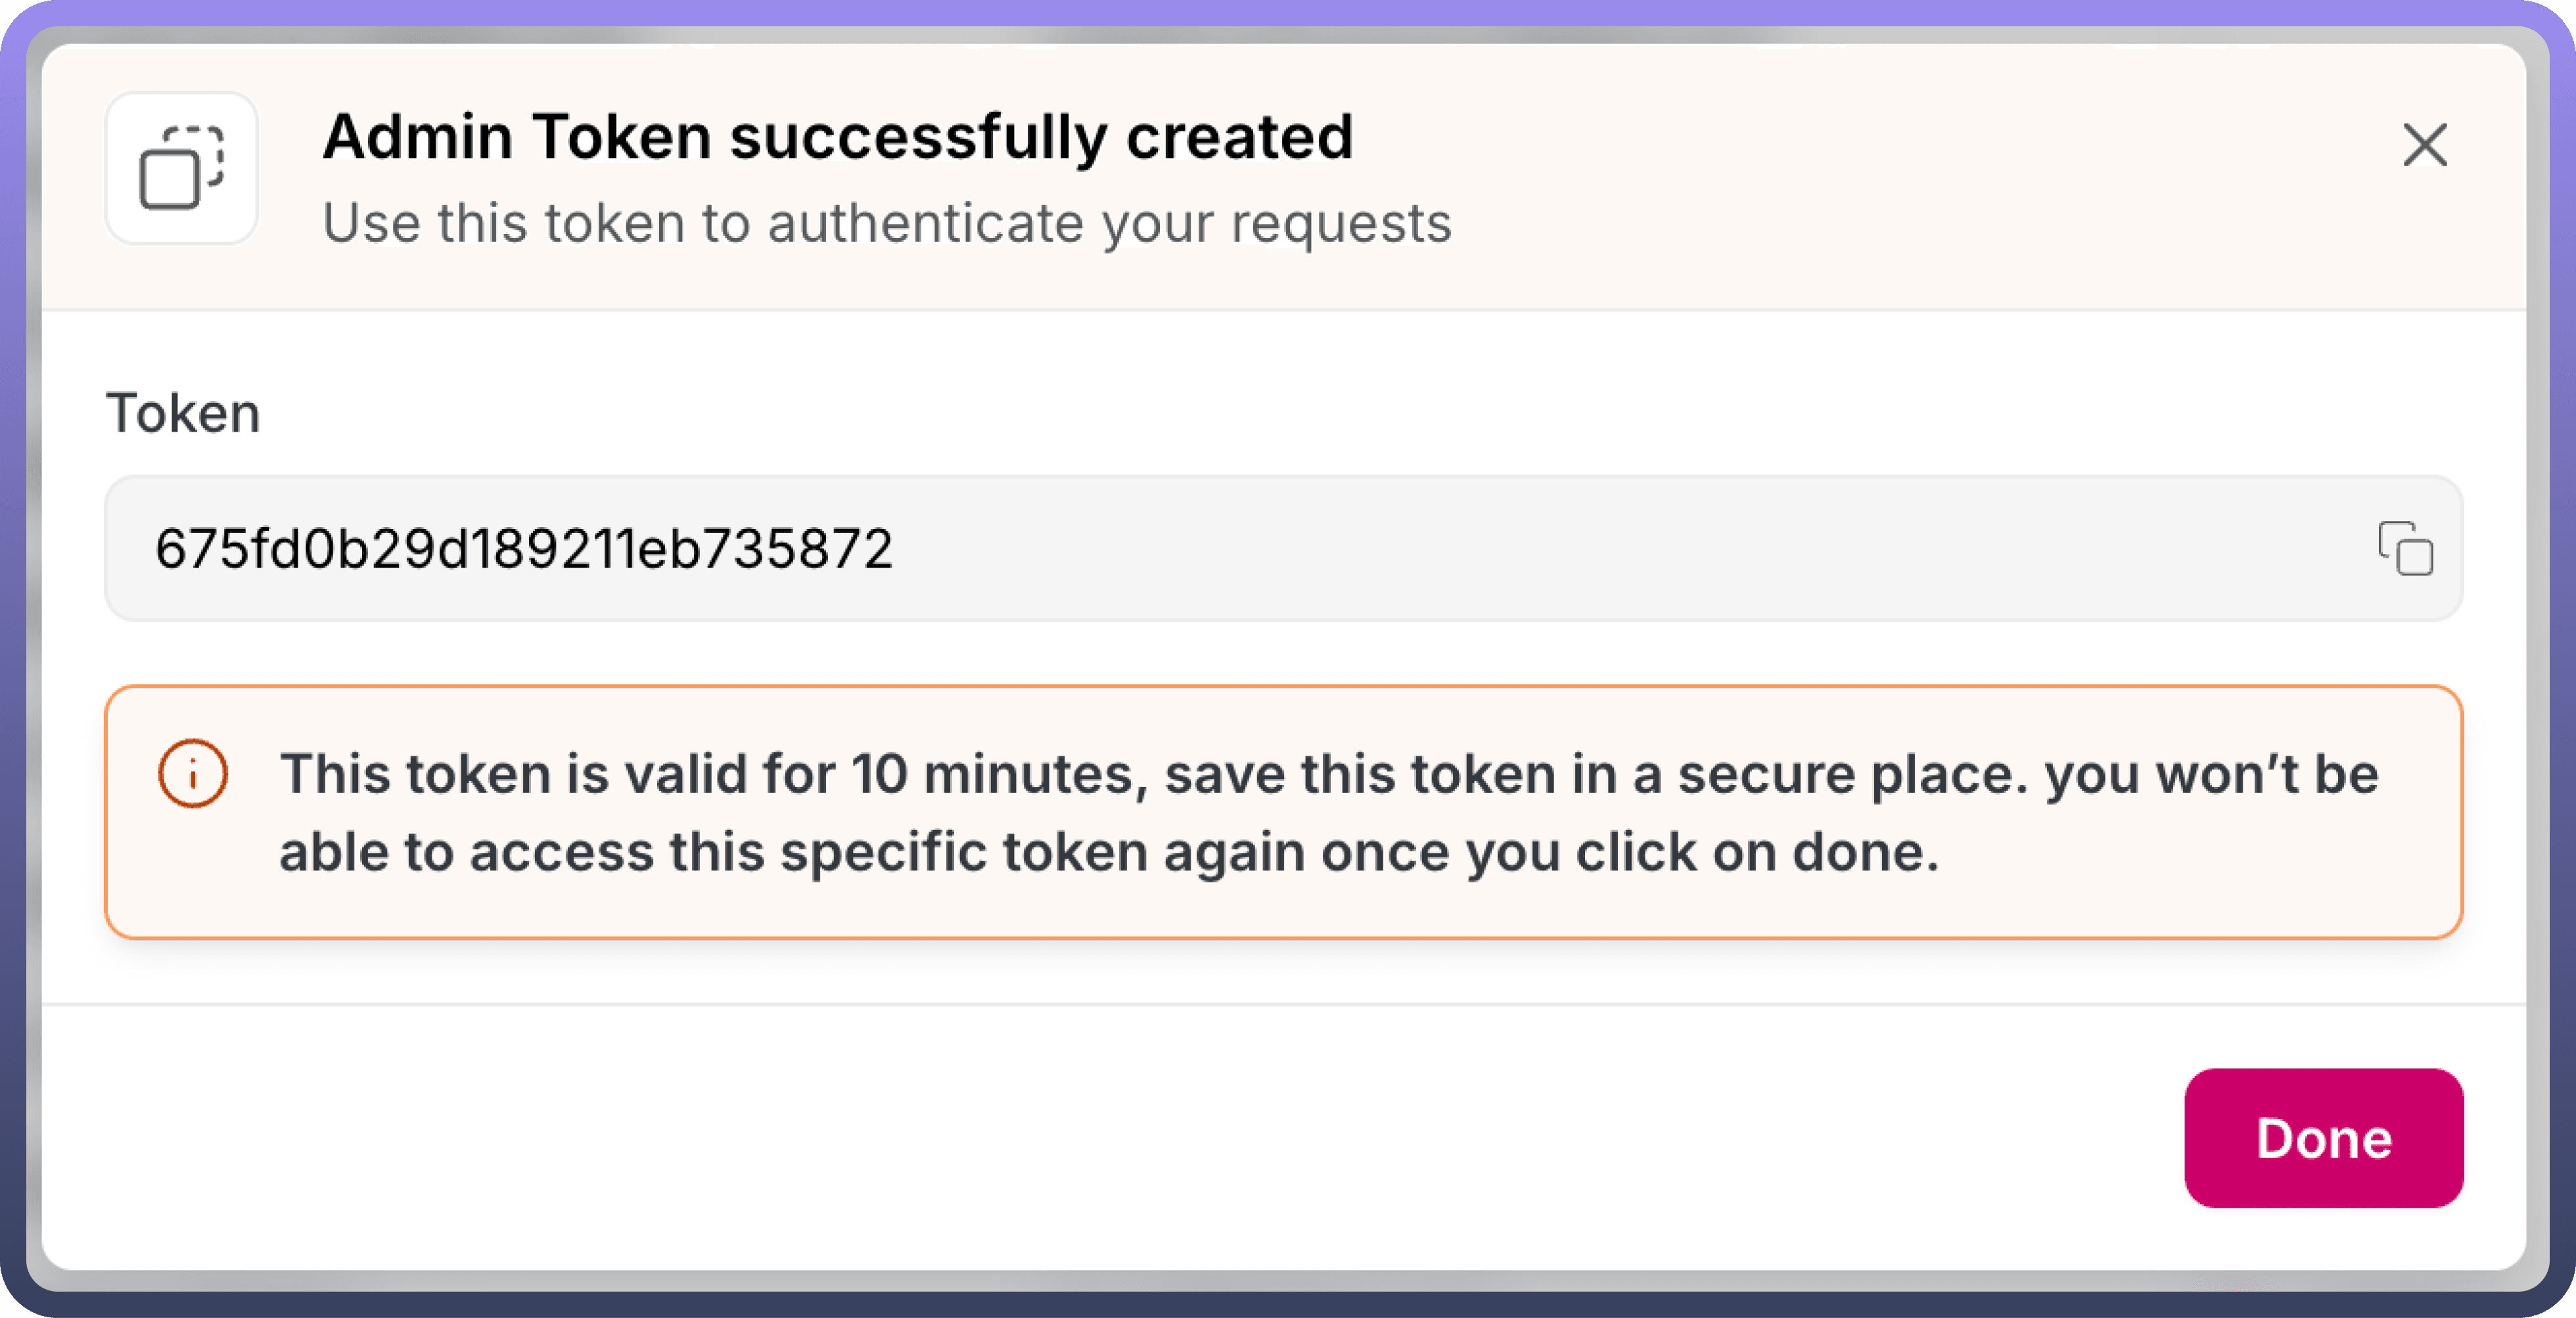
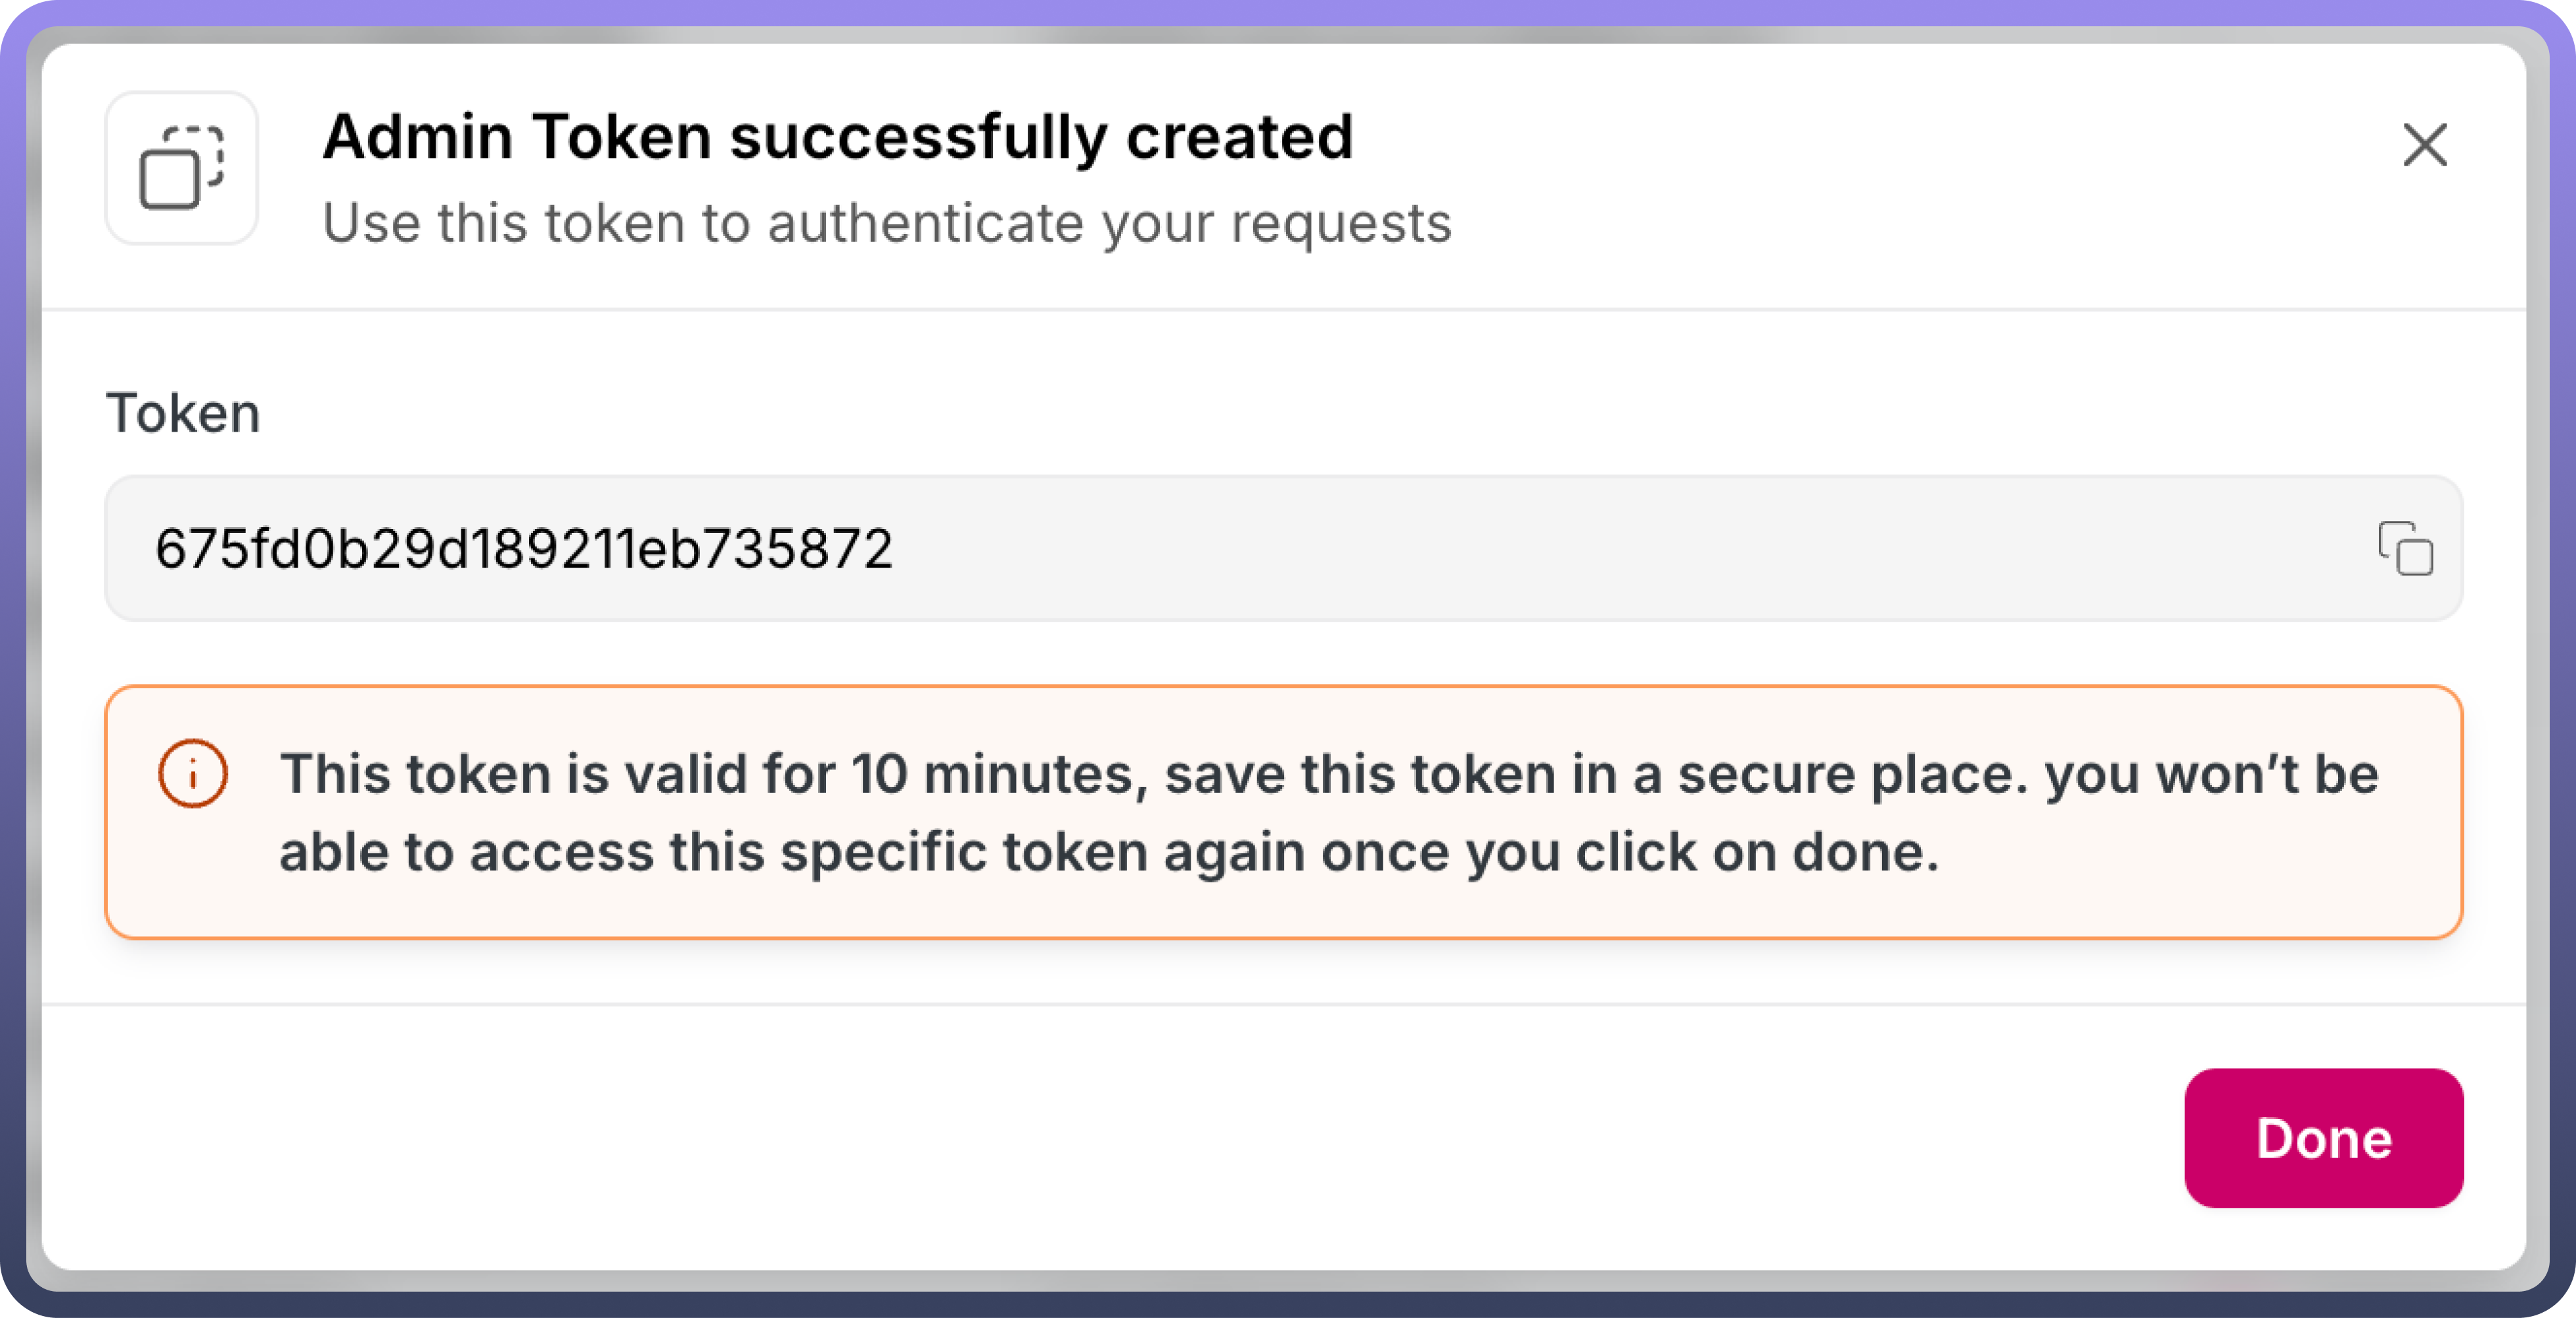
Environment NameEnvironment Domain(master.uat.ua.yo-digital.com)Environment Token: Generate this token in the environment you wish to connect by clicking the "Generate Environment Token" button on its Connected Environment screen.
Once the provided credentials are verified, the environment connection is established, enabling asset migration via Changesets.
Changesets
The key features of changesets are:
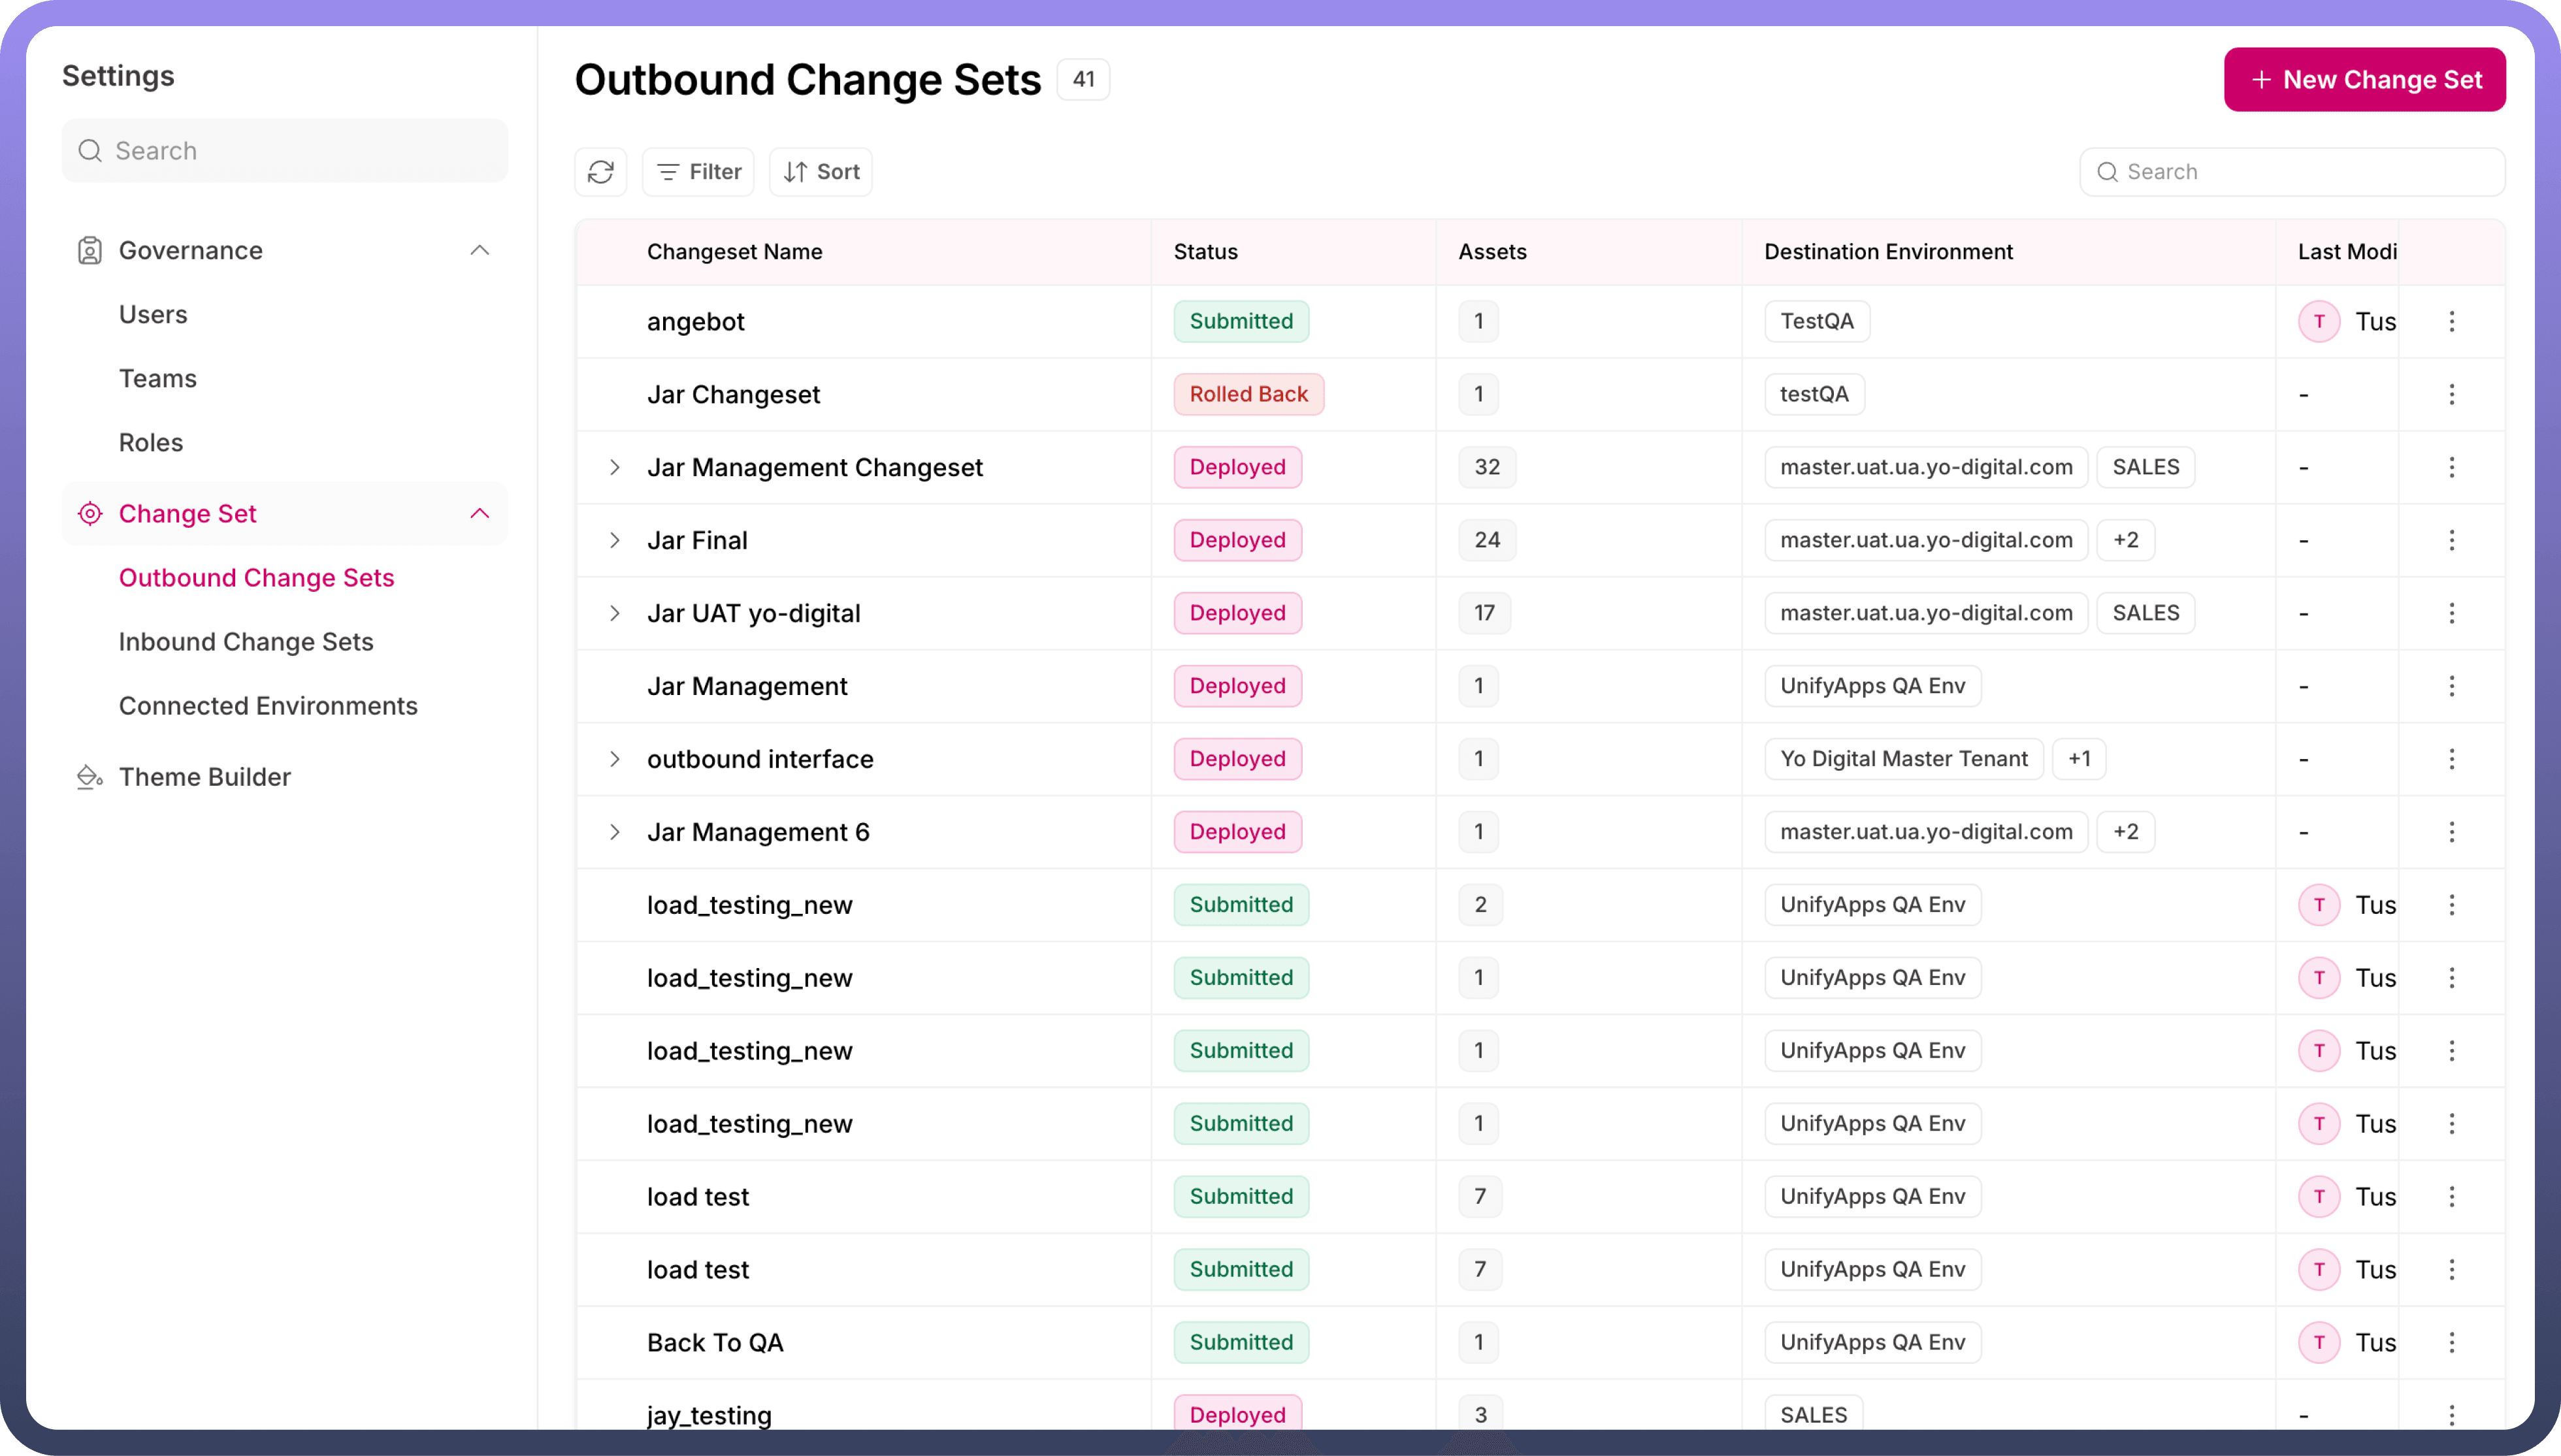
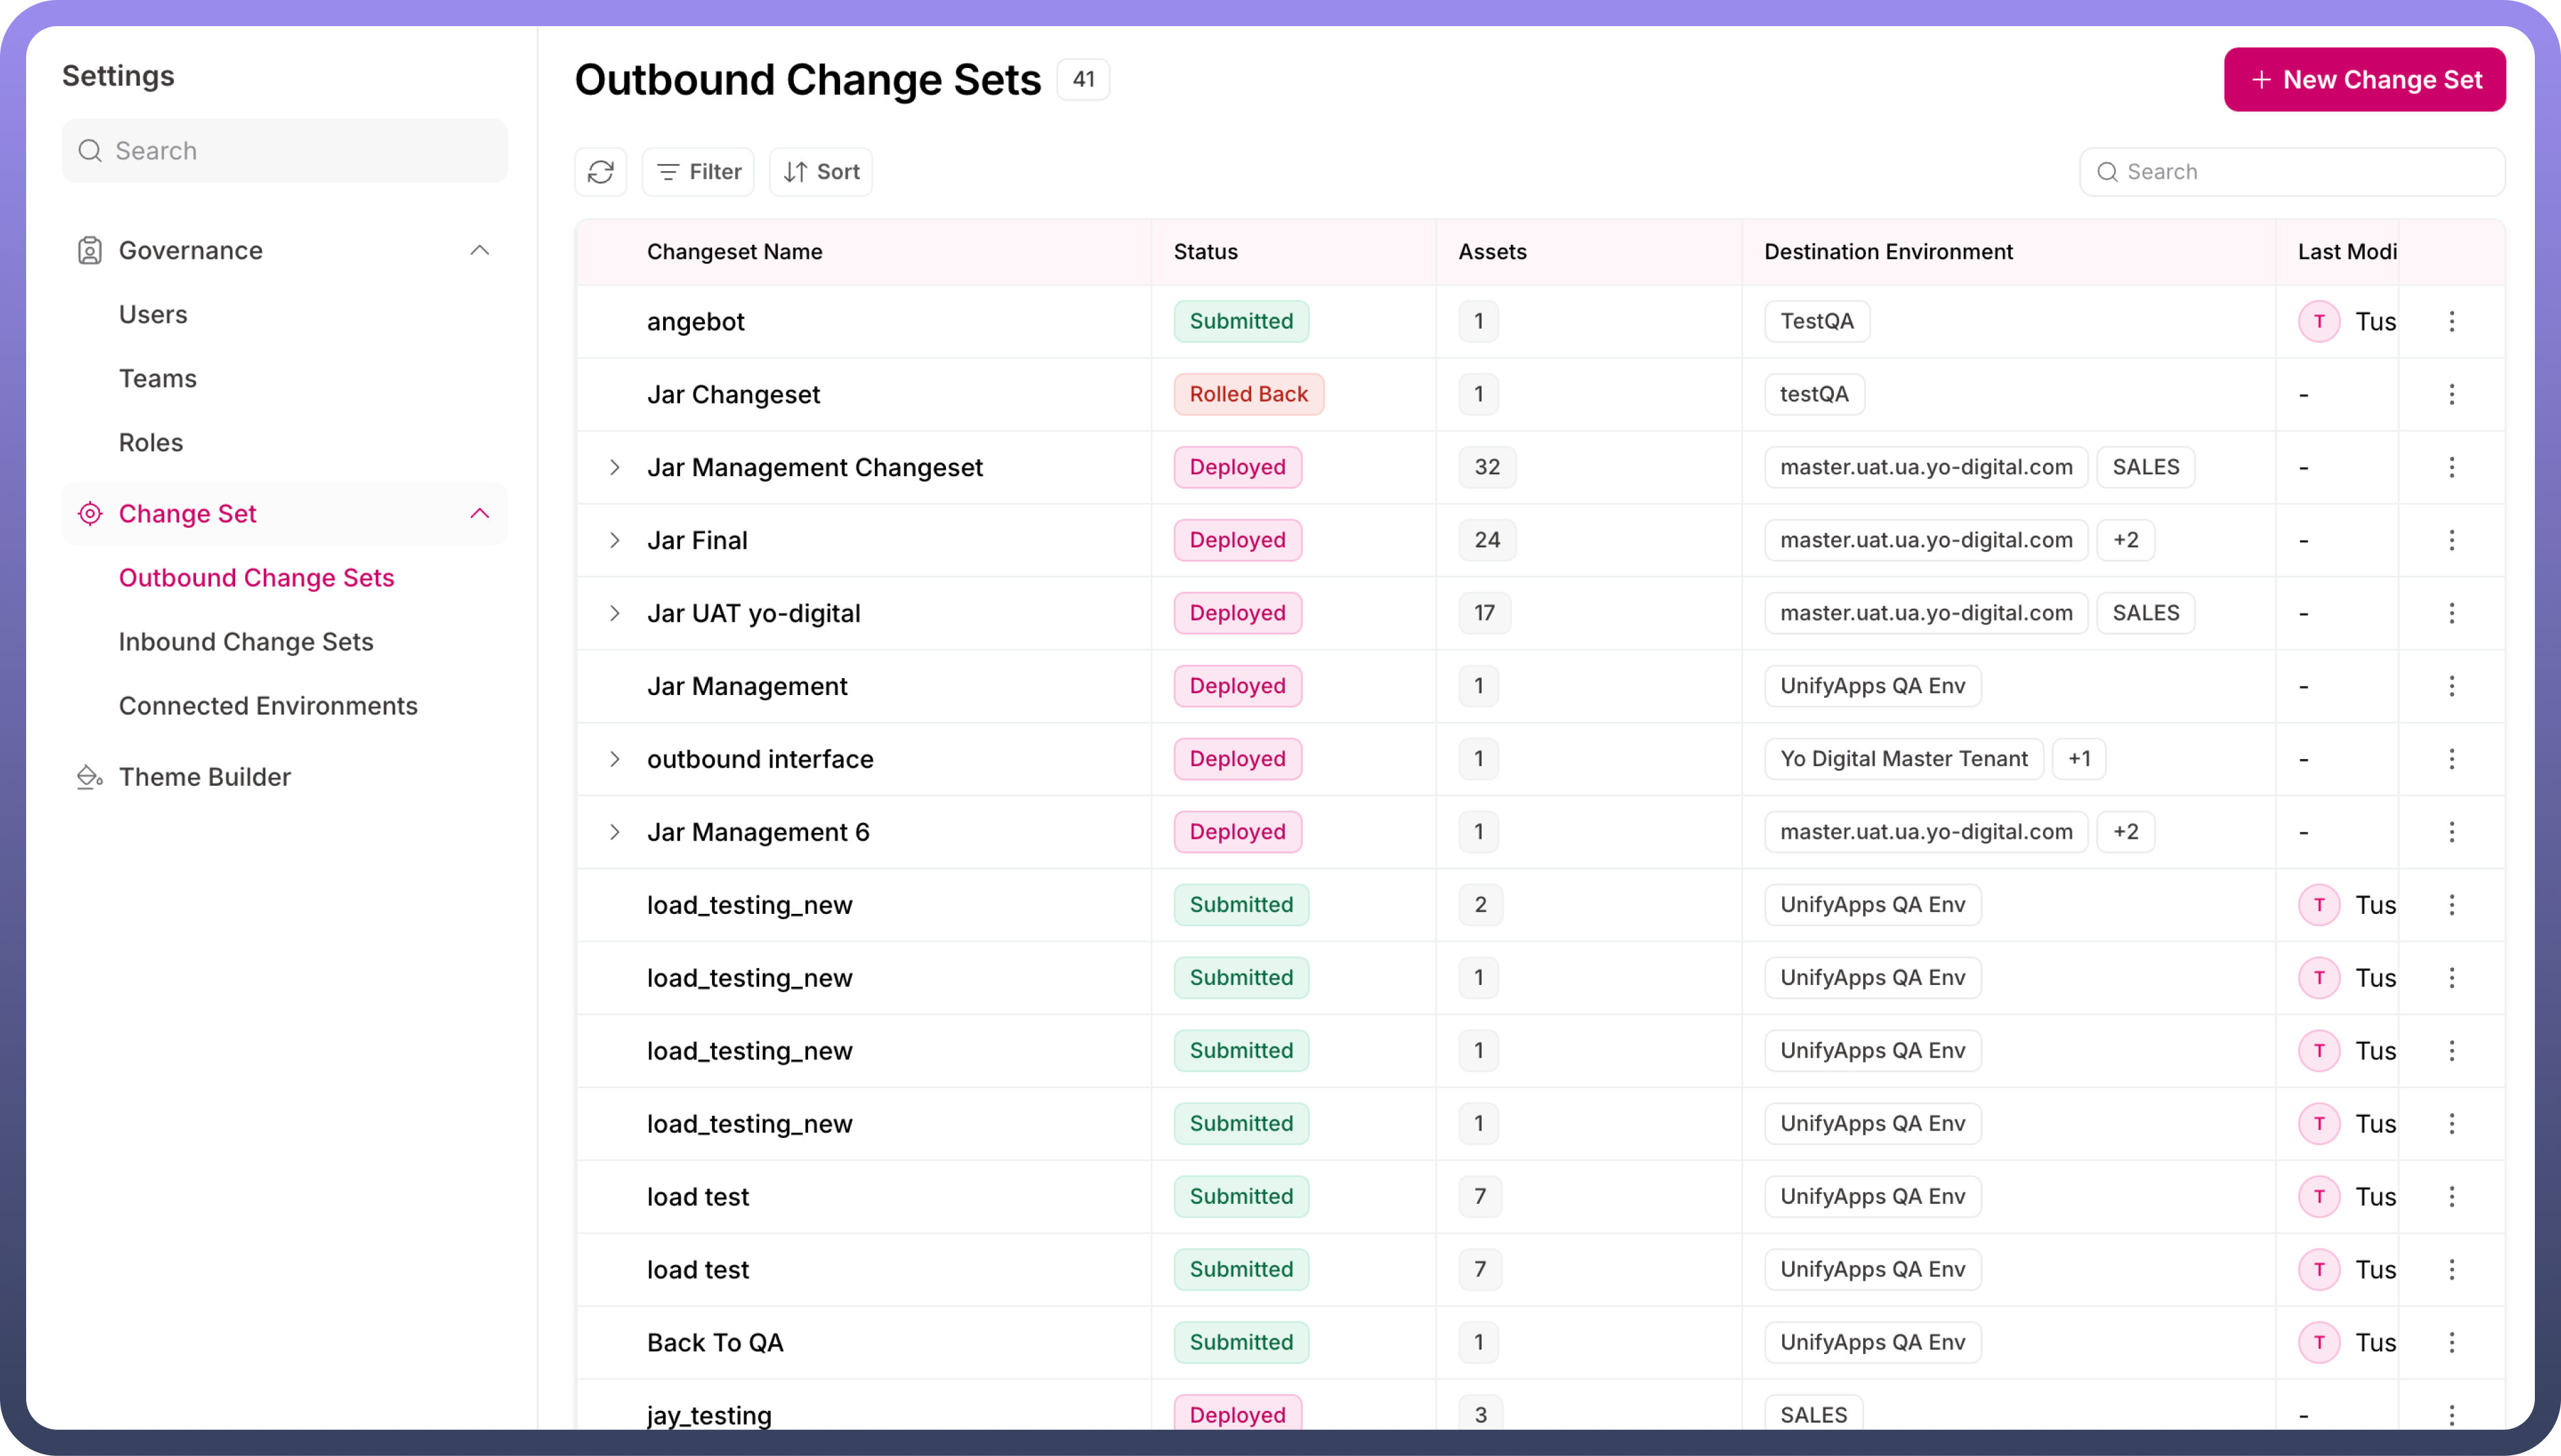
States: The Changeset feature in Unify Apps comes with the following key states, visible on the Changeset landing screen
State | Implication |
| The initial state of a Changeset when it is still being configured. Users can modify details, add or remove assets, and make changes while the Changeset remains in this state. |
| This state appears when the changeset has been submitted in the source environment, and is available for approval in the destination environment. |
| This state appears once the Changeset is configured and shared with the destination environment. The Changeset remains in this state until it is either approved or rejected in the destination environment. |
| The state of a Changeset after it has been approved by the user in the destination environment. |
| This state indicates that the assets in the Changeset have been successfully deployed to the destination environment and are ready for use. |
| This state appears when the Changeset is rejected by the approver in the destination environment. |
| The state of a previously deployed Changeset that has been rolled back, restoring the destination environment to its original state. |
2. Export as file: The Changeset feature in Unify Apps provides the flexibility to export a Changeset as an encrypted file. This is particularly useful when the destination environment is not determined at the time of configuration.
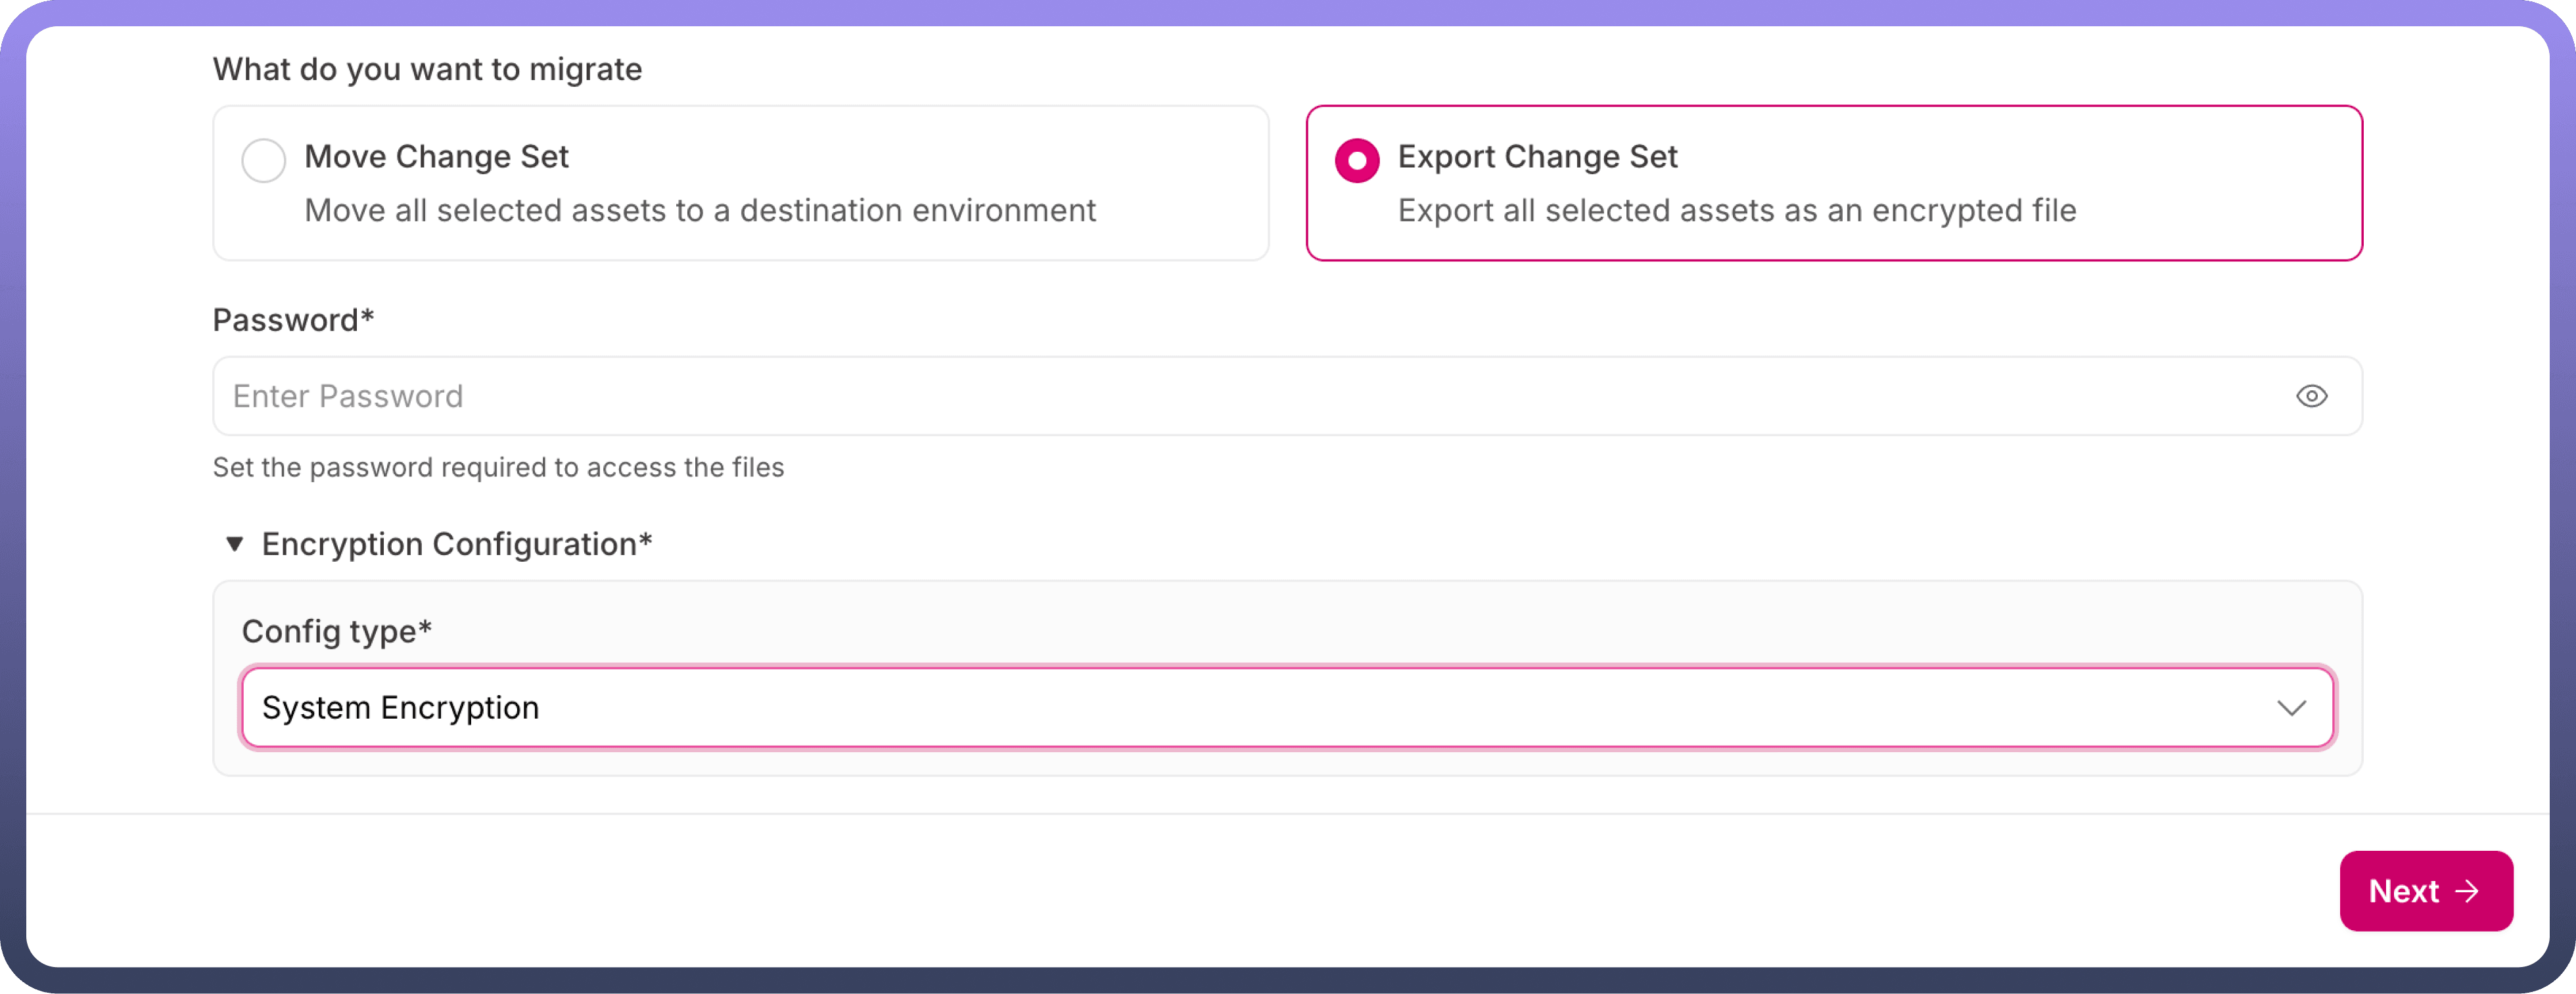

Key points about this feature:
The exported file is password-protected, ensuring secure access.
While configuring the Changeset, users set a password that must be provided when importing the file into the destination environment.
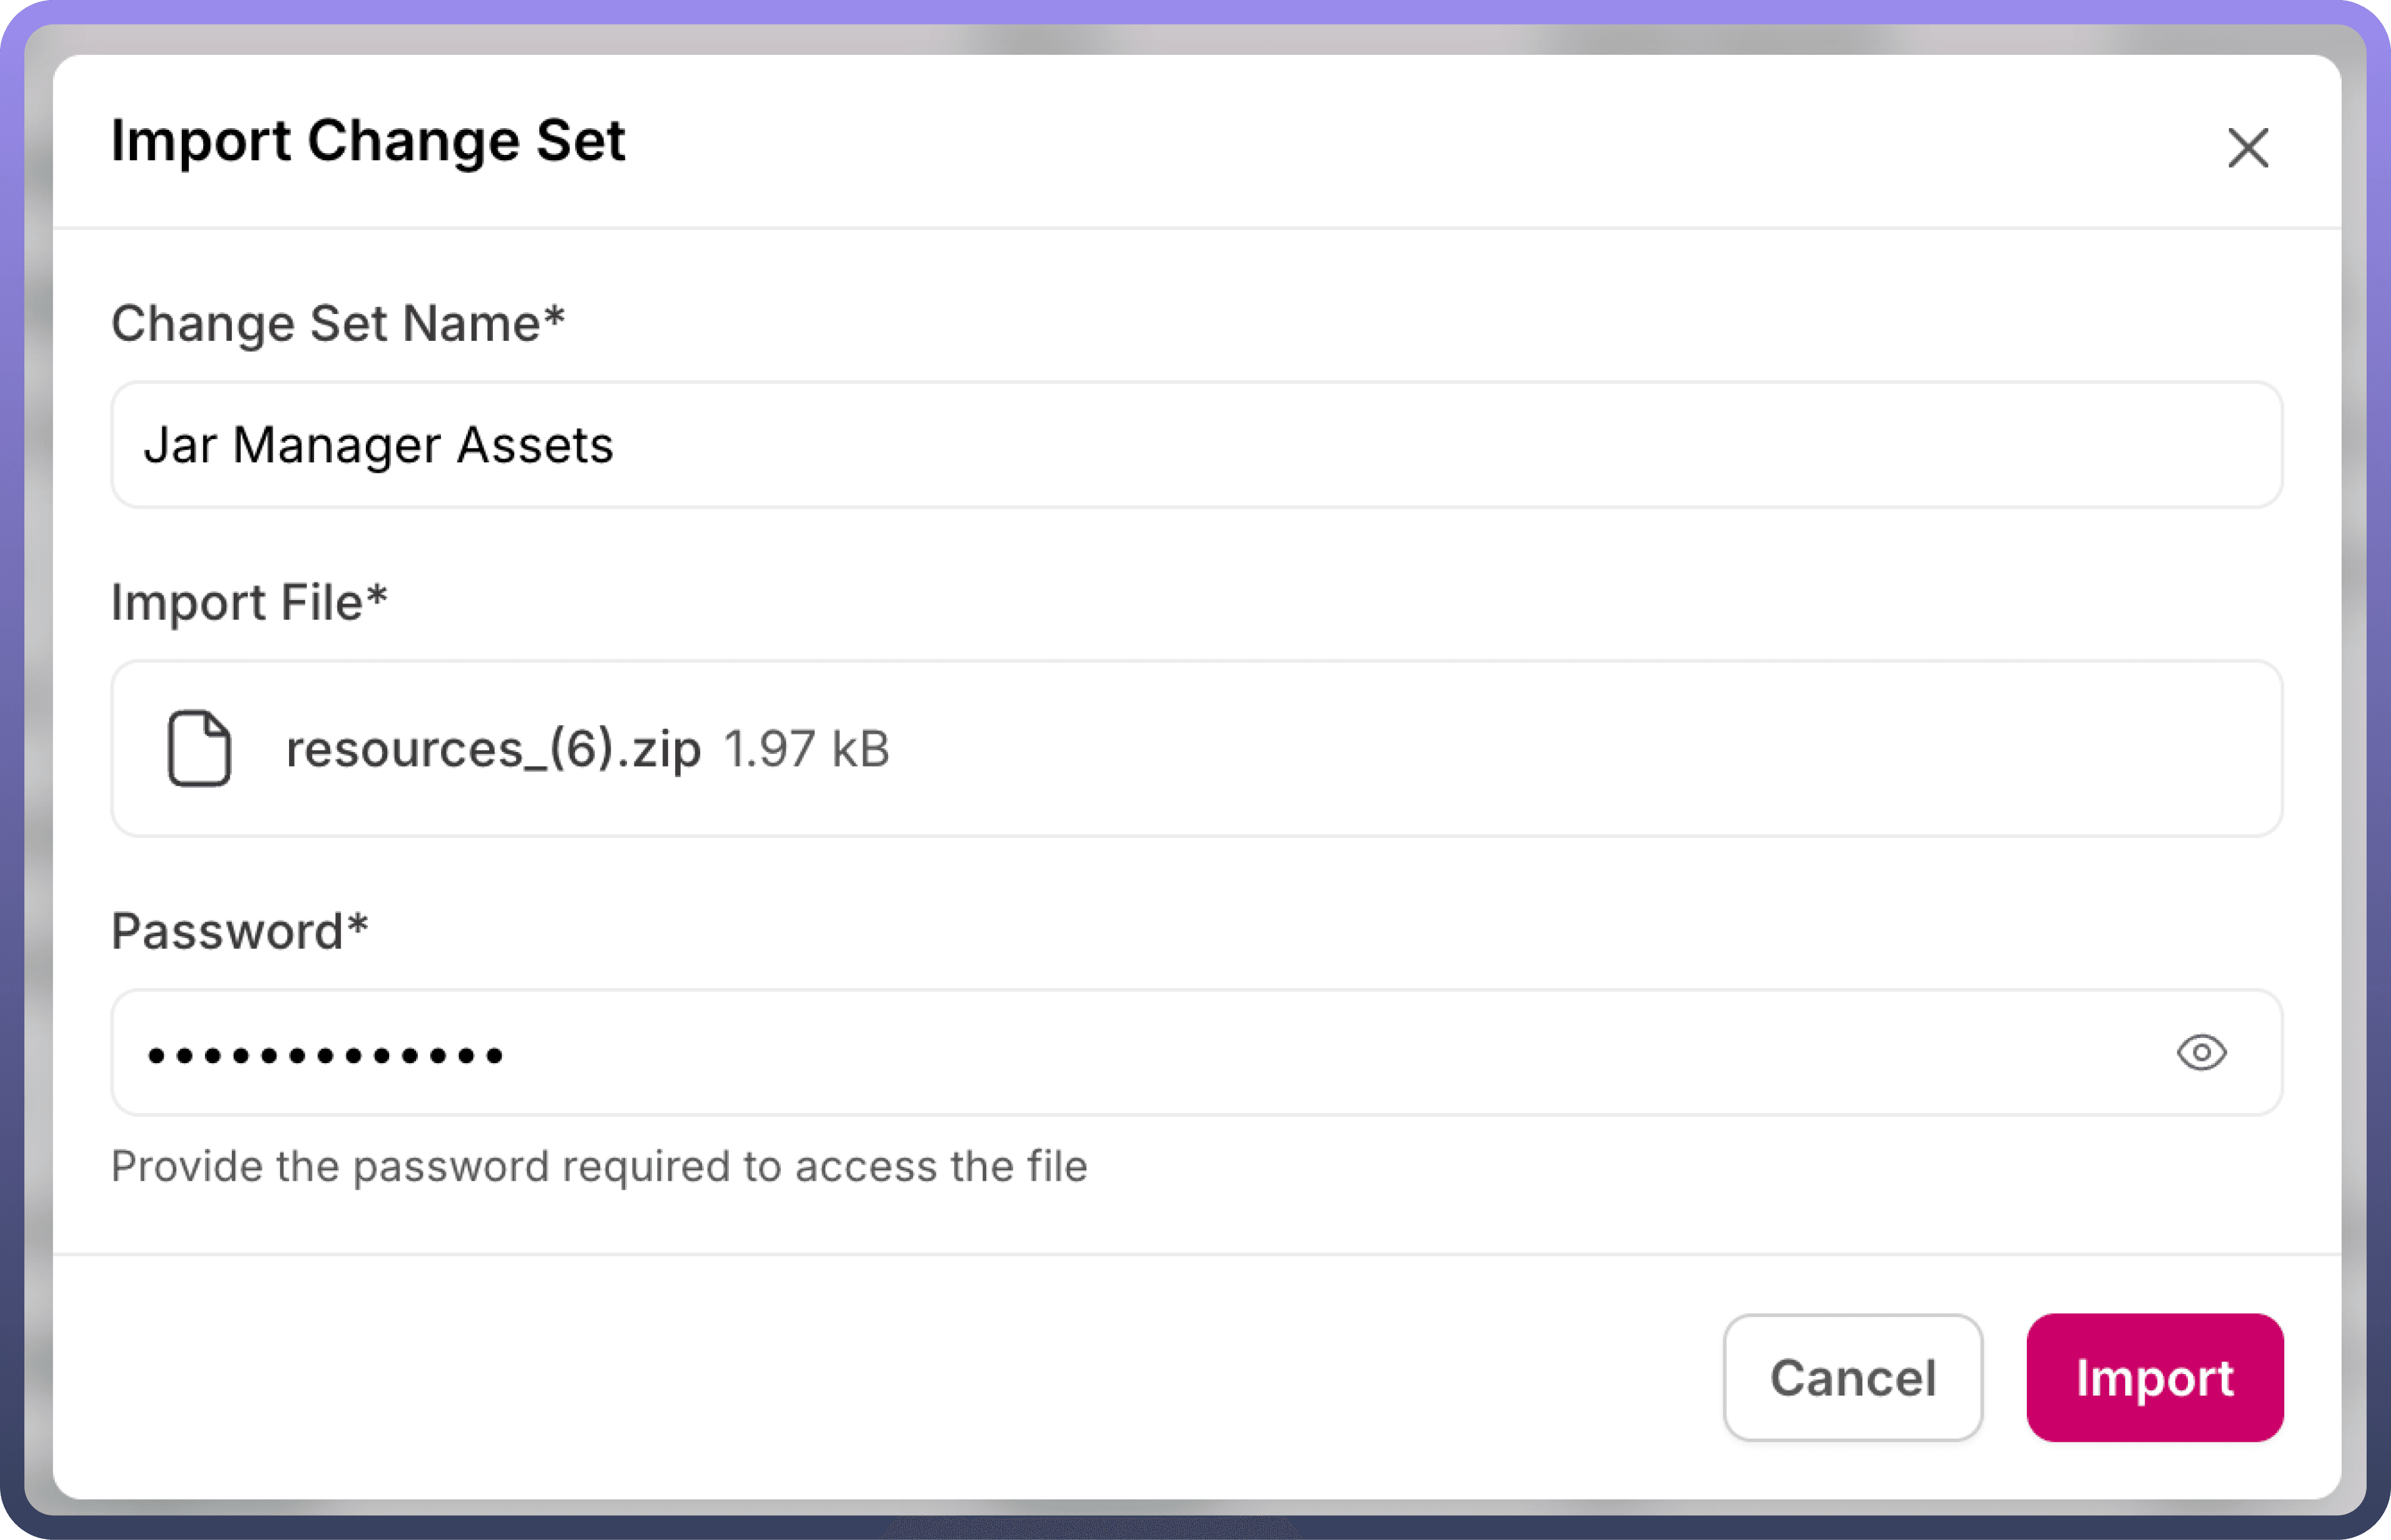
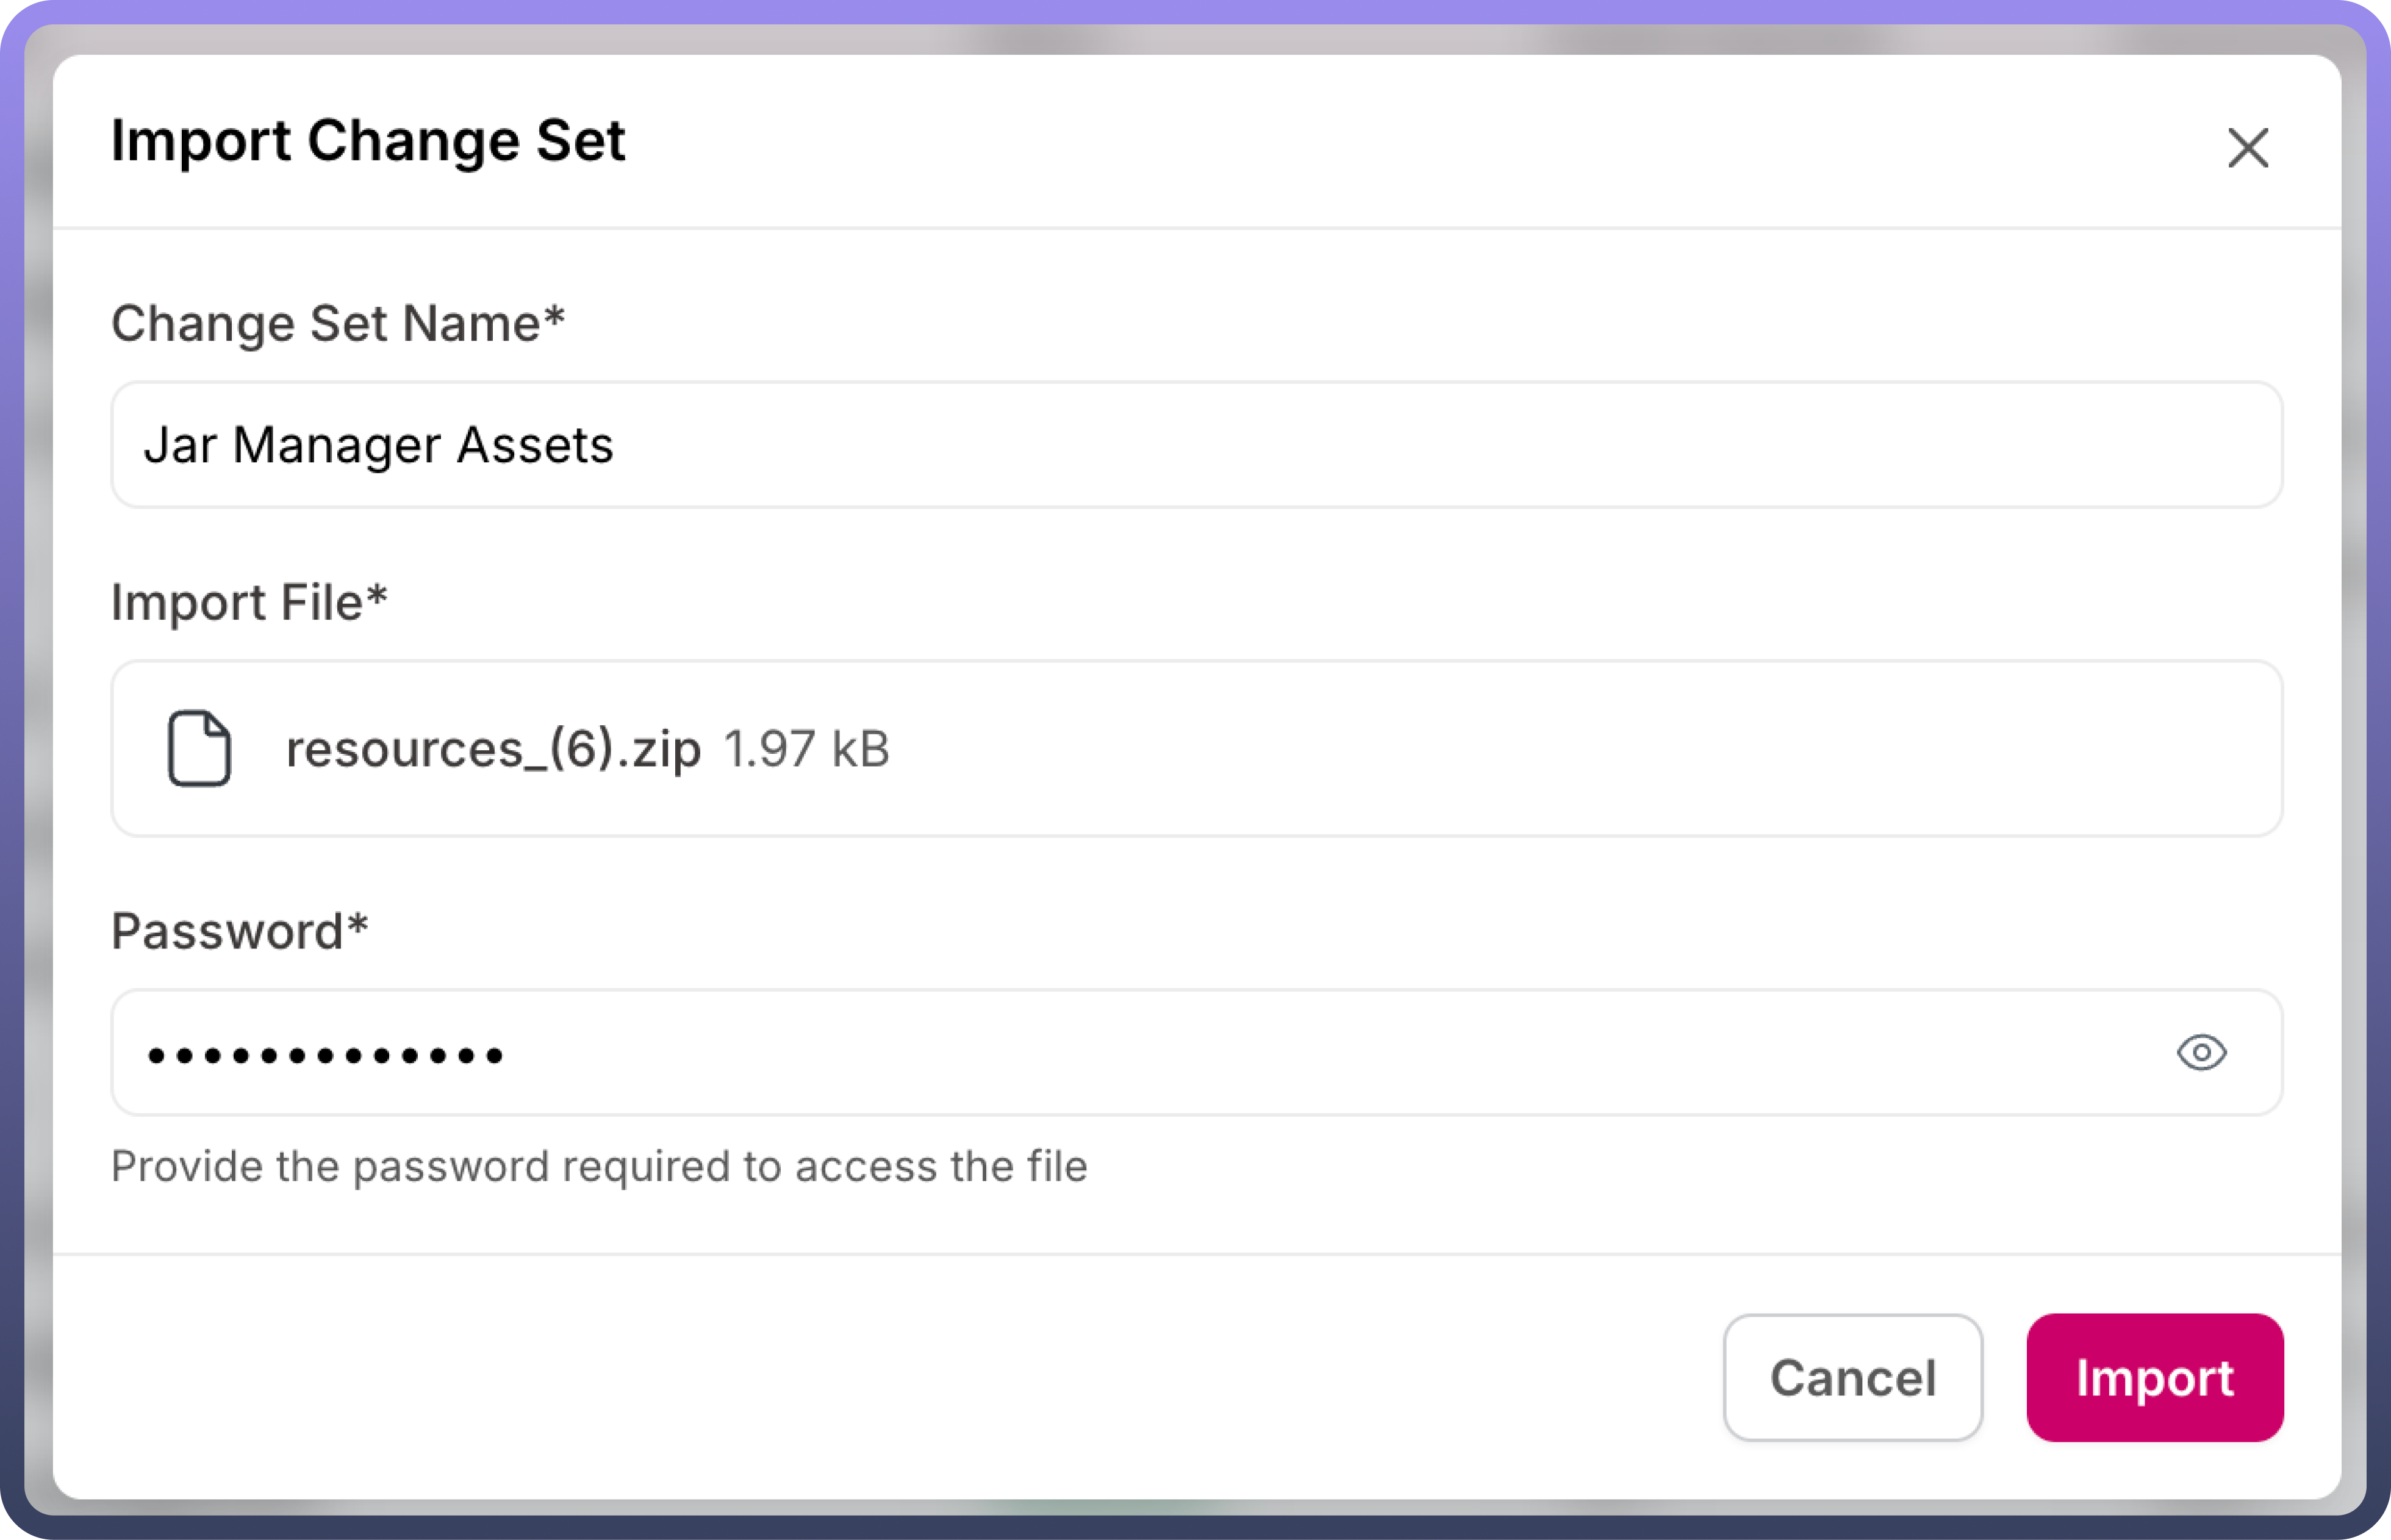
In order to import the file in the destination environment, following steps can be taken:
Click on “
Import new Changeset” button in the Inbound changeset pageImport the exported file from the source environment, and input the password.
Once imported, the changeset assets are ready to be deployed in the destination environment.
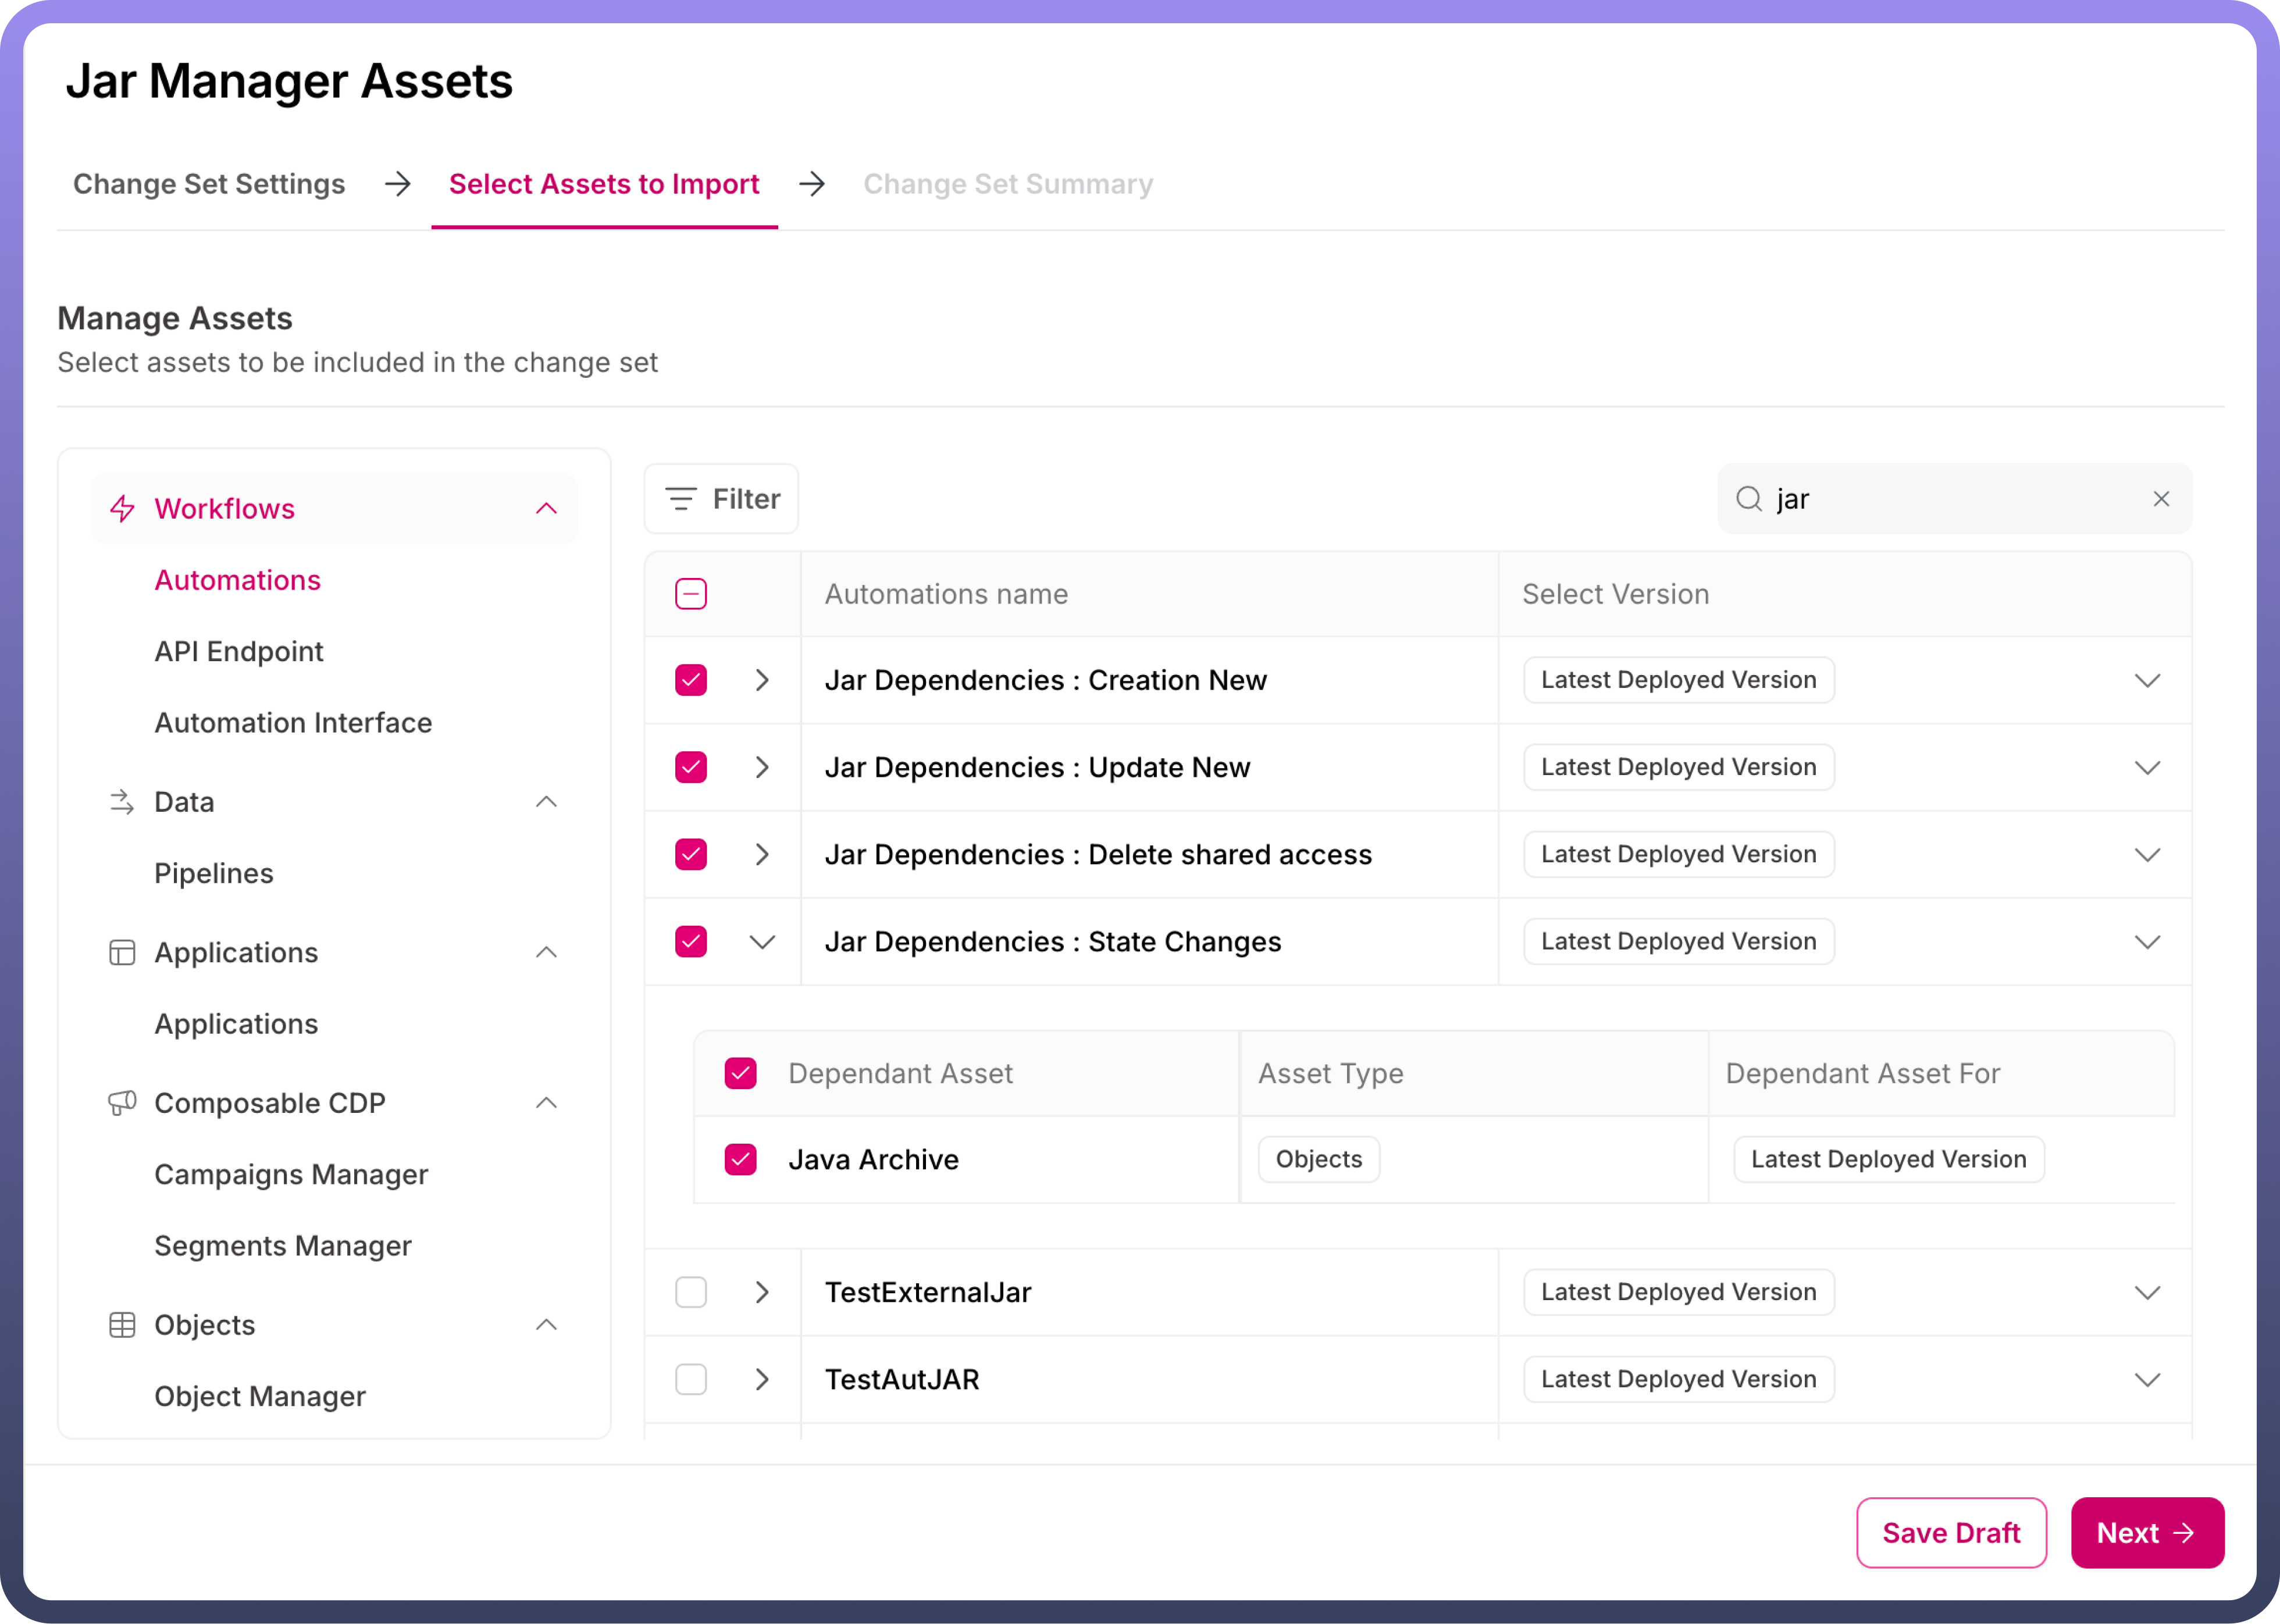
3. Version Selection: The Changeset feature in Unify Apps enables users to select specific versions of assets to be migrated. Whether it is the latest version or an earlier version, users can choose the desired asset version during the Changeset configuration. This ensures flexibility and precision in asset migration based on the requirements of the destination environment.
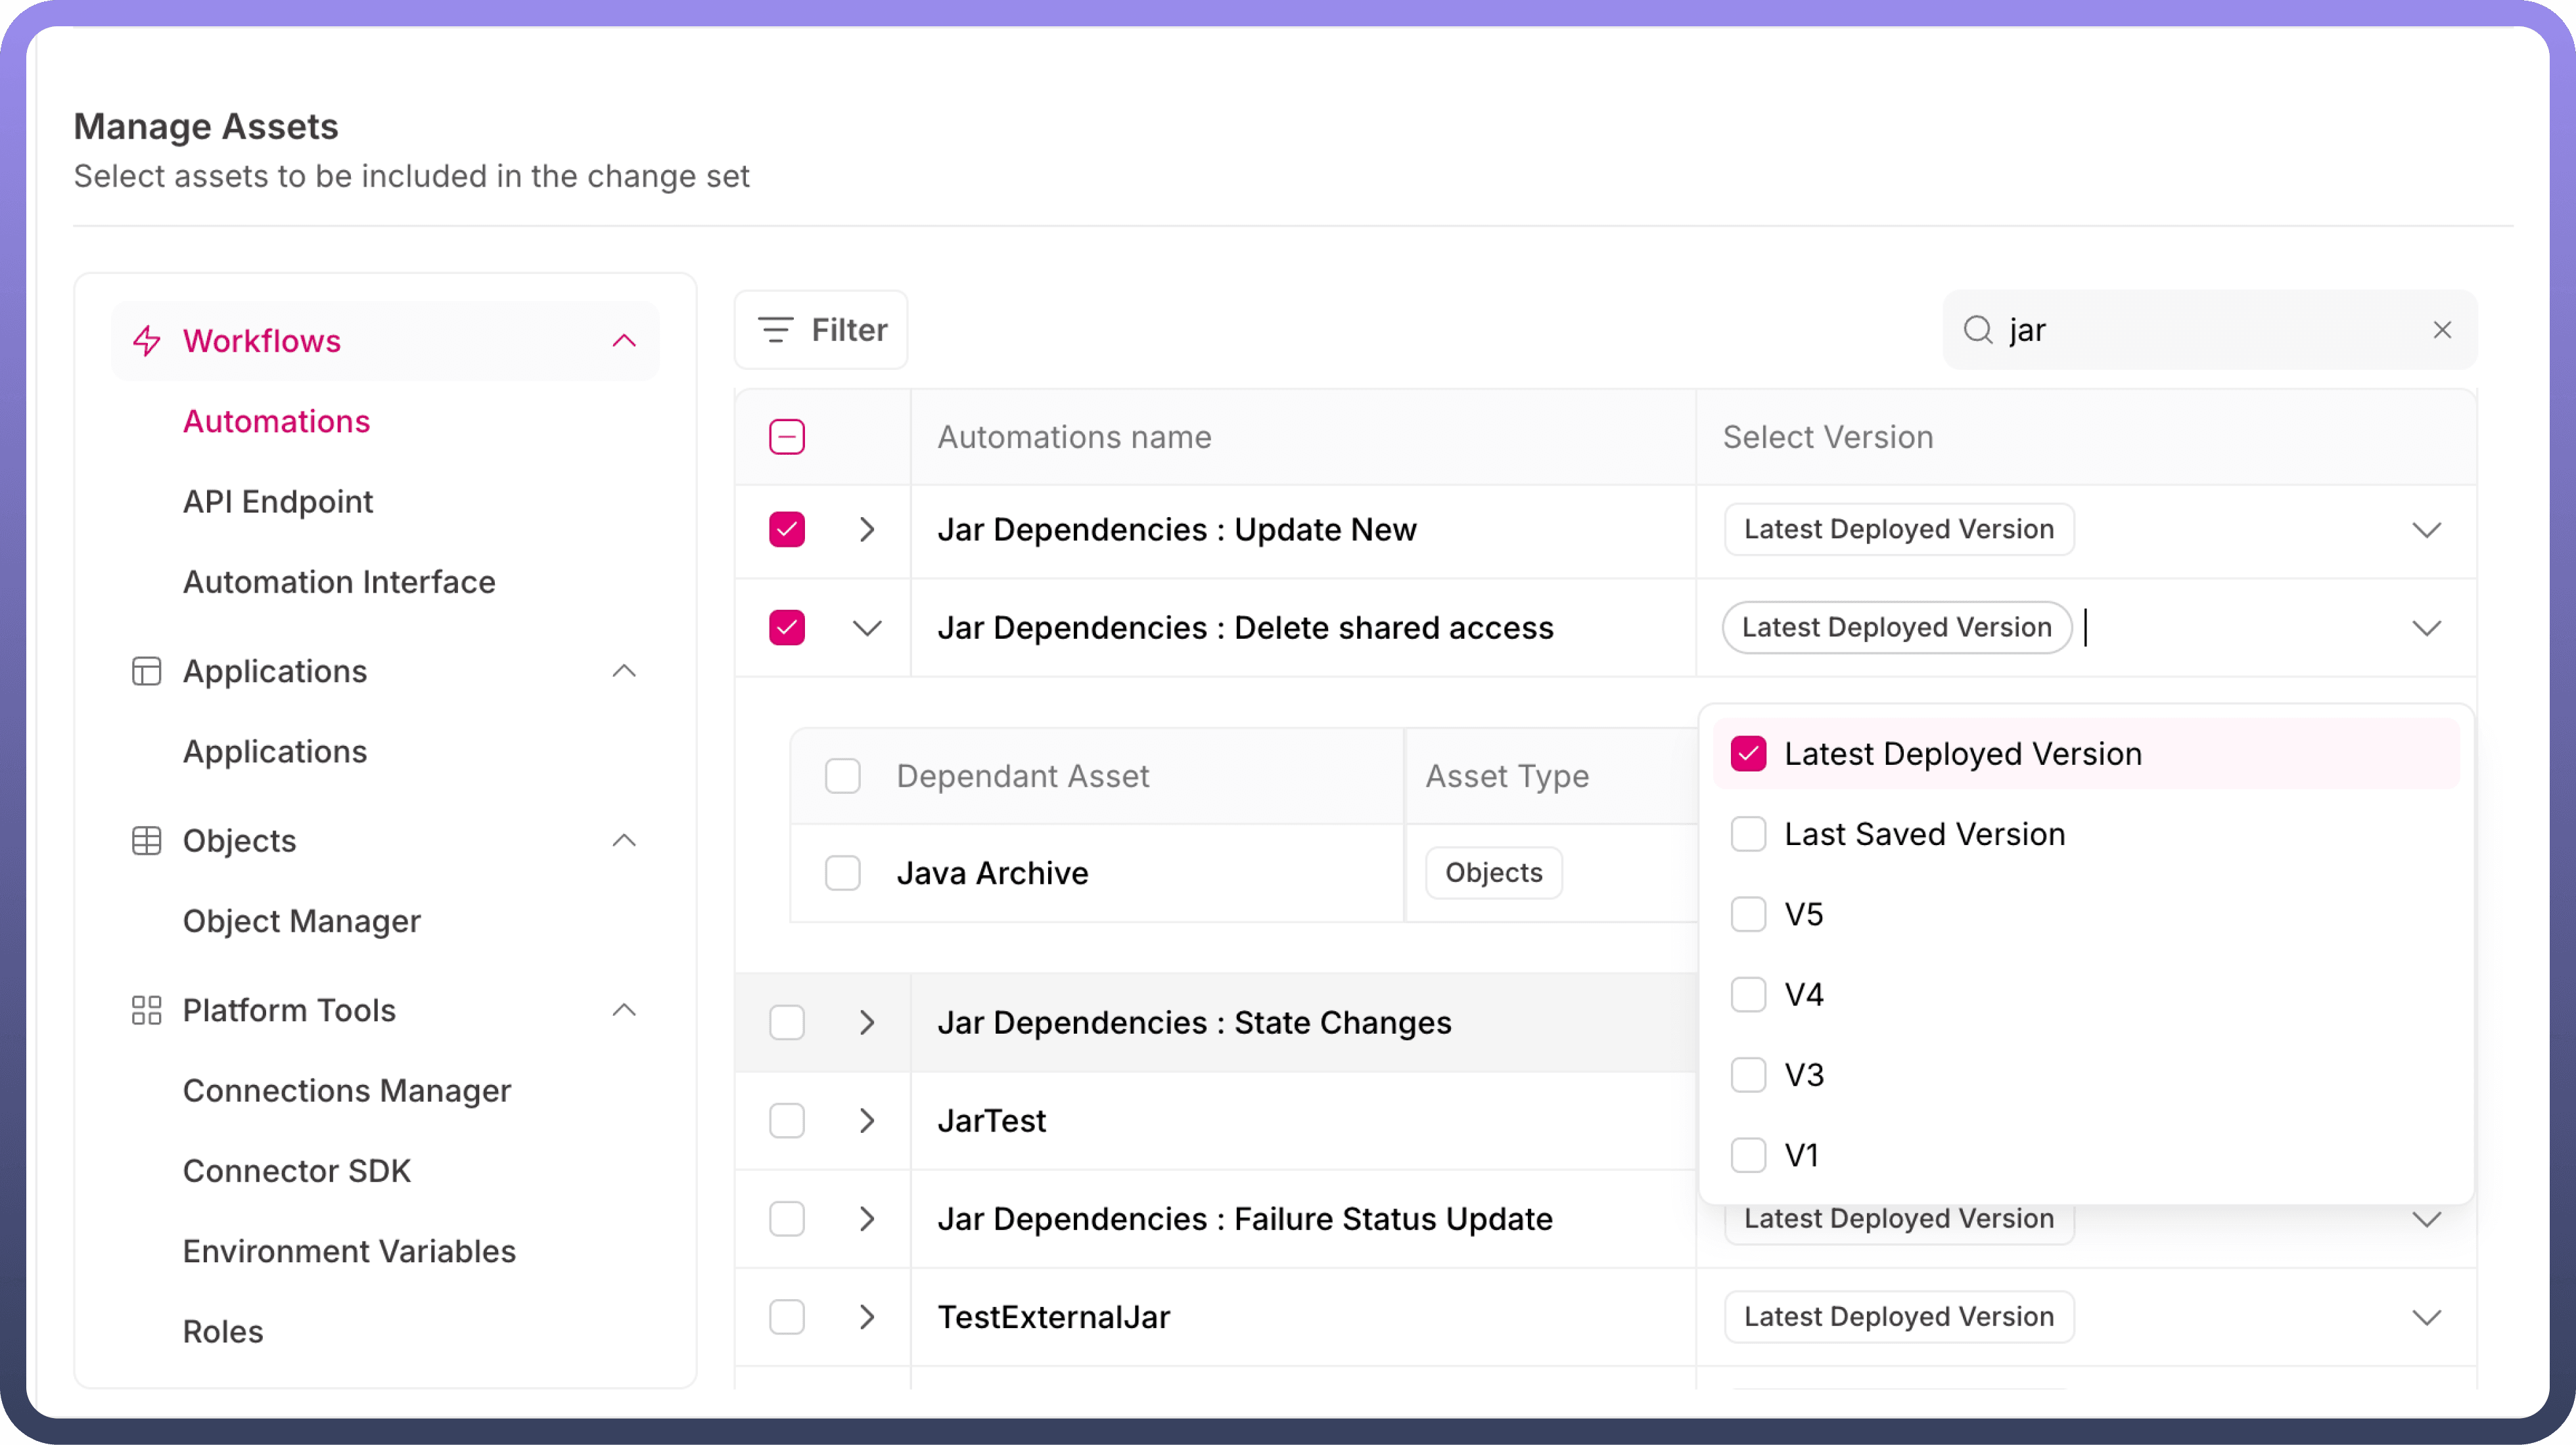

4. Asset Dependencies: The Changeset feature in Unify Apps also tracks and displays the dependent assets of the parent asset being moved. This ensures that users can select and migrate the dependent assets alongside the parent asset to the destination environment. By doing so, it helps maintain the integrity and proper functioning of the parent asset in the destination environment.

5. RBAC Controlled: The Changesets in UnifyApps are RBAC controlled. Creation, approval, deployment, deletion, and all other CRUD actions for the changesets are permission controlled.
Outbound Changeset
An Outbound Changeset in the Unify Apps platform enables users to move selected assets from a source environment to a destination environment. While configuring the Changeset, users can manually select the specific assets available in the source environment that need to be migrated. Once configured, the Changeset is sent to the destination environment for further processing.
Steps to Configure an Outbound changeset in UnifyApps:
Click on the "+New Outbound Changeset" button under the Outbound Changeset tab.
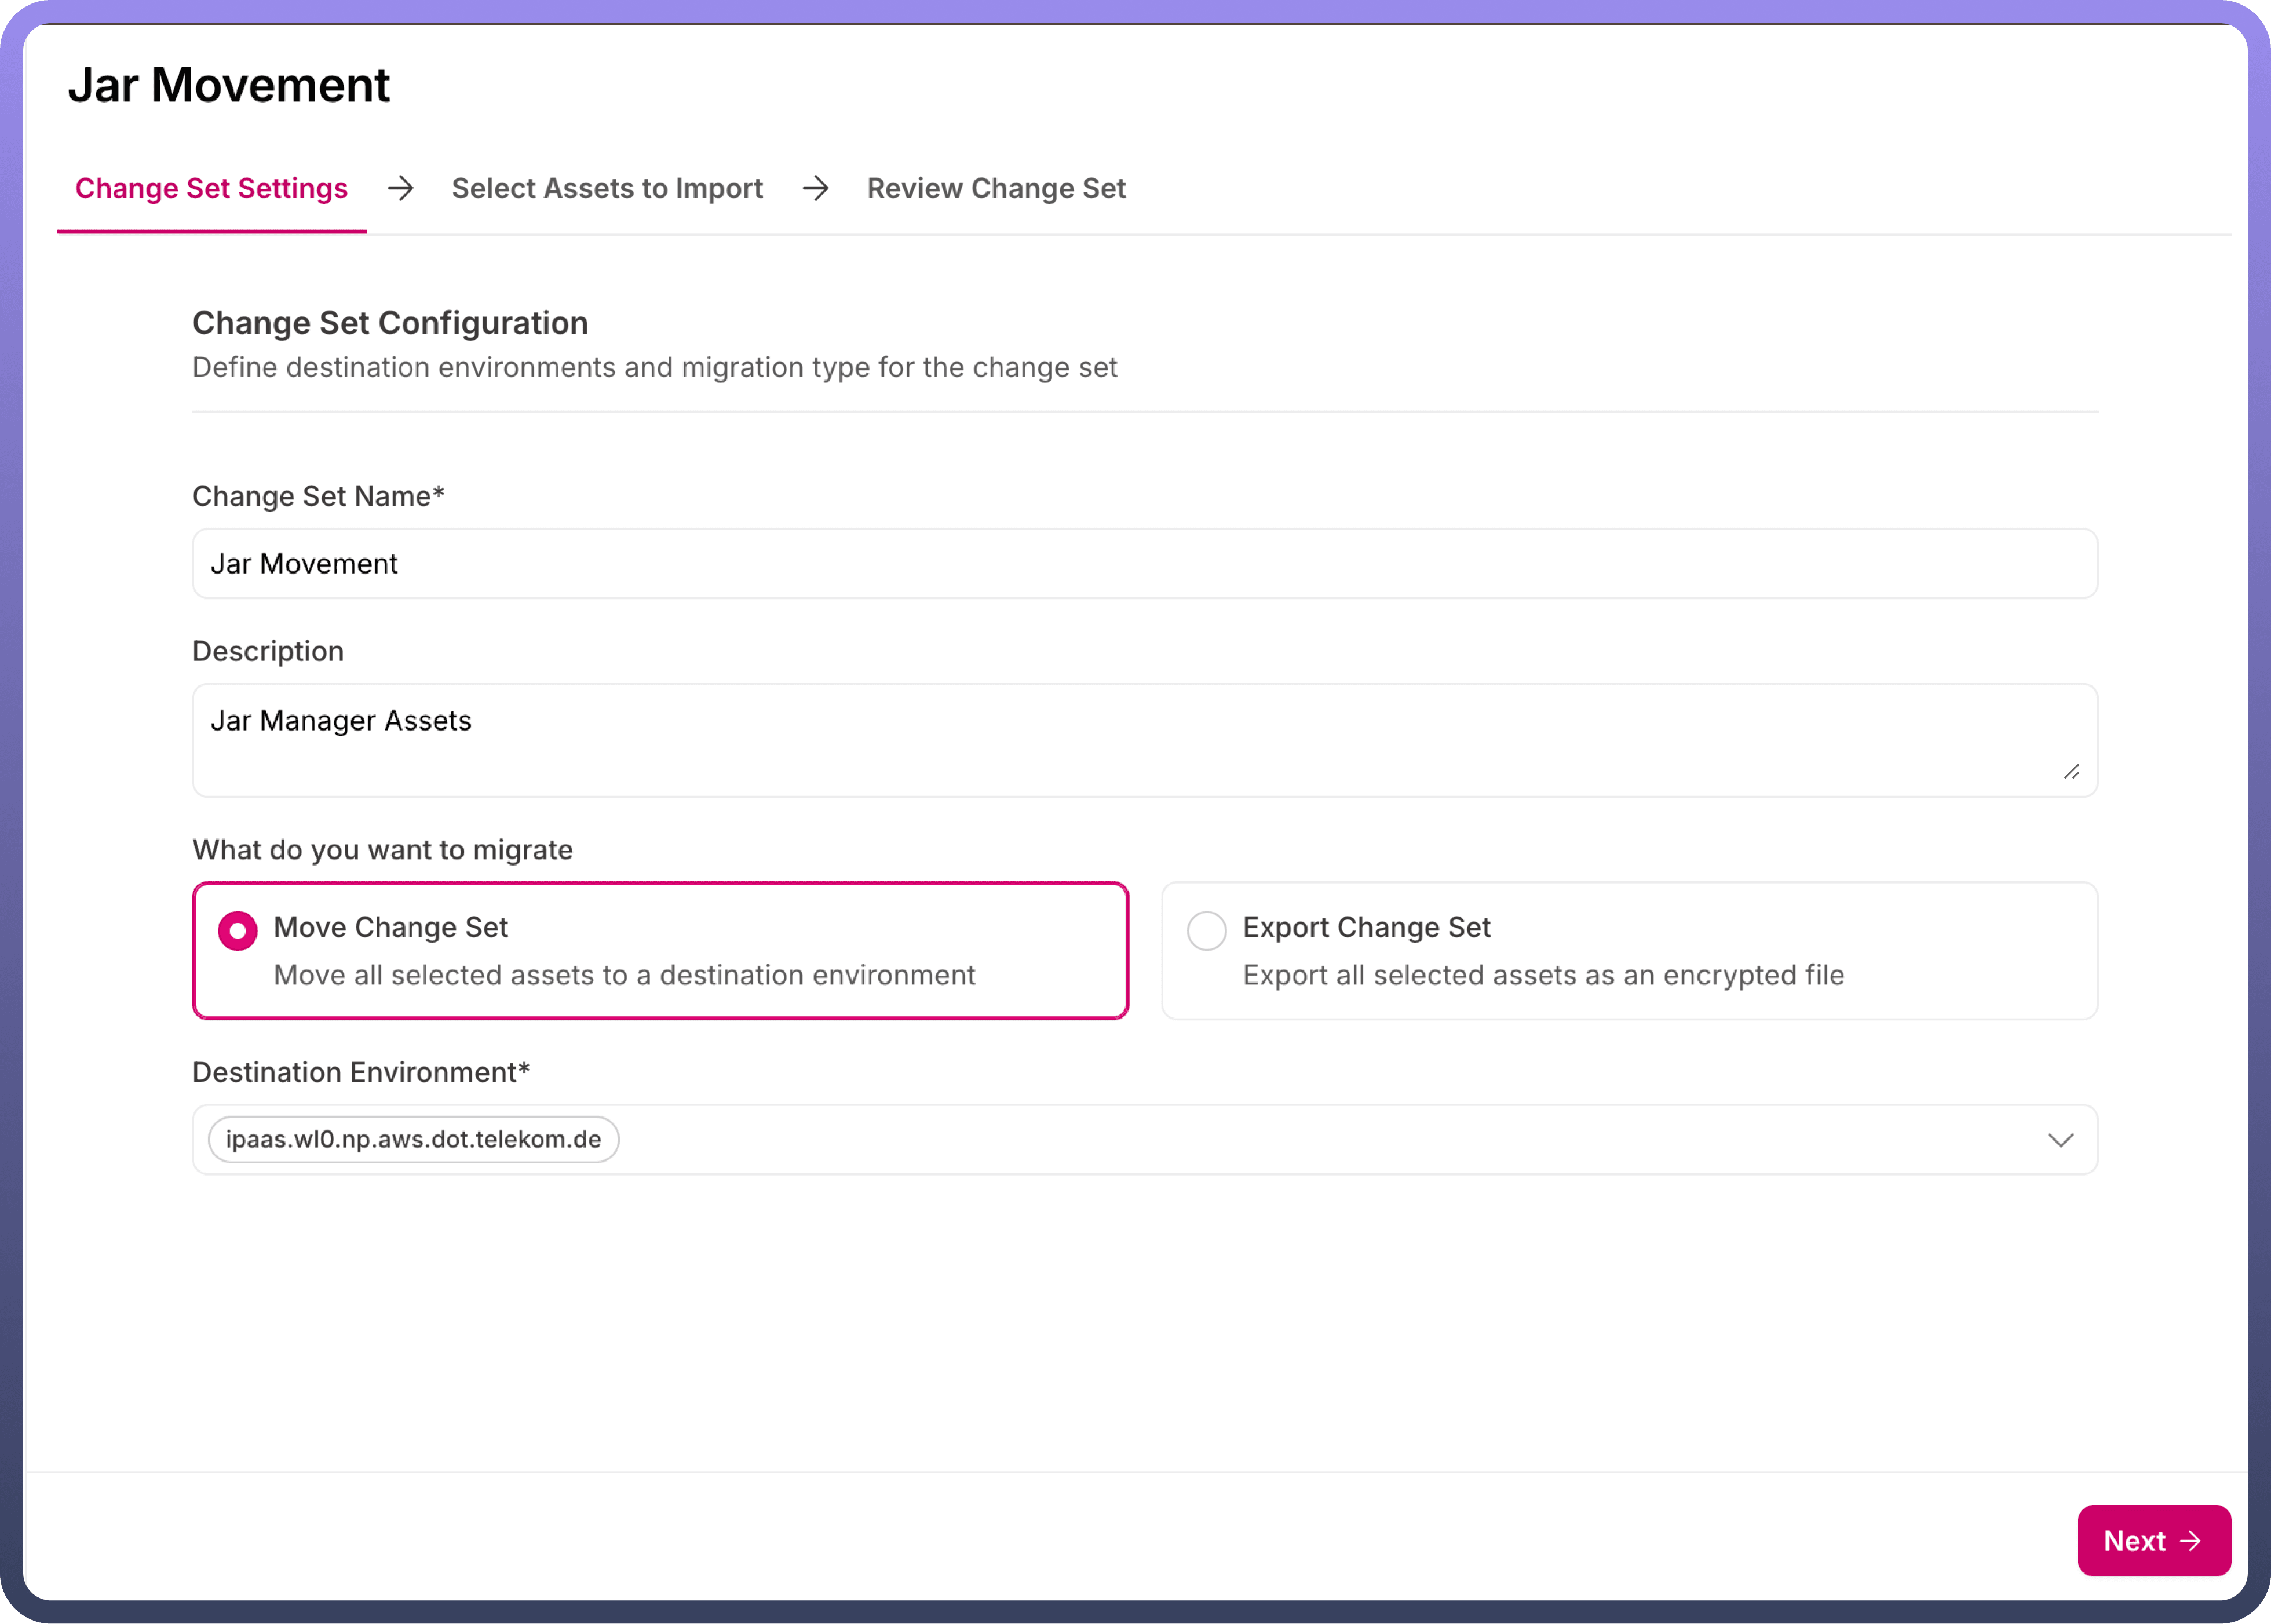
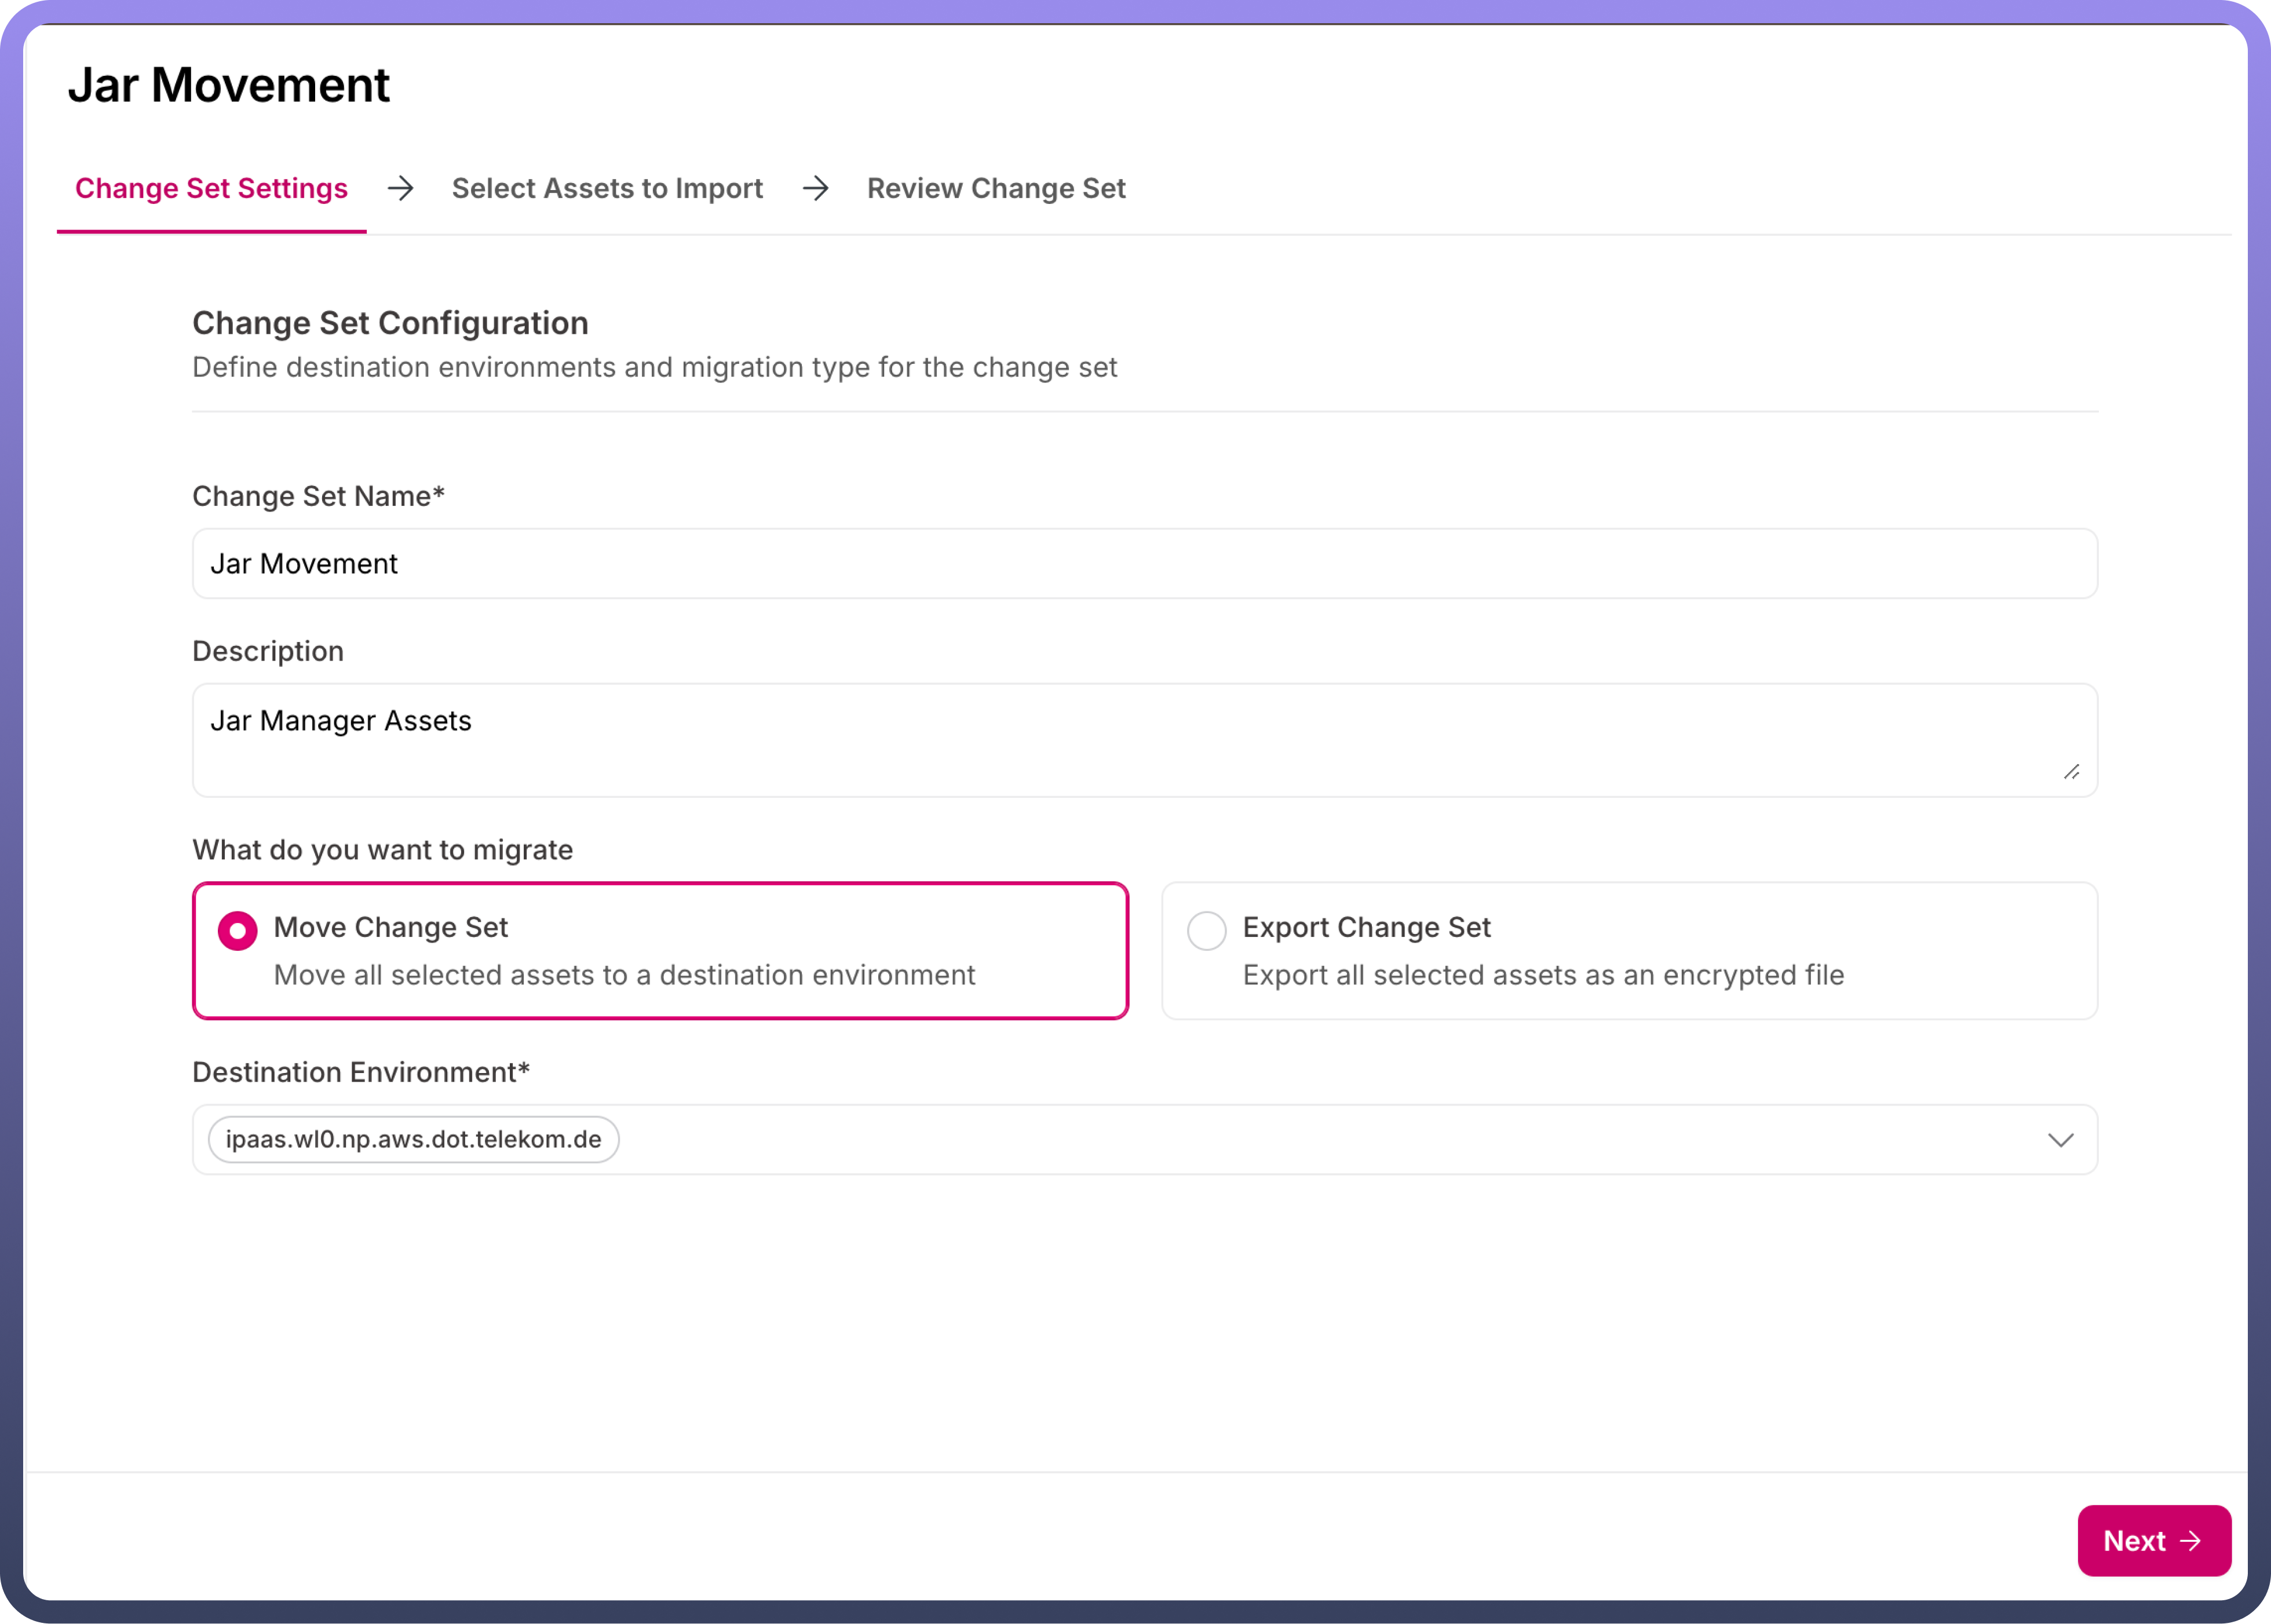
Fill in the necessary details about the Changeset in the form:
Changeset Name
Description
Migration Method(Move Changeset/Export Changeset)
Destination Environments
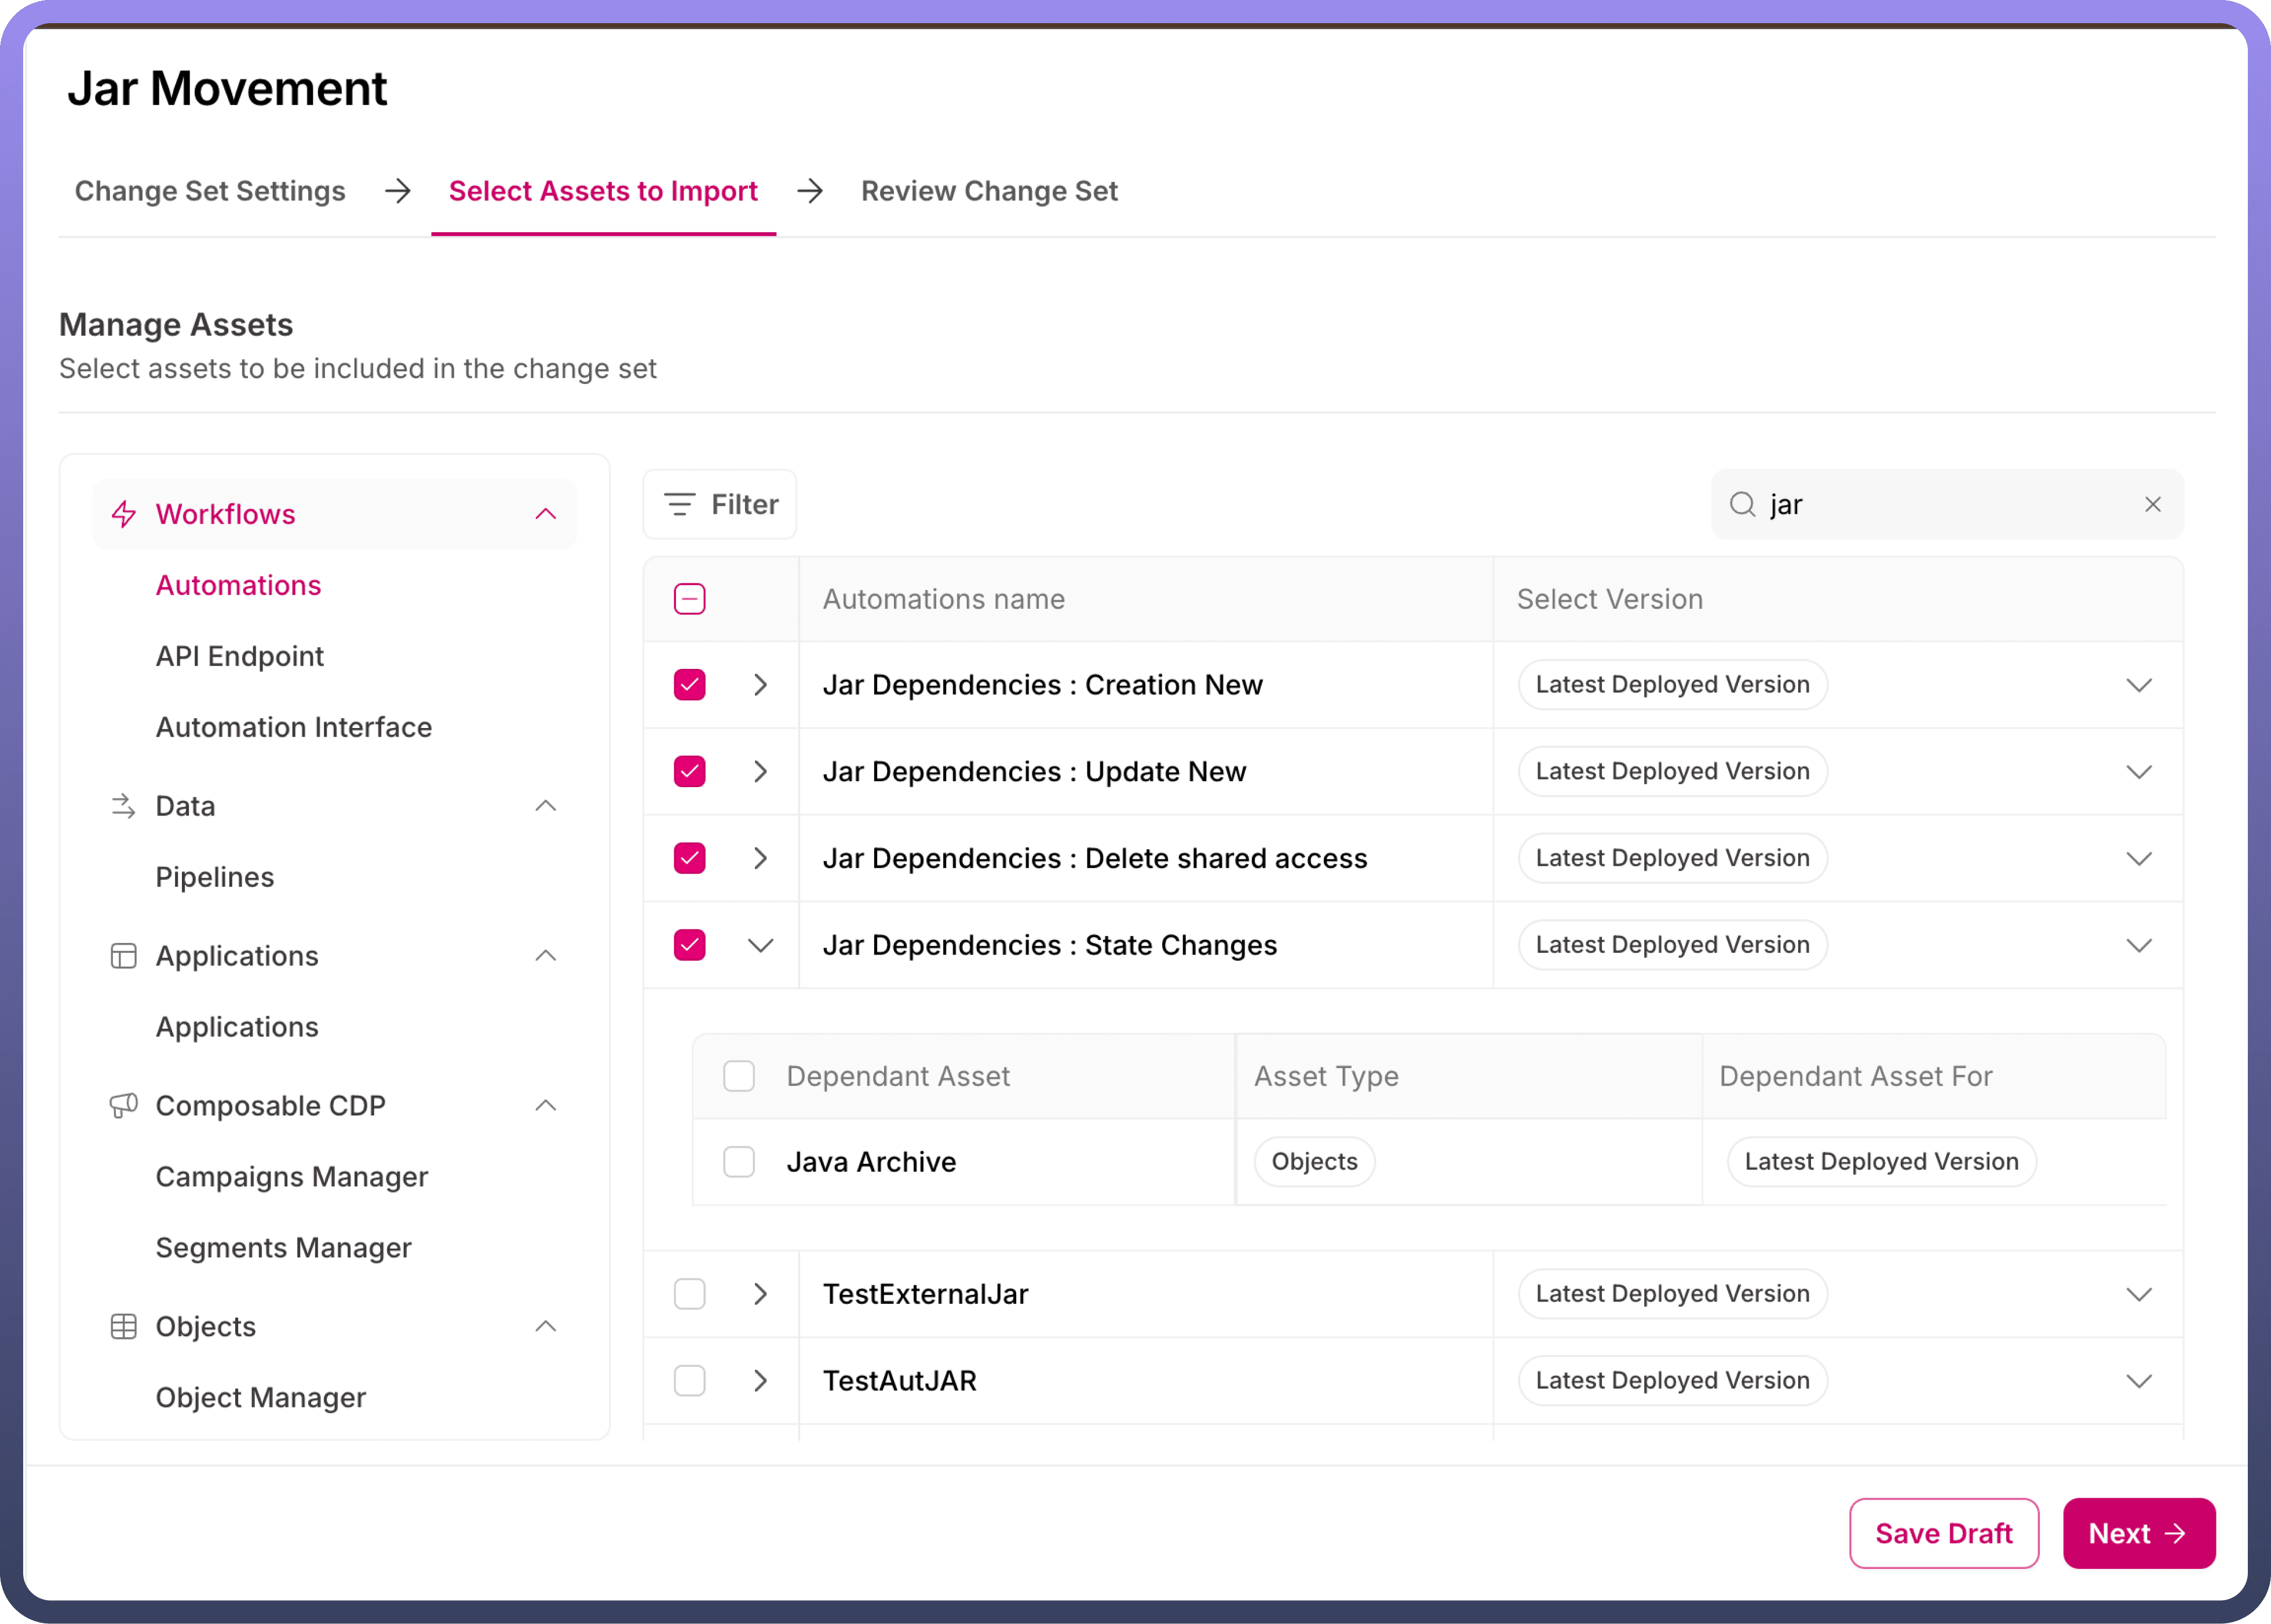
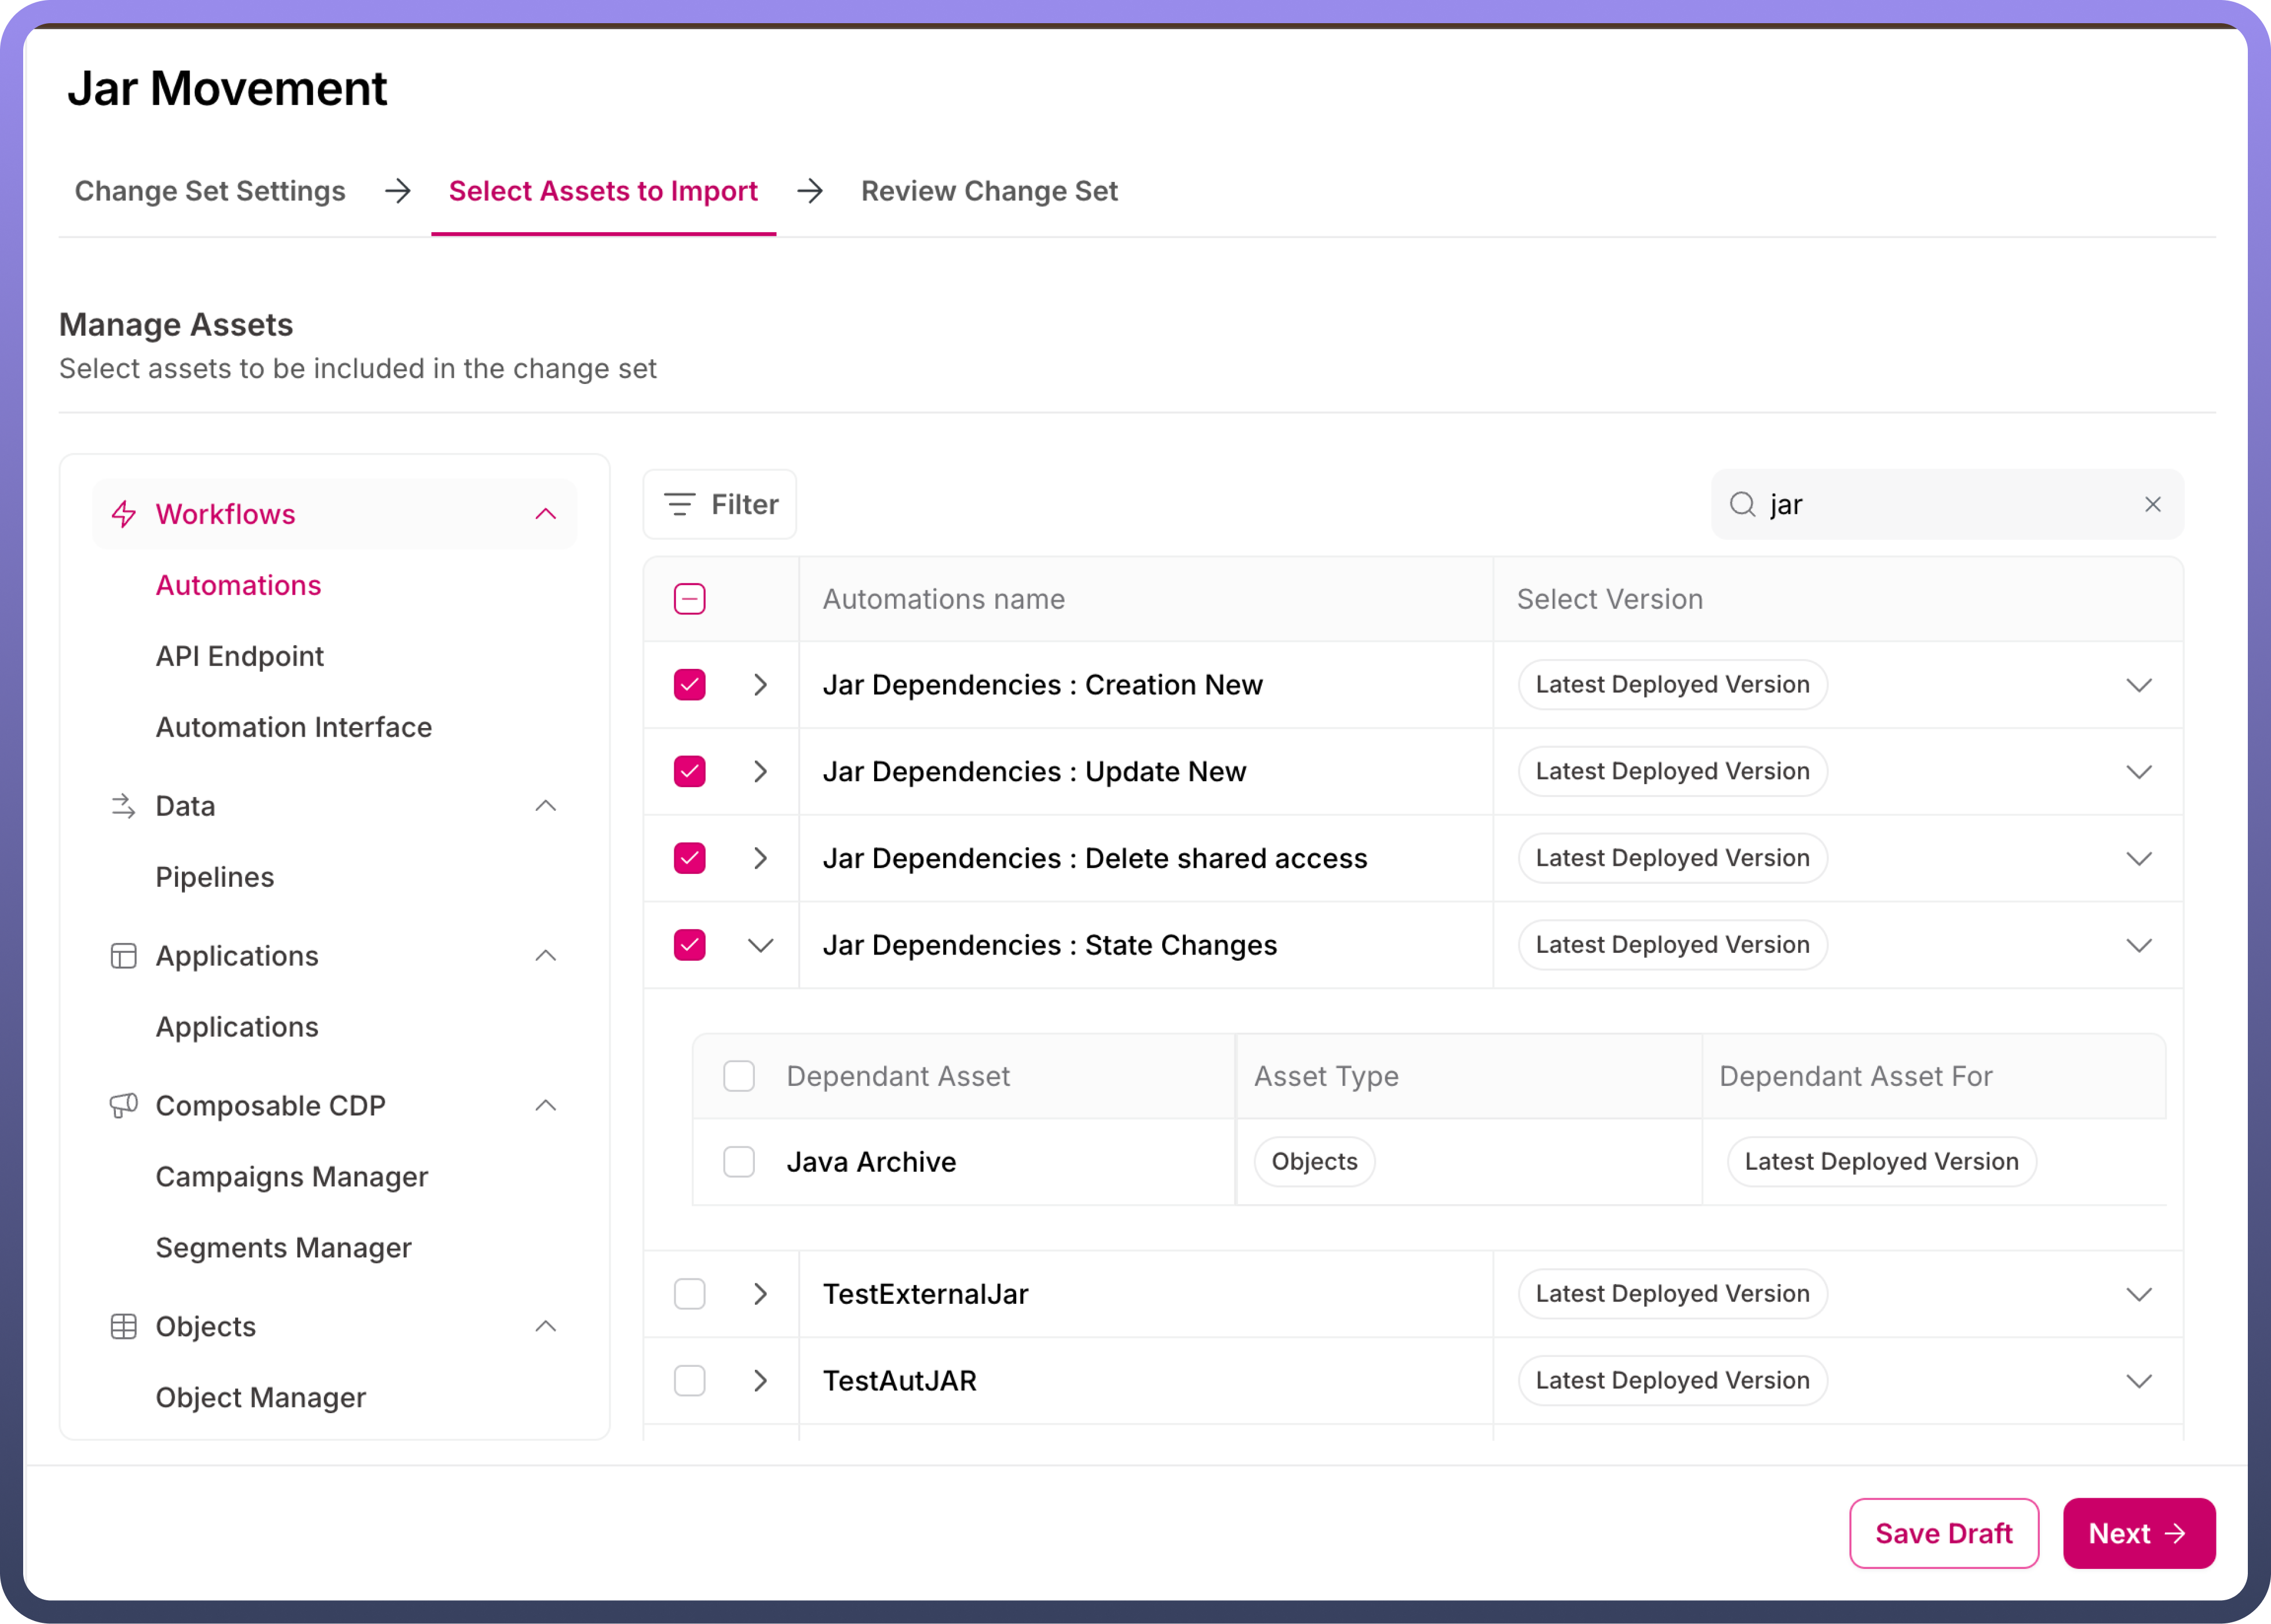
Select the assets to be moved, ensuring that any dependent assets for the parent assets being moved are also included.


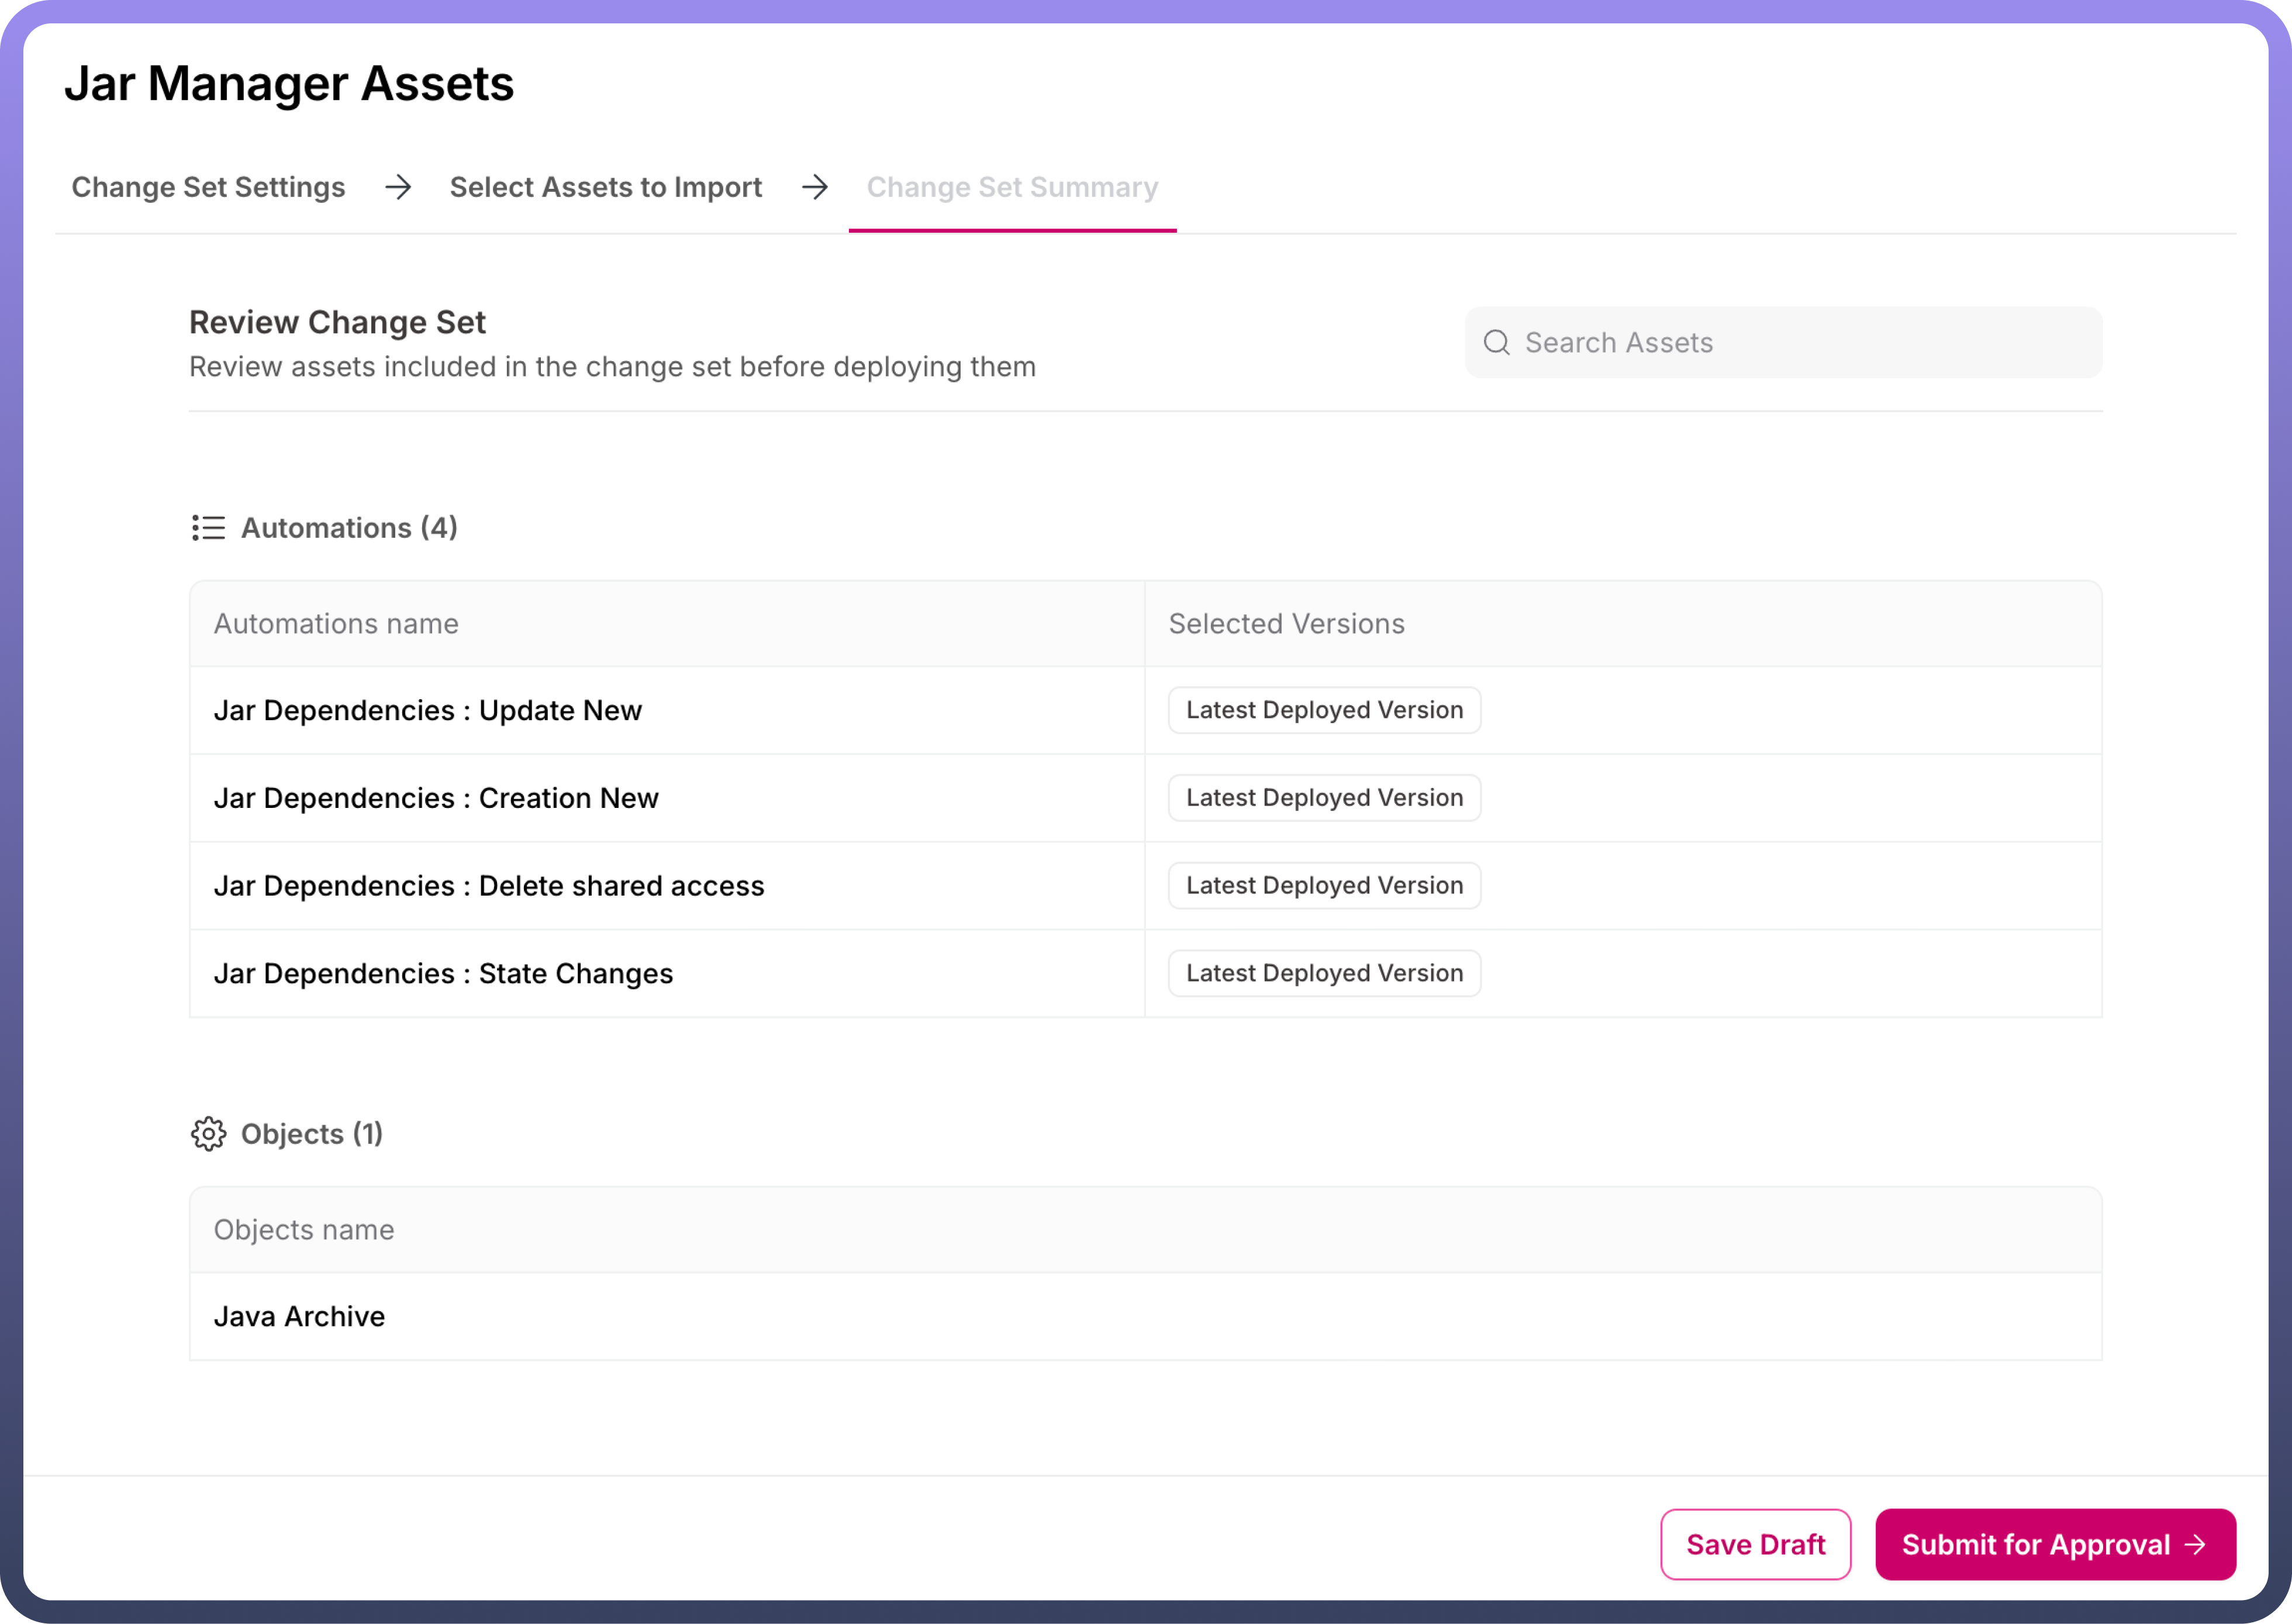
Review the Changeset content in the next step and validate that all selected assets are correctly listed.
Submit the Changeset for approval.
Deployment flow for an Outbound Changeset
Once the Outbound Changeset is submitted for approval in the source environment, it follows these steps for approval and deployment in the destination environment:
The submitted Outbound Changeset becomes visible in the
Inbound Changeset listof the destination environment.In the destination environment, users can review the requested Changeset and take one of the following actions:
Approve: The Changeset is approved and ready for deployment.Reject: The Changeset request is declined by clicking the "Reject" button on the approval screen.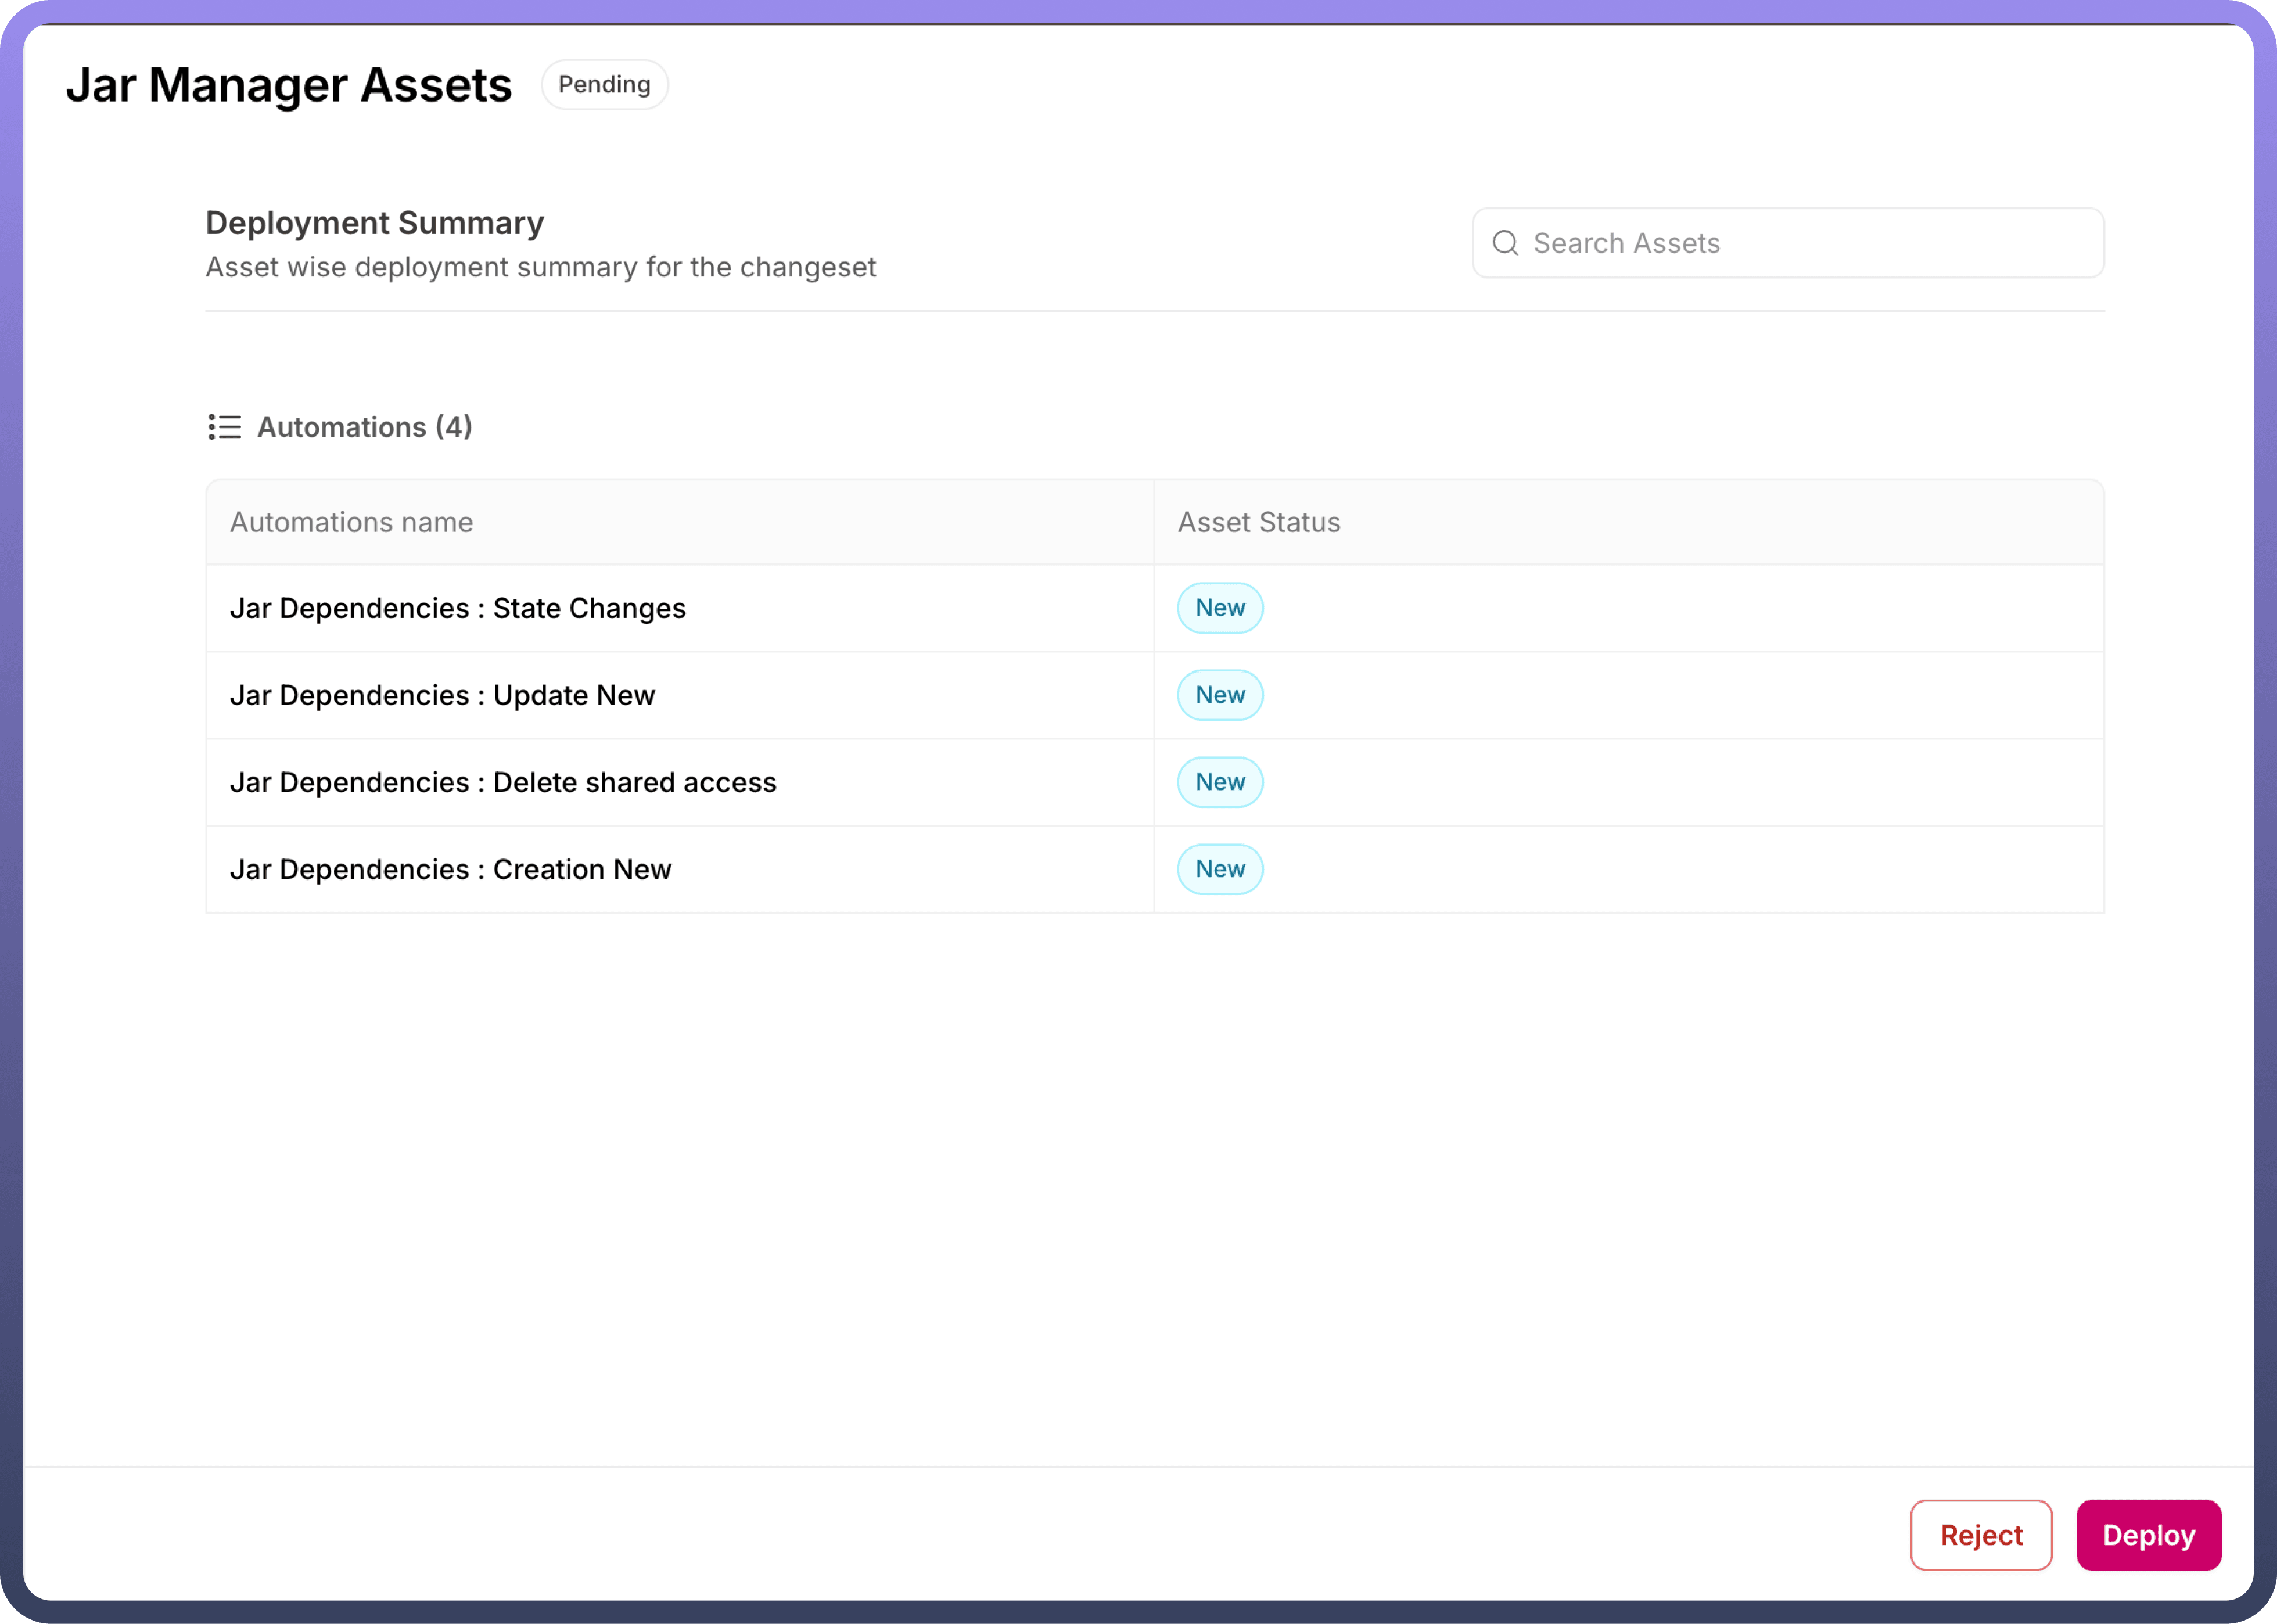

During deployment, users must manually select the
update methodfor assets:Update the assetsif they already exist in the destination environment.Skip the assetsif they already exist in the destination environment.
Once deployed, the assets from the changeset will be available in the environment for usage.
Inbound Changeset
The Inbound Changeset in Unify Apps allows users to pull assets from a source environment into the current environment. By leveraging connected environments, users can configure an Inbound Changeset and select the required assets from the source environment to bring them into the current environment seamlessly.
Steps to Configure an Inbound Changeset in UnifyApps
Click on the "
+New Inbound Changeset" button under the Inbound Changeset tab.Fill in the necessary information in the form.
Changeset NameDestination Environment
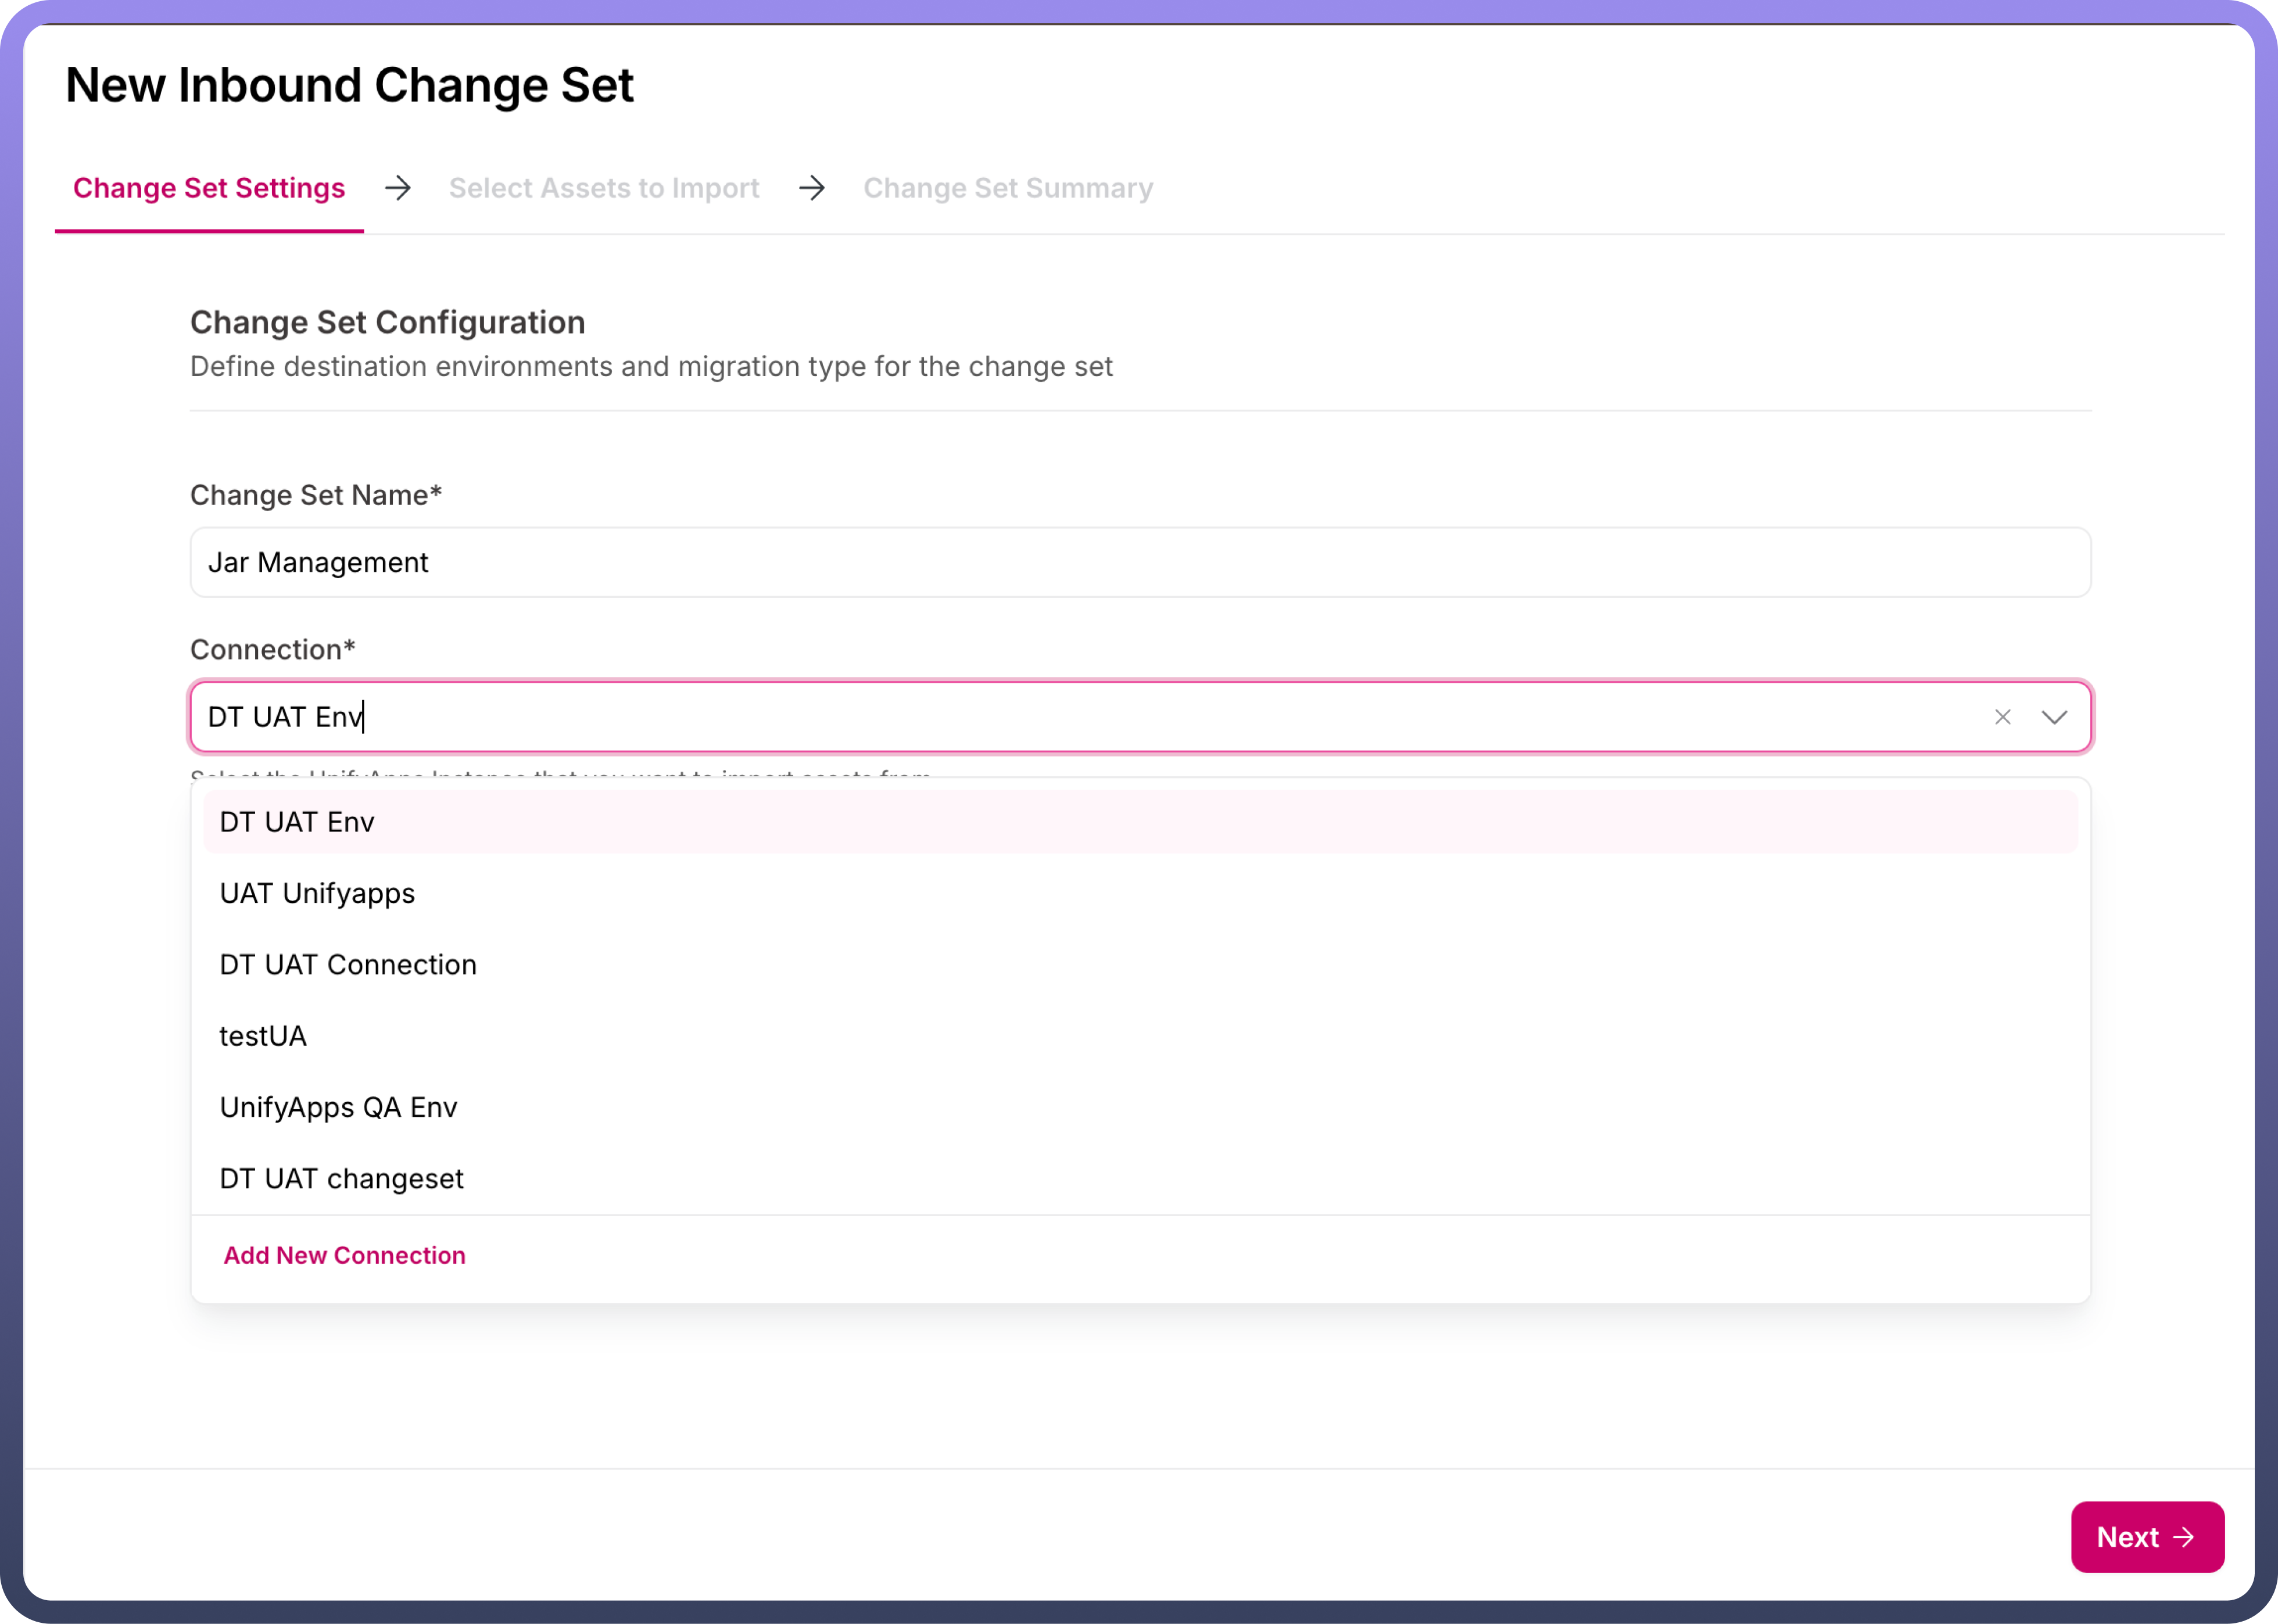
If the desired destination environment is not listed under connected environments, click on the "
Add New Connection" button in the dropdown to set up a new connection.This opens a form where the user must input details for connecting the source environment, such as the
Connection NameandEnvironment Domain.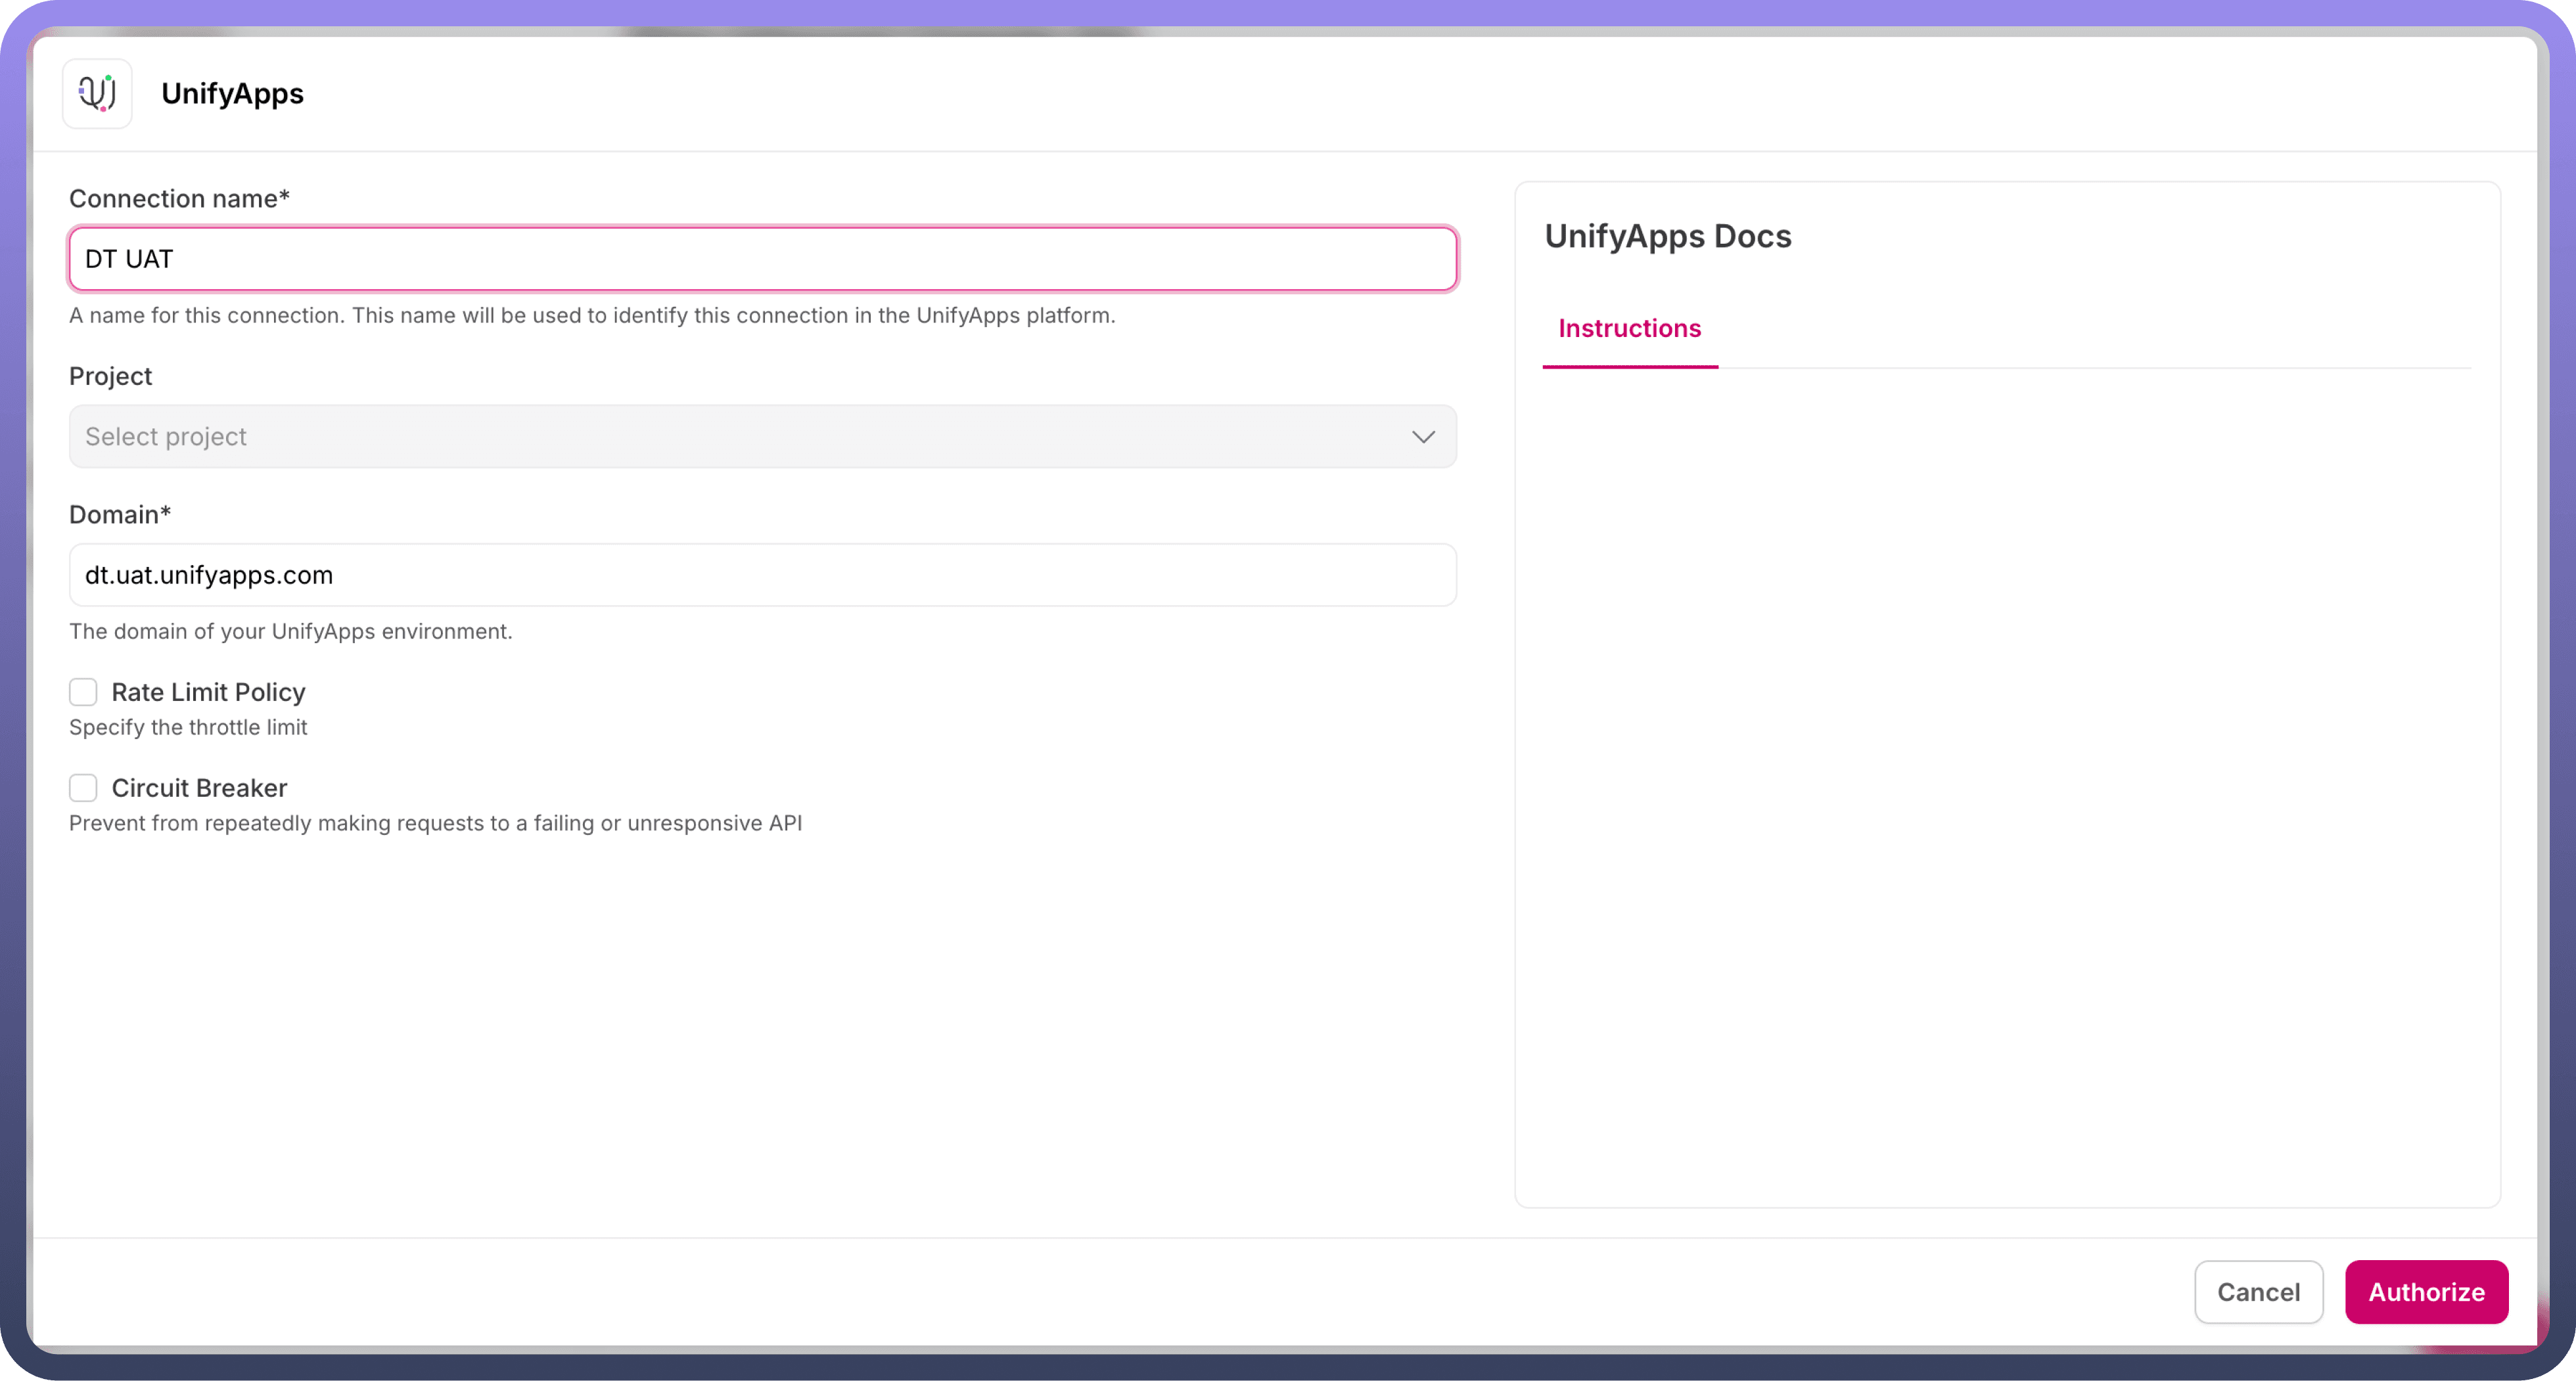
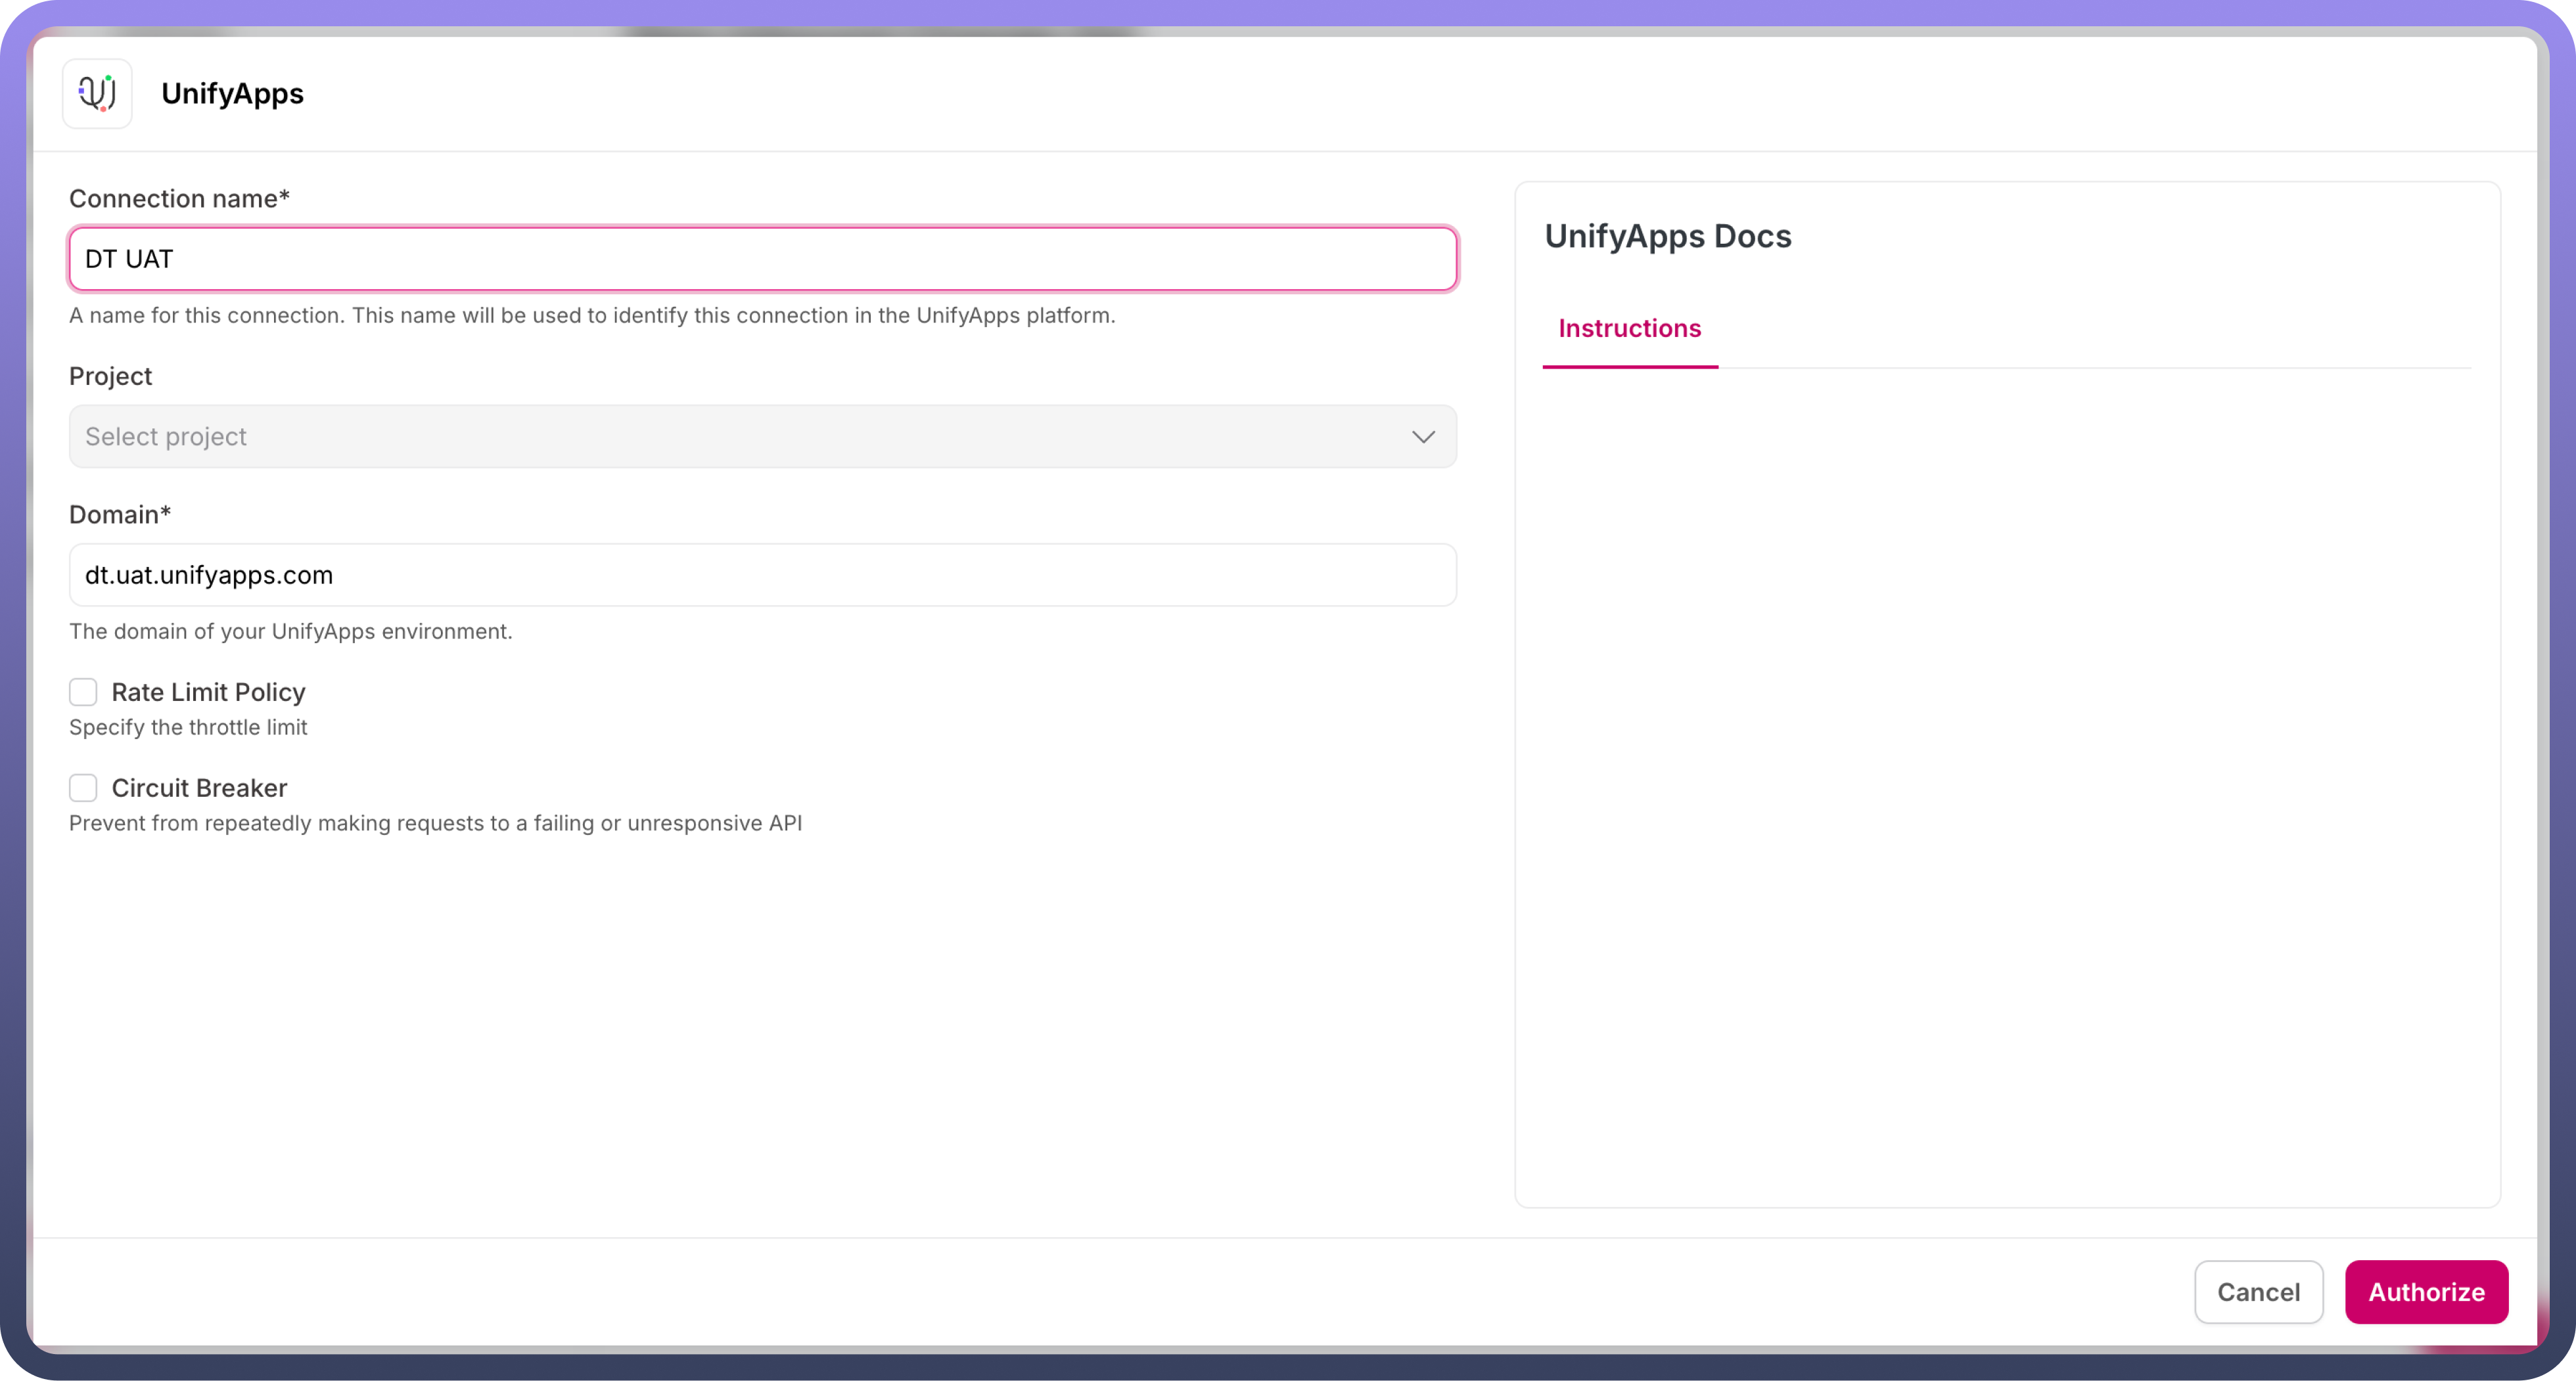
Once the connection is authorized, the runtime connection is configured and can be used to pull assets from the connected environment.
After selecting the source environment, manually choose the assets to be pulled along with their
dependent assetsto ensure proper functionality.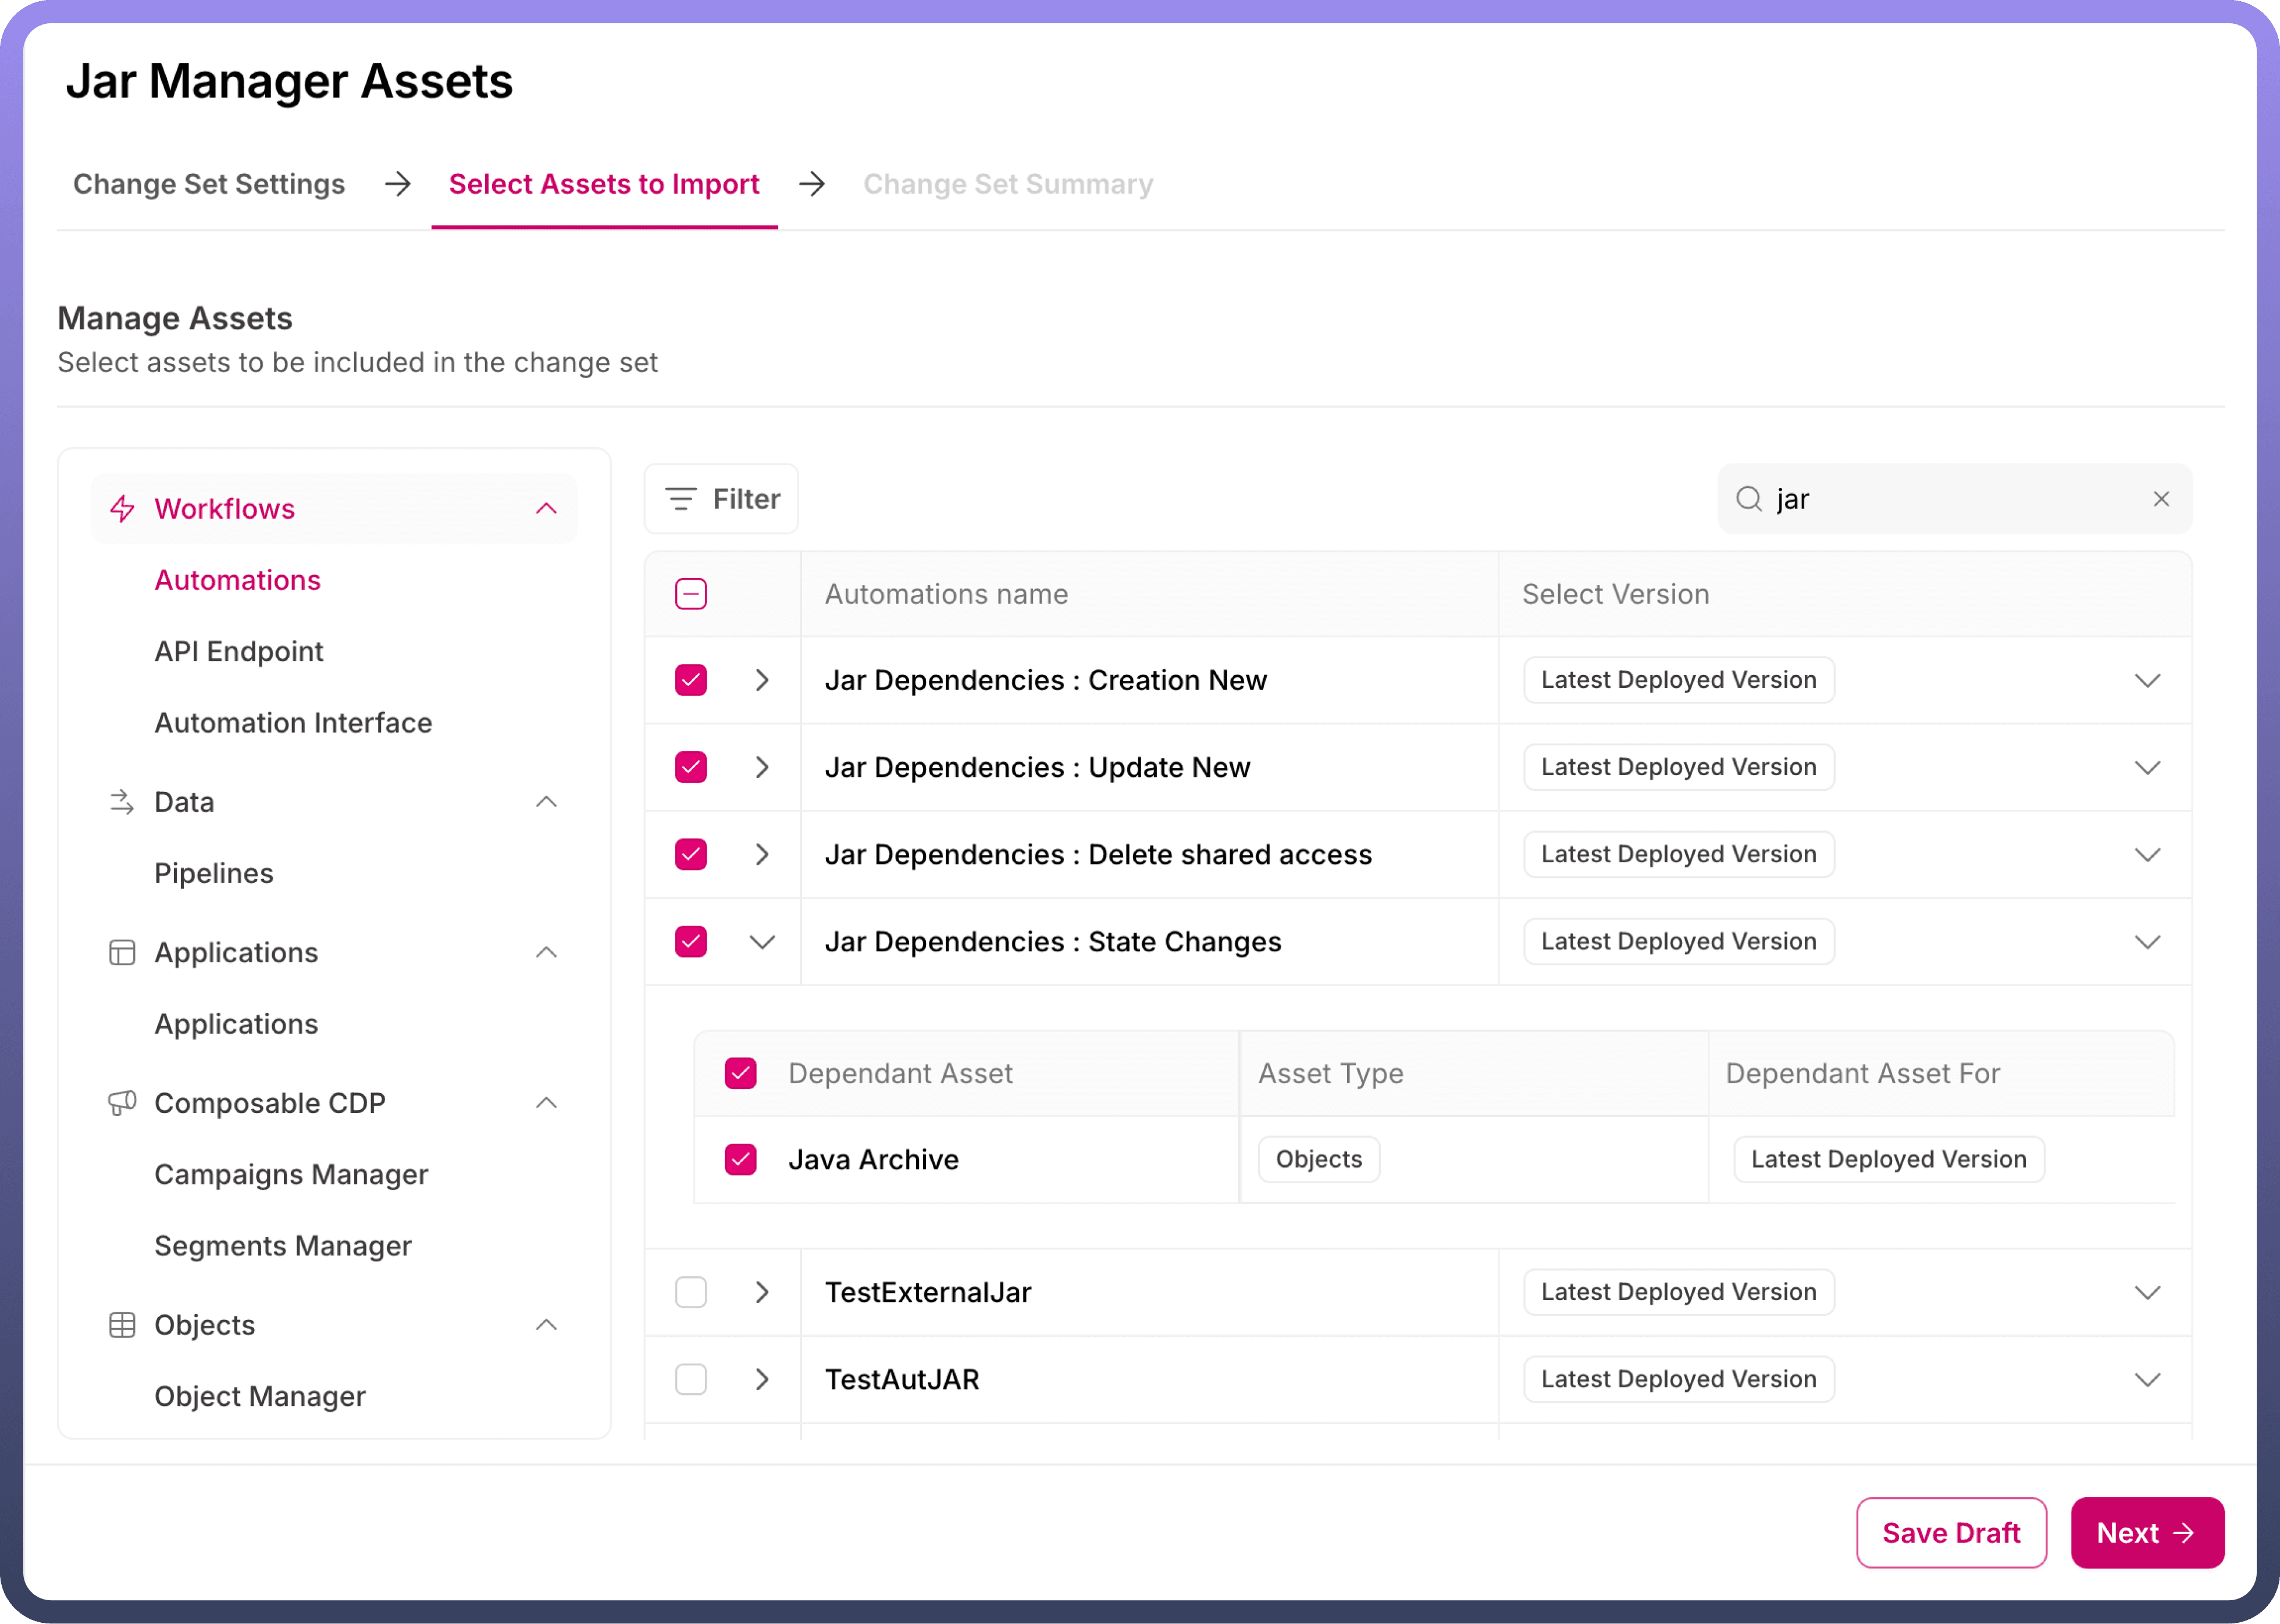

Once all the assets are selected, click the "
Next" button to review the content of the Changeset and then "Submit for Approval" to finalize the process.
Deployment flow for the inbound changeset is same as that for the outbound changeset.